Maus Mk II
1/35th scale plastic kit combination with a Dragon Hull with Amusing Hobby Turret
Assembled and painted in 2019
The Maus must be one of Hitler’s maddest ideas that actually got off the drawing board and made real.
OK, maybe not his idea per se, but his orders had the design teams thinking up these mad ideas, and one common factor seems to have been size – bigger is better.
The 198 tonne Mause made a Tiger I look small, it’s metre wide tracks were supposed to prevent it bogging down – not likely on soft ground – and its armour should have made it pretty invulnerable to other AFV’s of the time.
A rocket from a Tempest or a Typhoon might have given it problems, but generally speaking it was a metal castle on tracks……
However
It’s top speed a little above a fast walk, it’s inability to use most bridges because of it’s weight, the fuel needed to power the engines that then drove electric motors to power the tracks, and the materiel to fashion one meant that it was pretty doomed from the start.
It probably did the Allies more good that it ever would have the Germans, because the time, effort and components needed diverted important personnel and materials from other projects that might have prolonged the war, even if it didn’t mean that it would have made the outcome any different.
There are photographs of the Maus being tested, and with a turret weighted to what an actual turret would be – giving the inspectors an idea of what it could do, and also shots with a wooden mock-up of a possible turret design, all of which are easy to find on the Internet.
This particular model is of the initial test vehicle with a slant sided turret that has no armament and an open top.
Since the actual turret design is somewhat speculated, the same turret might also have been destined for the E100, it made me think that maybe other designs of turret could possibly have been produced, and maybe even utilised.
Amusing Hobby produce an E100 with what appears to be at first glance, the turret of a Tiger II. It is very similar in design, but is about half again as big. And seeing as I was using an E100 hull to do something else, it meant that, hey, look, a spare turret just turned up !
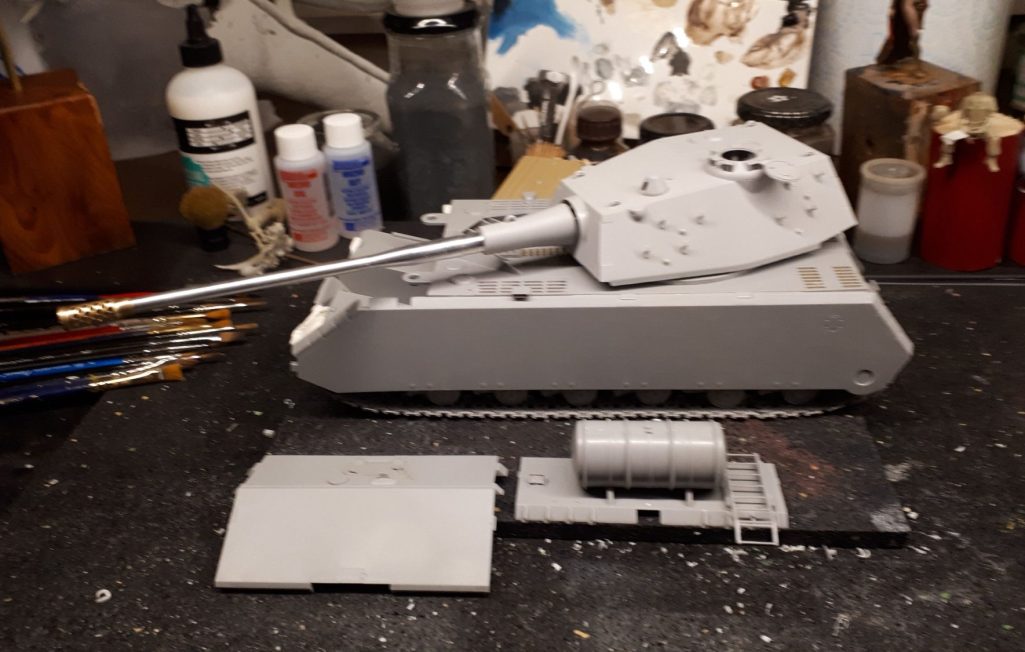
Photo #1 shows the hull of the Maus completed – there’s a lot of parts to the suspension that need gluing together, never to be seen once the side plates are on, which makes me wonder about doing a tank with them removed…..
Stop it Hopwood ! One idea at a time please !!
OK, so Maus hull done, E100 Turret constructed and a nice shiny aluminium barrel added with a brass “Pepper Pot” muzzle brake installed.
At this stage the side panels, front and rear plates and of course the turret are not fastened in place, that will come later.
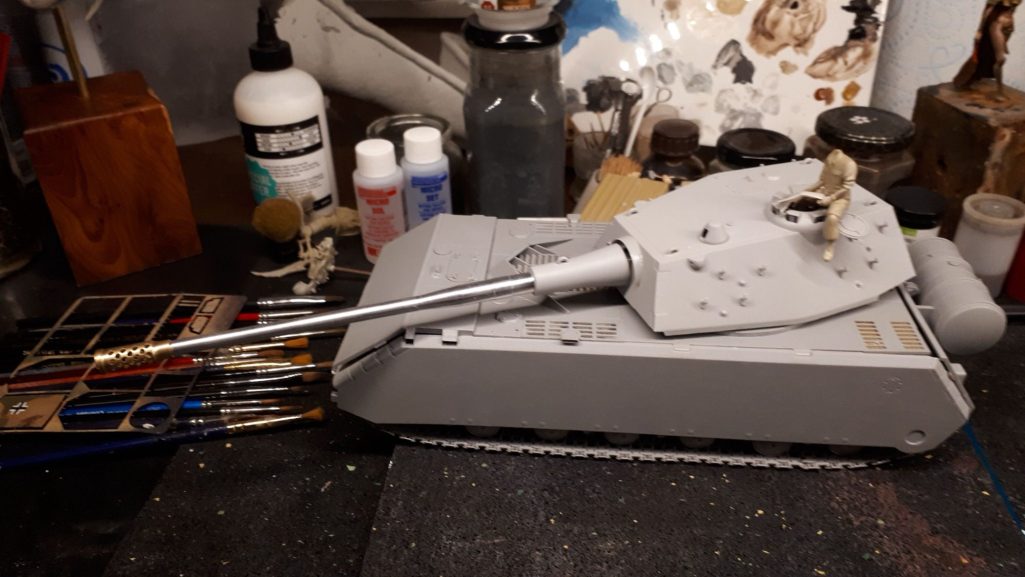
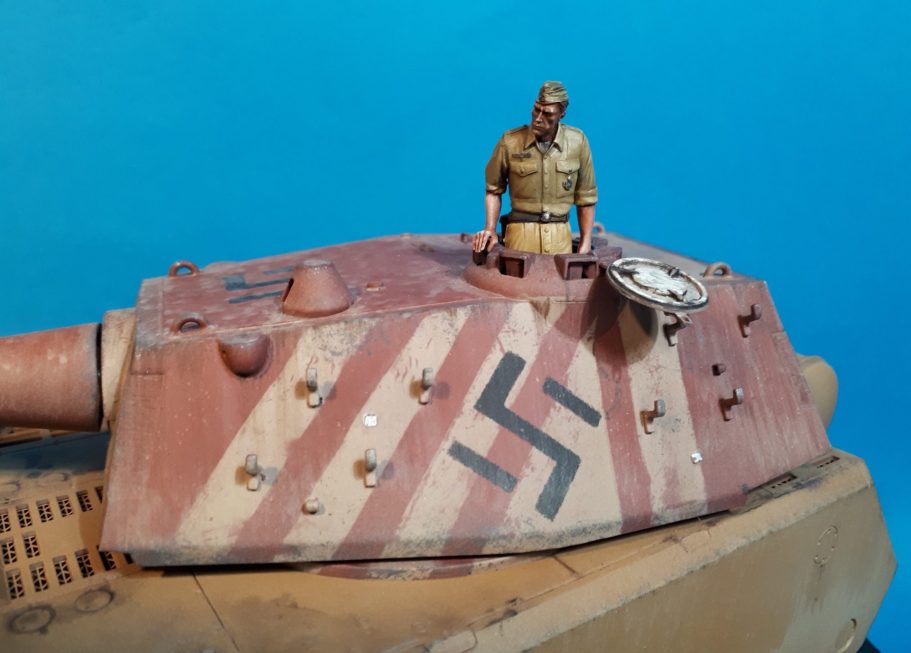
Photo #2 shows the Maus from a different angle, the different plates being temporarily placed in position, and a figure sitting in the cupola to give a sense of scale.

Photo #3 shows the little bit of fettling I had to do to get the Amusing Hobby turret to fit the Dragon Models hull.
The Amusing Hobby turret ring is smaller and would leave a gap around its edge which although narrow, would still be visible.
To fix this problem I removed the original ring on the turret and fastened the base plate of the open turret from the Dragon kit onto the underside of the amusing Hobby turret – simples !
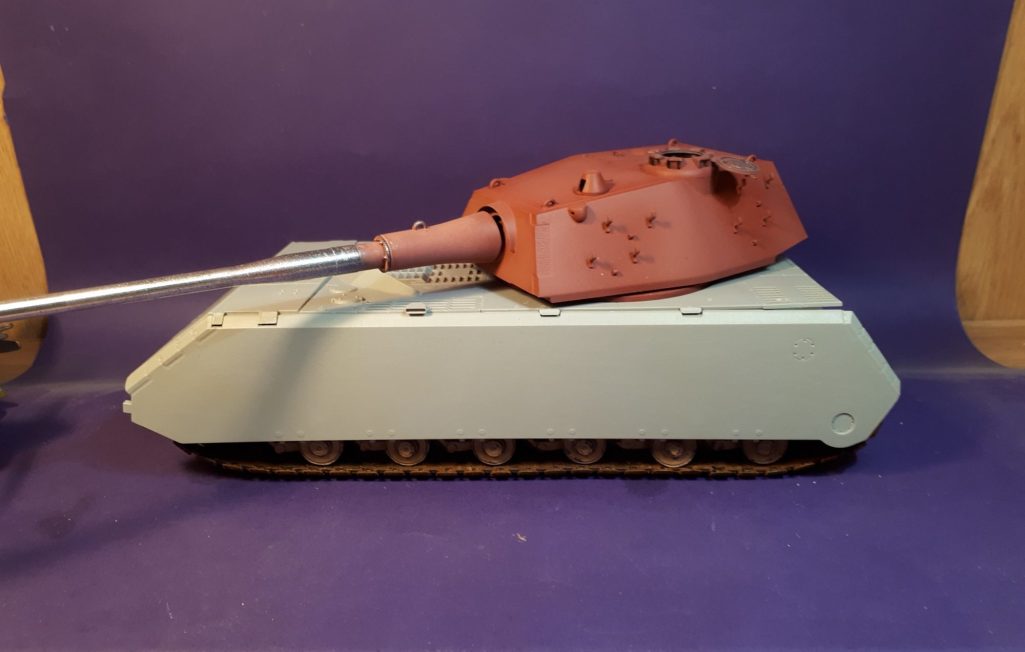
Photo #4 shows the Amusing Hobby turret in place, still with some of the hull side plates held on with Blu-tac.
I’ve got to admit here that to me, the change of turret makes the Maus look a lot more threatening somehow. Maybe because the turret reflects the shape of the Tiger II turret, I’m not sure. The original Maus turret always made me think that it’s have the same problems with deflected rounds that the earlier Panther turrets had, the shells being deflected into the hull if they hit the lower portion of the mantlet.
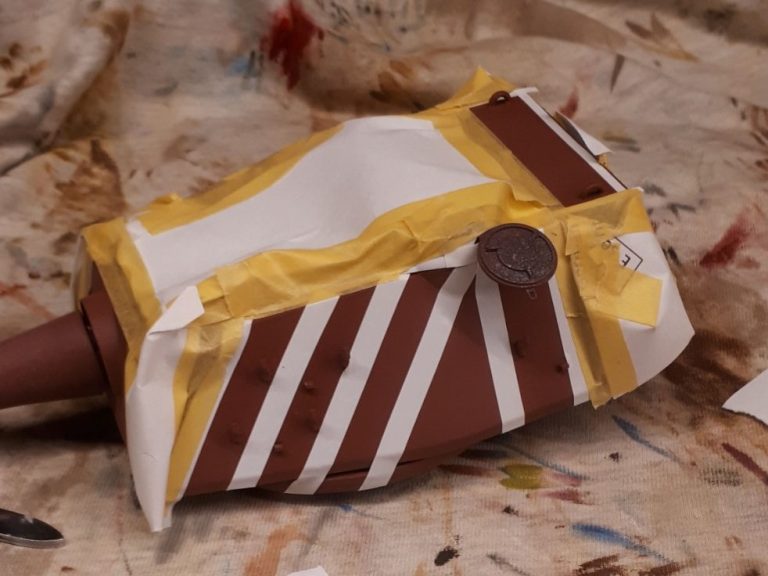
Photo #5, in the last shot I’d primed the turret with Halfords “Red lead” primer, and seen in this shot I’ve begun the process of masking the turret to accept some sand camouflage.
My thoughts being that the hull had been in a desert theatre, had its turret disabled or destroyed, and been upgraded with this new turret fairly freah from a production line. The crew then trying to add some paint to break up the silhouette, as there wasn’t enough to do the whole turret.
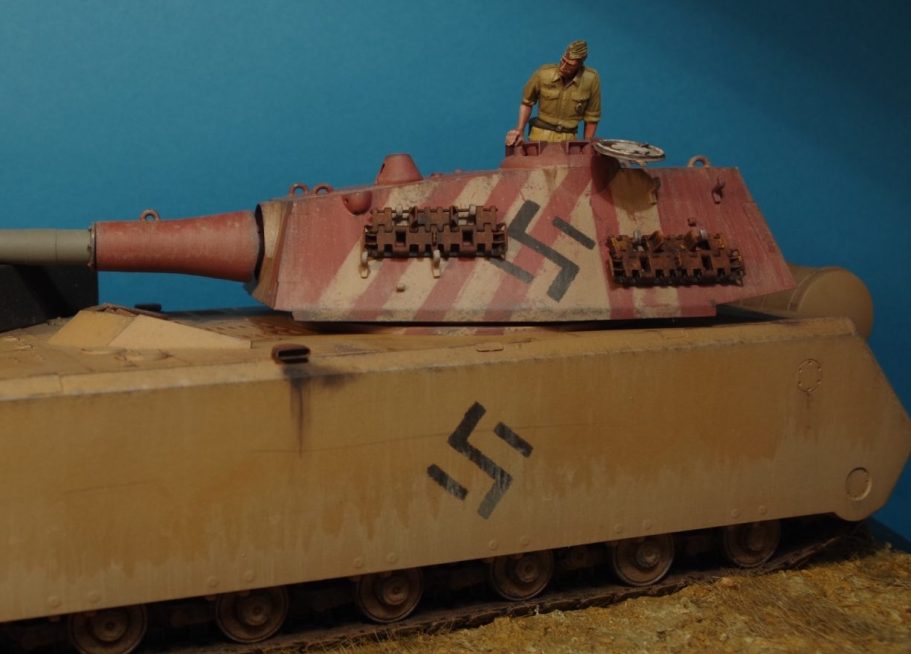
I’ve used 5mm masking tape and some paper to mask off the sides of the turret, the rectangular band on the back of the turret roof being for aircraft recognition.
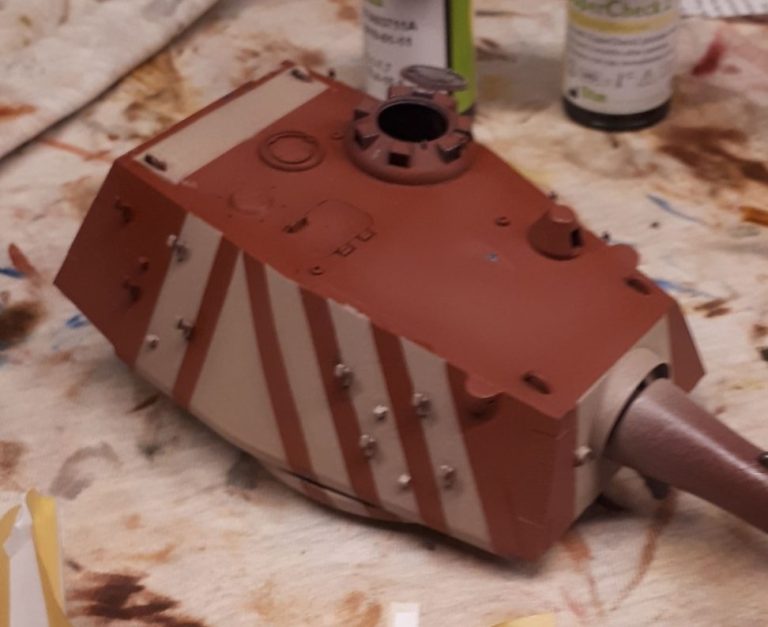
Photo #6. Prior to spraying on the sand colour with an airbrush, I’d got a small section of sponge and used it to apply a restrained stipple coat of Marmite to the areas of the turret that weren’t masked off.
With the masking tape stripped away, this was how the sand colour paint pattern looked.
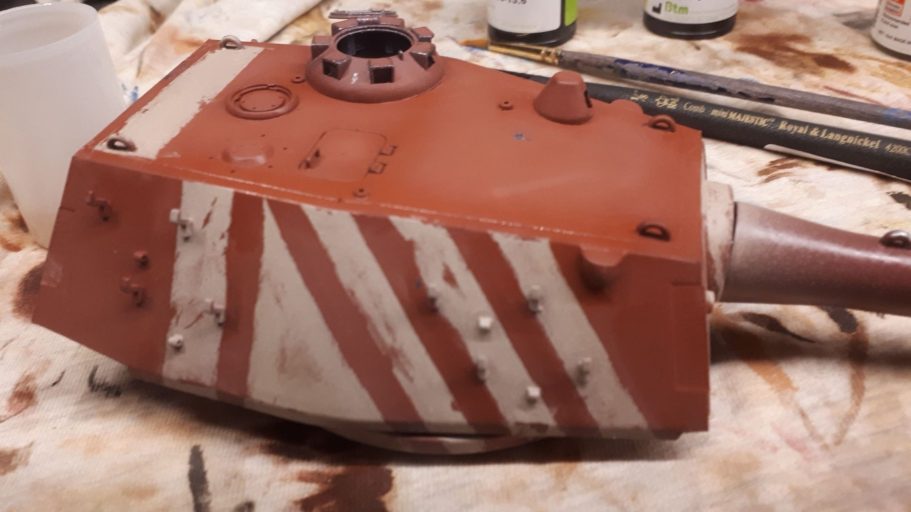
Photo #7 shows a closer look, the turret having been washed now with a soft brush and some detergent and warm water, removing the paint that had covered the Marmite so a scratched and slightly worn look to the camouflage stripes.

Photo #8 shows the other side of the turret at the same stage.
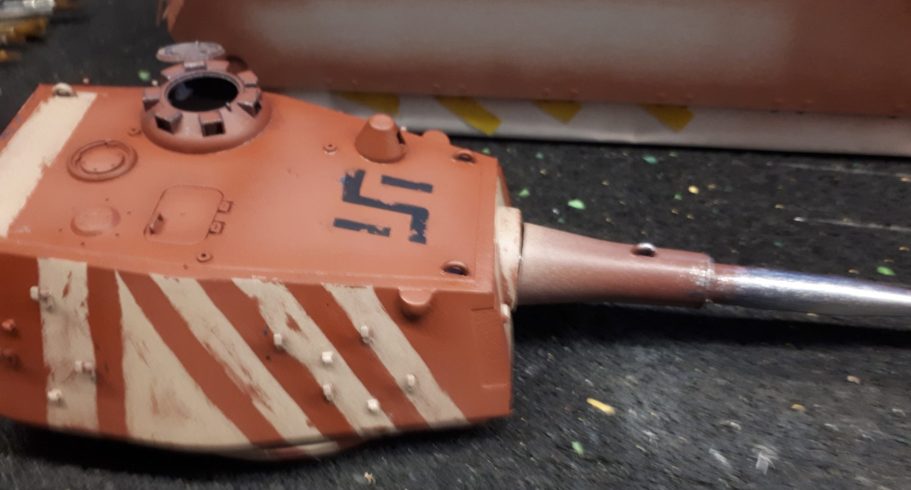
Photo #9. I know there’s some countries that have banned or suppressed the Swastika sigil, although to me the motif itself is not to blame for what those beneath it’s flag have done, I prefer not to use it unless it’s an actual historical piece – which this isn’t.
So I fall back on a mask that I made some time ago for a deconstructed Swastika, which results in the sigil on the turret roof and would be used on the hull sides too.

Photo #10 shows the masking off of the tracks and running gear.
I sprayed the suspension units, wheels and underside of the hull with Tamiya Nato Brown, then fastened the hull sides on, then added the masking as shown.
Once I’d got a solid sand colour on the hull sides, I’d remove the masking and allow some “creep” of the sand colour onto the wheels that were visible under the hull side armour plates.
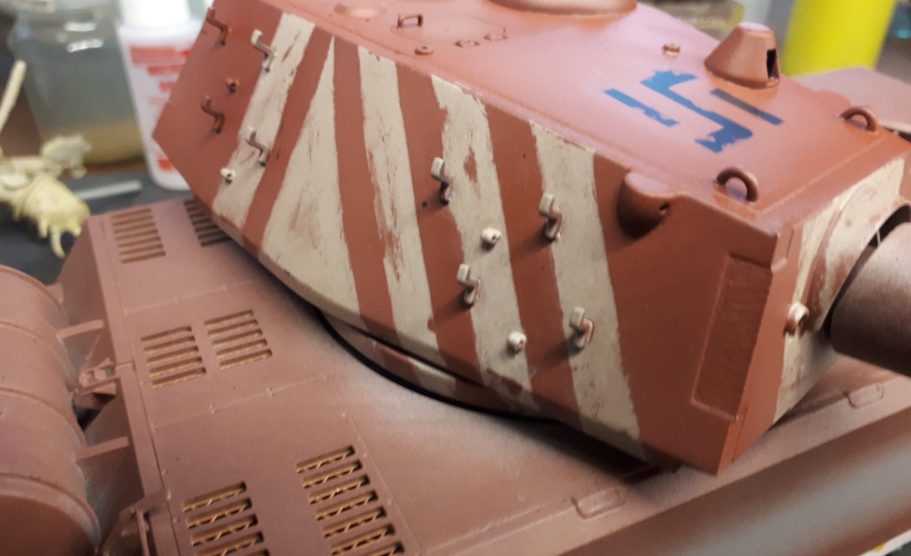
Photo #11 shows the turret set in place temporarily, the hull has been treated to some “Red Lead” spray paint along the edges and engine deck – basically anywhere that would get worn or scratched.
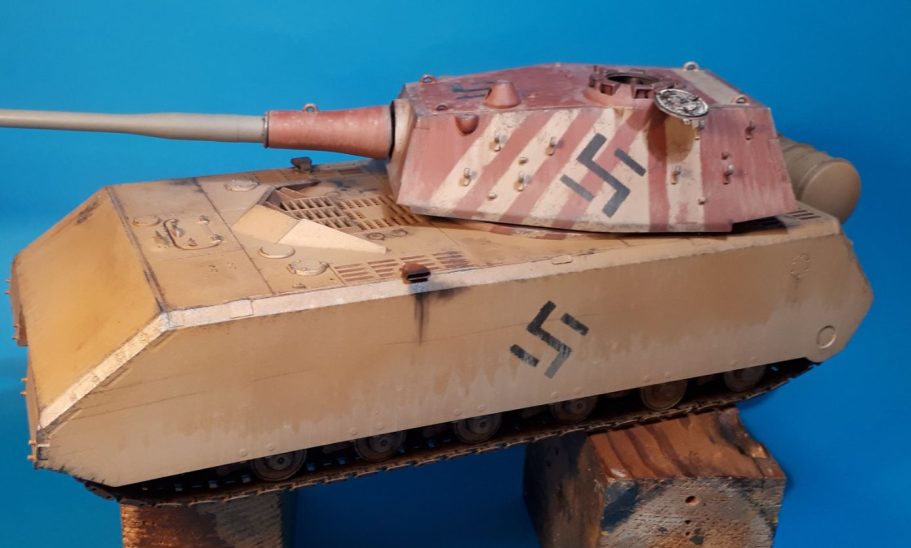
Photo #12 and the hull has been painted with a couple of shades of sand coloured paint from the Tamiya range – Desert Sand and Deck Tan.
I’ve added some oil drips from the exhaust amd although it can’t really be seen in this shot, there is some chipping of paint through to the Red Lead primer and also to the metal under that in one or two places.
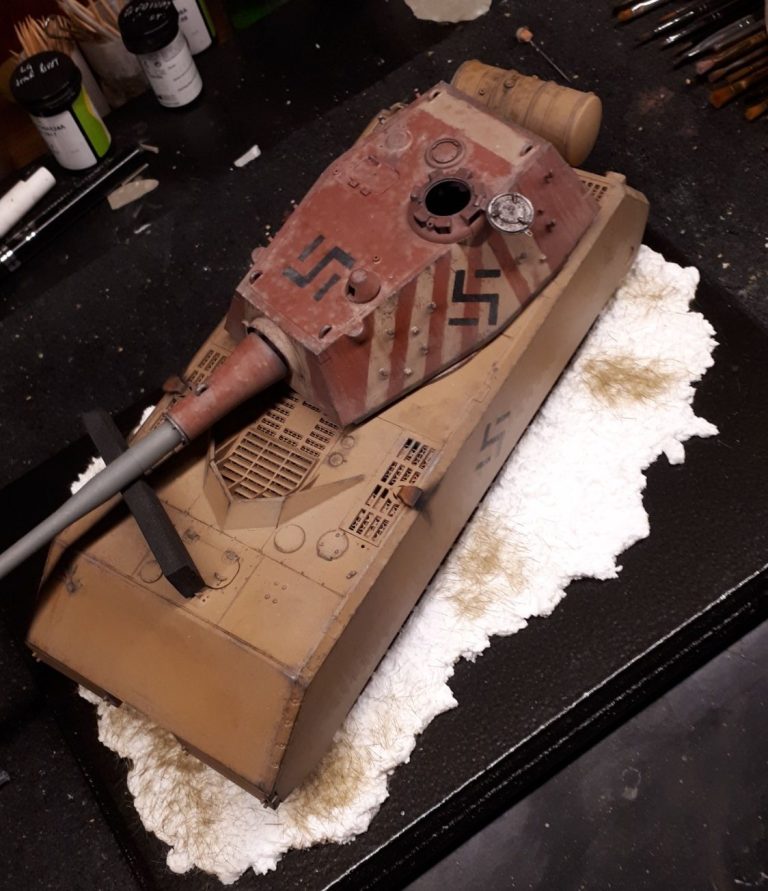
Photo #13 and I used a piece of MDF coated with Hammerite paint, then adding a mix of plaster filler and cat litter for the tank to sit on. I’ve had to use a piece of foam to hold the metal barrel up, although it will stay in place if the model isn’t moved, however, for transporting it to shows, the foam block comes in useful.
The tank was placed on the base, and a series of tread marks made in the plaster mix whilst it was still soft. I find it useful to use one of those very thin plastic freezer bags between the tank tracks and the wet plaster, so that one doesn’t stick to the other. The plastic bag pulls away fairly cleanly once the plaster is almost set.
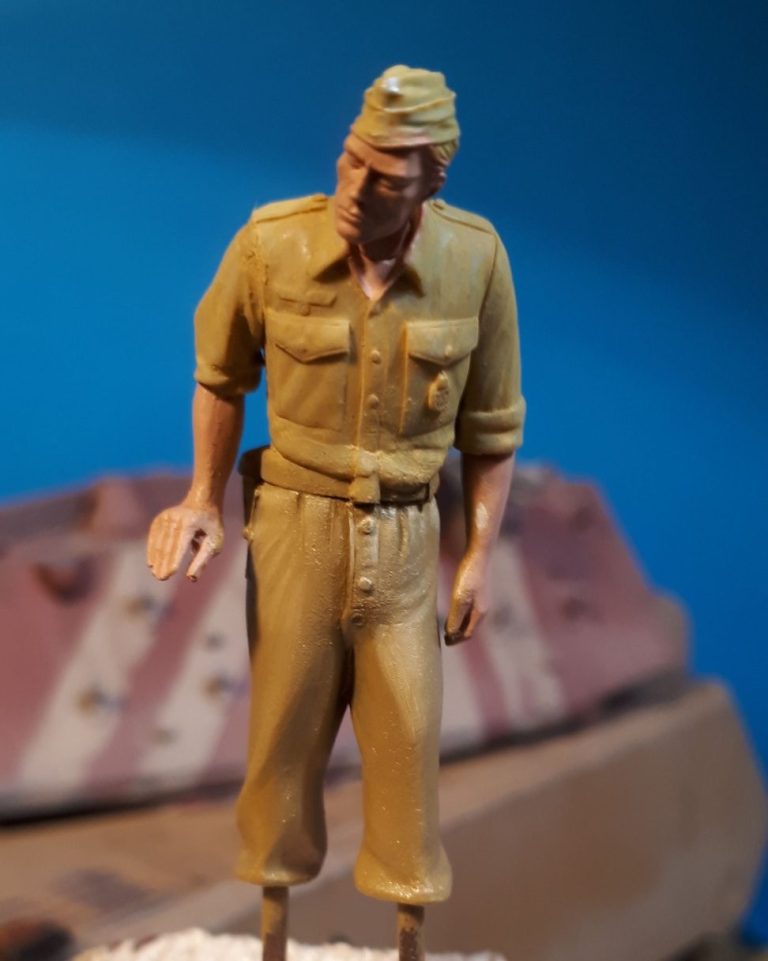
Photo #14. I found this figure lurking in the spares box, I know why he was there, I’d misplaced his boots, but he was perfect for a tanker looking to see over the side of this beast to check for clearance on one side.
If memory serves, this figure is from the Scale 75 range of 1/35th scale figure kits.
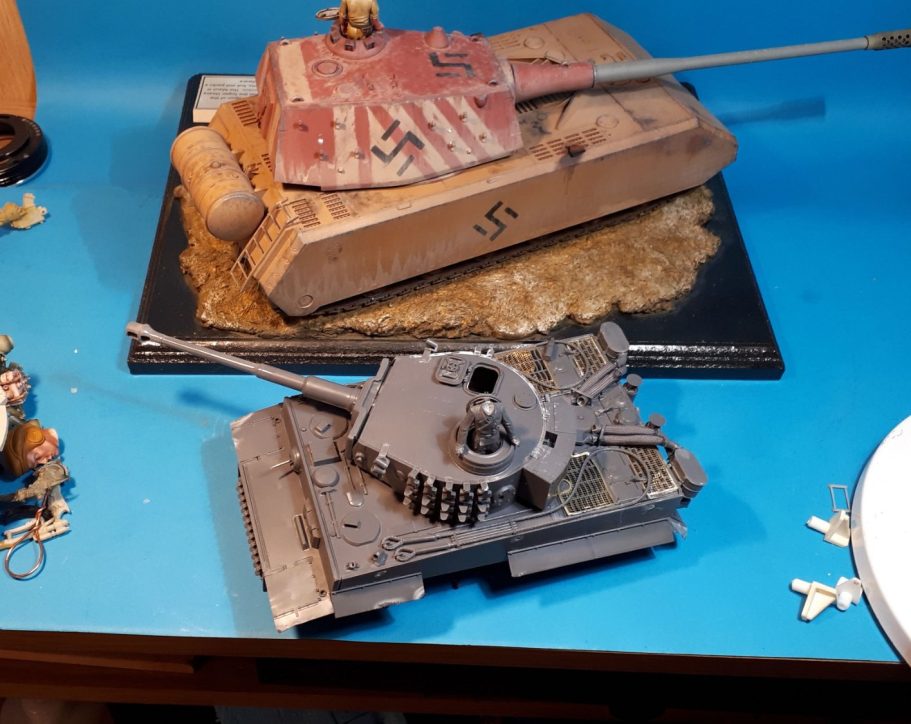
Photo #15 shows a comparison for size between the Maus and a 1/35th scale Tiger I, it’s a massive beast, and I guess would have been quite a scary sight if it was coming towards you.
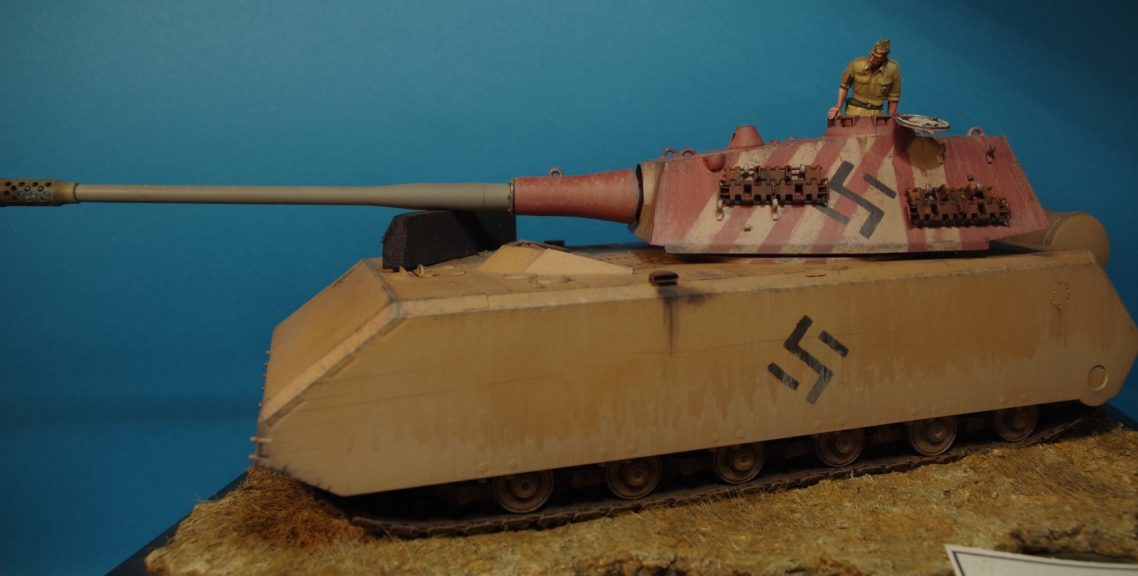
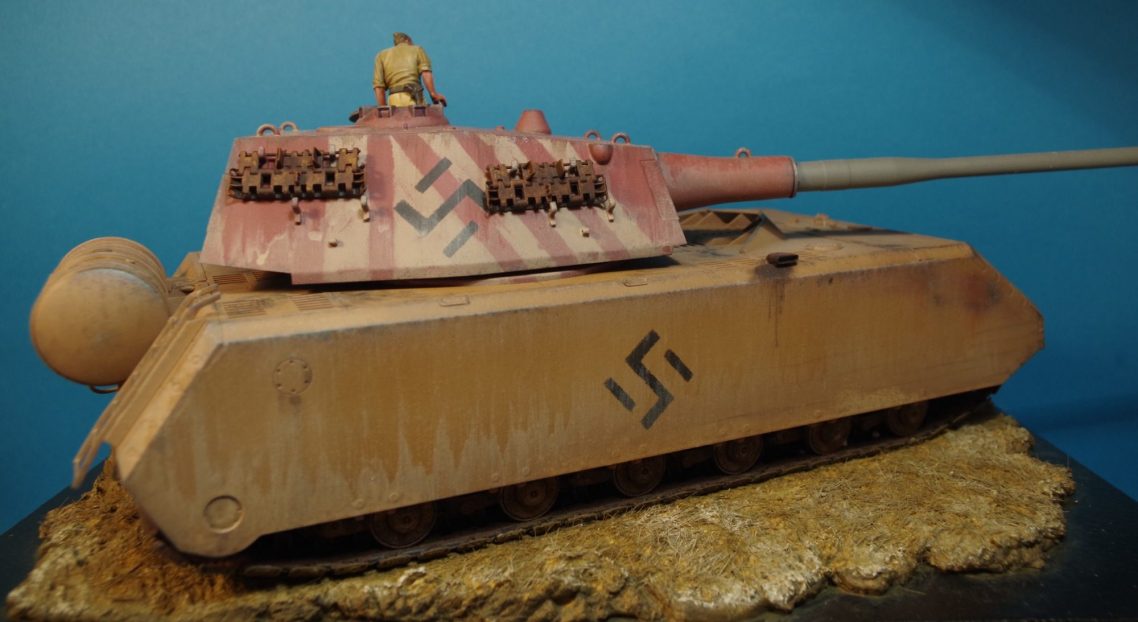
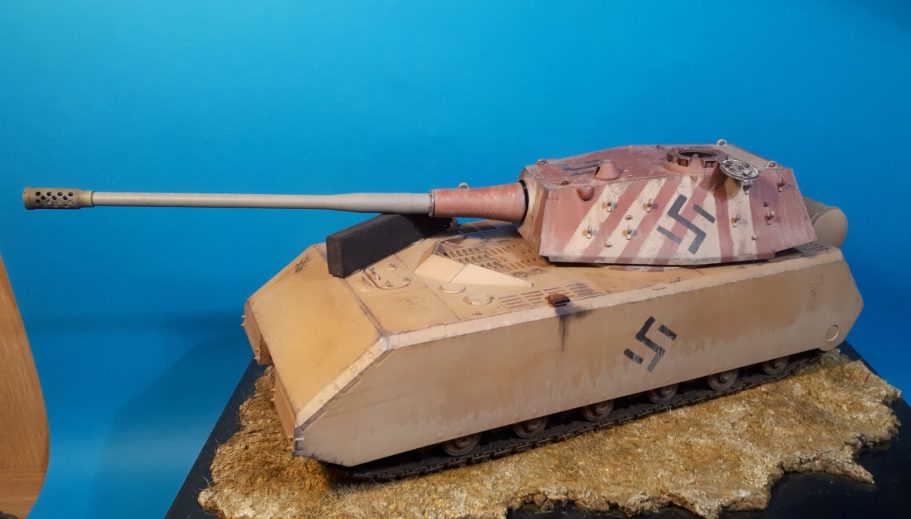
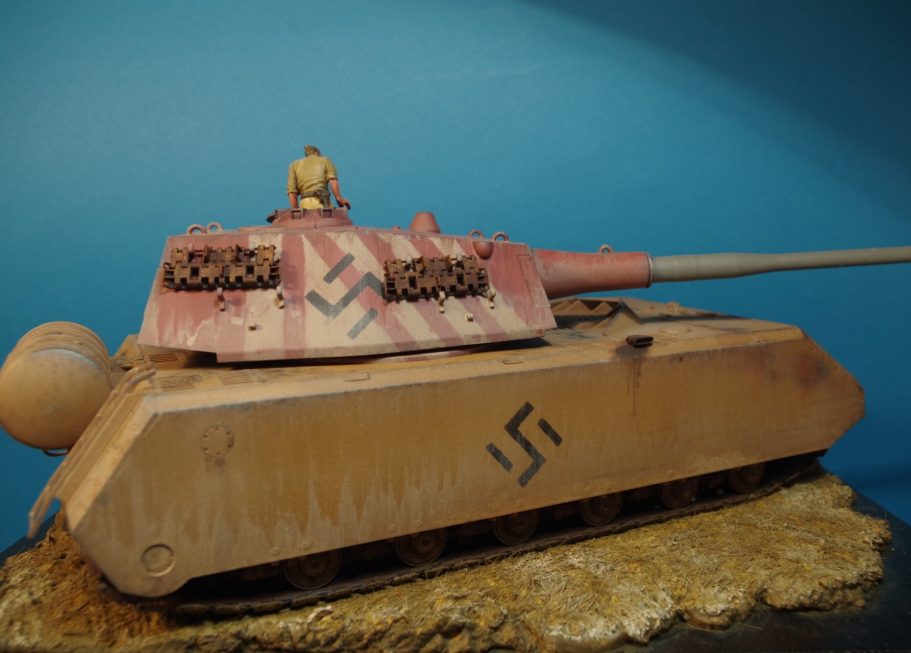
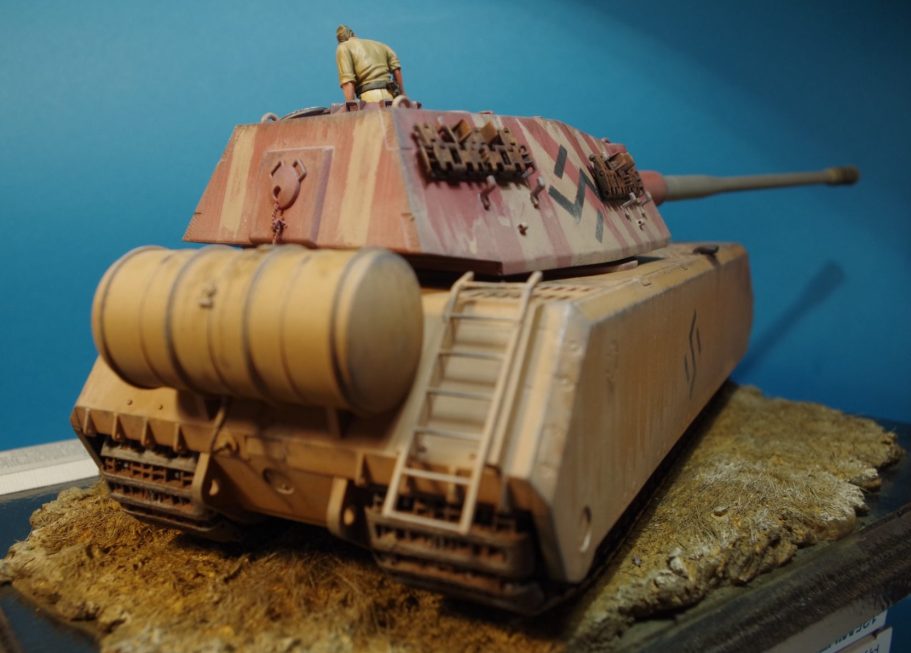
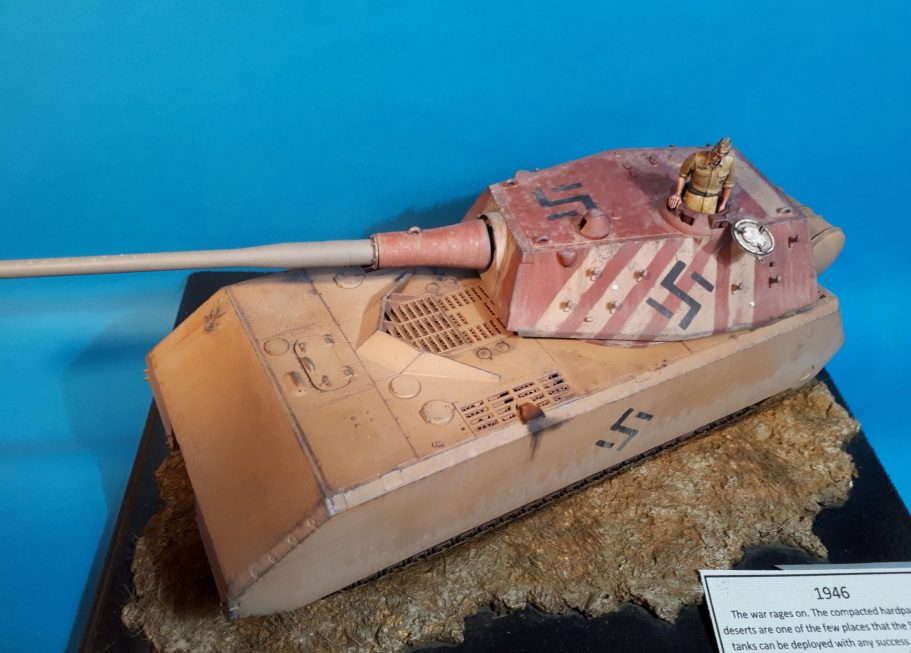
The rest of the photos show the finished model, the barrel is very long and due to it being heavy still tries to drop lower if there’s any vibration, so any movement of the piece sees it move.
Final thoughts.
I’m not convinced that I’ve sunk the tracks into the groundwork enough either, at around 190 tonnes or more, I think even the driest of baked mud and sand would collapse somewhat under that kind of weight.
Other than that, I’m pleased enough with the overall effects, the dust is restrained colour-wise, but is still visible, and the streaking suggests that there’s been some rain previously.
It’s a big tank, shown off well by the figure in the turret. I did think to have a second or third figure on or around the vehicle, but moved on to other projects before painting them. I may well return and add them at some point in the future.
So, both the base kit and the donated turret kit get a big thumbs up, the suspension may be a little bit “over the top” in it’s complexity, seeing as most people will have it hidden away with the side panels, but there’s plenty of detail there if you’re thinking of leaving it exposed.
And of course the Scale 75 WWII figures are superb additions and well worth the price to be added alongside AFV’s to give an idea of scale.