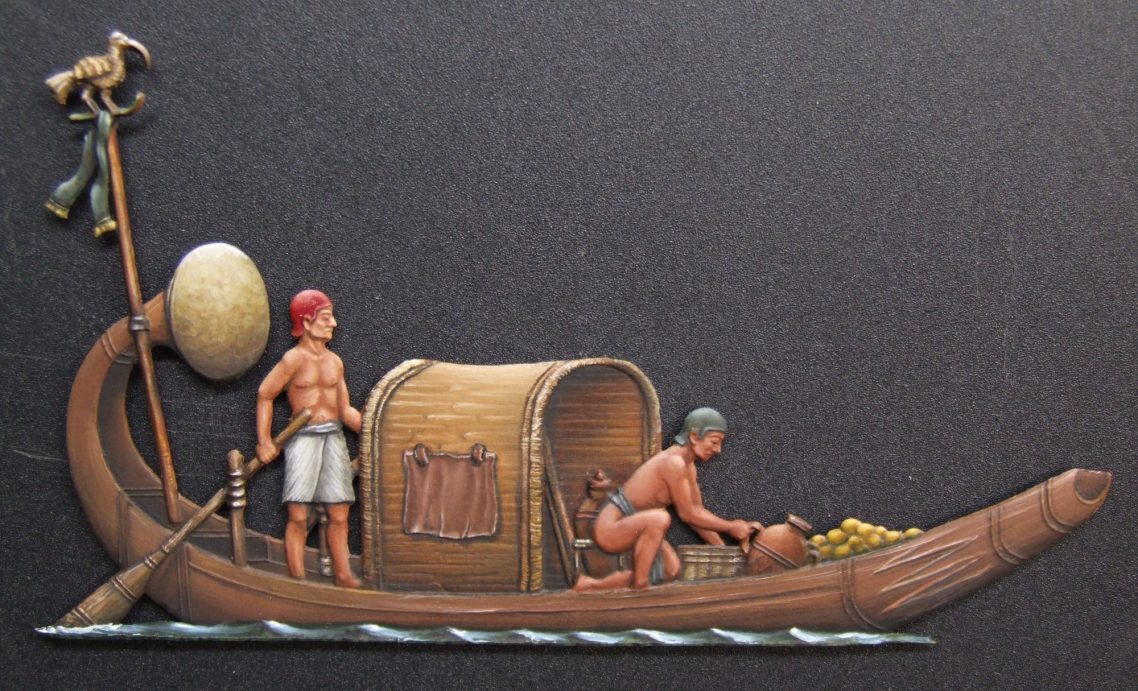
Egyptian Riverboat Flat
30mm White Metal casting
Painted in 2005

I don’t often paint flats, although I kick myself every time I admit that because I really enjoy doing them.
This one is part of a set depicting Egyptian subjects going about their business some 2000 years ( or more ) ago.
Cast in white metal and detailed on both sides, it, like the others in the set is a real treat to put paint on.
Just in case you haven’t come across flat figures before, the idea is to paint them to deceive the eye into thinking that they are three dimensional. This allows the painter to experiment with ideas such as cast shadows, forced highlights and shading, along with non metallic metal areas and the option of adding a background.

All the ideas and techniques above can be utilised on “round” figures, except possibly the idea of cast shadows……
So really, not only is a flat interesting to paint, it can also be used as a learning exercise.
So lets take a look at how the painting progressed on this one, and maybe it might make you want to look for a flat figure to have a go at yourself.
This first process shot shows the flat temporarily fastened to a block of wood with some blu-tac. As mentioned, there are two sides to this flat, so although I’ve chosen to paint the front view, the opposite side could be painted so that the boat appears to be sailing away from the viewer – handy for if someone wanted to produce a diorama with more than one of these in it.

I’ve washed the casting to remove any grease, and then painted a primer coat over the whole thing using a mix of Isopropyl Alcohol and some sand coloured acrylic.
At this point I was thinking about the lighting direction for this piece. I thought I’d be a little boring and decided on sunlight that would generally be from the top left of the flat, but on an overcast day, this would give a diffused even light with no harsh shadows.
In photo #2 I’ve completed the painting of the boat.
I tend to work from shadow to highlight using oil paints, and in this case I began with a mix of Mars Brown and Mars Black adding more Mars Brown to build up mid tones, and then some Mars Yellow and Buff Titanium to work up to highlights..

Worth pointing out is the apparent hollow look to the boat now at the rear end. It’s just a case of using the dark paint to fool the eye into thinking that the boat is hollow, with strengthening bars across to keep it’s shape, when if you refer to the previous picture, the casting is flat and has no such depth.
Photo #3 shows the sun shade “hut” having been painted, although I began this section with the same dark colour as the hull of the boat, I skipped using the mars brown, and went straight to the Mars Yellow to build up mid tones and highlights, using Titanium White to further lighten the colour change.
Note again the apparent hollow appearance to the hut, again using the shadow colours to give the impression of depth.

The same can be said for the leather window flap, again painted with the dark brown of the boat’s hull, but then highlighted with Buff Titanium and Titanium White.
In photo #4 the disc-like tail decoration ahs been added, and this is where a certain amount of interpretation comes in – in real life, is it metal, is it painted – and much like the hut and the window flap, I’ve assumed the materials used to be wooden planks and leather. However, I could just have easily painted them to represent a woven Texture for the hit, and a cloth ( perhaps with a pattern on it ) for the window flap. You see how there is latitude for interpretation now ?
So, the Sun Disc at the rear of the boat, which I chose to paint as a metal decoration was painted with “flat” colours. This is the accepted norm with flats, that like painting a picture, the artist does not use metallic paints, but by forcing the perspective the flat colours appear to show a metallic surface.

I used the shadow mix from the boat hull, and added Mars Yellow and Titanium White to build up the mid tones and highlights, endeavouring to create what looked like a hammered metal area what was not overly reflective.
In hindsight it might have been fun to try and paint a reflection on this area, but that’s perhaps for another flat in the future.
Photo #5 and things are really coming together, the water has been painted – perhaps a little too blue for the Nile, the steering oar and vegetable produce has been added along with the flesh colours of both figures.
The standing figure’s hat has been painted in too, whilst his skirt has been undercoated with white acrylic in preparation for further coats of paint.
Flesh tones are a mix of Mars Brown and Titanium White, adding a little less white than usual on the highlights to give a more suntanned aspect.

Photos #6 and #7 show close up’s of the riverboat at this stage, perhaps allowing more of the detail to be seen.
In particular in photo #6 is the wicker work basket and the pot amphorae stowed in the boat, and the poles – for guiding the vessel in shallow water ? – hidden away inside the hut.

In photo #7 I’ve painted some dark grey colour onto the skirt of the standing figure to give some shape to that area, and added highlights to the inner panels and structure of the boat.
The most difficult areas to paint are the figure’s faces, the size of the figures are quite small, but also there isn’t much definition to the faces to guide the painter, and so a fine brush, tongue in cheek and plenty of cursing tend to have held sway when painting the faces.

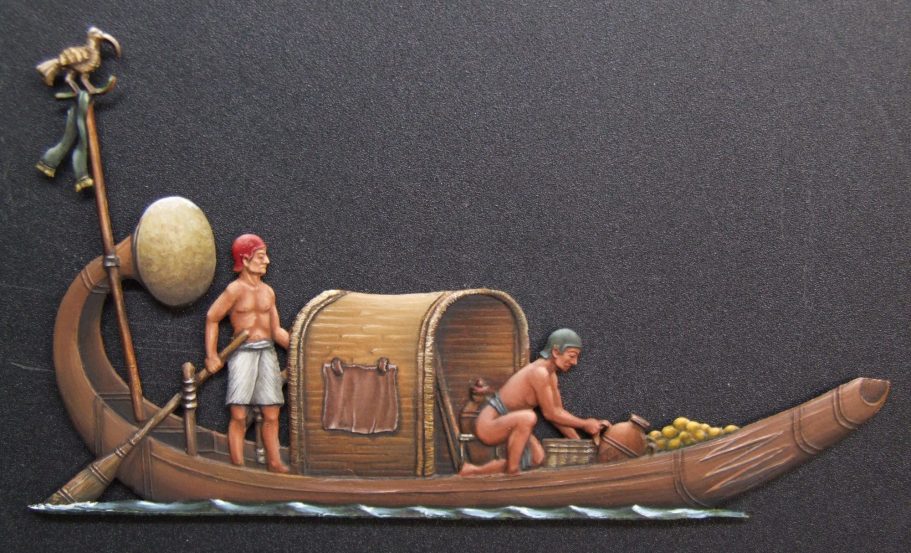
Photos #8, #9 and #10 show the flat having been moved to a black background. This ( to my mind ) shows the flat off to it’s best really, as there is nothing else to distract the eye.
A little more noticeable in the shots of the stern of the boat is the cast shadow of the steering oar against the boat’s hull. It’s not very distinct, as I mentioned at the beginning, the day is overcast, so shadows would be minimal, but I thought I’d have a go at painting a cast shadow and used Sepia oils, thinned with White spirit to add a line where I thought the shadow of the steering oar would be.
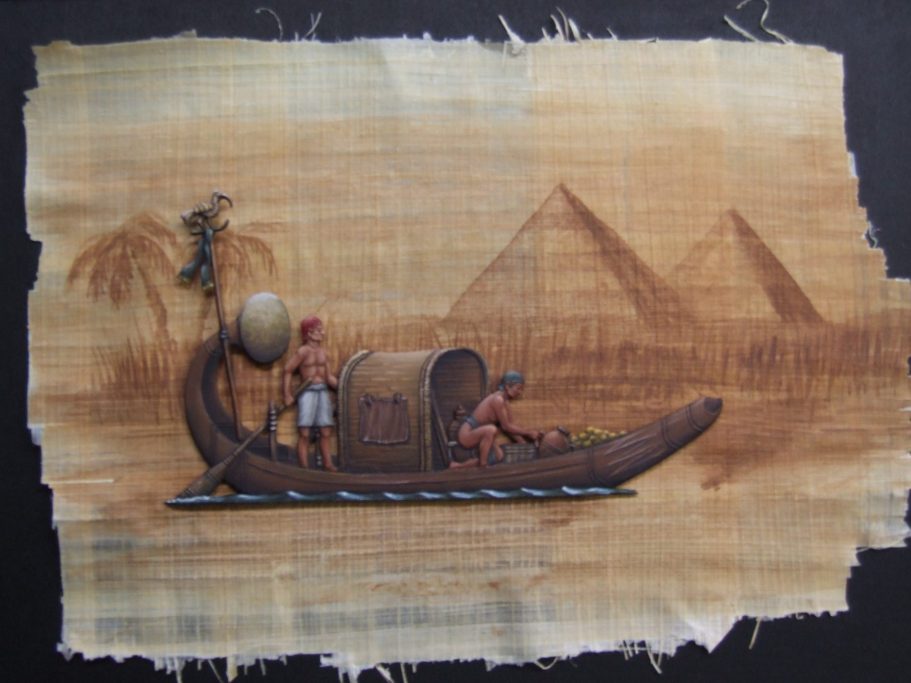
Whilst I prefer it displayed like this, I thought I’d have a go at painting a simple, monochrome background for it to see what it looked like.


I chose to depict a part of the River Nile, and although the pyramids probably aren’t visible from that point, to make the idea of this being Egypt, I thought I’d take the liberty of adding them in the distance. Palm trees are of course a must, and I do know that reed beds thrive along the banks of the Nile, so all these elements were put together and represented in the background shown in photo #11.
I used thinned Burnt Umber oils to paint the background, adding these to some Papyrus that I’d bought some time back to go with any Egyptian subjects that I might chance to paint – forward planning working for once.
I frayed the edges a little, to add a bit more interest to the background, although I wonder if this too is a distraction from the focal point of the boat…. Oh well.

Whilst I don’t claim to be any sort of artist, the background does look marginally better when placed in a nice frame, - shown in photo #12, and the finished boat mounted on the background is shown in the final shot.
In conclusion, I’ll say again that painting flats is both fun and provides an amount of learning to take place with the use of paints and forced perspective. Not only that, flat subjects tend to be a lot cheaper than “round” figures, although a lot of the multi-figure subjects tend to be made in smaller scales, typically 28 to 30mm.

We need your consent to load the translations
We use a third-party service to translate the website content that may collect data about your activity. Please review the details in the privacy policy and accept the service to view the translations.