Barbarian Girl Flat Figure
1/8th scale Flat Resin casting from Bash Models
Sculpted in 2018

I rather enjoy painting flat figures and busts, although I feel that I don’t do anywhere near enough of them, the small collection of unpainted ones has built up over the last few years.
So having quite a few waiting to be painted, I used that good old modeller logic of…… I’ll scratch built one !
This is the fifth one I’ve made and produced a mould for.
The sculpture itself is built up on a piece of glass, the Magic Sculpt putty sticks fairly well to it, but can be levered off gently with little or no damage if necessary.
“Why use glass as a base for sculpting ?” I hear you ask. Well for several reasons, one being that you can fasten a design to the back of the glass plate to give a guide to where you want the edges of the flat to be, a second reason is that it’s perfectly flat, so any mould made will have a flat area around the sculpture, another reason of course is that the rubber used to make the mould doesn’t adhere to glass, and finally the glass can be cleaned up and used as a display base for the sculpture whether you paint it or not.
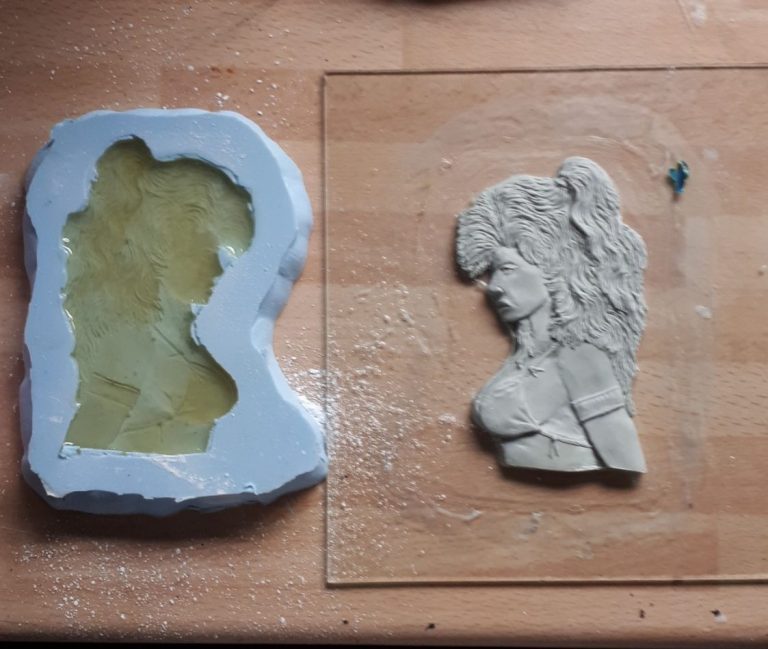
Photo #1 shows the sculpture still on the glass, and it’s easy then to build a “wall” around it from plasticine, coat the master sculpt with a thin layer of Vaseline and then to pour RTV ( Room Temperature Vulcanising ) rubber into it to produce a mould.
Once the rubber has cured ( which takes about 12 hours ), it can be peeled off the master, usually with little or no damage to the sculpt itself, and the glass with the master sculpt still attached, can be stored away for when a new mould needs to be made.
With care, the moulds will probably be good for twenty or so castings, possibly double that if there are no deep undercuts or details that will tear the rubber. The rubber is very soft, and will reproduce very fine detail, even up to and including fingerprints. So the master sculpt has to be checked thoroughly before the mould is made.


In photo #2 the resin casting can be seen, the cream coloured resin and the low relief of a flat don’t really display the details too well, but they are all there, just ready for some paint to bring them to light.
Photo #3 shows one of the castings having been primed with a mix of a sand coloured acrylic and some Isopropyl Alcohol. Over that, the skin areas have been undercoated with an acrylic flesh colour, then oil paints added using Mars Brown and Titanium White, with just a small amount of Alizarin Crimson to make the mid-tone slightly more pink than I’d use for a male subject.
The shadows are built up with more Mars Brown, and the highlights with the addition of more Titanium White.
The thing about a flat is that although the parts of the figure are marked out on the surface, the idea is to paint the model in such a way as to make it appear three dimensional. This is where forcing shadows and highlights by using very dark or very light paints can bring out the illusion of the piece being a “round” model, rather than a flat.


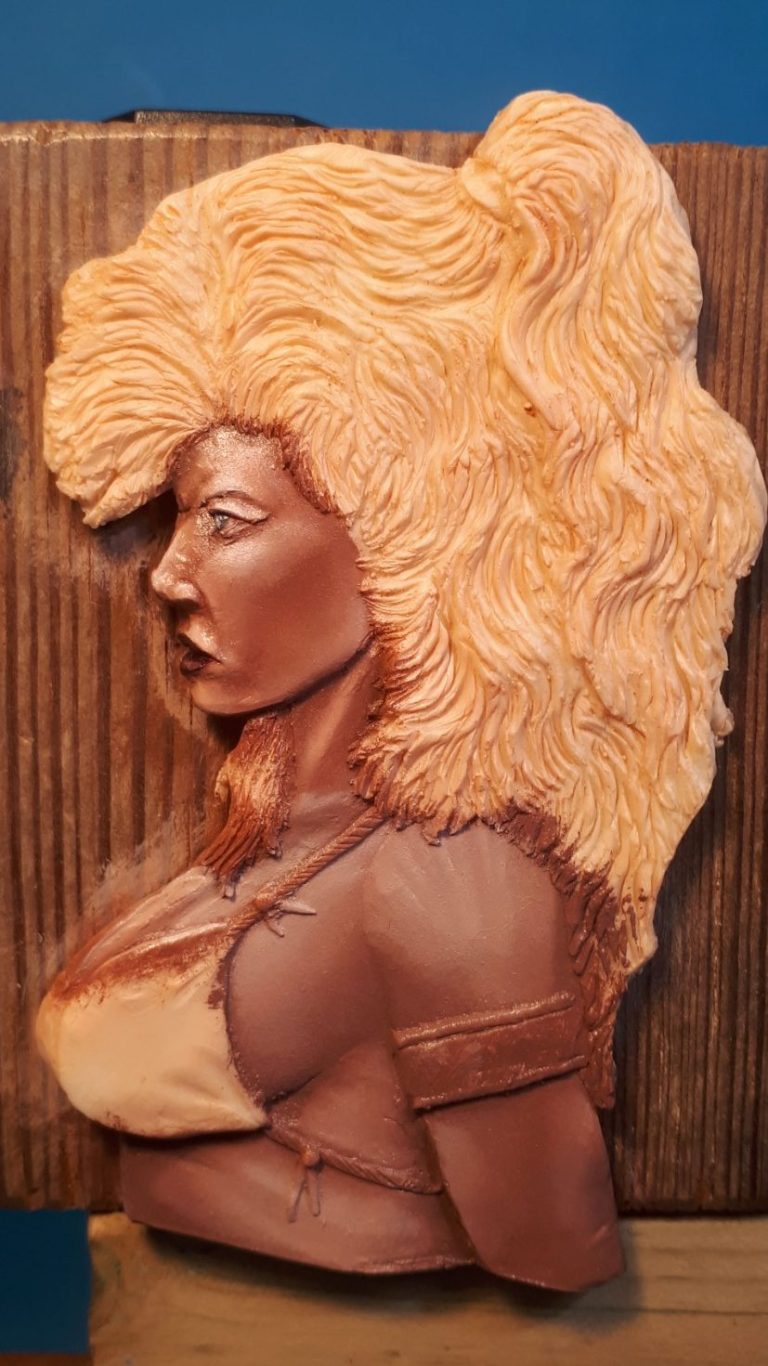
In photo #4 I’ve added the hair colours, again sticking with browns, but adding more Mars Yellow to the initial mix, and undercoated the bikini top. The hair, whilst being fully painted, now needs the shadows reinforcing so that areas of it appear to drop back, and that the highlights then leap forward towards the viewer.
Worthy of note in this shot is the bangle on the arm, this, whilst appearing to be metal, is in fact an illusion formed partly by the expectation of the viewer that it would be metal – gold or brass in this case – and by using flat colours rather than metallic paints to create the illusion. The use of metallic paints on flats is sort of frowned upon. The fact that you’re painting something that is nearer to a canvas painting rather than a model figure kit, being the point, and so like painters, the colours used are non metallic. It’s easier perhaps to actually paint it, because the perspective is forced, and the viewer can only look at the painting from one direction, so the highlights and shadows can be manipulated unlike on a round figure.
Notice also the difference in the shadows – particularly under the arm where it goes over the chest. The shadows has been deepened in photo #4 so that the chest recedes and the cast shadow makes the chest appears rounder and the bicep portion of the arm becomes more pronounced and appears closer to the viewer.
Photo #5 shows the flat almost complete, these’s more work needs to be done on the hair, but all the areas are painted and the Bikini – like the chest section =+- has had deep shadows added to make it appear more three dimensional.


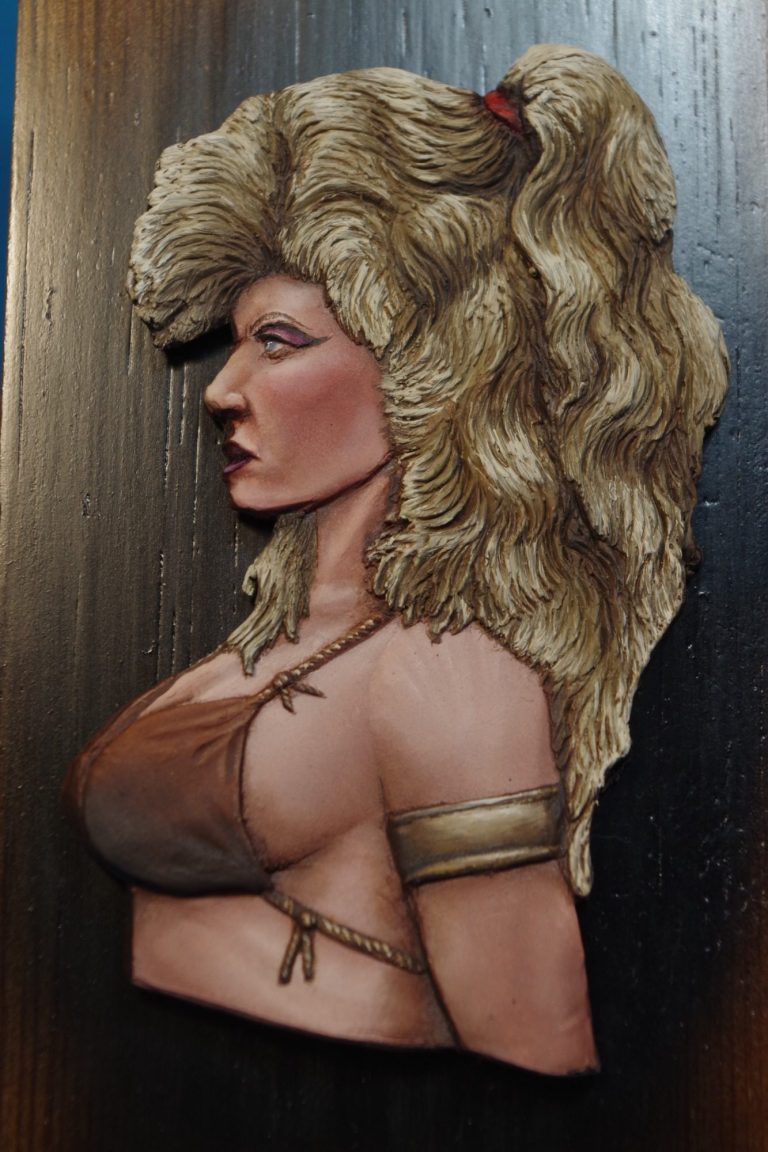
Photo #6 shows the flat placed on a block of wood to display it. I always think that if a single flat is being displayed, then it looks better on a dark background, it makes the piece stand out more and kills of any visual “noise” that a patterned background might create. On saying that, sometimes a flat can look superb posed on a painted scene, so it’s not exactly a rule, so much as a “see what looks best” kind of scenario.
In this case I sanded a nice block of Yellow Pine, marked out roughly the size and then airbrushed a cloudy pattern with some Tamiya Flat Black acrylic.
A simple nameplate was printed off and stuck in place, and that’s about it.
I’ve got lots of fantasy artwork books, but never seem to get around to sculpting flats very much – reminder to self, sculpt more.

We need your consent to load the translations
We use a third-party service to translate the website content that may collect data about your activity. Please review the details in the privacy policy and accept the service to view the translations.