Loss
40mm Resin kit from Nocturna Miniatures
Painted in 2013
At the time of painting, this was a relatively new scale of figure, still rather small, but a little bit bigger than the wargame 28mm standard.
I liked the idea, compact, but with enough space to have a decent amount of detail without being a caricature.
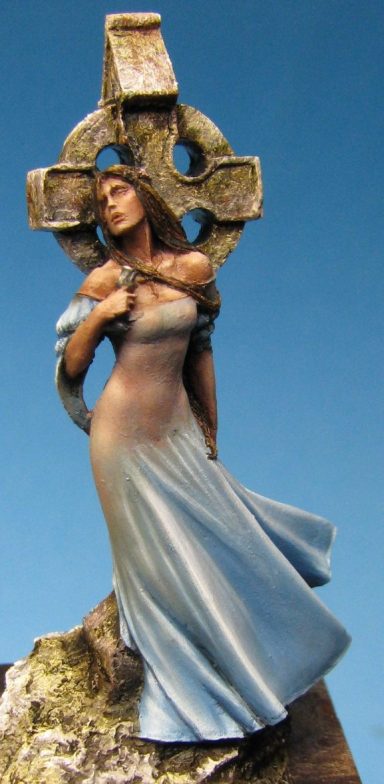

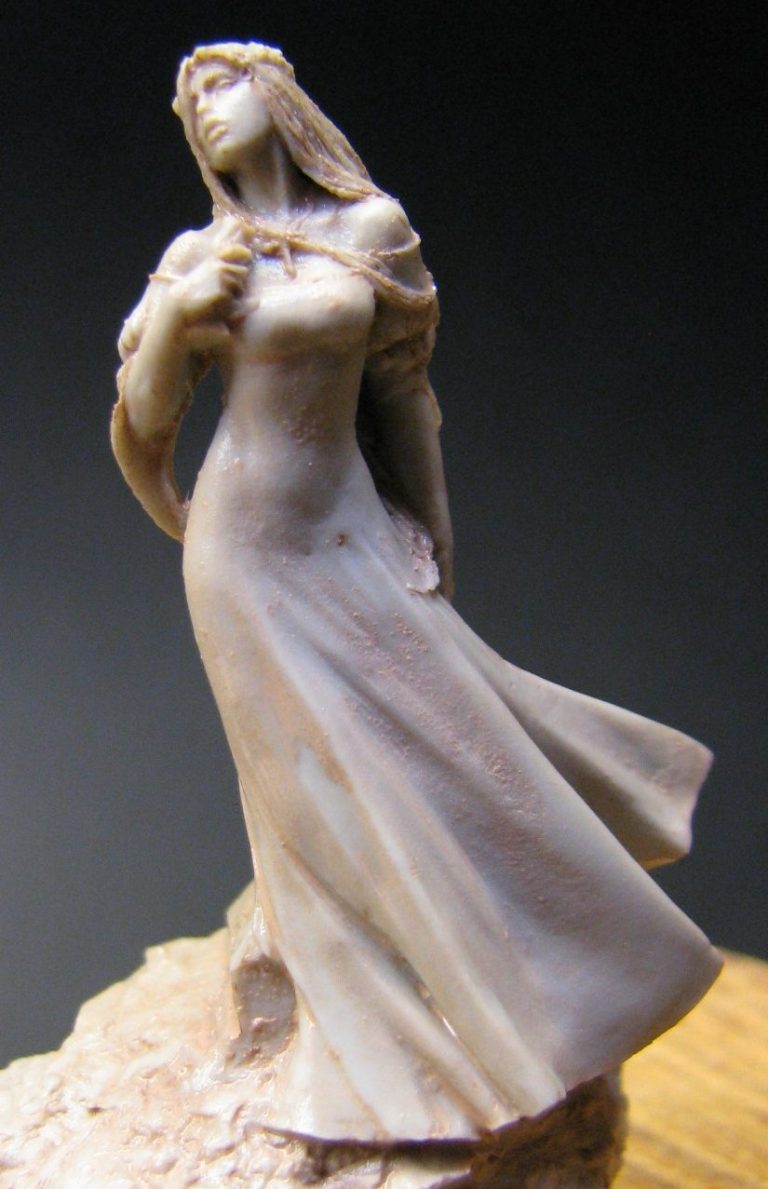
This figure in particular drew me, the anatomy and stance, not to mention the drapery, just works so well that it was a “must buy” and went almost straight away to the painting bench.
Photo #1 shows the bare resin model although the cross is a separate piece of resin that slots in at the back of the figure.
I got the impression that this was from a third batch of castings ( I can’t remember why I thought that at the time, there must have been something about limited numbers being released or some such ), and to be honest the moulds were showing their age.
Resin moulds are usually made from Room Temperature Vulcanising Rubber ( RTV Rubber ) and whilst they allow small companies and “one man bands” to produce copies of an original sculpture, they don’t have the longevity of the rubber used to make White Metal models.
A lot of people who make moulds eventually invest in a vacuum chamber, not necessarily to take air bubbles out of the resin – most types cure too fast – but to remove air bubbles from the rubber used to make the moulds.
If you don’t do this, then small bubbles of air can form throughout the mould, and repeated usage of said mould will eventually tear the tops off some of these bubbles that are near the surface of where the liquid resin rests against the rubber before it cures and hardens off.
RTV rubber is wonderful stuff, it will replicate the smallest detail, and the liquid resins that most model producers use will flow into those details.
So once the surface of the mould breaks up to reveal the tiny air bubbles within it, the resin very helpfully will flow into these, forming imperfections on the surface of the casting.
So what am I saying here, well, I think the moulds were getting a bit worn, and some faults that look to me to be the traces of small air bubbles breaking the surface of the mould are present.
On flatter areas such as her stomach and the larger flowing folds of the dress, these are simple enough to sand off using a very fine grit emery cloth or sanding stick, but on the smaller details, it’s nigh on impossible, because these simply isn’t enough material to work with, without ruining the form and volume of the area in question.
Photo #2 – including the large thumb tip shows the model primed with some flesh coloured acrylic and also shows the area below the chest where I’d been unable to remove the faults.

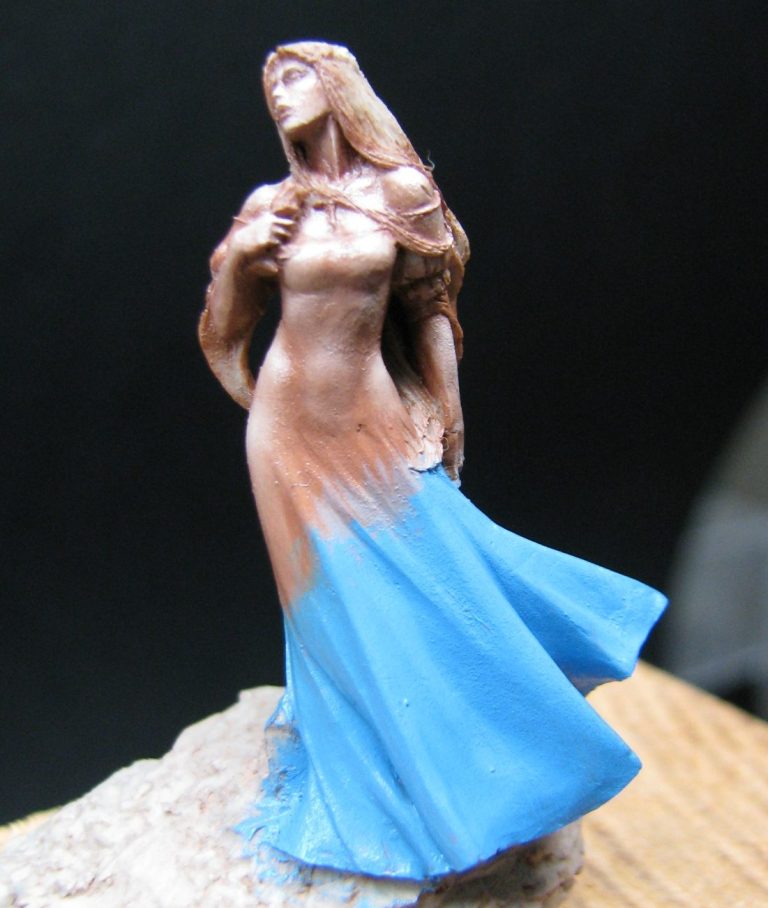
I returned to clean these up with some fine wet and dry, but just couldn’t remove them completely without ruining that area of the model, so I just had to put up with their presence.
To be honest, the model is that small that they can’t really be seen all that easily by the naked eye, it’s just that blowing up the pictures makes them stand out.
Photo #3 and I’ve begun the process of painting. The body was painted with the usual flesh coloured oils, completely ignoring the fact that she’s wearing a dress, the idea being that the material is slightly see through and the areas clinging to her body will show the skin underneath to some extent.
The dress will be a blue colour, so the areas where it will be opaque have been undercoated with GW Enchanted Blue in readiness for the oil colours that will be added soon.
Photo #4 and the oil colours of the dress have been added – Prussian Blue with mid-tones and highlights blended in with Titanium White.
The skin-tones were allowed to dry completely in the drying cabinet, and although I’m an impatient fellow, the figure was left in there for a week before adding the oil colours to the dress.
The blue colours have been allowed to fade into the flesh tones at the hips, only reappearing on the arms and in the space between the breasts, where the material wouldn’t be pressed against the skin.
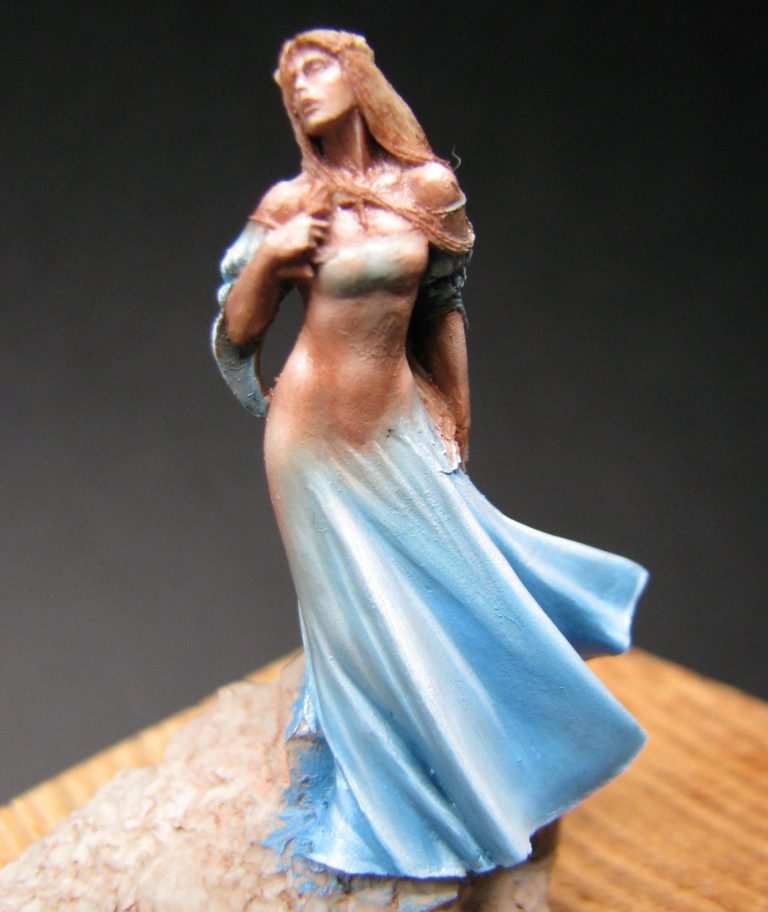

Photo #5 once the oil colours used so far on the dress have dried – another week in the drying cabinet – I added a very thin wash of the Prussian Blue / Titanium White mix over the “see through” areas that the dress covers to hint that there is material there, it’s just very, very thin.
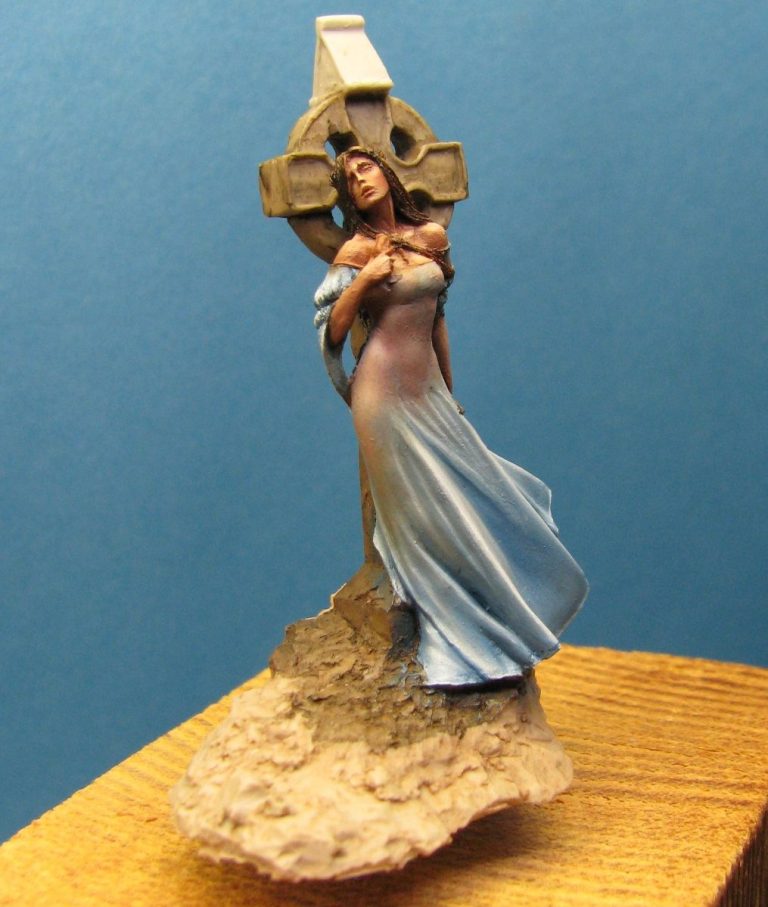
In photos #6, #7 and #8 the cross has been added temporarily and a shadow painted on the ground beneath the hem of the dress. A brown wash has been added to the hair and then lighter browns and yellows added in a combing movement to add highlights.
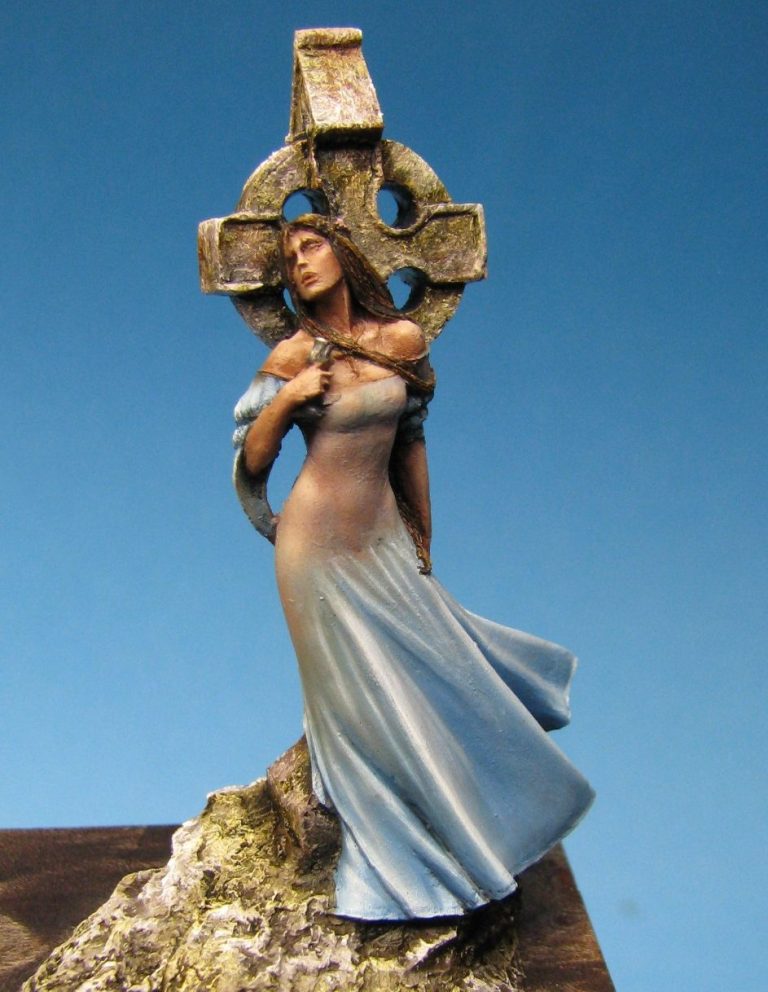
The finished shots show the cross and groundwork having been painted and weathered and the model added to one of Oakwood Studio’s plinths.
In an unusual move for me, I didn’t add anything at all to this model – no extra groundwork, no pebbles or stones, no static grass. It simply doesn’t need it, and to my mind anything else takes away the focus from the anguish the sculptor has managed to portray.


Final thoughts
Although there are mould faults on the torso of the kit I got, they really do only become invisible on very close inspection, or when some fool like me blows them up unreasonably to put up on a website.
Viewed normally, most people wouldn’t notice them.
The sculptor has managed to portray such grief in this figure that it is quite stunning, the sense of loss sums it up very eloquently.
The dress is open to interpretation; I think it was the American Painter Rick Taylor that painted a fantastic design on the dress, amazing when you actually know how small the model is.
I’m not sure if this model is still available, although I think Nocturna might still be selling it. I think I’d get another, but I’d like to see if the casting was in better shape than this one before parting with my money, clean-up was not easy and I can’t say I’m completely happy with some areas of the model.

We need your consent to load the translations
We use a third-party service to translate the website content that may collect data about your activity. Please review the details in the privacy policy and accept the service to view the translations.