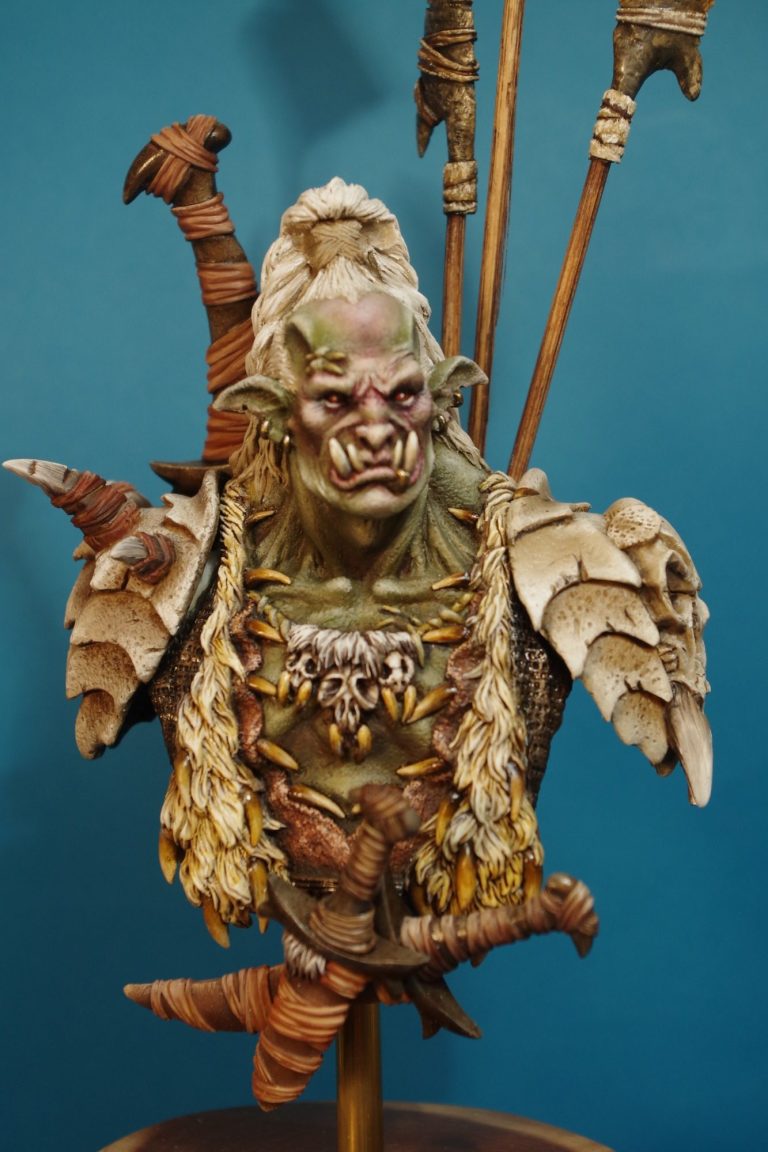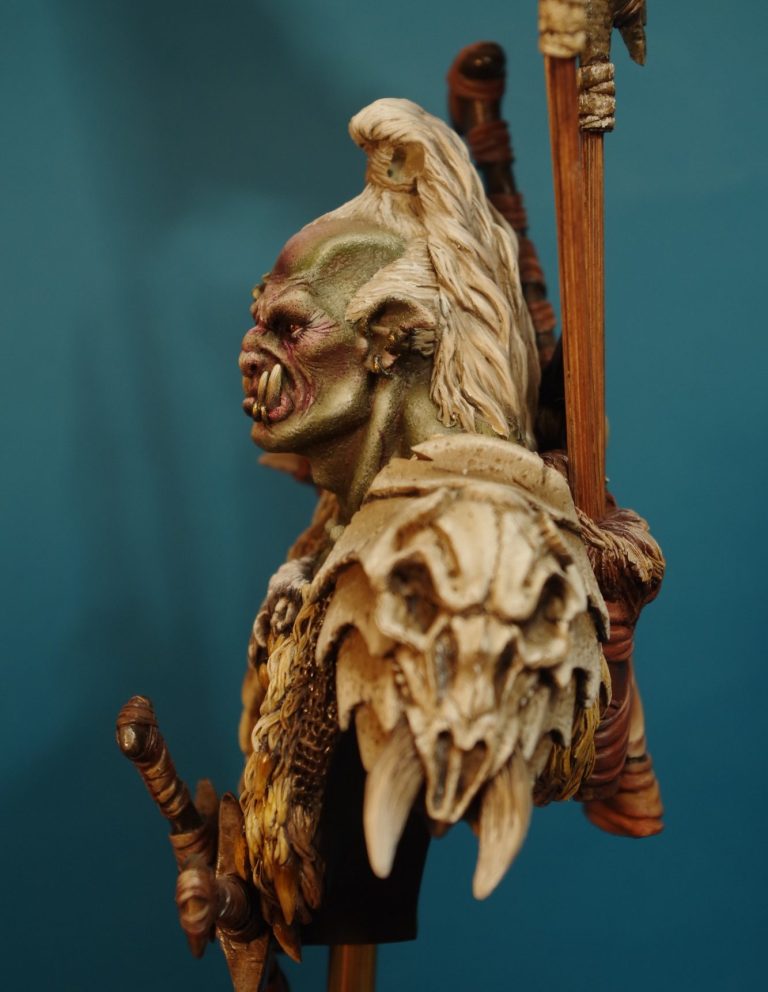
Orc Bust
1/8th scale Resin kit from MJ Models
Painted in 2017

Although I don’t have many “in process” shots for this piece, I do feel that it’s worth including an article for it – albeit a short one.
MJ Miniatures make some very odd busts, one or two which make you wonder…… Yup, just wonder, and that’s as far as I’m willing to go on that one.
However, this one is really good, and as I say, worthy of inclusion.
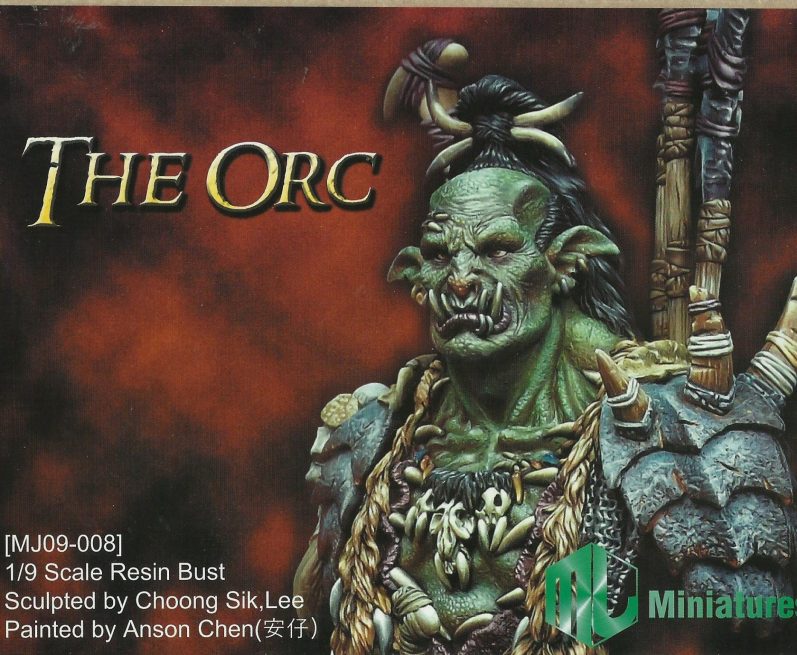
Photo #1 shows the box art, and it really doesn’t do this any justice at all. It’s well painted in the picture, and the box is sturdy with the parts well packaged, but I don’t feel the box art really gives the prospective buyer very much to go on.

Photo #2 shows the main casting with me already having started the priming and undercoating process. Nothing new being done here and I’ve detailed the process in many of the articles here.
All I will say is that this single casting is quite large, and from top to bottom it’s a good 150mm tall or more and there is a LOT of detail on there without even considering all the extra parts that will be joined on later.
There are three spears to be added to theback of the bust, and I chose to add some sculpted fur to the bag that they’re carried in – photo #3 – just a bit of Magic Sculpt textured with a dental tool and then the holes made to hold the shafts of the spears made with barbeque skewers…… Oh dear, that gave ma the thought that maybe I could swap out the resin shafts, which were a little bent, and substitute the skewers in their place.


Photo #4 shows a lot of the painting having been completed. The skin tones were painted with Olive green oils and some Buff Titanium and then Titanium White used to build up the lighter areas.
As for the spears on his back, I couldn’t just add the skewers on their own, I felt that maybe a small flag or two might make them a bit more interesting, so having stained the skewers with some Burnt Umber oils, painting it on unthinned and then wiping the excess away with a soft cloth, thus enhancing the grain, I then used some of the excess Magic Sculpt that I’d made to fashion the flags.
Simply rolling them out on a tile with some French Chalk ( Talc will do just as well ) and allowing the edges to crack, enhancing this bit with the tip of a scalpel to pull away at the edges of the putty to tear small sections away for the edges and create two sections of putty that were roughly triangular
While the putty was still relatively soft – it had been curing for about an hour – I formed the flags around the shafts of two of the skewers and put them to one side on a rumpled T-shirt to support the waves that I’d formed in the flags.
I used one of those clear plastic tubes that come covering the bristles of a new brush to press into the putty and form the heads of rivets holding the flags to the spear shafts.


Photo #6 shows the other side of the flag, the main field of it having been painted with acrylics, starting off with a bit of Kommando Khaki from the old GW range, and with a little Chaos Black added initially to form a solid dark colour after a few coats, and then whilst dampening the whole flag with a little water lighter additions of paint were made with just the Khaki colour and then moving on to mixing a little Skull White in and then just the white on it’s own.
Dampening the flag, and keeping it damp allows the edges of the paint being added to flow out a little and blur their edges, it can be done in several layers, allowing each one to dry fully, before repeating the process, but what results is a stained and blotchy effect that mimics tanned skin.
The finished shots show the components having been fastened together, with the spear staves possibly a little too long, but they look effective, so I’ll leave them be.
The plinth is a piece of Leylandi tree that next door cut down, and that I rescued a few short lengths of, drying them out slowly so that they didn’t crack too badly, and then trimming them down to short lengths tat could be used for bases.
I know I’ve skipped a lot of the painting process on this one, but there really isn’t much, if anything that I’ve done here that hasn’t been described elsewhere, and with not having photos to show the process I felt that it was best to keep the text short.


What is worth saying is that this is a really great bust. MJ Miniatures make some really strange kits, but this one stands out for me as being a whole couple of levels above most of the others, and paints up into a superb and complex looking model.
OK, I’ve adjusted or added a couple of bits, but nothing huge, and whilst there’s more than the average amount of parts, it really is a bust that draws the eye at show displays.
Highly recommended.


We need your consent to load the translations
We use a third-party service to translate the website content that may collect data about your activity. Please review the details in the privacy policy and accept the service to view the translations.