
Simple Groundwork
SBS

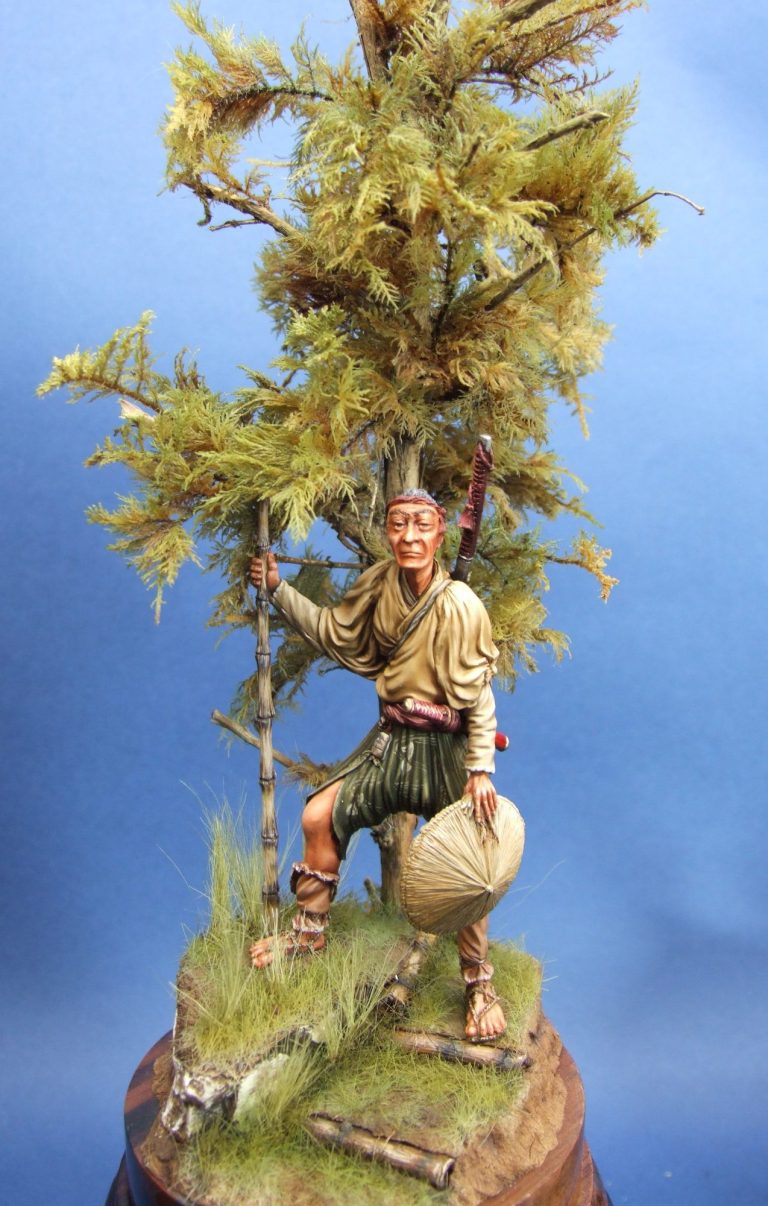
For this article, I’ve chosen to make a small piece of raised groundwork for Roy Hunt’s excellent Ronin figure. This is a 90mm kit, and Mike Harbour has already written an article about building and painting it.
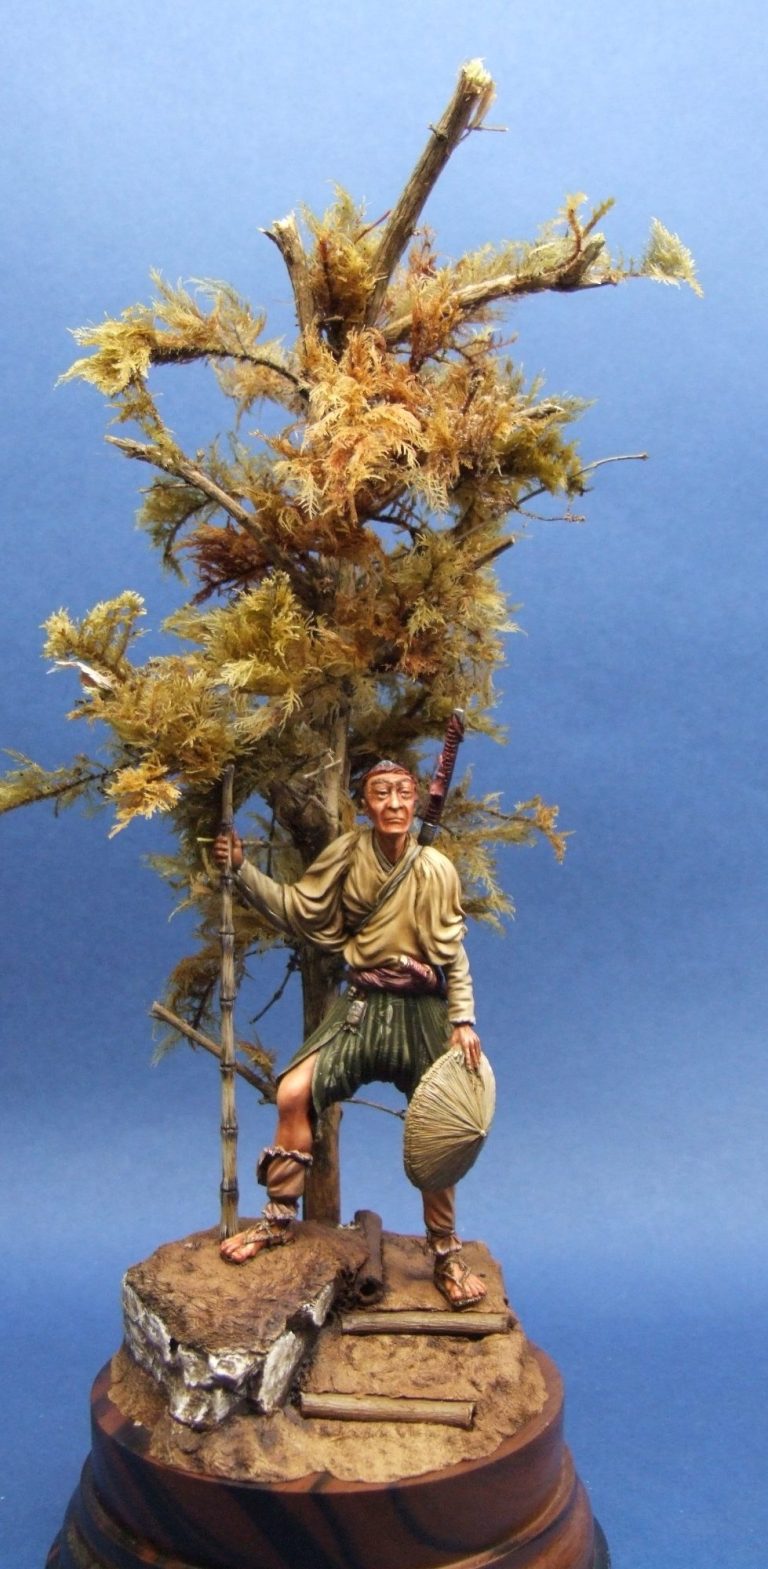
I’ve chosen to give my Ronin a woodland setting, and in the first picture, you can see the finished model, with the groundwork completed, and a scenic backdrop filling out the edges of the shot.
This is basically what I think modelling is all about; getting you the viewer to think, maybe just for a split second that the photograph is of a real person; rather than it being a very small resin or white metal kit. Maybe this shot works, maybe it doesn’t. But I feel that it’s at least got part way.
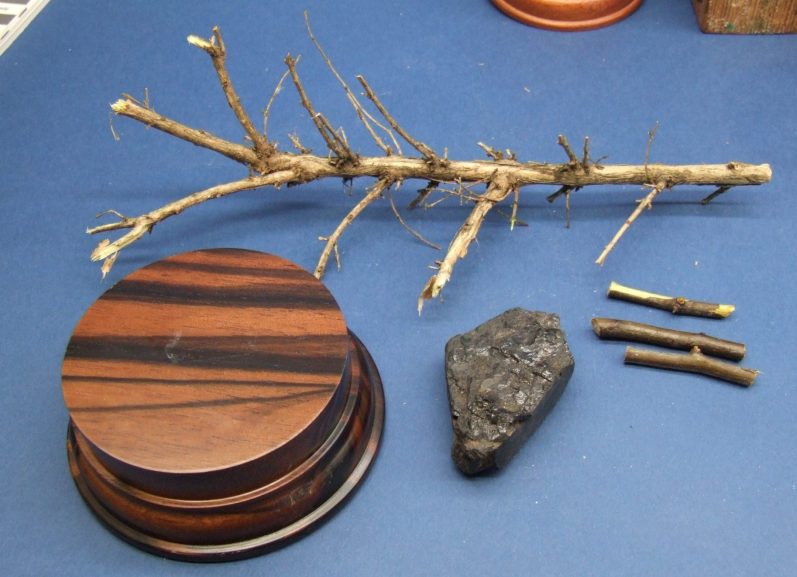
So how to make this little scene. Well, the basic ingredients are shown in photo #2. There’s a good quality plinth, a lump of coal, although almost any fine grained piece of stone would do ( Chalk is another good option ), there’s three short pieces of smooth twig. These will be turned into bamboo, with the help of a little paint and a drill, and finally a piece of twig for the tree.
The rock and the twig are rather important, in that what you choose can make or break the scene. Obviously you must have an idea of what sort of composition you want to end up with, and in this case I wanted to have a raised area with a small path leading up to it, and a tree to give the whole scene height and a backdrop.
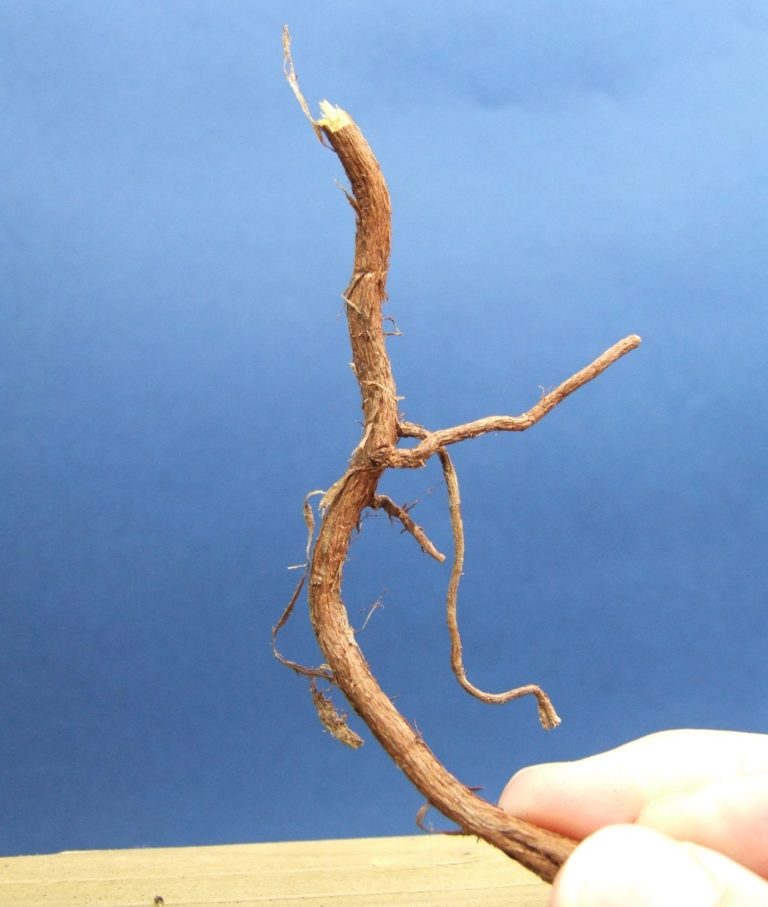
The “tree” needs to be a twig that has plenty of detail. I use old roots from plants that have died in the garden ( photo #3 ), but also I’ve discovered a variety of Cotoneaster climbing plant that seems to have gone wild, and although of no decorative use whatsoever in the garden, it does produce some close limbed shoots that have peeling bark, and which look brilliant for projects such as this.
One other thing to remember, and that is that everything gets painted. If you leave anything in it’s natural state, then it will look out of scale, so just accept the fact that paint goes over everything, and choose things that are within your capabilities.

I’ve left off two ingredients here, one is Milliput, which will form the earth of the groundwork, and the other is some large moss fronds that I pickled with some Glycerine ( see the article on picking plants ).
The first thing to do, having roughly tested things for size and composition, is to begin fastening them in place. I use a couple of brass rods for this – drilling into the coal and then into the wood plinth so that the rods can be glued to fasten the two together. Then once the glue is cured, I add the Milliput around the rock in the areas that I want the soil to be. This is beginning in photo #4.

and in photo #5 you can see how I’m building up a stepped area in front of the piece of coal.
I’m using Games Workshop plastic bases as filler for the Milliput, so that I don’t have to use quite so much of the putty.
Small blocks of wood, or even scrap resin runners, can be used for this, in fact anything that is solid and past any usefulness can be pressed into service to save on the amount of putty needed.
In photo #6 I’ve filled in the spaces, and I’ve used an old plastic hobby brush to texture the Milliput as it’s been added. The bonus here is that the brush can be used to push and prod the putty into place so that humps and mounds can be built up, and the groundwork doesn’t look too much like a golf course green. There are other things you can press into service to texture the soil areas – an old toothbrush is one favourite for example.
The “bamboo” logs, O.K. so they still look like twigs, have been set in place, but I did use a drill to make holes in the ends of each of these so that once painted, they will look like bamboo – honest.
Finally in this shot, you can just see the imprints of the Ronin’s feet. This is important, and you must press anything - like the figure ( and also in this case the base of the tree ) - into the putty before it hardens. It may seem distasteful, but about the best way of making anything like the soles of his feet not stick into the putty, is to put a bit of spit onto them. Once the impressions are made, remove the figure, or whatever, and leave the Milliput to harden.


Just checking…Yes, in photo #7 that’s exactly what I’m doing, I’m checking that everything fits in place. It’s no good going any further if things aren’t going to fit, so just check everything goes in place, and that you like the placement of the items used.
The Ronin and the tree will be removable until right at the end, although you will see them in place in most of the following shots, this is just to give scale to the groundwork as it builds, and also to check that I’ve not blocked any of the locations up with glue, grass or anything else.
Now it’s looking a bit better, photo #8 shows the groundwork with some paint on. I primed the whole thing with some sand coloured acrylic ( GW – Orc Brown ) mixed with some Isopropyl Alcohol, and then added several more layers of the same colour paint, but mixing these following layers with plain water. The alcohol lets the first application of paint grab onto the different elements used, and also stops the paint beading.
Once the colour is uniform over the groundwork, and this can take several coats of paint, I add a layer of Burnt Umber oil paint. This is brushed on with abandon, slapping it all over the groundwork with an old brush, and working it into the crevices, nooks and crannies. I then use an old T-shirt to wipe and dab off the excess paint, and the result is most clearly visible on the areas that were Milliput.
Whilst the oil paint is still wet, I blend in a mix of Mars Yellow and Titanium White on the “rock” working the highlights up to using almost pure Titanium White.


Photo #9 shows the tree. Now this has been made by the addition of the moss to the tree trunk and a few of the branches, using small amounts of Superglue - See the "How to" article on preserving plants.
One tip here is that Superglue doesn’t dry very quickly on greaseproof paper. I use the discarded paper backing from double sided tape ( because we use lots of the tape at work ) but kitchen greaseproof paper will do just as good a job. So if you squeeze out a large-ish blob of the glue onto the paper, you can then dip the tips of the moss into the glue, and quickly apply them into place on the tree. I worked up from the bottom of the tree towards the top, and it took all of around ten minutes to build this, in fact trimming off the brown stalks of the moss so that I could use the green tips was the most time consuming part.
Once the tree was constructed, I used an airbrush to paint the tree with various green colours from the Tamiya acrylic range.
Finally Photo #10 shows the Static Grass having been added. I use wood glue for this, but recently I’ve heard off Mike Harbour that he uses Acrylic Matt Gel Medium, which doesn’t dry shiny, and also dries faster, so I’ll give that a try.
You’ll also notice the Bamboo logs have been painted. They look a little dark in this shot, but with the dampness of the conditions, I left them like that on purpose. These were painted by adding Mars Yellow in a streaked pattern onto the still wet Burnt Umber; and then, whilst trying to retain the streaky pattern, adding some of the Titanium White. Once dry, Mars Black was used as a thinned wash to pick out the nodes where the leaves have been trimmed off. I allowed the oil time to dry, then added the Static Grass.
Once the Static Grass is in place, it can be painted. I use one of two methods. Either I heavily dilute Humbrol enamels with White Spirit, and flow this on with an old brush, allowing it to seep into the masses of grass and stain it more than actually painting it, or I use an airbrush and Tamiya acrylic paints to blow on various colours.
The first method gives a more vibrant colour, especially if you start dark, and work up to lighter colours over the course of a couple of days, allowing the initial coat to dry, and then using more enamels and possibly oils to very gently dry-brush the tips of the Static Grass.
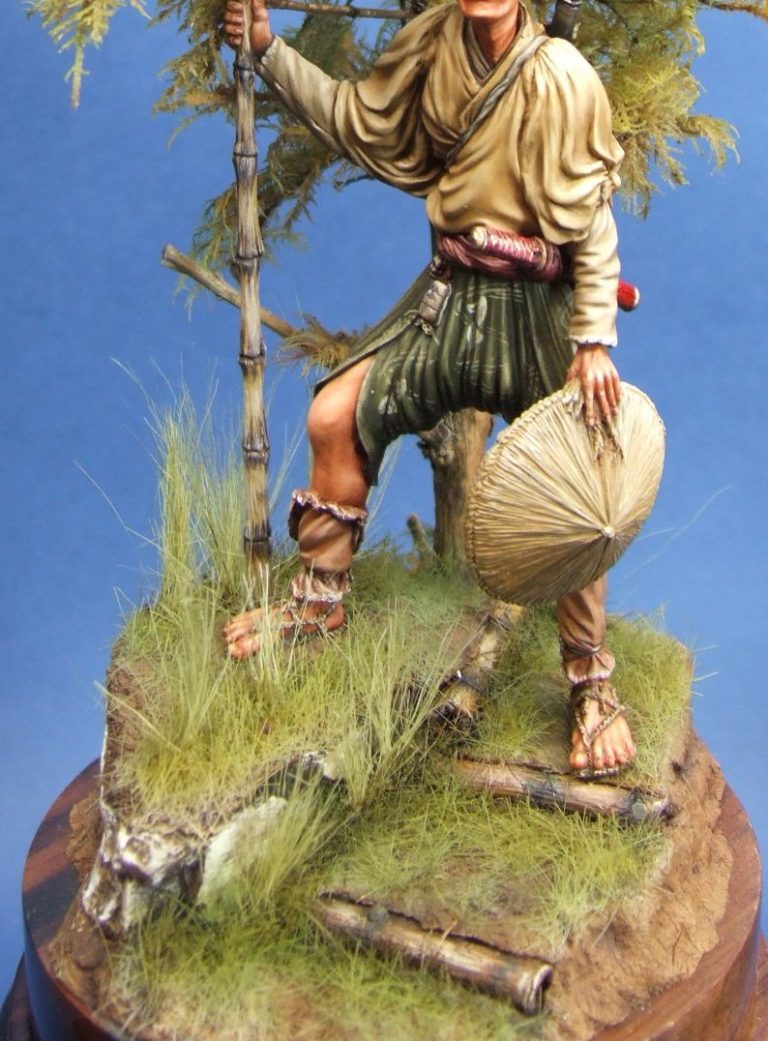
Spraying on the paint with the acrylics can result in a dustier appearance, with the groundwork looking dried and parched.
All depends upon the effect that you want. For this one, I wanted a lush forest floor, and so the enamel method was used.
In addition to the shorter Static Grass, I added some strands of longer grass, and for this I used some nylon fibres that I’d got at a show some time back. I bought them of F&F models, and they weren’t expensive – maybe a couple of pounds for the pack, and it’ll last for ages. Sometimes I’ve used deer hair, which is available in fishing tackle shops, usually in the fly-tying section, and again is relatively cheap for the amount you get in a pack, and the rate at which it will be used.
To fasten either of the above in place, I use the greaseproof paper method – first trimming the bottom of a small bunch of the hairs with a sharp pair of scissors, and then dipping the tips of the bunch of grass into the glue, and then applying that to the area I want it on the groundwork.
Finally, the figure and the tree are fastened in place.
Now I know what you’re thinking – “That grass does look very green.”
Well, it’ll fade quite a bit over the next month or so, and I’ve allowed for that colour loss, so don’t you be worrying.
One last thing to do is to add a scenic backing, as in the very first picture. Well, that initially will be up to you, either by going out with a camera and taking pictures of scenic places ( Don’t forget holidays for different climates- Several of my pictures have been used that were taken on holiday in Spain in the pages of Military Modelling, and it’s surprising just what you can come up with if you get half a chance, and can keep family members out of the frame for five seconds ! ).
It's not for everyone, as some might feel that adding a background takes the focus off the model, however using a backing – and bringing it in as close to the figure as possible – can enhance that realistic look, rather than the plain backings that are usually seen.

We need your consent to load the translations
We use a third-party service to translate the website content that may collect data about your activity. Please review the details in the privacy policy and accept the service to view the translations.