Dracula
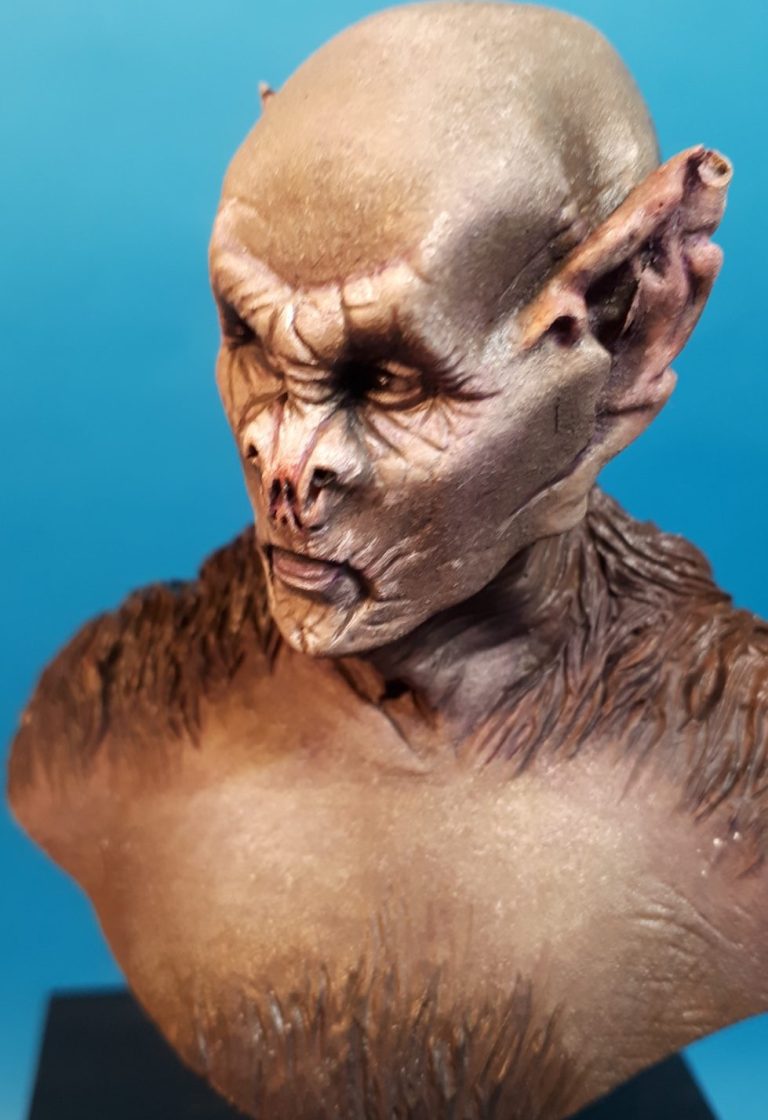
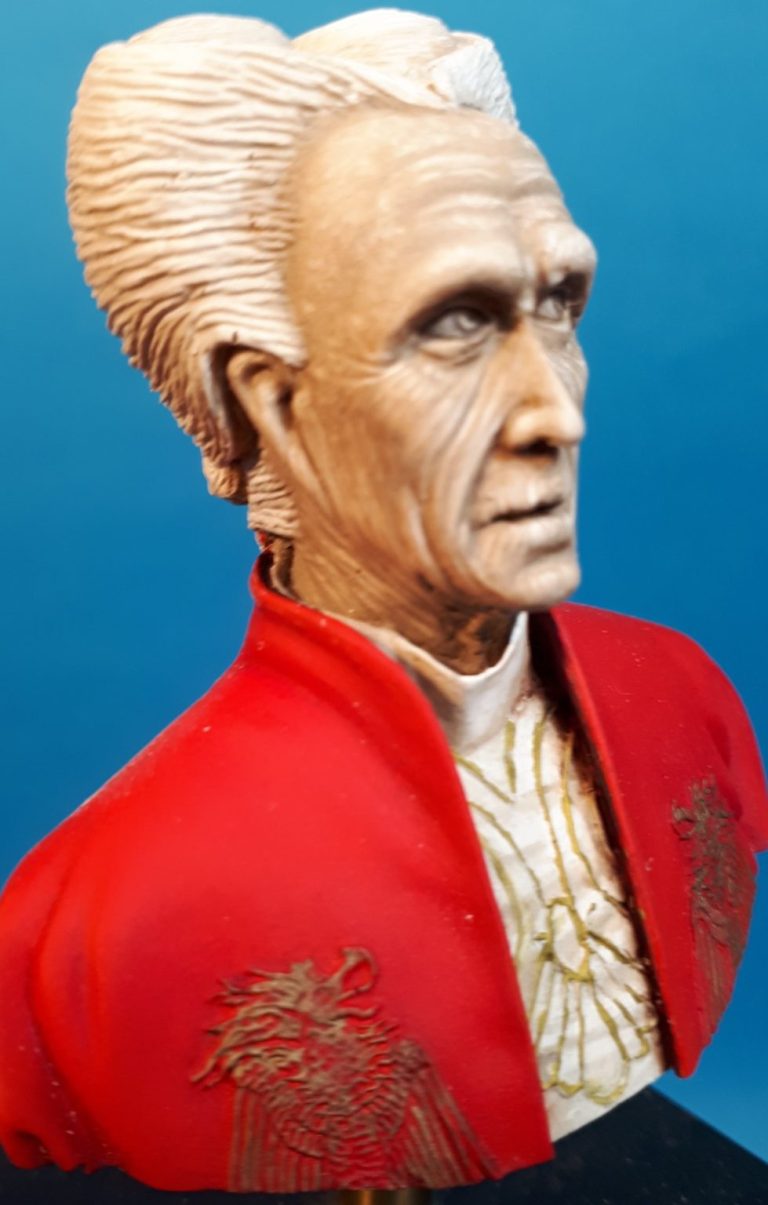
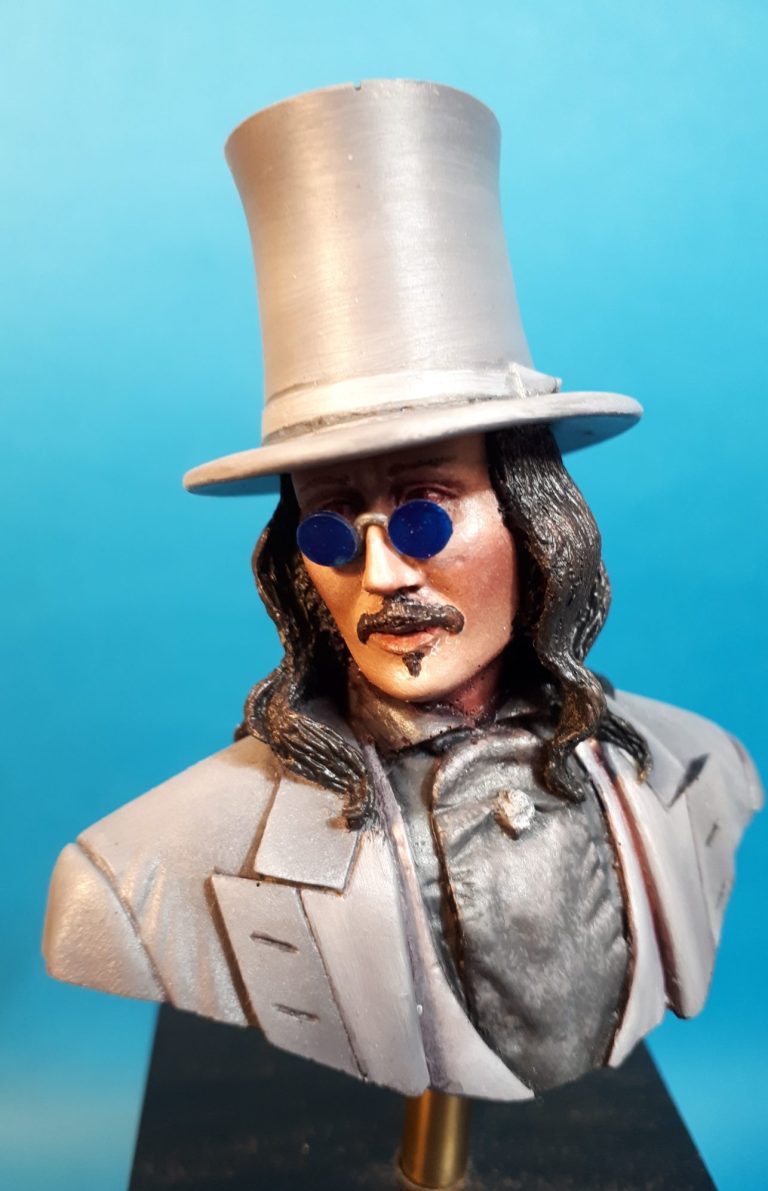
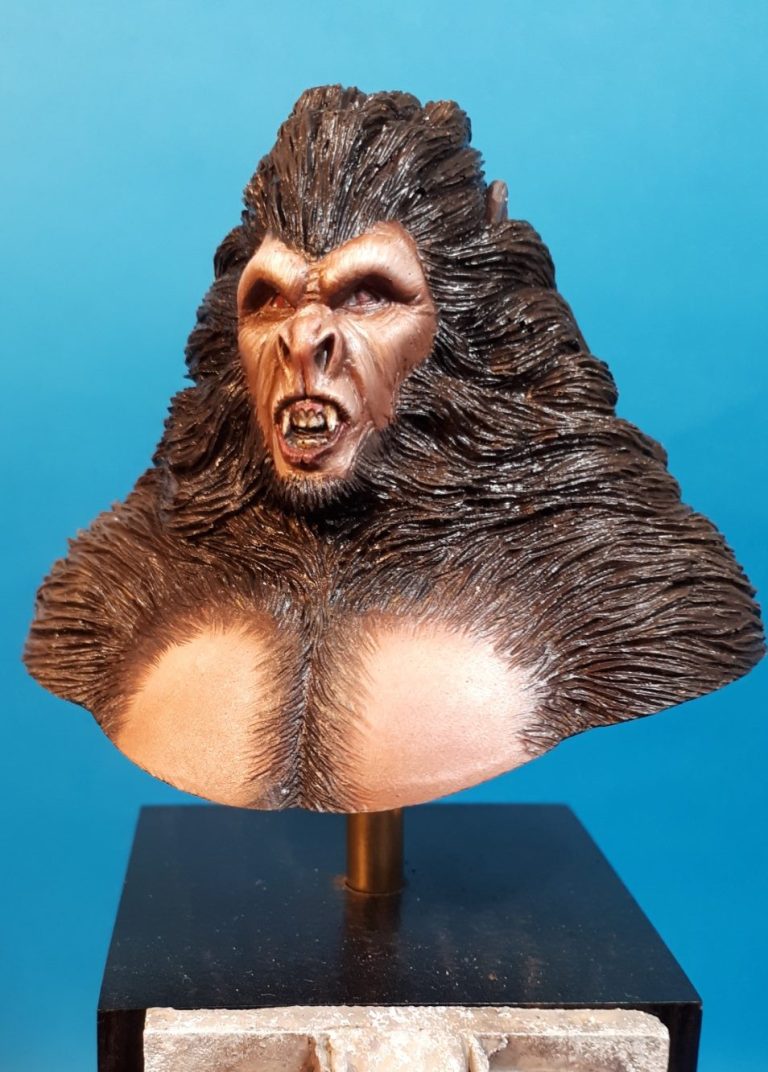
Four of the forms taken by Gary Oldman in the 1992 Francis Ford Coppola film
1/10th scale resin busts from Bash Models
Painted in 2005
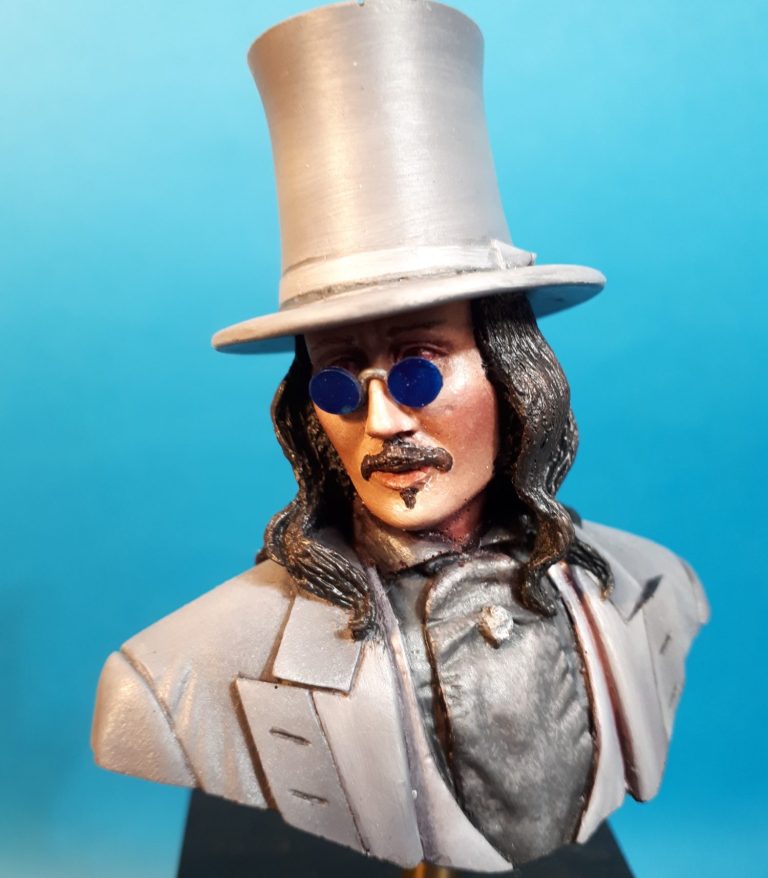
The version of Dracula directed by Francis Ford Coppola in 1992, done in true Hollywood style, may not be to the purists tastes - having a liking for the Hammer produced films myself - but one just can’t help enjoying watching the Coppola version and enjoying it.
When I.& E. miniatures of Leeds brought out the first bust of the young “ Victorian “ gentleman, I couldn’t help but fancy having a go at painting it.
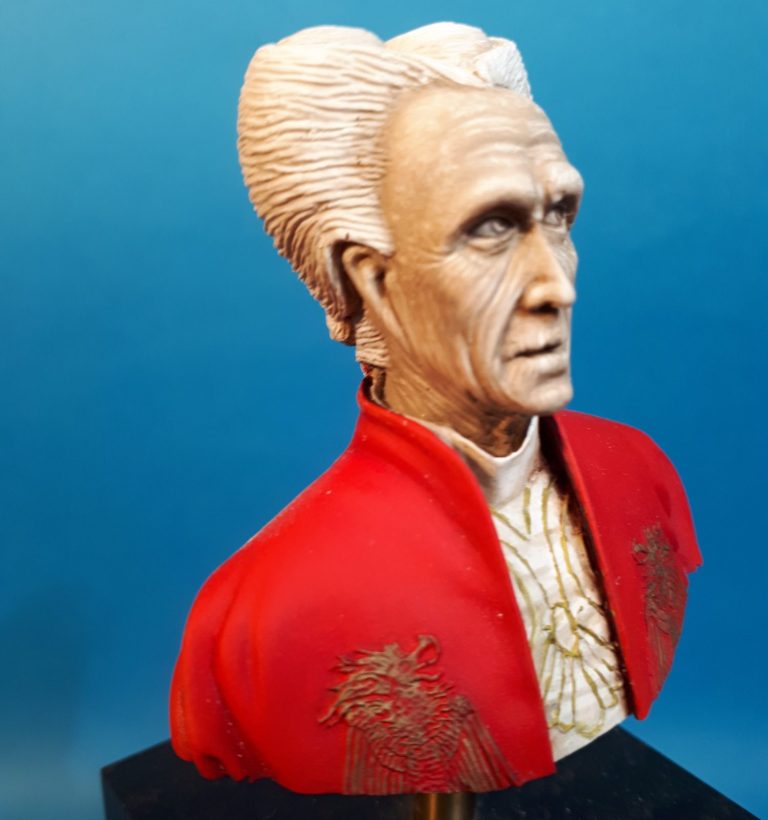
Subsequent release of the Old Man, which is to my mind even better, was again an opportunity not to be missed. I also heard that the wolfman and the bat were to be produced by the same company, and they should be good if the first two releases are anything to go by.

O.K. what do you get. Well lets start with the “ young “ chap first. He arrives in a small card box, packed in bubble wrap. The photo on the box of a painted example is quite good, although it lacks the pattern on the cravat and the colour could be a little misleading. It’s certainly adequate except for the purist.
The instruction sheet is basic, and again misleading in calling the suit grey, but then again if you’ve got the references then you’ll know different, and you’ll also know that most folk wouldn’t believe you if you told them the suit is a pale lilac / grey !
Right the model. This is made up of four parts, one for the main head / shoulders, another for the hat brim, a third for the main part of the hat, and a fourth part for the stand. Scale works out at about 1/10th, so he’s not going to eat a great deal of shelf space either.

Not included in the kit is the set of blue spectacles that were worn by the character in the film, these are apparently copyrighted and so you’ll have to build some from scratch - easy, honest.
The moulding is done in a very soft, cream coloured resin that is odourless when you come to clean it up. Being soft it’s very easy to remove too much material when cleaning up, so be warned. The usual mould plugs are present on all parts except the stand, and they need hacking, sorry gently cutting off with a razor saw and then filing the small amount left behind from that process to make the model fit for painting. There’s also a few air bubbles, but these tend to be restricted to the underside of each casting, and so tend not to require filling.
I chose to glue the hat together and leave it separate from the rest of the body so I could get at the face a little more easily with a brush, but if you’re doing the kit that decision will be yours.

O.K. now for some paint. Don’t rush off for the flesh colour yet, let’s deal with the cravat first. This is a grey colour in the film, and has a sort of embossed pattern on it that catches the light. The cravat on the model, except for a few folds, is flat. So to simulate the pattern you need to paint it on. There’s two ways to do this I suppose, one option is to sit down and paint it by hand ( plenty of Valium in reserve required for this method I think ), or you could be underhand and “ cheat “ by spraying the pattern 0n.
After spending almost three whole milliseconds thinking about it I opted for plan “B” First of all paint the whole of the shirt and cravat a dark grey.
Whilst this dried,I went in search of a suitably fine mesh to use as a “mask”.
The best thing I came up with was a small piece from a set of my good lady’s best stockings - look I told her about it ..... afterwards.
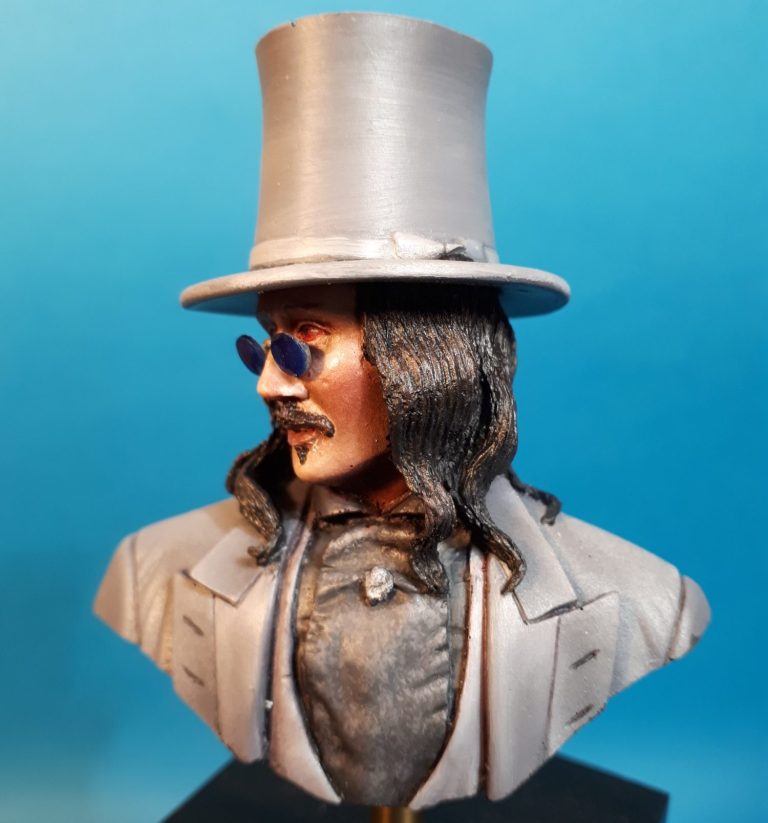
This was stretched over the chest of the figure and held in place with blu-tac. I then mixed a light grey which was sprayed onto the model with an airbrush ( A can of grey primer would work here if you don’t have access to an airbrush ).
The secret to getting this to work is to have the mesh “hovering” over the model, allowing about 2mm gap between the surface to be painted and the mesh, this stops the paint held on the mesh being sucked through and going all over the model, and thus ruining the effect. But you knew that already.
Now the figure can be painted as normal, The face I chose to do in oils, but I’ll skip over that as most of you’ll have your own preferred method for doing faces.
On to the suit, and the hat. First of all, I got it wrong. O.K. I’ll admit it, I’d watched the film several times and the suit was grey. Grey, grey, grey.
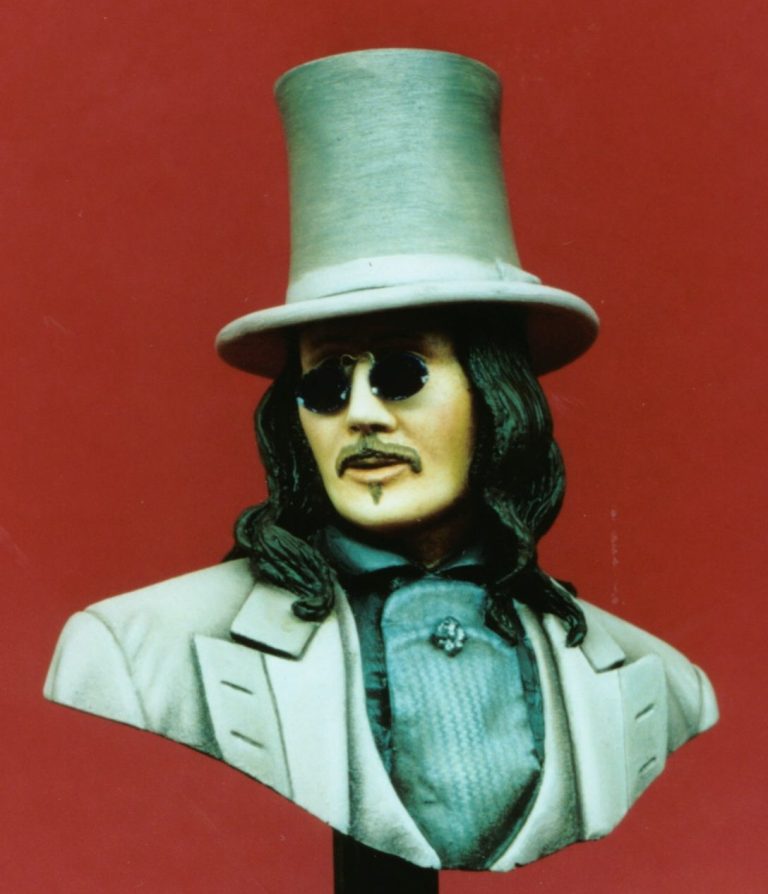
No other colour, just grey. And I spent a few happy hours painting it that way. What completely buggered the job up was one of my mates ( Steve Balmer by name ), who is a fount of knowledge on these things by way of having the most unlikely books in his collection, saying “ Oh you’re doing that are you, do you want to borrow the book on the making of the film ? “ seemed to be most helpful at the time, well it was in the long run I suppose !
Said book arrived, and the exact picture of Gary Oldman is there in all its glory. But hold on, the suit isn’t grey. Cue “wailing and gnashing of teeth” special effects !
So I stripped off all the grey paint on the suit and hat, which, even if I do say so myself, was expertly painted, and then proceeded to colour-match the suit.
First a light grey undercoat / primer, for this I used Games Workshop “elf grey” acrylic, into which I added a drop of “imperial purple” to get the lilac colour.

Then came the fun, mixing the exact shade in oil paints. It’s not much use me trying to make out I know the exact formula for the colour mix, I just messed around adding a bit of this and a bit of that. What I can say for sure is that there’s a touch of black, quite a lot of white, a dash of both Purple Madder Alazarin and Alazarin crimson, and a hint of burnt umber in there.
The sod is just messing about with these to get the right shade. After brushing the mix thinly over the suit and allowing it to dry for about half an hour, I could then add the highlights in the form of some Purple Madder Alazarin and black, mixed together and then added to the model in the places that shadows would naturally fall. This was blended in to the surrounding area to soften the effect.
Then a few highlights were added, just a case of adding white for these, again blending this in. The lapels are a lighter shade of the suit colour, this being made by adding white and a touch more of the purple to the original “base” colour, adding some shadows of the now darker seeming original base colour and more white for highlights.

The hat was basically the same colour as the suit, but I tried to leave some brush marks in the paint to simulate the way that the felt texture on the real thing is treated to have a grain or nap. This shows up more on the top of the hat, but looks quite effective on the sides too.
After all that the bust as about done, painting the underside black of course and adding the stand. And then mounting it on a suitable piece of marble for a base, I left off glueing the hat in place, just to ease the placement of the spectacles though.
To make the specs, I used one of those things for cutting holes in sheets of paper when you want to put the paper in ring binders. By cutting circles of clear plastic, filing them into a more oval shape then glueing them to a “U” shaped piece of wire I had a reasonable pair of glasses. By building up about ten to fifteen coats of Tamiya clear blue acrylic on one side of the glasses I got them to have a convex look, they could then, once dry be fastened in place and the hat glued on. That’s one bust finished.
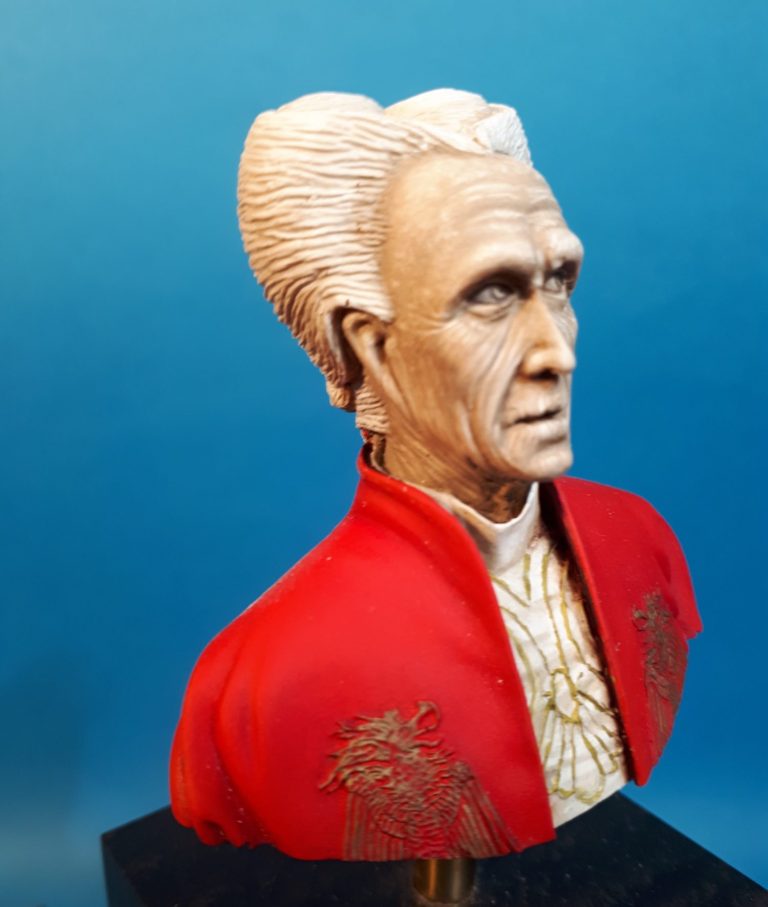
The old man
Basically the same in the way its been moulded and packed, although the instructions are a bit more helpful ( the box art is good too, but I did that so it’s no wonder ! ).
This is a very good likeness to the old, wrinkly chapie in the same film. There are only two components, those being a stand and the bust itself.
No funny business with an airbrush on this one, well unless you want there to be that is. I used oils yet again to paint this, and the basic colours required will be very pale tints being added to an undercoat of white for the skin and the shirt, the colours differing for each of course.
And a bright scarlet for the cloak / gown. Some additions of gold and silver to the embroidered designs on the shirt and cloak and he’s done. The book in this instance wasn’t too much help, but you do get much longer to look at the makeup and the costume in the film, as Gary Oldman is in this guise for quite a long while.

Famous last words
Both these busts are worth getting, especially if you’re into the Dracula film, as the likenesses are extremely good. Not only that, the collection is to be extended in the near future to include Dracula both in bat and wolf man form, again as seen in the Francis Ford Coppola film.
Now for a bit of home selling. I’ve just produced a nameplate to go with these models, and if Dr One is feeling in a good mood then perhaps he’s pictured it in this article. Basically its a resin plaque, 65mm x 45mm approx, that has a lightly textured surface, with the Dracula name indented into it below a gargoyle type vampire head flanked by two wolf heads.


Since this article was written, I and E ceased trading, the moulds and rights to produce them transferring to a couple of companies and finally coming to me.
All the busts from this set, including the Old Man, the Victorian Gentleman, the Bat and the Wolf area all available, including a free nameplate from Ebay seller ash0040 for between £15 and £12 each plus p&p or as a set of four for £45 plus p&p.
Please see the links below –
Bash Models Dracula As A Young Man Resin Bust Kit | eBay – Young Gentleman
Bash Models Dracula As An Old Man | eBay – as an old manBash Models Dracula As A Bat Resin Bust | eBay – Bat
Bash Models Dracula As A Wolf Resin Bust | eBay – Wolf
Dracula Nameplate For Models | eBay - nameplate by itself


We need your consent to load the translations
We use a third-party service to translate the website content that may collect data about your activity. Please review the details in the privacy policy and accept the service to view the translations.