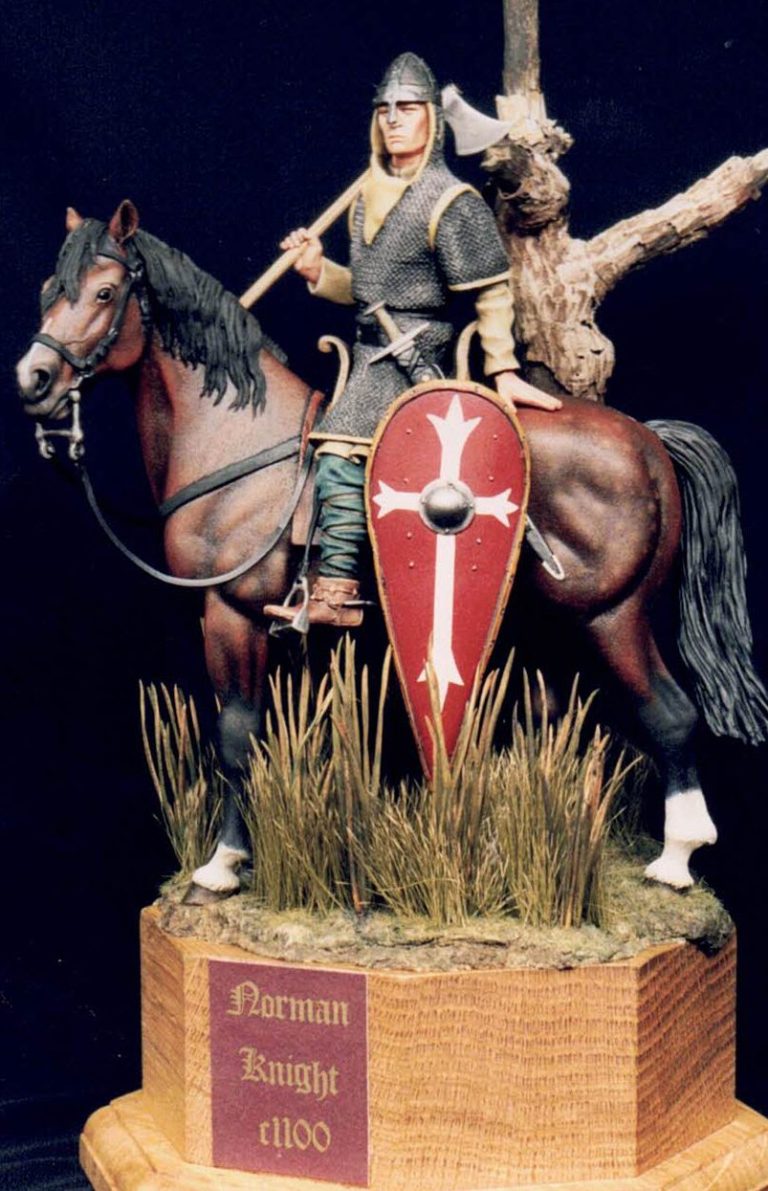

Norman Knight
120mm Resin and White Metal kit from Andrea Miniatures
Article in Military
Modelling in 2002
It's getting close to a thousand years ago that Britain was last successfully invaded. It was a Norman army, led by William, who succeeded in taking Britain then, and it could be that it was by luck or good timing that he actually managed it.
The then king of Britain was Harold, who having readied himself for an assault by William's army, was forced to dash north to Stamford Bridge to wage war on another invading force made up of Vikings and rebel Britons.
Harold's men were tired and probably next to useless as a cohesive fighting force when they finally got back south to face William's army which had established a beach-head near Hastings.
The rest of the battle is well documented history, particularly with the still extant Bayeux Tapestry which shows many fine details of costume, armour and equipment of that period of history.
But who were the Normans ?
Well the term "Norman" is a cut down version of "Northman" alluding to the fact that Normans actually originated from Scandinavia, having their roots as Vikings.
They were expert warriors, and rather than invading and subduing a country and its culture, were more inclined to assimilate the country's inhabitants with their own invading force.
Intermarriage was encouraged, and at the time of William, the two cultures of the Frankish and Norsemen in northern France were truly mixed to form the Normans. So much so that William's son – Richard - had to be sent to Bayeux to learn Danish.
This willingness to mix with the indigenous population went so far as to remove almost totally any trace of their Scandinavian roots, language being one of the first things to be lost.
The one idea that the Normans kept from their Viking heritage was that of conquest. The view that the last acquisition would finance the next, was one that they held dear. This ideal caused them not only to conquer Britain, but also Sicily, Southern Italy and Antioch.
Another thing that the Normans began to develop was the use of heraldry to identify each other in battle. This was highlighted by the fact that armour and weapons were becoming so similar that it was difficult to identify one's foe from a friend, let alone who in particular any one person might be. This is reported at the battle of Gerberoi, Robert of Normandy unhorsed his father - William - wounding him in the arm in the process, and was only stopped from killing him when he recognised his fathers voice.

There are of course some differences in armour of the period, but looking at them in museum conditions compared to in the heat of a battle is vastly different. And so basic heraldry was developed as a means of telling one man from another, which in subsequent centuries developed to a complex and bewildering complexity.
Enough history though, let's look at the model.
The kit
This one's a bit of a curate's egg.
I'd actually asked to review this model - so I must have liked the look of it, and was surprised when I got the kit, because the box is relatively small.
For a 120mm figure, with a horse too, the box only measures about 8 x 5 x 3 inches ( 200 x 125 x 75 mm ). But it's almost like a Tardis once you start pulling the bits out. They're big, and go to make up a big model.
The packing in the box was good too, no broken bits apart from one of the horse's ears which superglued back in place with no visible flaws left behind.
The parts are a mixture of resin and white metal, the resin making up the bigger castings, whilst the smaller accoutrements such as the reins, bit, sword and axe are cast in metal.
This is where the problems began really, as the metal parts are all moulded well enough - oh alright, but who really uses the reins supplied in a kit ?
It's the resin that lets the model down, and the problems are detailed below.
Whilst I will stress that I like the kit, both initially when I opened the box, and also with the finished article, the perfectionist (which I certainly ain't ) is probably going to have a bit of work to do on the model.
It's not so much a case of buyer beware, as a case of be aware - that there is some clean-up necessary, but it's work that will be rewarded.
In the past I have found Andrea's casting to be excellent, the fit of parts nigh on perfect and mould lines etc. to be very restrained indeed.
Whilst this kit fits together very well, a wipe of filler to the horse halves was all that I saw fit to add, the casting is somewhat rough.
I say the casting. The truth is probably more that the original possessed the flaws, and that these were then transferred on to the mould, and so on to the finished castings.
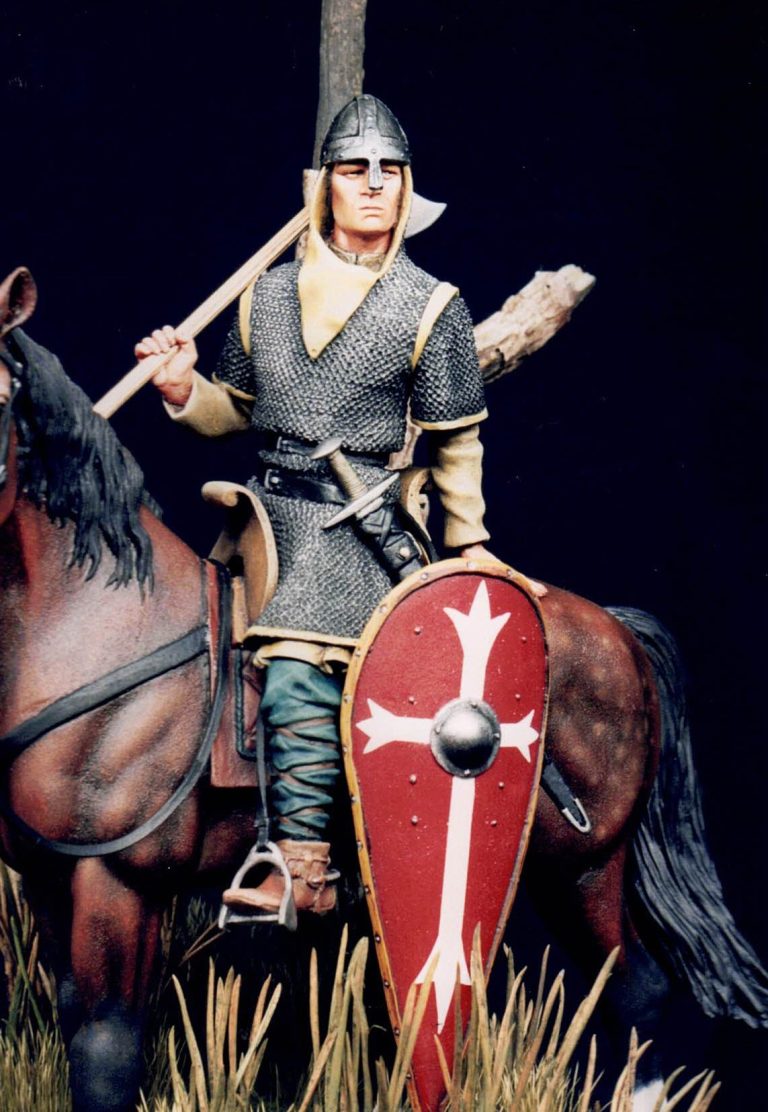
So what's my problem ?
Well, for a start off, the horse requires sanding down to remove the rough texture of a grit-like quality that covers the model. It also needs several air bubbles filling in.
On the figure, the mould problems are fewer, but the face needs smoothing off, otherwise he'll look like he's going through puberty all over again.
On saying that, none of these mould problems are anything to get hot under the collar about, and many moons ago, when reviewing an I & E offering I noted that it's sometimes fun to actually have to use all the skills that we build up as modellers to make good any moulding faults. I'll say that here too, as I did enjoy having to put a little bit of extra effort into the model to get the best out of it.
But now for the dodgy bits. I would say inaccuracies, but some of the bits I'm just not sure about simply because of not knowing what sources Andrea's sculptors have taken their ideas from.
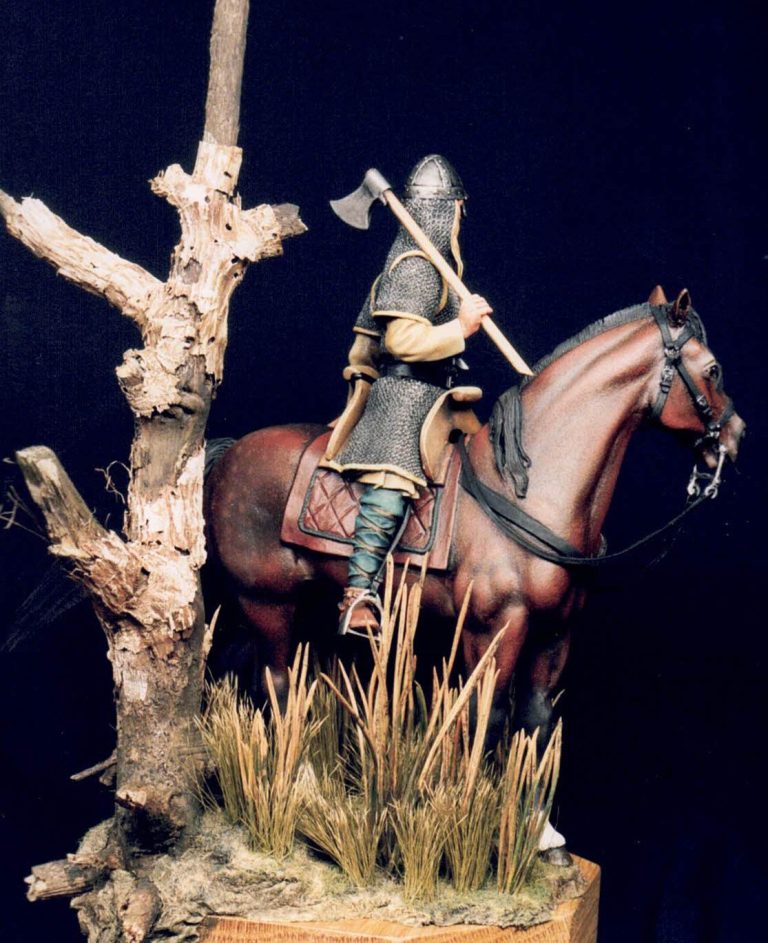
The girth strap on the belly of the horse looks to be too far towards the rump, and some would probably advise changing this before adding paint.
However, looking at my references on the Bayeux Tapestry, some of the figures depicted on this seem to be mounted on horses with the girth in this position. I take it that the sculptors at Andrea have designed the model from this source, so they look to be correct. However, I'm told that a horse in real life would be unlikely to stand being ridden if the strap was in this position.
So what do you do, go for accuracy to the Tapestry, something that was designed at that period in history, or go for present day known thought.
Luckily I didn't have the problem pointed out to me until I'd got paint on the horse, and so I left it as it was, once I'd checked my references more thoroughly.
The mail is suspect though.
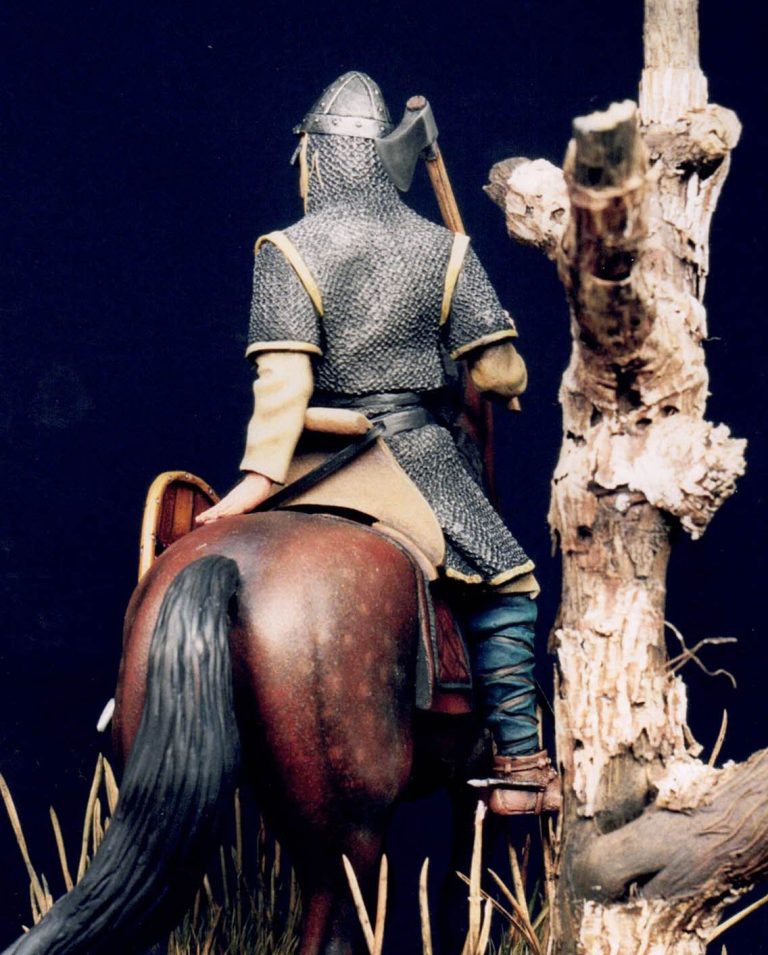
The Bayeux Tapestry seems to depict either mail or scale armour, but I'm not too sure that the stuff sculpted on the kit depicts that. It seems to be large ring mail, but not mimicking that of the tapestry. Maybe I'm being picky.
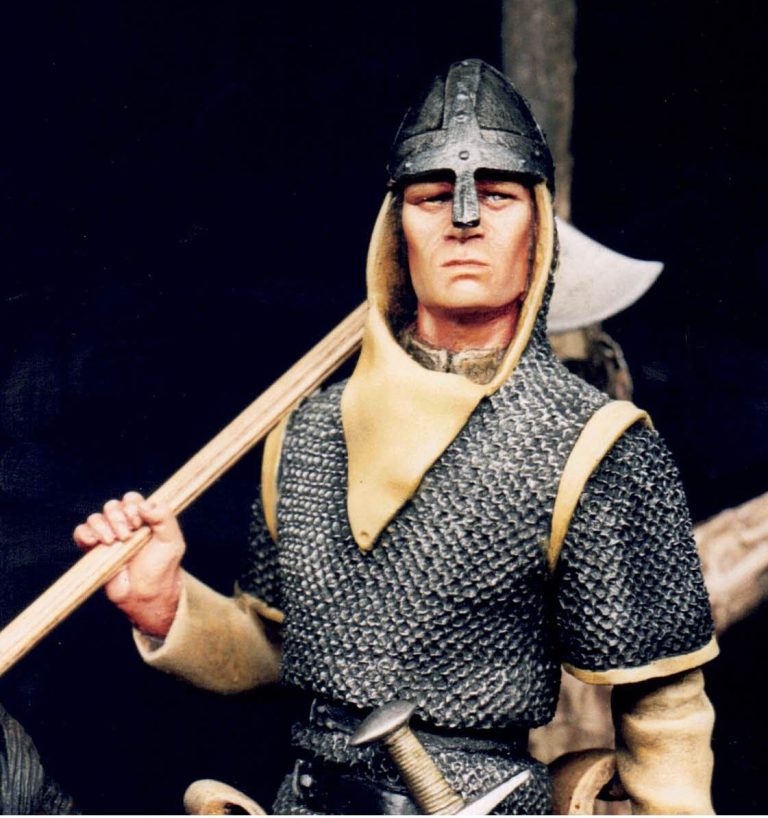
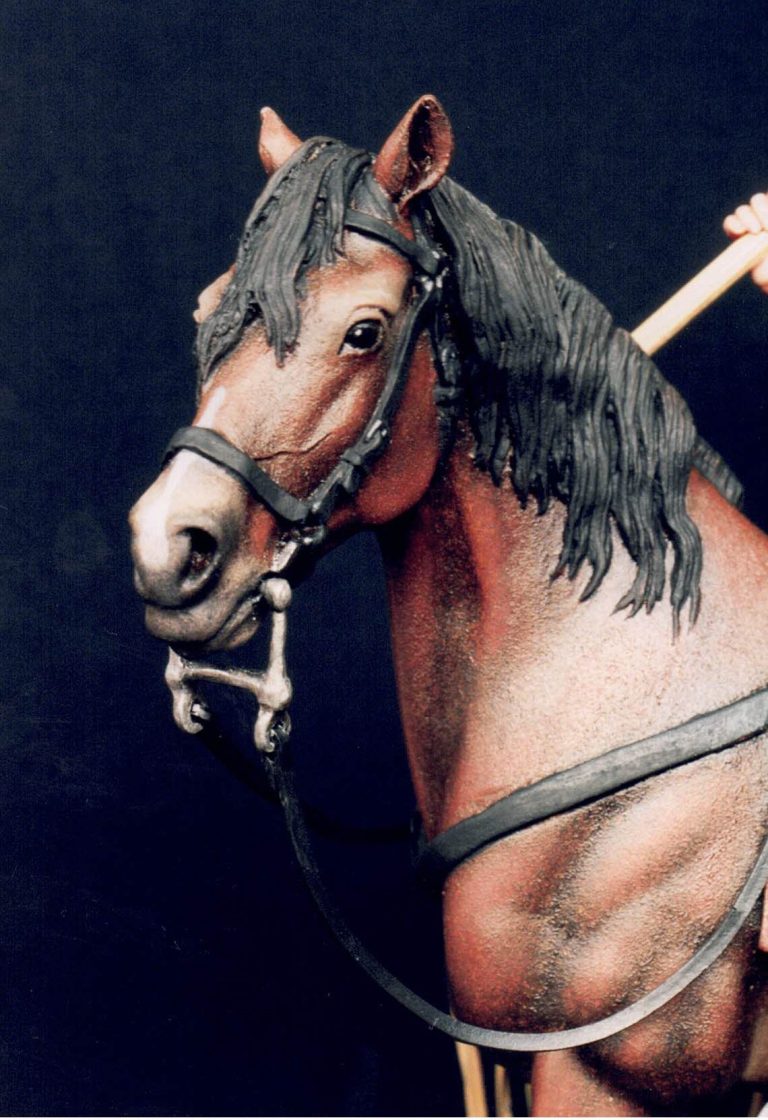
Either way, I still wasn't about to go and change it, although there's nothing stopping the purchaser doing just that if they can't live with the moulding.
As noted by the Editor in his review of the kit in Attenshun, there seems to be a lack of a shirt collar. Again it's a matter of minutes to add one out of Milliput, but it should really be there in the first place.
I'm not too sure about the face on the chap. From the front, he's fine, but in profile, he seems to have a skull that slopes back quite alarmingly from the jaw. It's probably not going to be noticed by anyone but the dedicated face painter, ( or sad person like me ! ), but it's there, so I thought I'd mention it.
Apart from the above, yes, I've been blunt - sorry, and this'll sound contrary, but I really do like the model. Once all the problems have been sorted out - as far as you're happy with them, then it is an impressive model that looks a treat.
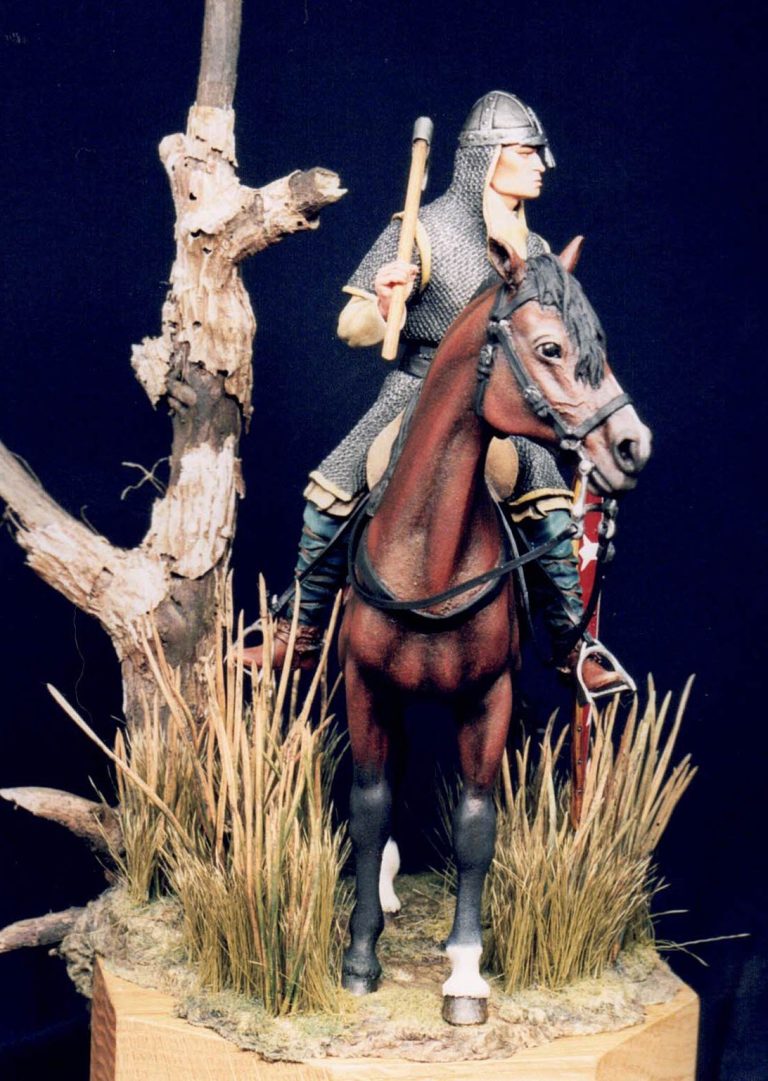
The size alone will draw the eye, and with a creative paint job on both the horse and the shield, it will impress even the most jaded of viewers.
As far as the paint work is concerned, there isn't too much that I haven't covered before. I thought I'd like a go at a dapple brown, seeing as I get to look at one most evenings after tea whilst washing up the pots ( why install a dish-washer when my good lady has me ! ).
I began by adding Burnt Umber oils over a sand coloured acrylic undercoat. I had fun with this, getting it to cover the sand acrylic, but persevered, and added highlights of Burnt Sienna and Light red, gradually building up the lighter colouration.
Finally ( taking my life in my hands, and without the use of a safety net ) I added the dapples whilst the rest of the paint was still wet.
These were little spots of a mix of Light Red and Yellow Ochre, added to the model where required, and then gently blended in to the surrounding paint.
The brown paint was continued down the legs but stopped aroundmid-shin so that I could add the white socks once all the brown was thoroughly dry - photo 3. Before the white is added to each leg though, I painted on a coat of black to the mid-leg, highlighting this with a little flesh colour, and readying this to be blended in to the white. This black can be seen on the leg nearest the camera, whilst the leg in the background is still just sporting the brown paint.
Instead of using a pure white, I mixed Titanium White with a small amount of Raw Umber, just enough to darken it when compared to the pure white oil colour next to it on the palette.
This off-white was then applied to the leg, adding small amounts of the Raw Umber to build up the shadows,
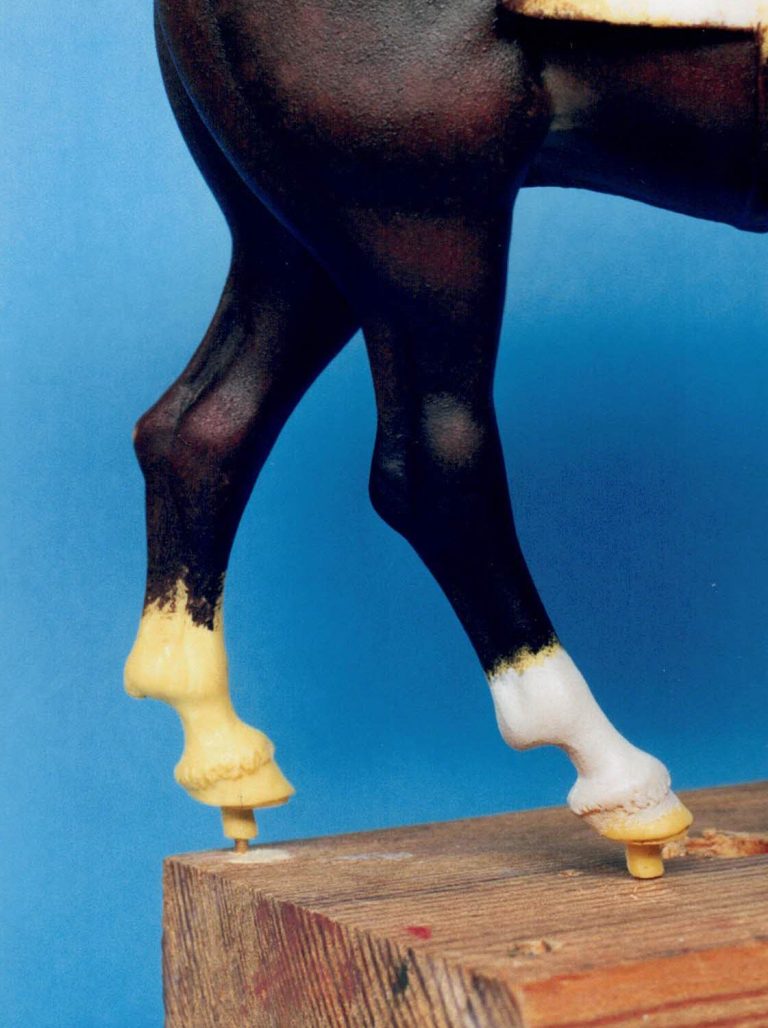

The Raw umber was blended in, and then pure Titanium White was added. The effect this has can be seen in the finished shots, the difference between the off white and the pure white colours.
With the white blended in, the black on the upper leg can be feathered in to the white of the lower leg, just blurring the edges, being careful not to blend them and hence end up with a grey band around the leg. the shadow running down the black area at the back of the leg carries through to the white, y'see the shading process does work !
The rest of the horse is fairly straight forward, the saddle
fits together with a minimum of trimming, and thankfully, the rider will slot into place after the saddle is constructed so he can be painted separately.
It is advisable to paint under the arches of the saddle before assembling it, I didn't do this and it's a bit of a fiddle getting the paint to go under these nooks and hide all the glaringly bright resin afterwards.
My single change to the horse was the tail. I didn't like the one in the kit.
I made a new one out of a piece of brass wire covered with Milliput, texturing it with a piece of wire formed into a loop.
I decided to stick to earth colours on the saddle and cloth and also on the figure, and although relatively dull, it does vouch for a certain authenticity.
While I concentrated on the horse with the paint, I did find myself doing some work on the rider, although most of his paint was added once the horse was complete.
Talking of which, he's rather a doddle to paint, there's very little flesh to cope with, and the mail coat covers a great deal of the rest.
This latter item will benefit from some very gentle drybrushing, and I cheated a bit by adding heavier than normal highlights so that I could calm them down with subsequent washes of Tamiya Smoke acrylic.
I did add the shirt collar mentioned earlier in the article, and also changed the handle of the axe for one of wood, a barbeque skewer in this case.
Apart from the armour done mainly in acrylics, I used oils for everything else on the figure, mixing a green for the leggings from Prussian Blue and Yellow Ochre.
Nothing too difficult here, and assembly once dry was a breeze too.
The stirrups went on first, cutting the straps where they disappear behind the knee, to allow the rider to sit in place in the saddle correctly.
There's a small amount of trimming necessary to get the axe into place, the original shaft must be slightly curved - I'd thrown it in the spares box by now and will probably never see it again as I heard it hit bottom in that deep and dark pit.

As for the cross motif. I used Tamiya masking tape to get the straight lines of the cross, adding the fluting at each end once the lines had dried. The red by the way is oil paint stained over an acrylic undercoat, and the white too is an acrylic.
Now for the scenery.
As I've mentioned, this is a big model, and I was somewhat stuck for what to put it on. The base I've used is an octagonal piece, and is about seven inches across at it's widest.
This barely allows enough room for the model, but I did want to add something with a bit of height, and chose a large twig with attendant roots for the job.
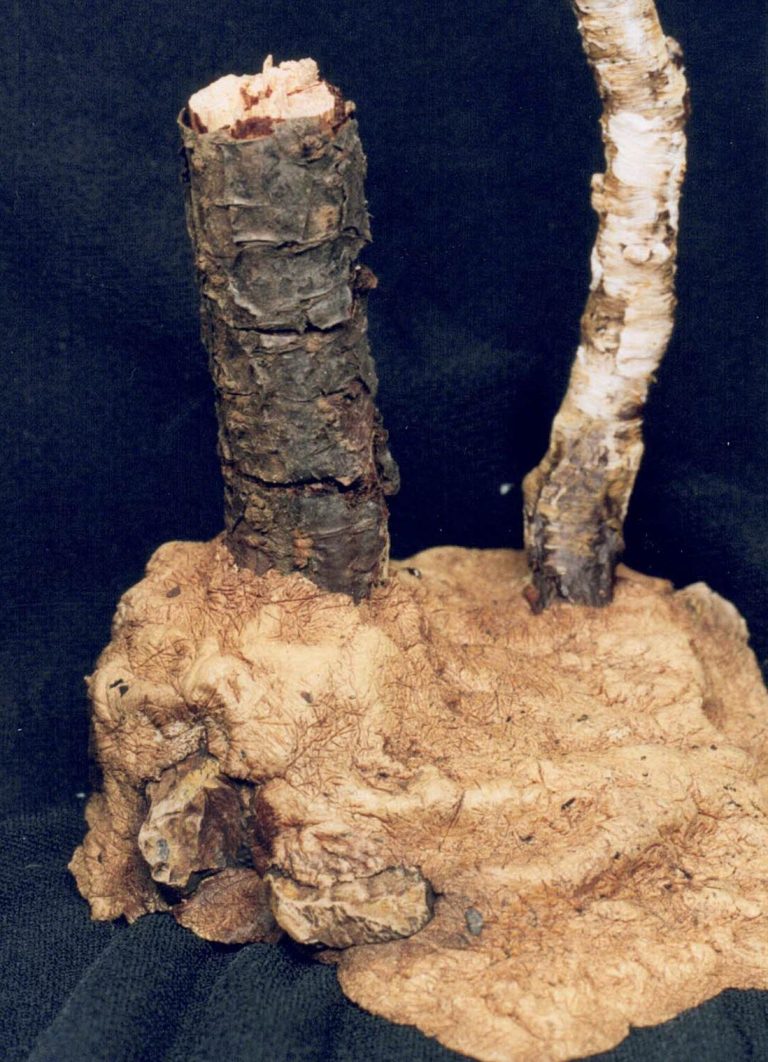
In a fit of frivolity I used Milliput ( a pack and a half, possibly more ) for the groundwork, building this up and stippling it with a small stone and also a coarse bristled brush.
Before it hardened, I embedded the "tree" in it and also fitted the horse in place too, removing the model so that the imprints of the hooves could dry and allow a positive fit for the model once the groundwork was painted. In this photo , I've shown a small section of another bit of groundwork, textured in a similar manner to that on this base. To show the texture up better, I've painted it with Burnt Umber oil paint and then wiped the excess off. I've put this picture in because it's not cluttered up with the long grass etc that I added to the base shown in the other photos, and the detail effect should be easier to see.
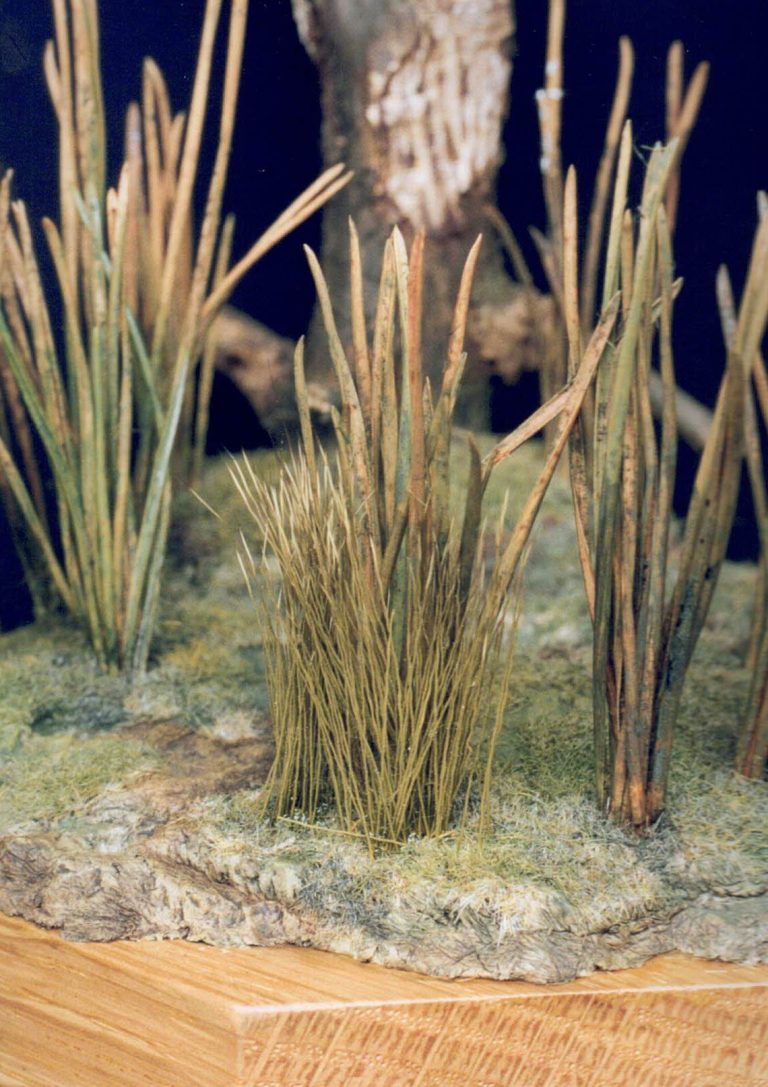
For the long grass I used some pine needles off a tree I have in the garden. I'd noticed these last autumn, mainly because the tree looked like it was dying as the needles up a portion of the trunk and along some of the branches were turning brown and dropping off. it appears that the tree was just shedding un-necessary foliage, and does this each year, and will be an excellent source for more "long grass" in coming years.
The needles are a bit coarse all on their own as seen in this picture, where they've been coloured with a little Olive Green oil paint. I decided to add the static grass, and then after that was dry, add some deer hair to blend in the vastly differing size between the pine needles and static grass.
This can be seen in the finished shots, where I've cut small batches of deer hair from the hide it's supplied on, dipping the cut ends in superglue and then just placing it in the desired position.
I've found that it's best to glue on too much of the deer hair, and thin it out afterwards, as with the static grass, it tends to have a certain amount of it that doesn't actually stay in place.
The finished groundwork can be seen in the final shots of the model, The tree was painted with oils using Burnt Umber all over the wood areas to begin with, followed by Yellow Ochre lightly applied to the bare wood, and more heavily applied with a large brush to the bark.

The bark areas were topped off with Titanium white to suggest a silver birch, which is easy enough to do by applying the paint across the trunk of the tree ( quite thickly too ) rather than up and down with the grain. Don't work the paint to much, as the more that the yellow and white blend together then the less it looks like a silver birch.
Once everything had dried, the horse and rider were glued in place, and the final photos taken.
I'll admit that in the middle stages of this kit I was having a few misgivings about leaping up and down saying "Me, me, me" when the kit came up for review.
Yes, there are a few problems, although nothing major that a good file and a sanding stick can't put right.
As for the girth strap and all. Well to be honest, it can't really be seen all that well anyway. Granted on a lighter coloured horse it may be more evident, but then again If I'd noticed it beforehand, I might have been tempted to change things around.
Final thoughts
The thing is though, do we build for pleasure, or for dogged accuracy ? And if it's for accuracy, do we always use the correct reference source. I'm afraid I'm in the former camp for the greater part, tending to build and paint for pleasure, although I'm not adverse to making necessary changes.
I've moaned a little about this kit, which from the final photo's is a little unfair. It's a darn good looking piece, and deserves praise.
Of course you the customer can vote with your wallets, but I think that you could do worse than getting one of these, and I'd like to extend my thanks to Carlos Andrea for sending the kit in for review, hoping that he doesn't take too much offense at my whinges.

We need your consent to load the translations
We use a third-party service to translate the website content that may collect data about your activity. Please review the details in the privacy policy and accept the service to view the translations.