
Hospitaller Knight XIII Century
90mm White Metal casting from Pegaso of Italy.
Painted November 2023
It’s no secret that I like the models that Pegaso release. I’ve been buying their kits since the late 1990’s and have rarely been disappointed when opening the box to look at the components.
I buy many more than I manage to paint, but they’re never far from mind when I come to choose what to start next.
The days of their casting in metal are coming to a close though, and for that I am sorry. However, the technology they’re using to produce castings in resin is working well indeed, and the quality has not been lost.

I’ve had this on my shelf for a while, so long in fact that I bought a second one by mistake at the 2023 SMC show in Eindhoven, and having found that I had two, decided to put one up for sale on Ebay.
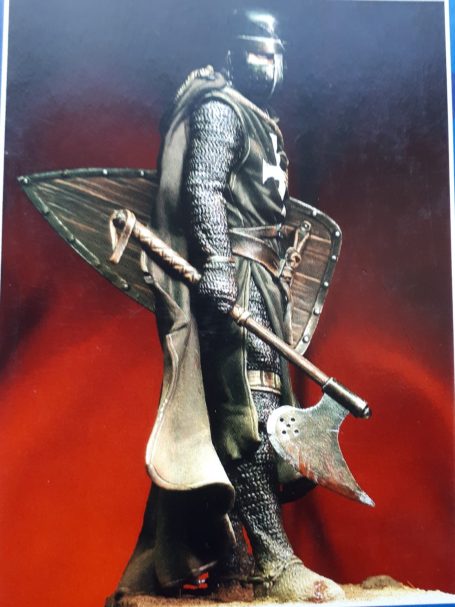
The fellow who bought it asked that it be painted as well mimicking the box top artwork, which I agreed to do.
Photo’s #1, #2, #3 and #4 show the pictures provided with the newer box style, which are much larger than on the old box, which gave only one large picture and although the other views were provided, they were only along one edge and rather small.




Photos #5 and #6 show the components, all quite cleanly cast with not a great deal of work to remove the mould lines.
Just a few words about metal castings from any company – although I did cover this in a video on this website.
In this day and age of 3D printing with no mould part lines ( but plenty of support pips ) some people tend to forget that they’re going to have to deal with marks resulting from making a casting in a mould. Metal parts are cast in two part moulds, and there will always be lines where the two halves of the mould meet. They may be very slight, but they will be there, and it’s best to deal with them if at all possible prior to painting begins in earnest.
Priming the parts will usually help find any that you’ve missed, and watching the video on here will help you identify the most likely positioning of said mould lines.

Back to painting.
Having cleaned up the mould lines and primed the castings with a thin wash of Isopropyl Alcohol and a small amount of flesh coloured acrylic paint, I began by adding the metallic areas of the helmet.
I tend to paint the metallic areas of models on castings first, simply because the ground up pigments can migrate to areas of the model that you don’t want them, and they’re a beggar to both find on other areas of paint, and also a beggar to remove them once found.
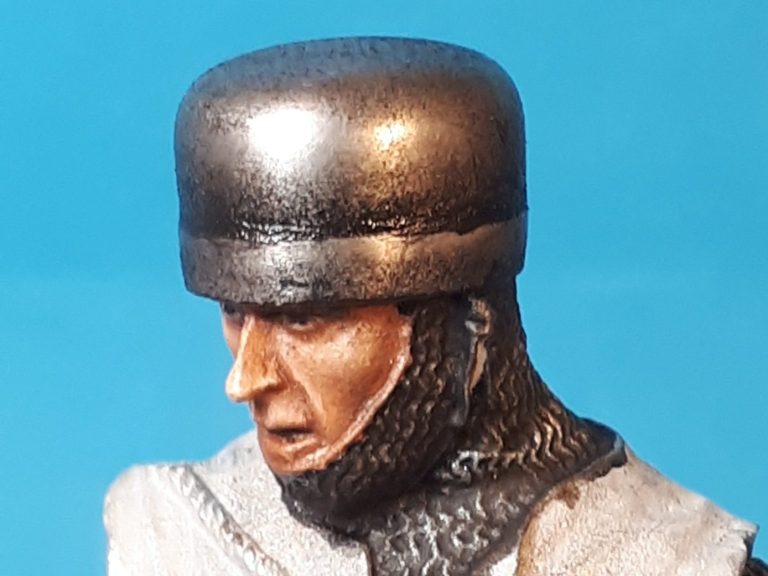
Photo #7 shows the helmet and face having been painted, and what a mess that metallic paint looks.
I know, I know, why on earth paint a silver metal casting with silver paint.
So the paint was stripped off, carefully avoiding disturbing the flesh colours of the face, and then, as shown in photo #8, the metal of the casting was polished using fine grit emery cloth, and then some T-Cut on a soft rag.
Vestiges of the black paint can still be seen around the rim of the helmet, but these would form part of the line of that rim anyway, so they could stay put.

Photo #9 shows the first of three additions of Black oil paint, each one being allowed to dry fully before adding the next one, which would gradually darken the metal to match the box artwork.
During the time it took for the coats of oils on the helmet to dry, I started work on the shield. This might seem a strange move, but there was method in my madness, in that I wanted to get one of those crosses done, and I’d had “an idea”.

So, photo #10 shows the undercoated shield, yes, I know it’s a pale stone colour, and it’s supposed to be black, but it’s only undercoat.
Now I was enjoying painting this model, and was rushing a little with the shield, using a hairdryer to quicken the drying of the acrylic undercoats.
A couple of coats of Black acrylic, then some Mars Black oils, with dusty additions made with some Mars Yellow, Buff Titanium and a little Titanium White.
Allow to dry for a couple of days, and then for the “idea” Photo #11 gives you an idea of what this looked like….
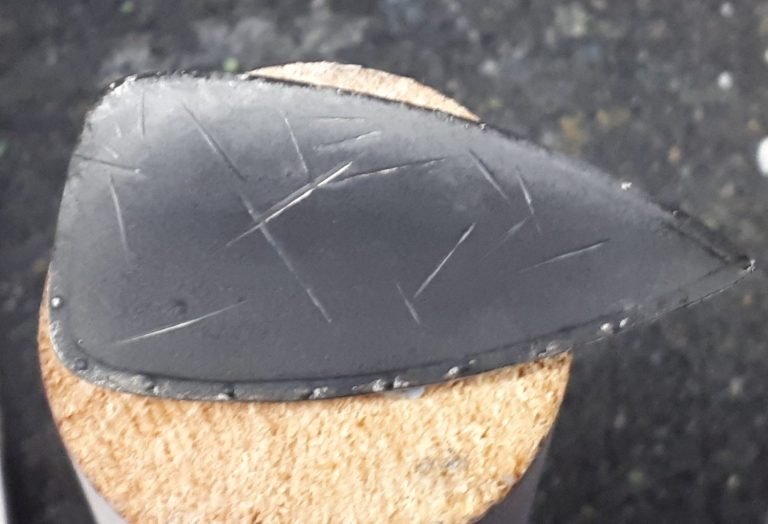
Photo #12 shows some masking tape – there’s two layers of it – and I’ve used a new scalpel blade to cut one of the sections of the cross into it so that I can use it as a mask.
Splitting one layer of masking tape from the other, and then placing them so that they formed a cross on the shield front was easy enough – see the idea’s working – and then using a fine sponge to stipple white acrylic over the mask, thus creating the cross.
Oh what a clever fellow I felt as I gently prised the masking tape away from the shield.

And that lovely masking tape was so good it took the flipin’ paint with it.
Yup, right back to the metal in ragged sections.
I cannot quite form into words how unhappy I was.
There was an amount of cursing involved, then a cup of tea, maybe a biscuit, and then I stripped all the paint off the shield, scrubbed it with some fine emery cloth and gave it a good wash with an old toothbrush and plenty of detergent.
“That’ll teach it !” I thought.

Moving on to happier times though, photo #13 shows the completed shield, done in the good old fashioned way of painting the background colour in oils ( black ) adding the dust effects on to what will be the lower edge, again in oils ( it’s being held horizontally, so the lower edge will be on the right ), and then painting on the cross with a fine brush in acrylics.
I added the scuffs and scarring to the surface of the shield before adding the cross, painting on fine black lines and adding Buff Titanium to one edge or another of the black line to show where the surface leather has parted a little.
Once the cross was painted on, the scarring was continued over it to make the design cohesive.
The arm holding the shield was next, adding a thin wash of black oil paints to pick out the mail texture, and then painting the straps with various brown colours to mimic worn leather. See photo #14

Before the arm was added to the back of the shield – photo #15 – I painted the wood boarding effect using an initial coat of Mars Brown over a mid-brown acrylic undercoat.
Over the top of the brown oils I applied Mars Yellow, followed by Buff Titanium and then Titanium White using an old brush that the bristles could no longer form a point.

The split bristles gives an excellent imitation of wood. Using a bit of Vandyke Brown on a fine brush, I added knot hole effects as a final addition. The pad that the arm fastens onto was painted to represent a leather covering, with similar colours to those used on the straps.
Now whilst I do seem to be flitting around the different areas of the model, there is actually a logic ( somewhere, honest ) as to why this is.

Whether I’m painting something for myself, or as a commission, I try and work out the order that areas need to be painted.
In this case there is a section of the surcoat that fastens onto the front of the main body casting, and theirs is detail of the mail and padding beneath it that might be visible on the finished model. It’s easier to paint it now, than return to it once the additional section has been glued in place. And so photo #16 shows this area having had the mail and leather quilted liner painted.
Oil paints, as we all know, need time to dry, so I decided to prime, undercoat and paint the inner areas of the cloak. This would fasten to the back of the figure, and again I wasn’t completely sure how much of it would still be visible once all the parts were joined together, so better safe than sorry, paint almost all of it.
I undercoated it with a MP paints Black acrylic, adding a couple of spots of Tamiya Flat Base ( X21 ) to the paint to give it a nice matt finish. This would help absorb some of the oils from the oil paint and make them matt down nicely.
Photo #17 shows the oil paints having been added – Vine Black in this case, with a little bit of Mars Brown mixed in, and then Buff Titanium used to form very gentle highlights and all that dust that’s adhered to the lower third of the cloak.
It’s all shiny and wet in this picture, but….

As the song goes “What a difference a day can make”.

OK, maybe two or three days in the drying cabinet, but photo #18 shows the cloak fully dry, and yes, it does look quite a bit different.

In photo #19 I’ve added a very light drybrushing of bright silver and the surcoat has been given it’s initial undercoat of black acrylic.
As with the cloak, I added some Tamiya Flat Base to the black acrylic undercoat, and the matting effect can be seen in photo #20 on the upper half of the figure.
Whilst the mail has received a wash of Vine Black oils to bring out the details, the final shadows will be added in later once the lower half of the surcoat has been painted

Perhaps a better comparison of the matting effect of the Tamiya Flat Base ( X21 ) can be seen in photo #21, where the black acrylic paint on the lower part of the surcoat has some of it painted with the matting agent, and some without any added.

Quite a difference, and this would affect how well the oil paint will dry.

Speaking of which, photo #22 shows the oils having been added, Vine Black being used here, with some lightening of the upper areas of each fold with Buff Titanium, then a lot heavier application of the same colour on the lower edges, stippling on with an old brush and not being too careful about blending it in to the surrounding paint to give the dust and grime effects.
In this picture I’ve returned to add the shadows to the mail on the legs, washing thin coats of Vine Black oils onto the areas that would be in shadow.
All the leather belts have been painted too, adding worn and cracked edges to them – my thinking being that in a desert setting it would be likely that the leather, however well oiled, would tend to show cracking and fraying at the edges.
The effect is added with an old brush that has lost it’s point – about a size 1 brush – and using light coloured oil paints straight from the tube on a palette, the bristles are completely coated in paint, then the excess is wiped off, The bristles of the brush are formed into a fan by pressing them onto the palette, adding just a small amount of paint again to the tips. The fan is then stroked across the very edge of the belt to leave fine lines.
it’s a slow process, because adding paint to the model will pick up darker paint from the surface, so the brush has to be wiped on a cloth after each pass, and then reformed into a fane and more of the lighter paint added.
However, it is worth the time and effort, as the look of the worn belt is very effective once dry.
Photo #23 gives a closer look at the main belt at the waist, although at this point the paint is still wet and shiny

In photo #24 I’ve used a similar method to paint the sword scabbard. It looks very nice in it’s finished state here,

but will hardly be seen once the cloak is in place. A shame, as it’s a nice little casting all on it’s own.
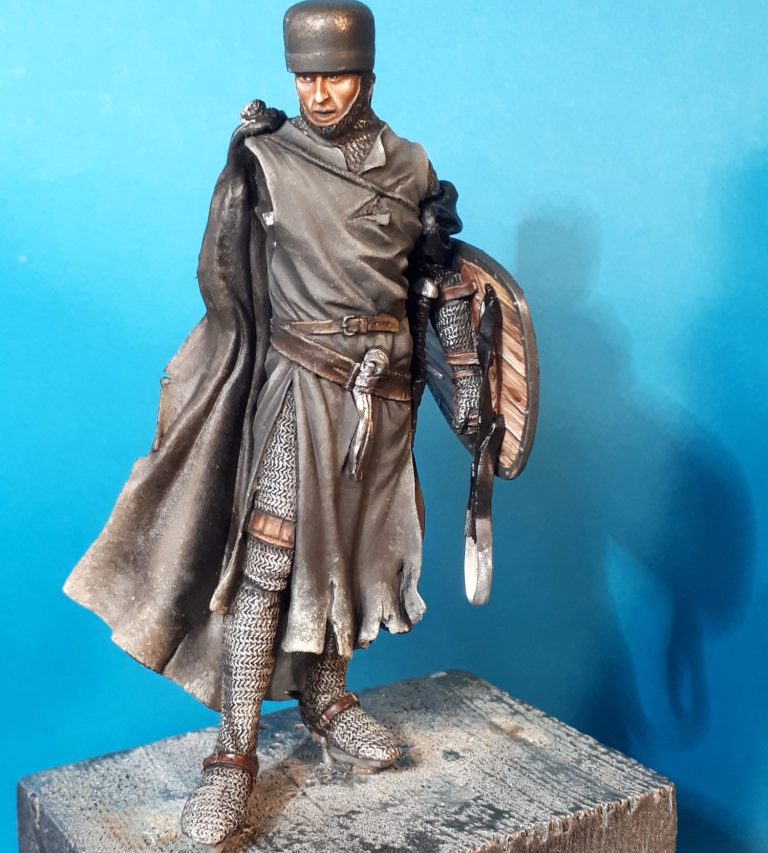
Photo #25, and I’m test fitting the cloak to the main body.
I’ve glued and pinned the left arm in place with the shield fastened on and the strap hanging from the shield still to be painted. The way the cloak fits under the left shoulder is clever, and it allows a strengthening pin to be drilled though it and down into the arm, something I felt was necessary as the arm and shield are relatively heavy and the contact point for the arm / cloak is relatively small.
Photo #26 shows the slight gap between the left shoulder and the cloak, it’s not a huge problem, and a small amount of filler added prior to painting will fix it. I’d have to get the filler out anyway for the manner in which the cloak would be fastened in place.

But before that, I needed to replicate the cross on the shield face onto the front of the surcoat. I removed the cloak, and in photo #27 I’ve added the cross.
Here’s method in my madness of painting the shield front design first.
Simply put, painting the design on a relatively flat surface – on the shield – is a lot easier than when there’s folds and other details in the way. So the shield gives you a practice run to see how the design works, no matter how relatively simple it is.

The more complex the design, the harder it will be to do it on the surcoat later, so a practice run on the shield is worth a go, because it allows you to simplify the design if necessary before committing too much time and effort.
Oh, and I wish I’d not glued that sword in place before doing the cross here, as I’m right handed and it fouled up where I could rest a finger on the model to steady my hand as I painted the cross. We live and learn.

I spoke about needing filler on the cloak for fastening it in place.
Photo #28 shows the addition of some filler in the middle of the cloak on the back of the figure, why would I do this, it seems completely unnecessary ?
Well, again, the cloak, arm and shield is a heavy bit of metal, and I don’t want it moving or coming adrift during shipping, so once glued in place, I drilled two holes through the back of the cloak into the chest of the body casting, into which I inserted a couple of wire pins.
Testing the wire for length and then creasing it with snips just a little bit short, allows the wire pin to be inserted into the hole with glue and then snapped off so that the end of the pin is just below the surface of the part. The hole can then be filled, and in this case a small crease added to disguise the work done.
Photo #29 shows the gap at the shoulder being filled at the same time with a small amount of putty, adding an extra fold to the upper edge of the cloak – easier than sculpting more mail.

Photo #30 shows the cloak in place now, the knotted belt component added at the waist and it along with the strap hanging from the shield painted up.

He’s looking less like the armless Black knight from Monty Python’s Holy Grail and more like an actual Hospitaller now.

The cloak has been undercoated in photo #31, a light crack in the paint over that section of filler I added to disguise the pins in the back of the cloak can be seen. This was intentional, as I wanted you to see where the filler had been added, and painting it before it had cured would crack the paint a little. A second coat of the acrylic undercoat would fill and hide the cracks before adding oil paints to match up the back of the cloak to the lining done a lot earlier in the painting process.
And by the magic that is article writing, here in photo #32 is the back of the cloak painted with the cracks in the undercoat filled and completely hidden.
I used a very dark brown mix of oils here, adding Vine Black ( a Michael Harding colour ) to some Vandyke Brown. The addition of the brown to the mix makes sure that any lightening of the colour will have a brown bias, and so look like a worn cloth.
I used Buff Titanium to make some very subtle highlights to the cloak, and then used an old brush – one any decent artist would have discarded ages ago – to add the spotted and stained effect along the lower edges of the cloak.
It’s the randomness that the old bristles of the brush give here that is so important. I’m not so sure about other painters, but I think my mind rebels against painting random patterns. I’ve managed to overcome it with some camo patterns, but on things like this, I’d probably get about halfway done and there’s be a distinct pattern forming.
So an old brush gets the job done far more easily, for me at least.

Photo #33 and we’re back to the front of the figure to finish things off. I’d cut out the wooden section of the axe and replaced it with a slimmed down cocktail stick. There’s nothing like wood to actually look like…. Well…. Wood, and adding a coat of Burnt Umber to the wood, allowing it to sit for a few minutes and then wiping it with a soft cloth to remove the excess paint, shows up the grain detail nicely.
The axe had was polished with some T-Cut, although the slight pitting from the moulding process was left, and a thin coat of Mars Black added.

Again a soft cloth was used to dab off most of the paint to show up the surface texture, then the edge of the blade was polished to make it look like it had been sharpened recently. Some Molotow liquid chrome was painted on to add a couple of highlights to edges.
The handle of the axe and the strap around the wrist had been painted in leather colours, and once all the bits had been joined back together, the arm was fastened onto the figure.

Photo #34 shows a close-up of the left shoulder. The knot holding the cloak in place was a separate part, and the back of it was painted black before being glued in place. This means that there’s no raw metal of the casting visible. Once the glue had cured, I painted the knot to match in with the cord that crosses the chest.
All that was left to do now was to fasten the figure to the base, print out a nameplate and check the join around the feet. I’d painted the groundwork section that comes with the figure with various browns and sand colours in preparation for the figure being added, although now I hit a little problem. The feet didn’t fit into the slots in the base.
Somehow I’d managed to join the legs up with a stance that was about 1mm too wide at the feet, so that the lugs on the soles of his shoes. So whilst the depressions in the groundwork that should have accepted each foot lug, would only accept one or the other.
The options were simple enough. Carve one of the lugs off and reseat that foot or carve out one of the depressions on the groundwork and backfill any gap.
I chose the second option, because I didn’t want to disturb the wire strengthening pin that would pass through the groundwork and into the wooden plinth.
So I used a grinding bit in a minidrill to gently carve out a bit of the depression that would be accepting the left foot, test fitting to see if I’d removed enough material at regular intervals.
Once that was done, the figure fitted just fine, but now there was a gap on the inside of the left foot where the side of the original depression showed as a very narrow slot.
To fill this I used a thin scattering of fine sand fastened in place with some superglue that had the consistency of water.

With the sand fastened in place, I could reapply some paint to the groundwork to match the sand in to the areas already painted.
With all that done, I took photos and sent them to the buyer for him to check that he liked the model.
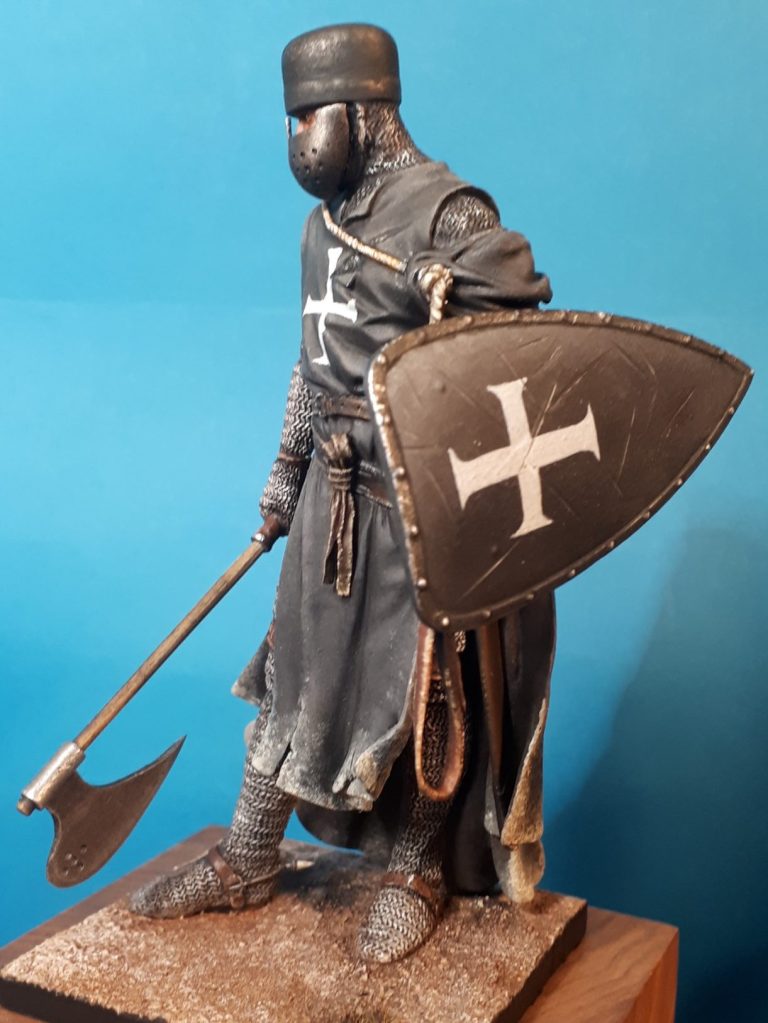
With such a simple request from the buyer – that being to replicate the box art – it’s a fairly simple brief to complete….. Well provided you feel up to painting as well as the guy or gal that did the box art of course.
The buyer said he was pleased with the finish, so I was happy too. All good stuff.

Final thoughts.
I used to profess to not liking doing commissions, and stated that I’d rather have new models in the display cabinet, accepting the sale of older models as a way of making space.
Now I’ve changed my mind, although I have no idea what came to cause that change in thought.
The only stipulation I do stick to is that I paint something I like, something that I would perhaps paint for myself. I’ll say again, that anyone taking commissions should avoid taking jobs on that they are less than enthusiastic about the subject matter. And that the model(s) need to be of a quality both sculpting and moulding-wise that attract you. Even painting a subject or period you like, if it’s a dog of a sculpt, will end up being a right royal pain to complete. Better to let someone else have a go.
As for this model,
Pegaso are a pretty good bet for a decent sculpt and moulding, and this particular kit was no exception to that rule.
Painting this piece, whilst I have to be honest and say I’ll be sad to see it leave me, has been enjoyable. It’s taken around twenty eight hours to complete ( yes, I keep a record of how long each painting session is ), and whilst it perhaps isn’t the most colourful of pieces, there’s a lot of little details that pop out once a careful eye is passed over it.
The face of the helmet is removable – amazing what a little spot of Blu-tac will do, so the bare face or just the eyes can be seen.
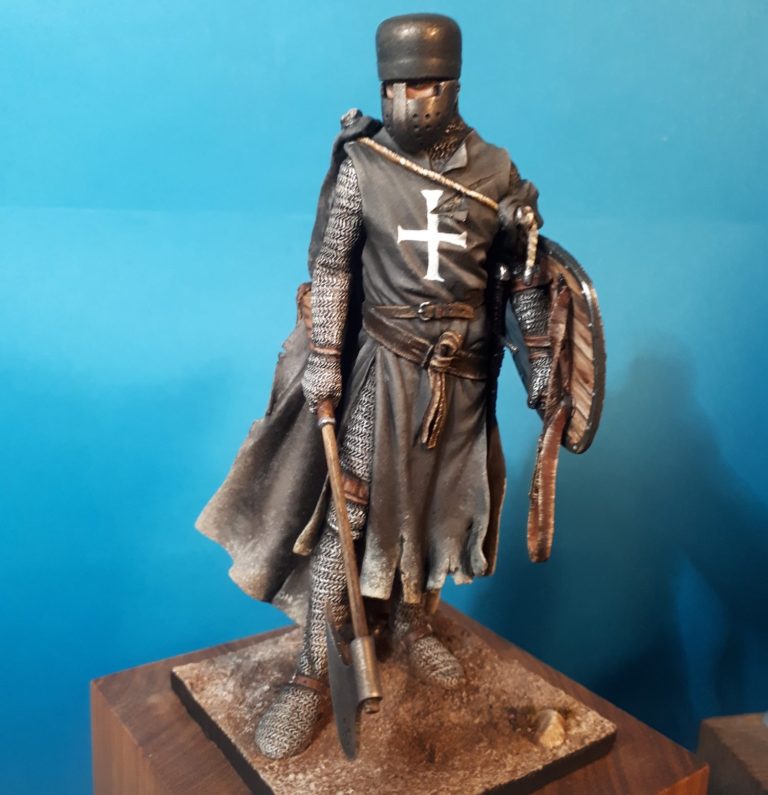
I think the best thing about this project was that It’s made me want to paint another knight for myself.

In the past I’ve focussed on the Knights of St Lazarus ( the Leper Knights ) that were present through the Crusades, and I suspect I may be tempted to paint another one, and possibly a mounted figure at that….. We’ll see. There’s a lot of other half-completed projects calling for my time, so I’m not promising even myself that I’ll get to it any time soon……. But maybe, just maybe…..


We need your consent to load the translations
We use a third-party service to translate the website content that may collect data about your activity. Please review the details in the privacy policy and accept the service to view the translations.