
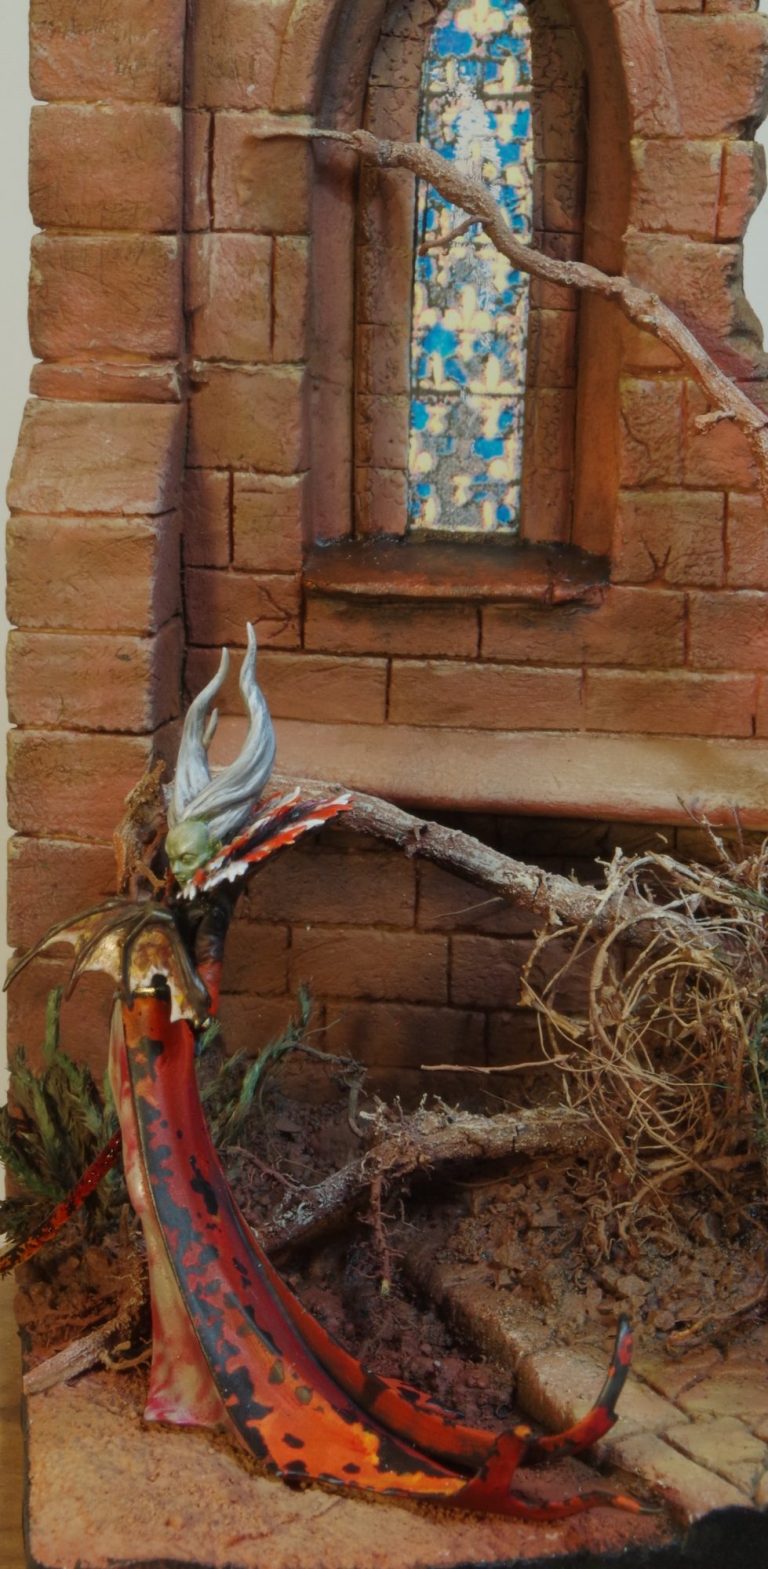
Vampire Empress
28mm Plastic kit from Games Workshop
Painted in 2021
I have a distinct problem going anywhere near a shop that sells Games Workshop figures and sets -don’t even mention going to Warhammer World – because my money becomes an endangered species.
But I always leave with a smile, so it’s not all bad.
It used to be a case that I couldn’t paint the same model twice, but something has changed in these last couple of years, and I’m now able to return and paint a second figure with no problems, and in some cases, the second figure turns out better than the first.
This particular figure was one such, where I painted an initial figure up as a commission, and having liked the outcome, painted a second one for myself, and whilst both figures were pretty much identical once finished, the only real difference was the blue sword for the commission and mine having a red sword, plus the final bases that the figures were attached to were vastly different.
The painting took the same route though, and photo #1 shows the figure having been constructed minus it’s left arm.
At this stage, I’ve primed the plastic with a very thin coat of flesh coloured acrylic mixed with a lot of Isopropyl Alcohol to enable the paint to cover the model without it “beading” on the surface.
Undercoats of acrylic paint can just be mixed with water then if they need to be thinned for application.
In this shot I’ve painted the inner panel of the skirt with what can only be termed as bone colours, the highlights running to white and the shadows mixed with a warm brown to create a dark cream colour.
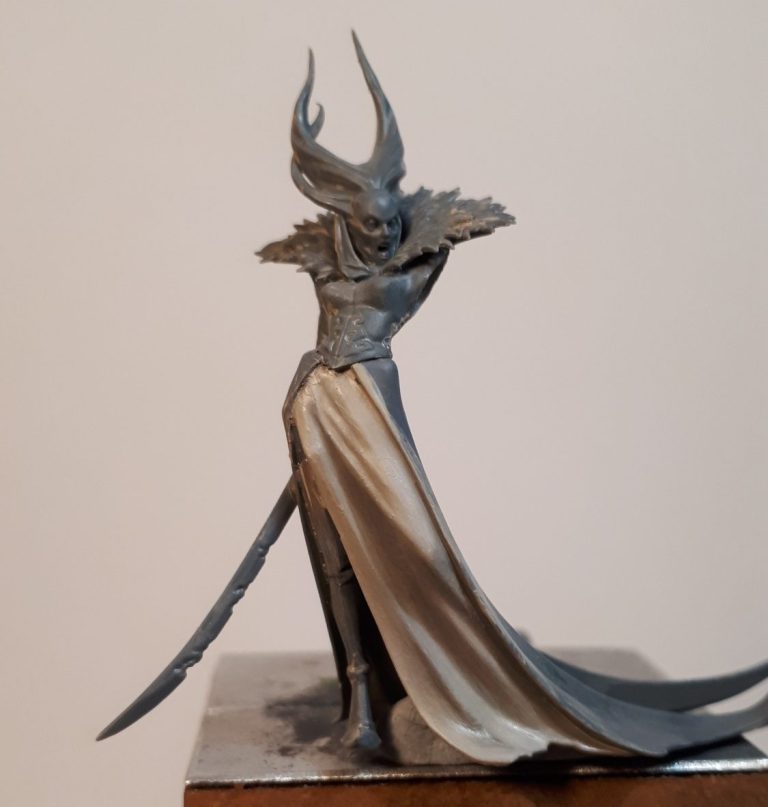
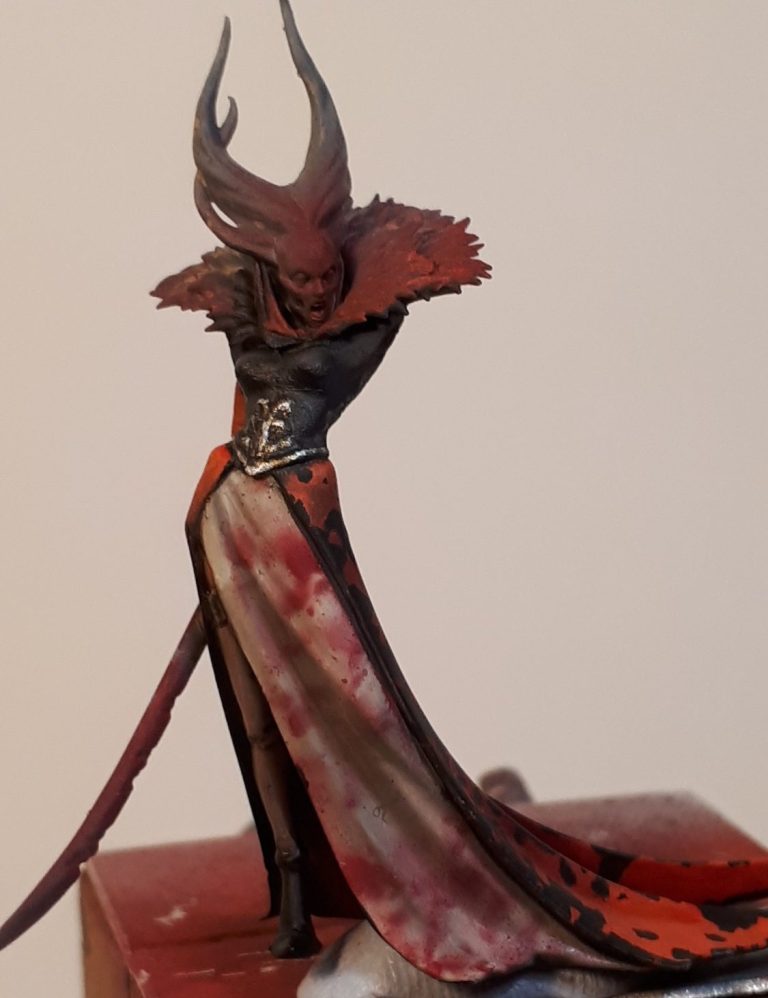
Photo #2 and there’s a fair leap forward. Let’s stick with that inner panel of the skirt though, as that needs doing first. With the bone colouration established and dry, a risky method of getting the random red pattern is used. I slice a thin layer of Loofa sponge and place it tightly over the area, then use an airbrush to spray the red acrylic ( from Tamiya ) through the sponge.
Remove the sponge and ( hopefully ) a pleasingly random effect has been attained. If not, it’s a case of repeat painting the bone colouration and then repeating the spraying through the sponge.
Photo #3 and another method using an airbrush is to paint the long train of the dress with a black acrylic.
This is allowed to dry fully, then a fine sponge with some Marmite on it is gently dabbed on the area in a random fashion. A couple of different colours of red were sprayed on ( again from the Tamiya range of paints ) and the model is left to dry for about half an hour – cuppa and biscuit time I think - and then a soft brush, some detergent and warm water are used to gently wash the area.
The parts where the Marmite has been applied don’t allow the paint to adhere to the model, and the action of washing removes them, leaving the black paint underneath to show through the upper layers of red, resulting in the dress as you see it here.
Again though, it is a completely random effect, and takes a few practice runs to get the finish you want.
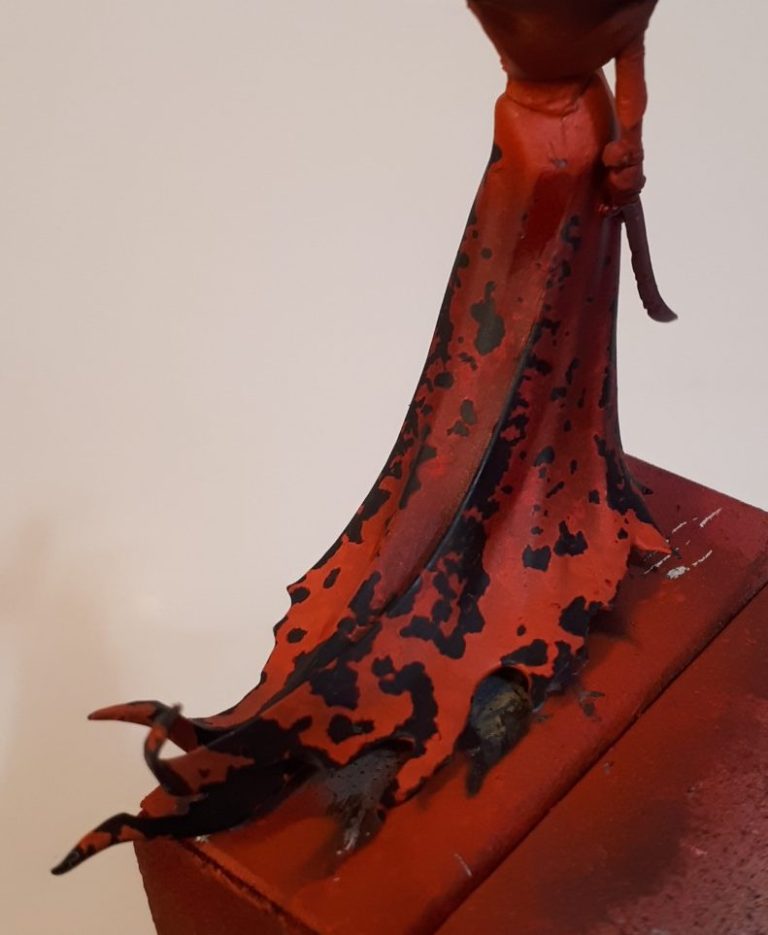

Photo #4 shows a different angle at this stage, with a little practice you can control the effect to a degree, because the paint will only come off where you’ve put the Marmite, but it’s down to how much of the stuff sticks to the model, and how heavily you’ve applied it.
Photo #5 shows some of the details being added now that the airbrushing is done with. The leg, shoe and garter have been painted on, and the corset has been painted with dark greys, working towards black and the motif picked out in silver.
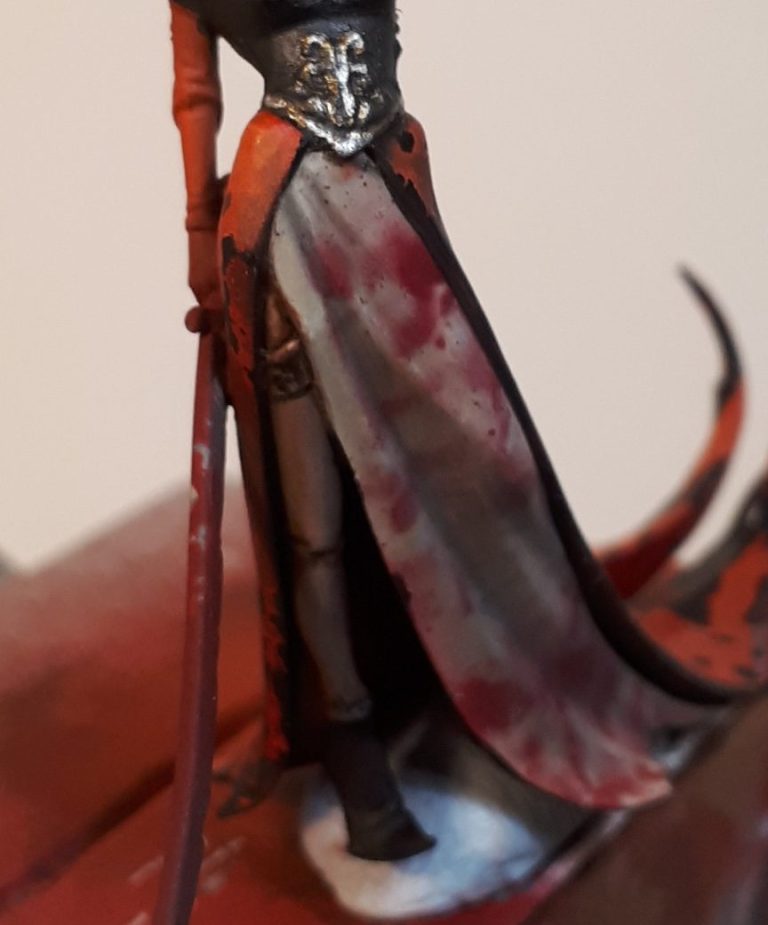
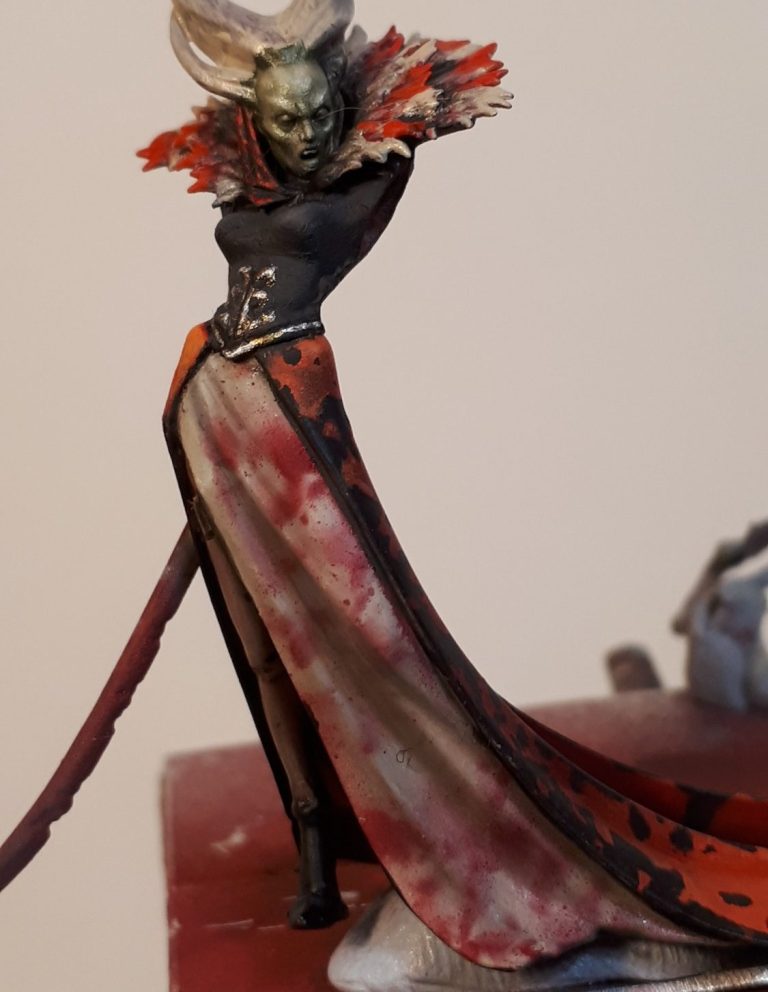
Photos #6 and #7 show another view of the dress and the scabrous appearance the Marmite method has given to it.
The overspray on the sword from the sponge mask gave me an idea to use another old-school method, but more of that later.
On this version of the model, I decided to paint the flesh with an unhealthy green pallor, simply making up a pale flesh colour from Mars Brown and Titanium White oils and then adding a spot of Olive Green in to that. The oils are of course painted over an acrylic undercoat of Flesh colour.
The spiky collar is undercoated in a pale grey acrylic, then highlighted with white, and then the red stripes are added with oils beginning with Carmine and topping off with Scarlet.
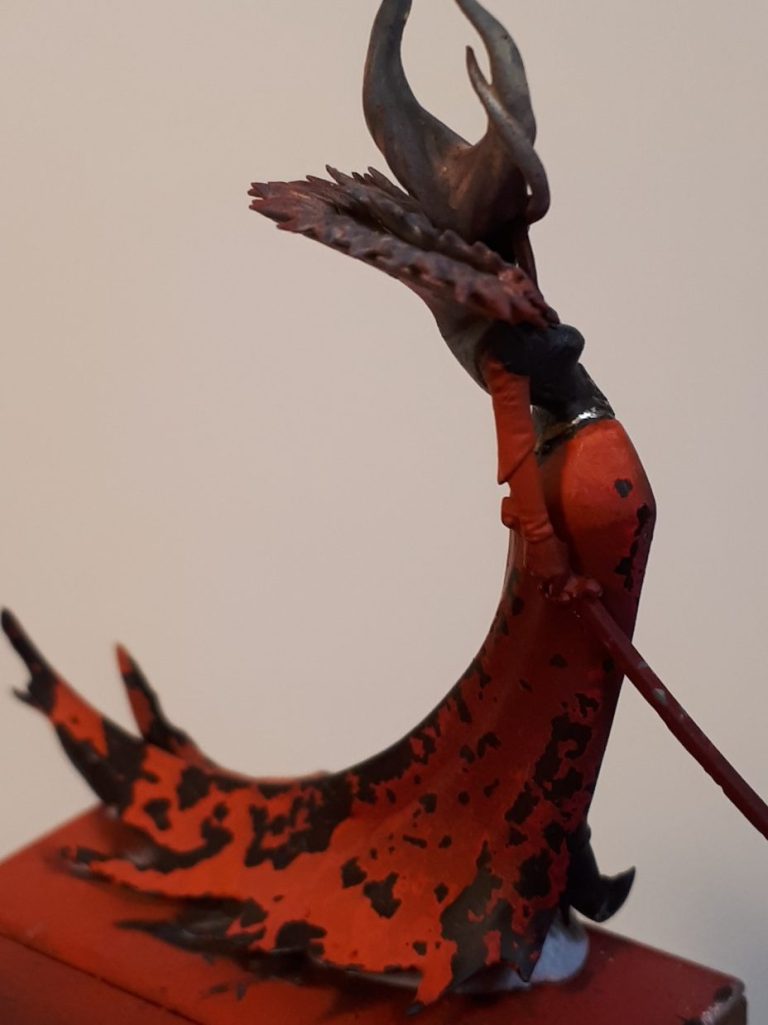

In photo #8 the face is finished with it’s distinctly green cast, and I’ve added a couple of pin washes to the collar to give heavier shadows to the white sections. The inclusion of my thumb gives a sense of the size of this figure – if you’re not familiar with it that is – and it gives an indication of how subtle the use of the sponge mask can be for on the paler area of the skirt.
Photo #9 and I’ve painted the hair. I began with an undercoat of grey acrylic, then added a similar colour oil coat to the hair to give a shadow base coat to work with.
I used an oldish, fine brush to then add Titanium White to sections of the hair, splaying the bristles slightly on the palette and applying the hair as though I was using a comb on the real thing.
The splayed bristles leave brush marks as they pass over the length of the hair, making it look like there are individual hairs making up the mass.
The one thing to remember to do is to wipe the excess paint off the bristles of the brush after each pass, because otherwise the brush picks up some of the darker paint off the hair and this will “muddy” the effect on the next pass if its not removed.
Recharging the brush with fresh paint before each pass is a must too.

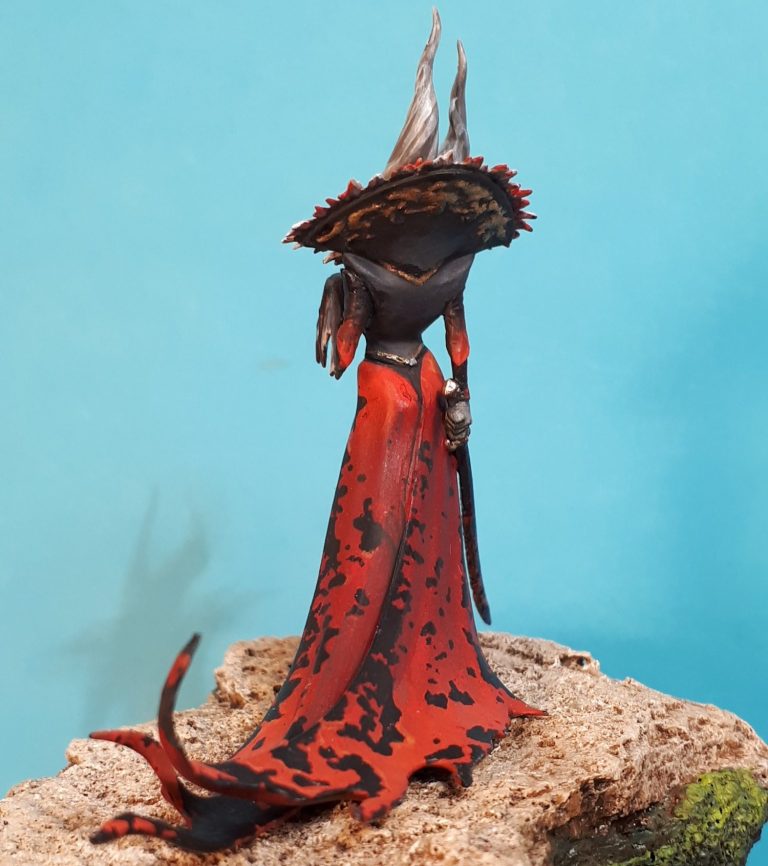
Photo #10 shows the back of the model and possibly an area that few viewers would normally notice, which is the design moulded into the underside of the collar. I picked this out with some gold paint and then added some pin washes to make the design stand out a little more.
Photo #11 takes a step backwards in the painting process to show the collar having been painted and the pin washes added. The washes made the white areas a bit too dark, so after this picture was taken I refined the highlights with some small flecks of pure white acrylic.

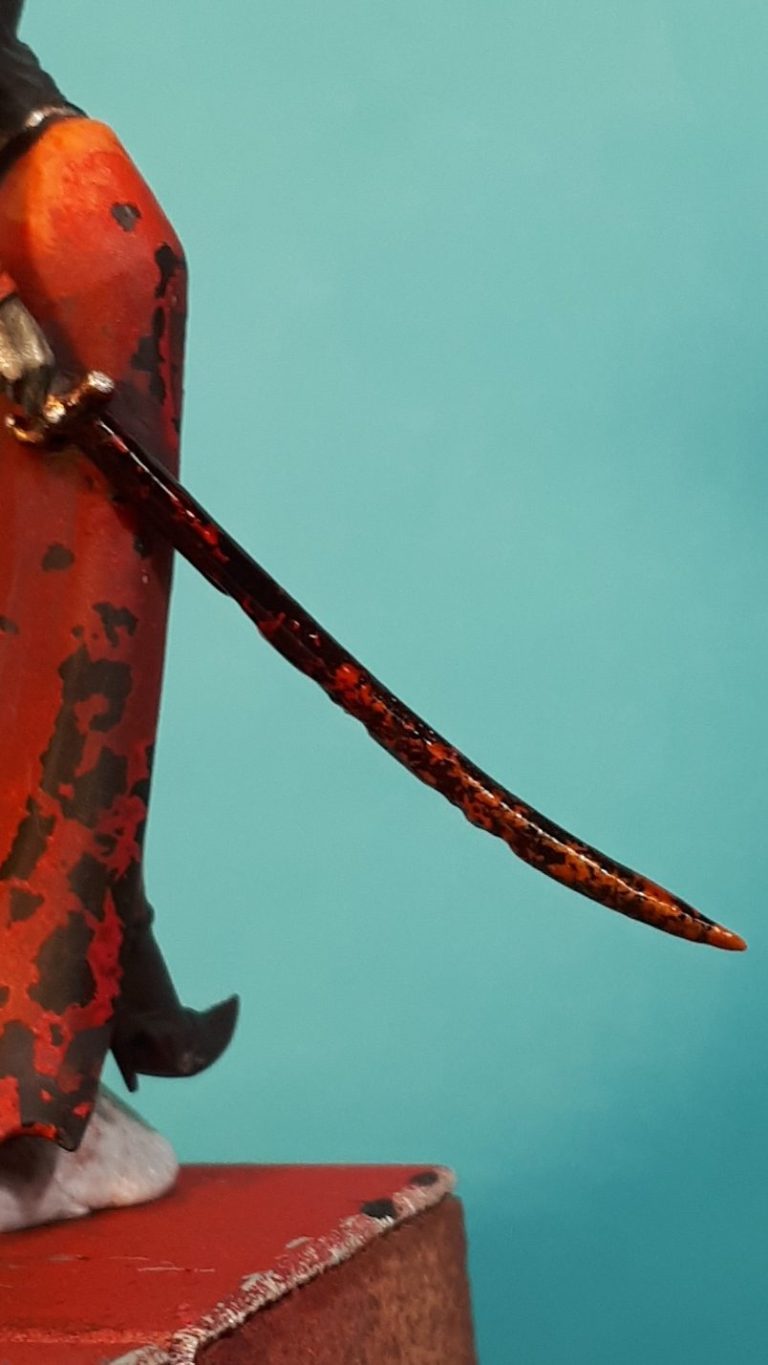
Photo #12 and the sword. In the old days, before most people got an airbrush, many people had to resort to spray cans as a means of painting or priming figures. Refined work had to be done later, as the spray can would give too broad a coverage on such small figures – OK for priming and undercoating, but any detail work was impossible with a spray can.
However one cool effect was that spray cans would sometimes – with a bit of gentle control – make a splatter effect, and if you painted the area ( in this case the sword ) black, then applied the splatter in say white, you got a completely random pattern.
Getting the splatter to be heaviest at the tip of the sword was fairly easy, with the droplets of paint being less dense up towards the hilt.
Then once the white had dried, any clear colour, for example the Tamiya range of Clear lacquers, could be thinned a little with water and painted over in several layers to build up a gloss colour of your choice.
The finished effect is what you see in this shot, and although I didn’t do this first, it was fairly easy to wrap a cloth around the body of the figure to protect it from any overspray.
Photo #13 shows the opposite side of the sword with the same effect added.
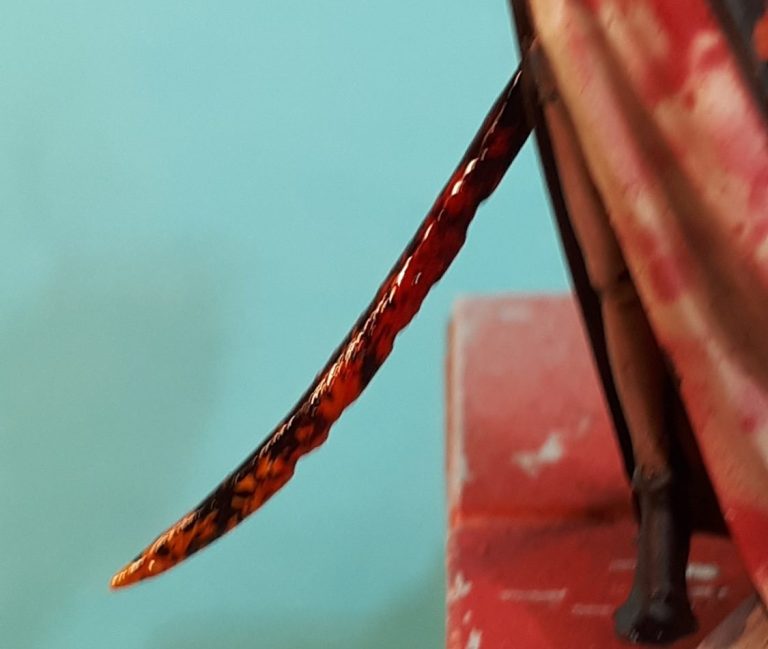
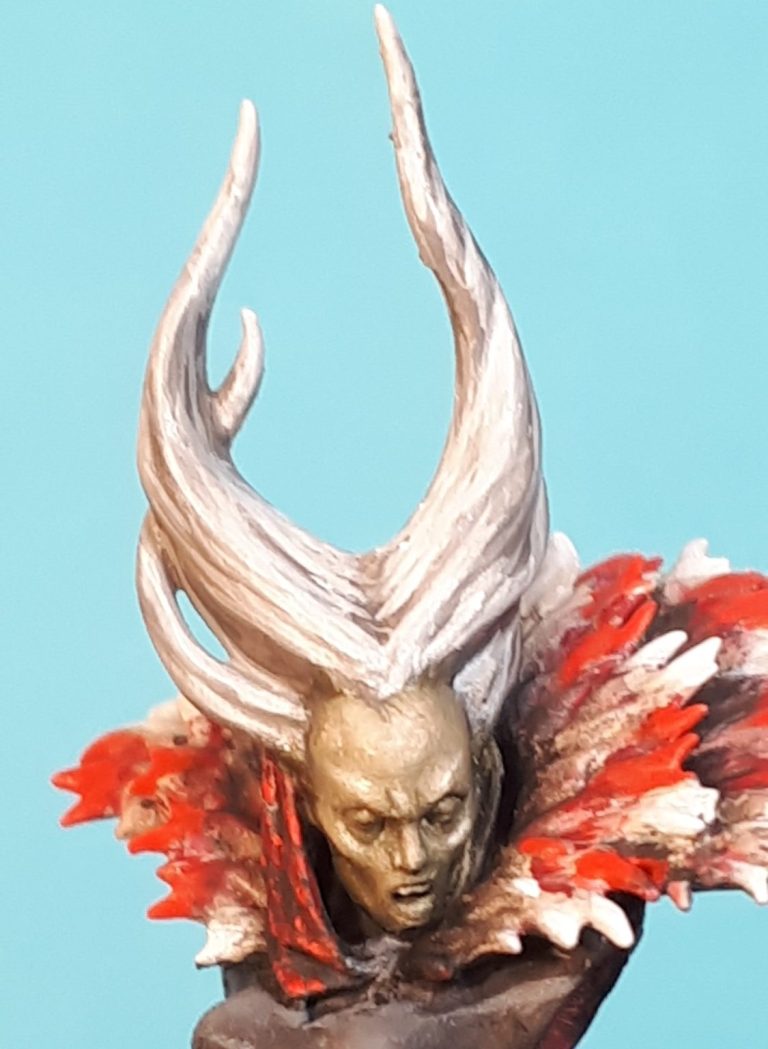
Photo #14 shows a close-up of the face and hair. In this shot the lined effect on the hair is easier to spot, and the details like the eyes and teeth having been added once the flesh tones on the face had dried completely.

Photo #15 gives a look from the same angle, but pulled back and the additional highlights on the collar show themselves, and whilst I haven’t mentioned it so far, I’m just not happy with that silver motif on the front of her chest. It’s heavy handed when the picture’s blown up to this size and needs refining.
Photo #16 shows the model at this stage, all the details are done, just that motif to refine and the left arm to paint up and glue in place.
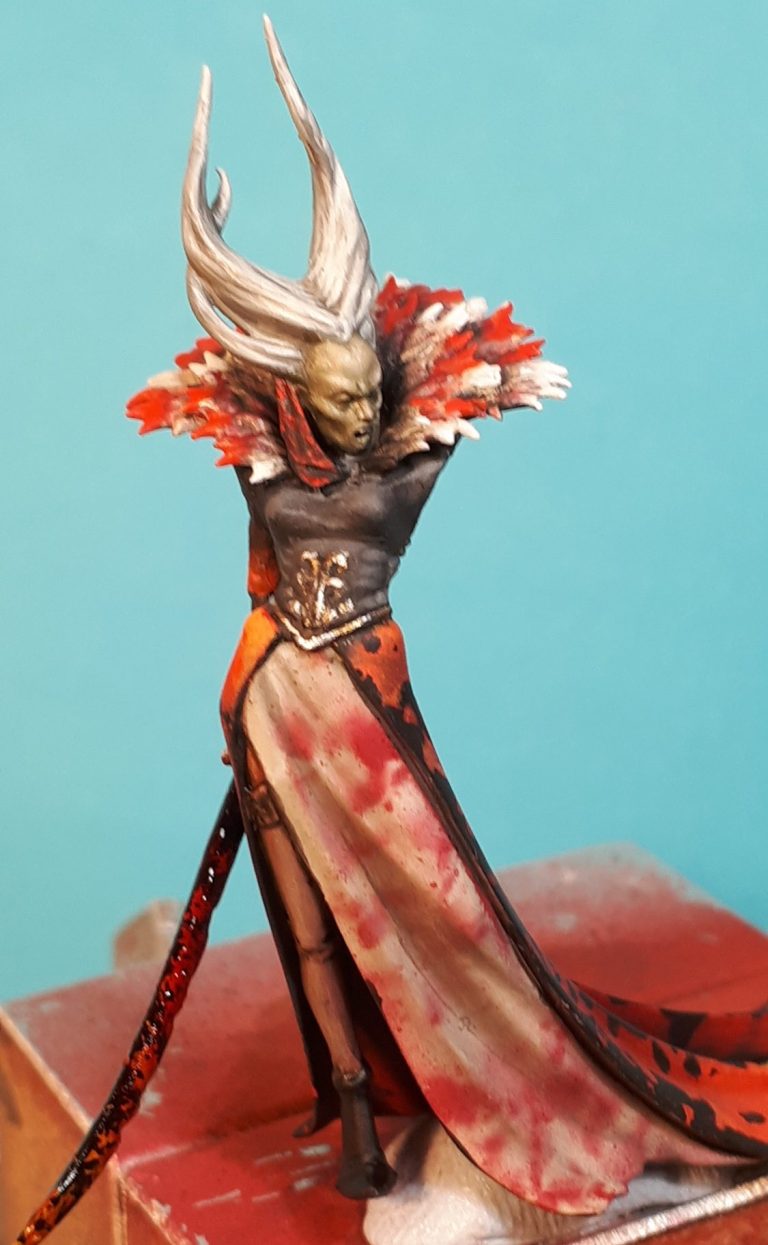
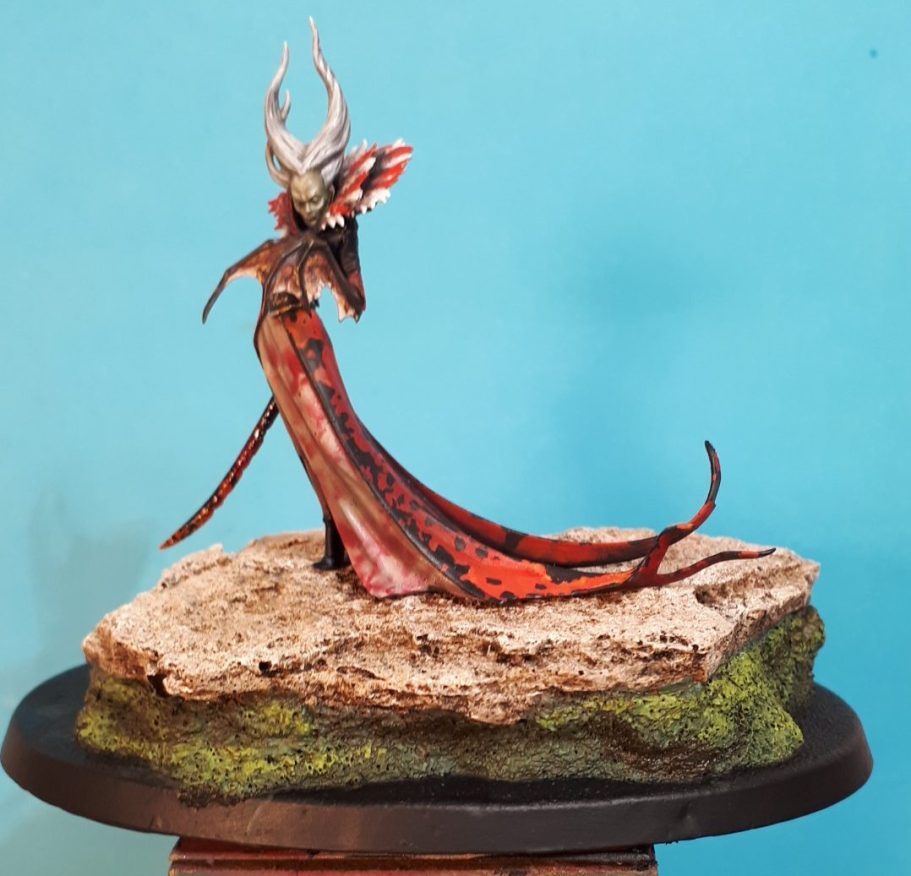
Photo #17 and a bit of a blurred shot when it gets blown up, showing the left arm. On this figure I chose to add the bat wing, painting the webs with a blotchy, mottled mix of browns fading to flesh at the “fingers” and the digits were painted with very dark greys adding some deep shadows with pure black.
Because this would be sold as a piece to be used in the Age of Sigmar game, I fastened it to a 80mm x 40mm base that gave enough of a margin around the figure’s extremities to prevent any damage. The base is made by Bash Models and is available from eBay from seller ash0040 for £5 for two.

As I said at the beginning of this article, I liked this model so much that I thought I’d paint one up for my own collection, and as I don’t play any of the games, I could add my figure to a more elaborate base, the beginnings of which are shown in photo #18.
This is a resin casting of a ruined church wall. It’s pretty well detailed on it’s front face, but like a lot of this type of groundwork accessories, it’s got a completely flat back.
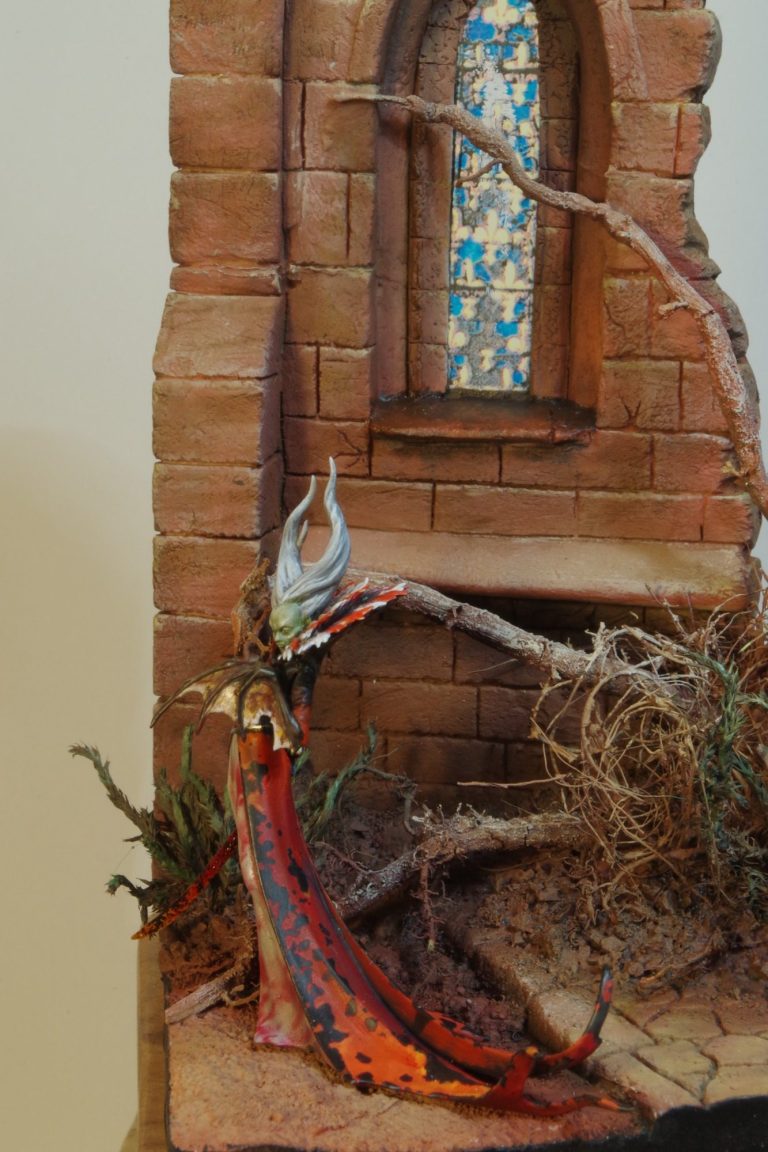
Although that didn’t bother me, the empty window did, and so I added a printed stained glass section to it and the grey set of masonry surrounding the window is made of Magic Sculpt and is there to blend the stained glass section into the rest of the stonework.
Photo #19 shows the base that comes with the ruined wall section, just enough space to allow our Vampire Queen to stand at the front, with the two steps and cobbles adding interest underfoot.
The “stained glass” section of plastic works well in this shot, a lot better than an opaque piece of plastic with a design painted on.


Photo #20. I didn’t want the scene to look too clean and fresh, the wall of the building is broken and appears ruined, so I wanted to add to this appearance of dereliction.
I added a couple of small twigs and some “pickled” plants along with a mix of Chinchilla Bathing Sand and some Cat Litter to hide the joints between the twigs, plants and the resin base.

Photo #21 and the figure is test fitted again, making sure that I hadn’t gone too mad with the additions of debris and plant life and that she had space to stand in.
Photo #22 and by masking off the stained glass window I could resort to using the airbrush to paint the groundwork and wall.
I tend to use Tamiya or Mr Model colours through the airbrush, they work well, give decent coverage and are easy to clean from the airbrush after use.
Here I’ve added an overall sand colour as a primer / undercoat, then built up darker areas from Rust and Nato Brown.

Photo #23 and I’ve stripped away the masking from the Stained Glass, added a thin wash of Vandyke Brown oils to the wall and paving and allowed it to dry for forty eight hours to see what effect came out.
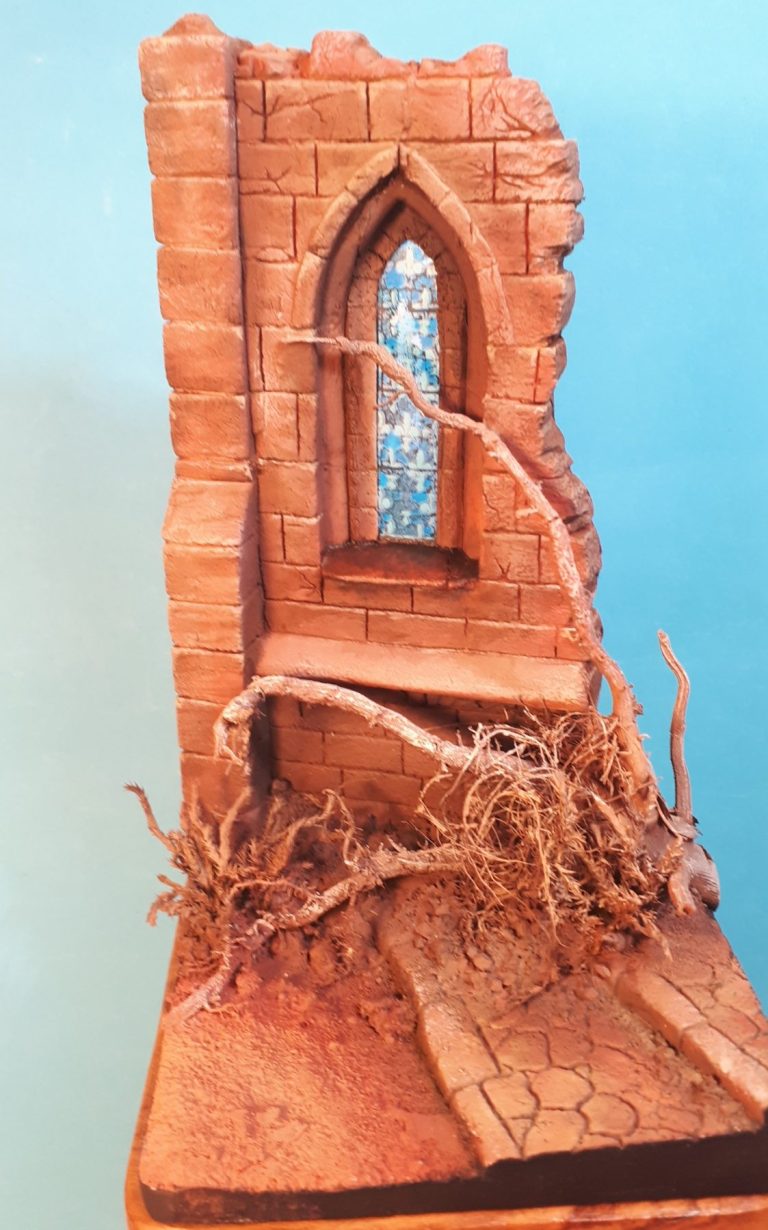

Photos #24 and #25 show the figure in place, some pin washes have been added to the steps and paving, and further attention given to the deeper recesses under the plant roots and around the window.
The plinth is a lovely piece of Olive wood that I bought in Spain whilst on holiday. It’s actually meant to be used as an ashtray, but I don’t smoke, and when I saw it, thought that if it was turned upside down, it’s make an excellent plinth for a model at some point.


Photo #26 shows the beginning of me painting my version of the model, with a heavier effect on the front panel of the skirt, although done the same way with a piece of Loofa and an airbrush, and the same Marmite effect on the longer dress section at the back. Same colours too.
Photo #27 and you can see what I mean about the Marmite effect being pretty random. I thought I’d been as heavy-handed with the Marmite and sponge, but obviously I wasn’t and the pattern once the section was washed is a lot finer.

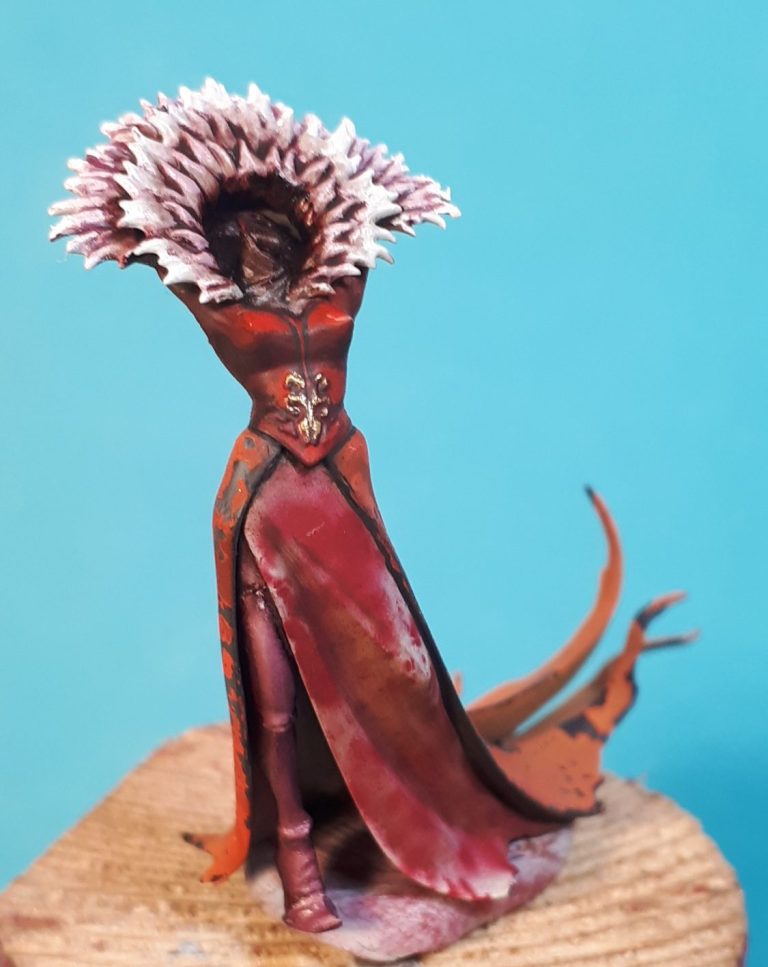
Photo #28 and the leg is painted in along too with the chest area, this time going for a red colouration. The collar has been painted a lot lighter too, with a lot more pure white to pick out the highlights.

The head has been added in photo #29, although it is yet to be painted, although I decided on a healthier look to the flesh areas, as can be seen with the hand in photo #30.

Photo #31 and the face has been painted, this time using the Mars Brown / Titanium White oil mix, but adding a small amount of Carmine to make the mix a lot more red. Mid-tines and highlights are blended in with Titanium White.


Photo #32, And to complete the angrier look lets have the hair looking like it’s on fire, eh ?
Beginning with a black and Carmine oil mix at the hairline, and working through the Carmine to Scarlet, then to Orange and Chrome Yellow, and finally to pure White at the tips of the hair.
The oils were a bit thick on this, so they took about a week to dry fully in the heated cabinet I use as a drying box.
Photo #33 and just to be a little different from the initial figure, and whilst I liked the splatter effect of the sword, I thought I’d go for blue on this one. The only difference in the painting was the use of Tamiya Clear Blue lacquer as opposed to the red on the first version.
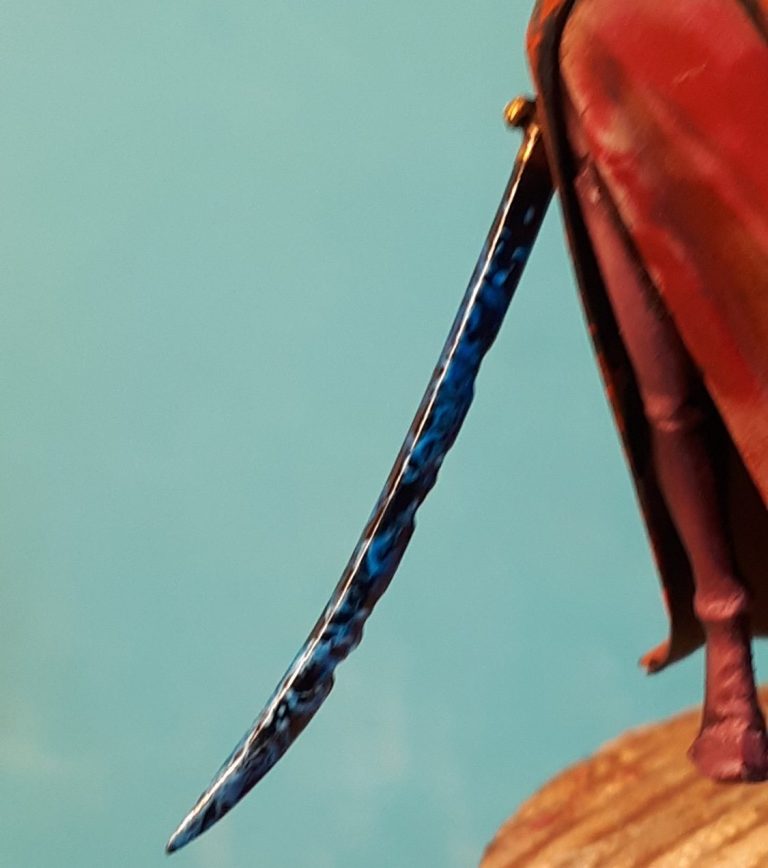
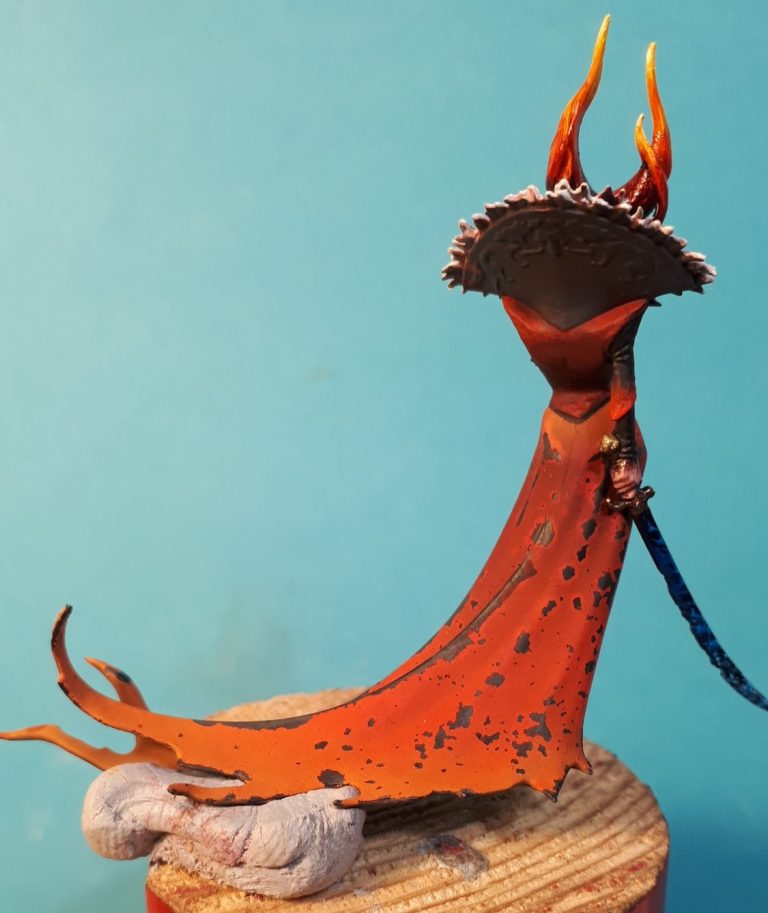
Photo #34 and a loot at the back of this one. The motif under the back of the collar hasn’t been added yet, but you can see that the Marmite has given a very different affect on this version of the figure, and I used a little more orange paint as a highlight rather than just the red.
Photo #35 and rather than use the wing for the left arm, I chose to add the alternative, which is a full arm and hand that’s holding a mask.
The hand is very well sculpted and very delicate, just the thumb, index and middle finger holding the stem of the mask, a nice touch from whoever designed the figure.
And then the rest of the pictures show the initial figure posed on the more decorative ruined church scene.
I was a bit torn as to which of the figures to keep in the end, being as I painted them almost simultaneously.


Final thoughts.
How Games Workshop plastic figures have come along from those initial somewhat flat looking castings of a dwarf and an orc, in fact the comparison in quality and detail is a universe away from one to the other.
When GW brought out the first offerings in plastic, I for one couldn’t see how they would be popular with anyone other than the wargamer who required massed ranks of figures as cheaply as possible.
But with the multipart figures now available, and design methods having leapt forward so much, the quality of the figures over the past ten years or so has improved immeasurably.
I know I buy far too many, and my stock of unpainted GW plastic is quite large, but the marketing strategy of having very well painted box art, easy to construct models with clear, colour coded instructions, and with plastic being very easy to allow for conversions or just changes in pose to be allowed, there really is only the cost of the darn things that’s going to cause a problem for the potential buyer.
I really can’t recommend these enough; they’re small, but very good to paint up.
We need your consent to load the translations
We use a third-party service to translate the website content that may collect data about your activity. Please review the details in the privacy policy and accept the service to view the translations.