
Brian the Ogre
1/12th scale Elan 13 Miniatures resin bust
Painted in 2014
Why Brian ?
Why not.
He looks like a Brian to me somehow.
So that’s that explained.
this is an Elan 13 piece, that was originally from a small range of busts marketed by the Basement Forum.
It’s a darn fine bit of sculpting by Chris Clayton, not to mention it allowing me to play about with painting skin texture and zits………There’s something teenager-ish in me that enjoys a good ripe zit…..Well, the painting of one of course; whatever were you thinking of !
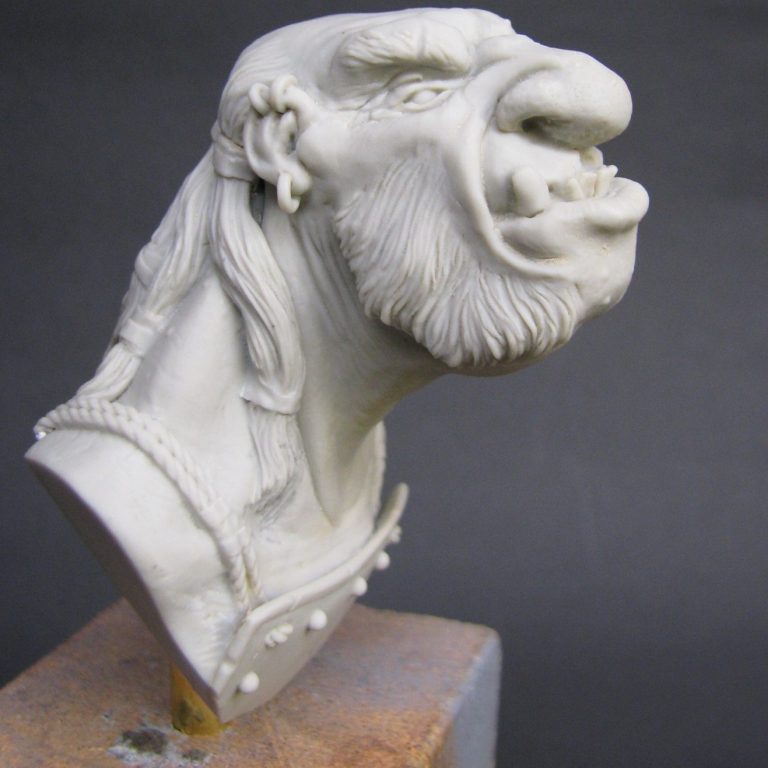
To describe the bust, well, it’s a large scale piece, equating to a human being about 200mm tall and Ogres being a darn sight bigger. I guess to give you an idea of size, the head on this kit is perhaps slightly larger than an Action Man or G. I. Joe.
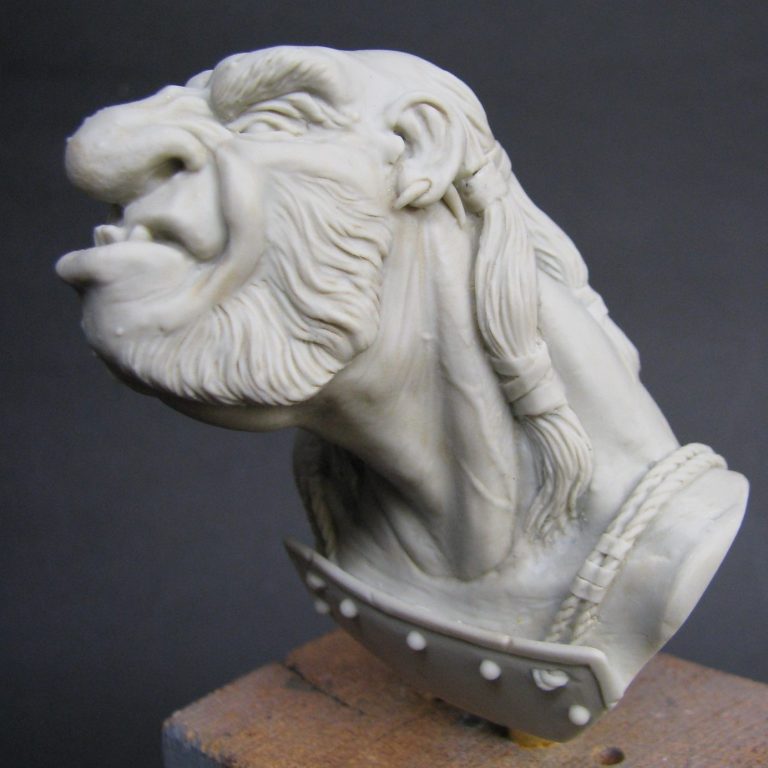
The first three photos ( cunningly disguised as photos #1. #2 and #3 ) show the bare grey resin.
There’s two parts to the kit, with the joint running down the side of the neck but hidden somewhat by the hair braids, then across the base of the neck and up the other side.
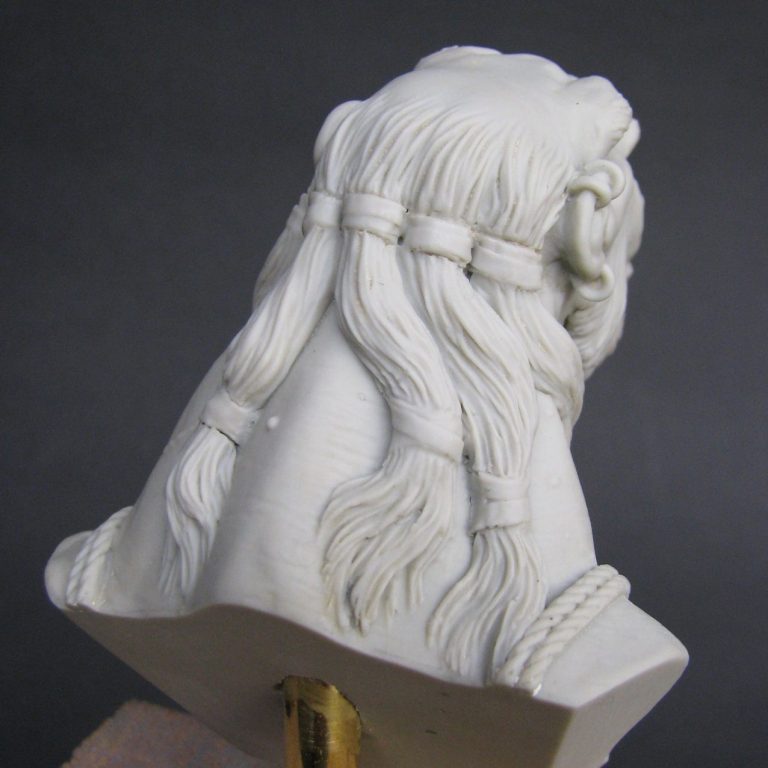
At the back of the head, the joint is hidden by the natural break that is formed by the braided hair where the ribbons are tied around each braid.

So, that’s the subject. What about the paint then ?
I wanted to give an old, weathered look to the skin, and to add some wrinkled texture to add to that already sculpted into the piece. Originally I had thought of doing some kind of marble effect, but after several failed attempts, I gave up on that idea – it hid the sculpted details too much.
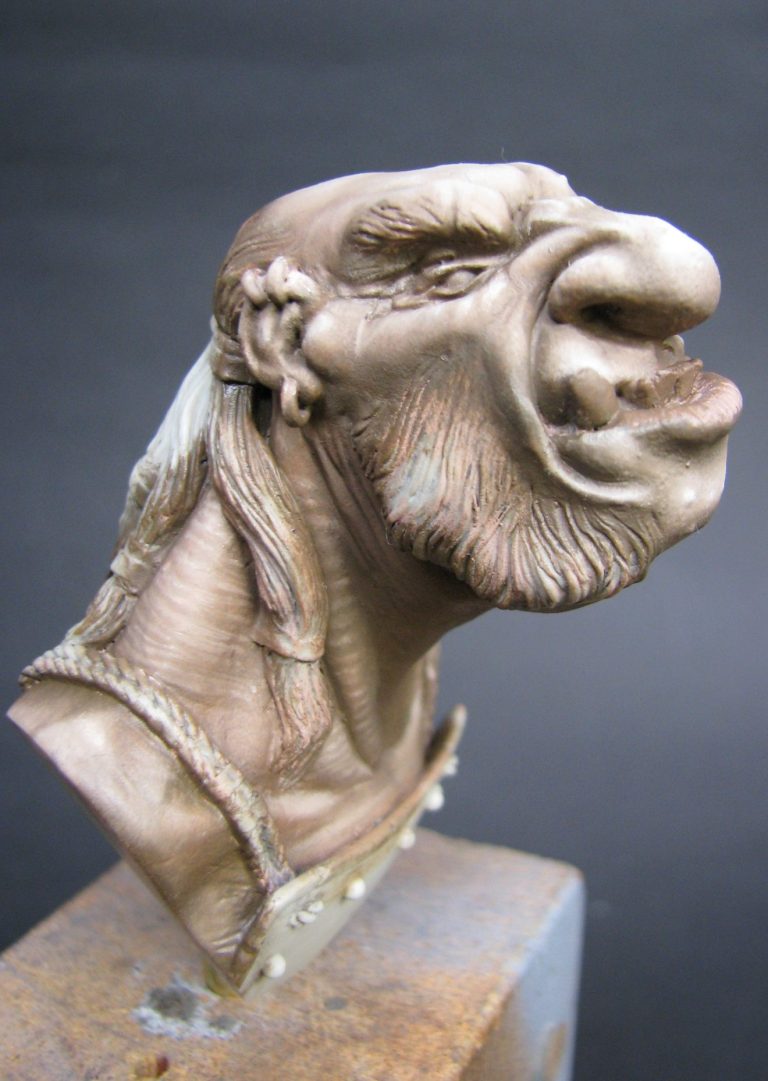
Photo #4 shows the initial painting of the skin in acrylics, beginning with a nice dark mix of GW Kommando Kakhi and Chaos Black with just a hint of Tallarn Flesh added to pink the mix off a bit. This covers the whole of the model, but by the stage this shot is taken at, it’s been knocked back so that it only appears in the shadow areas.
By gradually lightening the mix ( and adding a lot of water to thin it too ) I could then build up lines across the area being painted. I used a number 1 Series 7 Winsor and Newton sable brush for this – expensive it’s true, but it keeps it’s point and holds a good reservoir of paint to allow me to paint quite a while without replenishing the brush.
Gradually I added small amounts of Tallarn Flesh and Skull White, not forgetting to also add water to keep the paint thinned out, and added more layers of paint to the model.
I painted several sections of the model at one time. This allowed me to work gradually around the model and for the paint to dry fully before coming back to the same area. I would add perhaps five or six layers of the same colour paint - remember it’s very thin, so thin in fact that I couldn’t actually see the lines being painted on until several layers had been done – frustrating I know !
Then, and only then, was more of the lighter paint added to the mix, along with water to keep it thinned down.

The other thing to do is to work on smaller and smaller areas of the model as the mid-tones and highlights build up on the model. It’s important to work out where the lighter colours will go, and to also think about what muscles and veins are under the skin so that you end up with the lighter colours in the right places. It’s easy on the back of the neck, but becomes harder on restricted areas such as the sides of the neck ( photo #5 shows the thick lines that I’ve added to the tendons running up the side of the neck. These lines will be broken up by later coats of paint )
Getting to the point where the mix is a very pale pinkish colour requires a lot of patience and is probably working towards having a hundred or more payers of paint on some areas of the model. Obviously the dark areas will have received less paint layers than the very light ones.
At that stage I leave the model overnight to dry in a warm room. I know that acrylics dry really quickly, but before I go messing about any further with the paint, I like to make sure that it’s had plenty of time to harden off.
So, the next night I added a very thin wash of the dark mix. This is so watery that there’s hardly any pigment in the mix, and put on so that it dampens the whole skin area, but doesn’t pool in the recesses. I did this three or four times allowing each layer about ten minutes to dry fully, before adding the next one.
Photo #6 shows the darkening of the skin to have been completed, and if it goes too dark, don’t be afraid to add some lighter colours to build up the highlights.
Also seen in this shot is the initial undercoating of the hair and eyes. I re-coat both these areas because I’m a messy painter and don’t really care where the paint goes when I’m doing the skin – I kind of get neater as the model progresses.
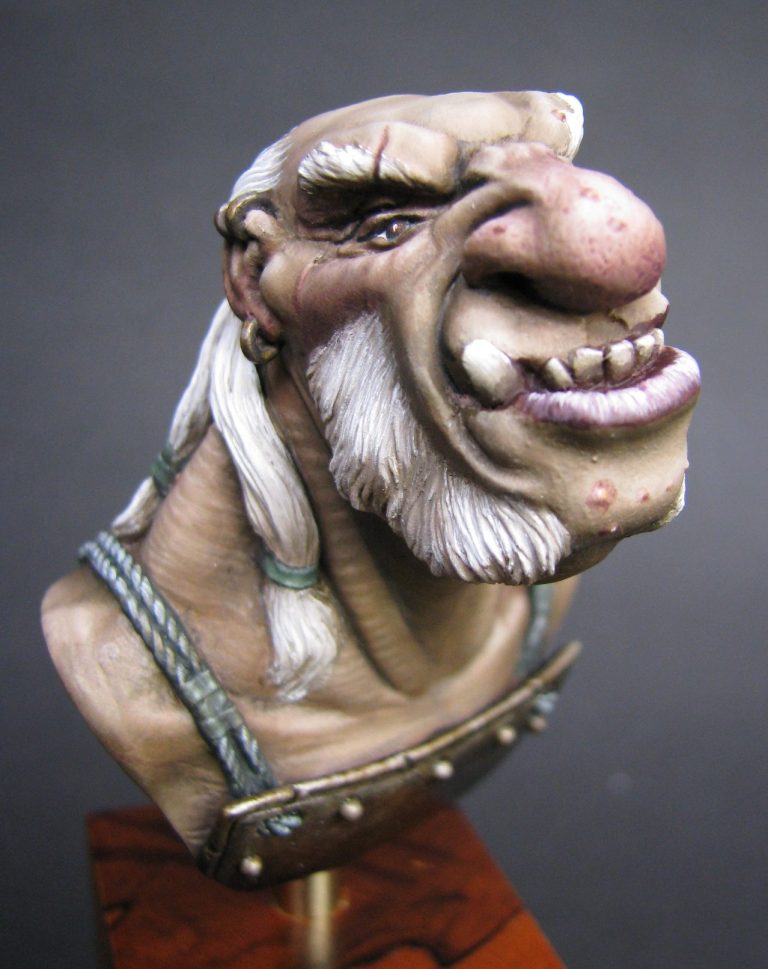
Photo #7 shows the hair colour starting to be added. This involved a process of painting on a mid-tone similar to the skin colour, but mixed from oil paint ( I used Raw Umber, Titanium White and just a touch of Mars Yellow ).
I then lightened the areas by using Titanium White and a fairly wide, flat brush to almost comb new colour on to the top of the darker colour. The combing technique – just like running a comb through hair – means that the colour is added with the grain of the sculpted detail, and if the paint is used straight from the tube, then it’s usually thick enough to leave small lines from the brush. These fine lines look like actual hairs, backing up the sculpting of the area and making it look really cool.
By adding the lighter colour to the hair in distinct areas – where the highlights would catch, and also towards the end of the hairs, it begins to look like real hair. One tip here is to repeatedly wipe the brush clean on an old T-shirt. This gets rid of the excess paint and stops the darker paint contaminating the lighter colours being used.
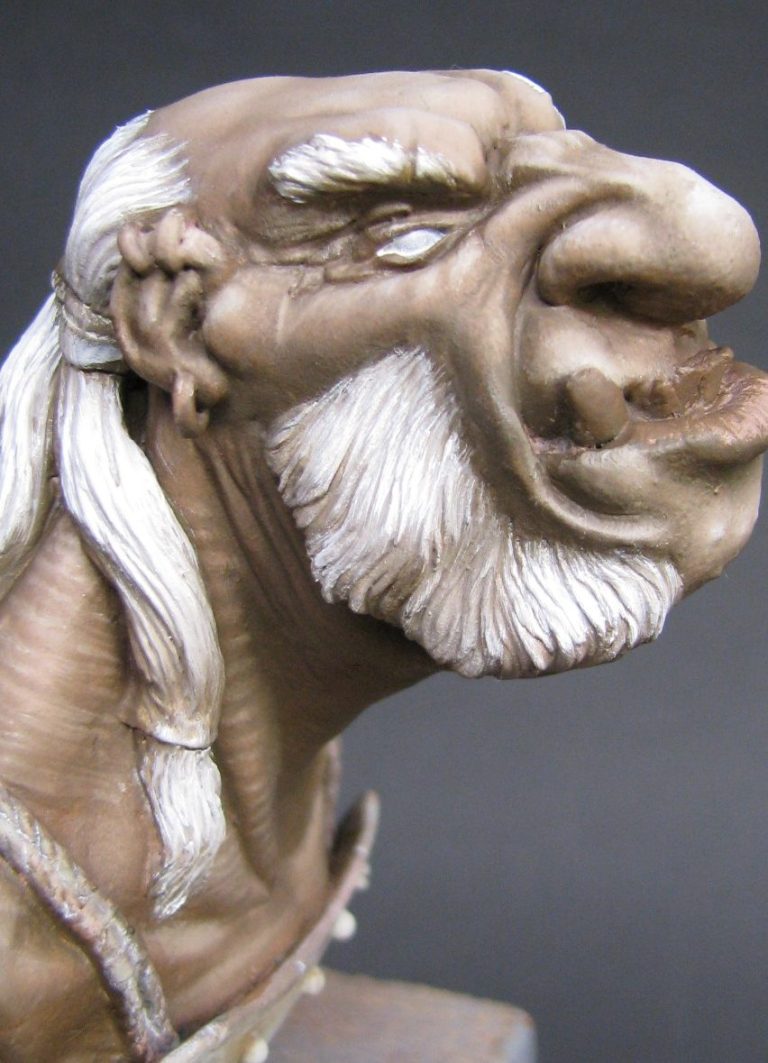
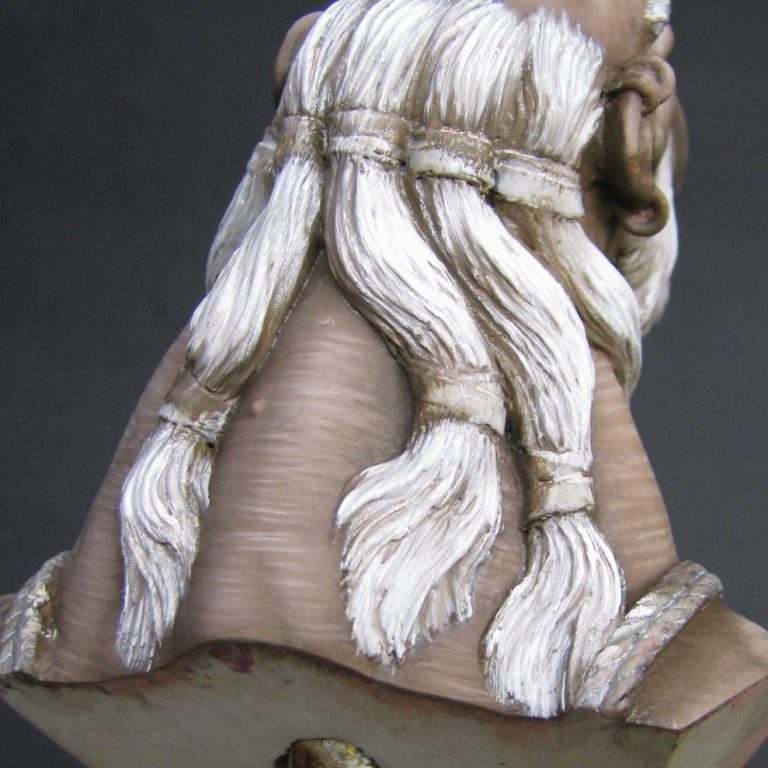
Photo #8 shows the back of the model, again the method for combing on the colour is being used on the hair and allowing the darker colour to still be seen in the shadows.
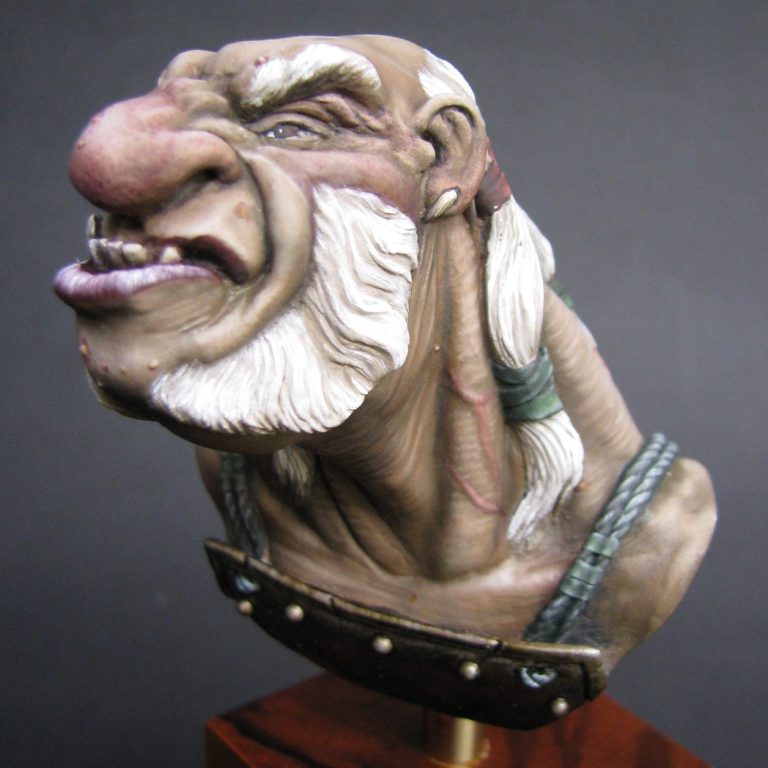
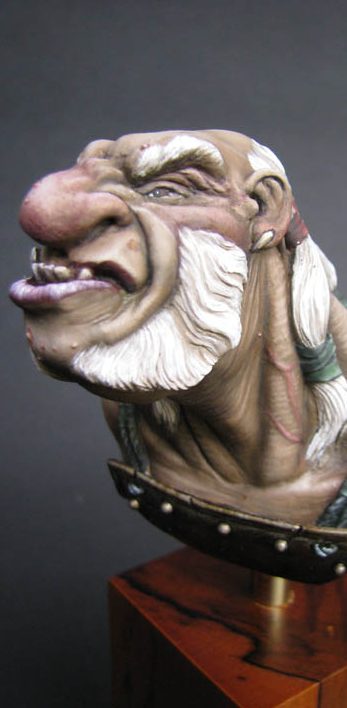
From photo #9, we’re seeing the finished piece really. I’ve added the eye colours with some brown and black, and put a catchlight in with a tiny spot of white.
The eyes at this stage need a coat of varnish to finish them off.
Also seen here is the green and red colour added to the cloth ties on the hair. This is done with oil paint and I used some buff Titanium, which is a cream colour, to add frayed edges to the green colour used.
Finally the metal breastplate that has been painted with printers inks.
These are available from El Greco Miniatures, and are a spirit based, so the brushes can be cleaned with turpentine or white spirit and they can also be mixed with oil colours to alter the metallic ink’s shade. I usually add some Mars Black to the base colour ( in this case Bronze ), then add mid-tones with just the straight Bronze, work in some highlights with Old Gold and finish off with some damage done with silver for where the metal has been hacked at, and some of the deep shadow colour to add cuts and scores in the metal.

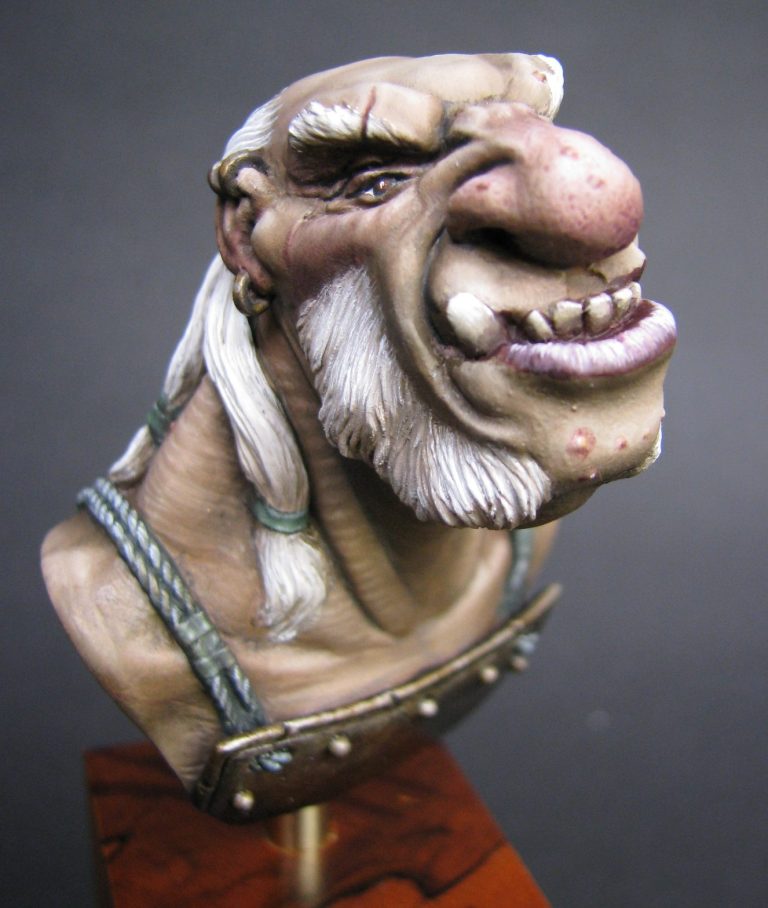
I added a wash of red to some of the areas of the face to either make him look like a heavy drinker, or alternatively like he’s got a bit of a cold. Simply a case of thinning some red paint down with a lot of thinners and washing it over the desired areas – in this case the tip of the nose, under the eye bags and over the ears. This is probably best seen in photo #10.
Finally those zits.
Very easy to paint, and so long as there appears to be little swellings on the skin areas you’re well away to a pustule. They can always be added prior to painting with a small blob of putty, rounded of and blended in to the skin a bit with a dampened brush.
As to painting them, basically a couple of thin coats of a pale yellow colour ( Skull White and Iyandan Darksun work well, and once that’s dried, a wash of the red colour over the surrounding area to make the skin look a bit sore…..Mmmmm plooky !
So that’s it, one ugly Ogre, a simple paint-job, but with options of tattooing if you want.
It’s actually a superb bit of resin, well sculpted and very well cast; in fact the parts just need the mould plug cleaning off and they slotted together perfectly on the one I got. I did need just a small wipe of filler around the lower neck joint, otherwise there will be a line visible between the two parts, but that’s all really.
I know, I know, I’m biased, but Chris Clayton’s a darn fine sculptor; I just thought I’d mention it.
We need your consent to load the translations
We use a third-party service to translate the website content that may collect data about your activity. Please review the details in the privacy policy and accept the service to view the translations.