16th Century German Mercenary
54mm resin kit from Troop 54 / Stormtroopers
Painted in 2023
Over the years I’ve painted quite a few of Stuart Hale’s offerings from the Stormtroopers brand. Although there are a lot of Napoleonic subjects in his range, there are also a good number of kits depicting other periods of history.
They all have one thing in common though, nice sculpting, great production values, and an attention to detail.
In other words I like them.

Stuart released pictures of this model just before the White Rose / FigureWorld North model show in June 2023, and said he’d have a few with him as pre-releases at the show.
You can guess where I was going when the show opened, and I was lucky enough to bag one of these.


Shown in photo #1 is the box art, and like a few companies, Stuart tends to have pictures of assembled, but unpainted kits on his box lids. However photo #2 shows how much attention to detail Stuart puts into his offerings, with not one, but several colourful pictures showing ideas for how the model can be painted.


I’ve taken the liberty of showing five pictures of the parts. Partly to celebrate the fact that I managed to take pictures before starting painting, and partly to show the very fine detail on the components. So that takes care of photos #3 through to #7.
As I mentioned, this kit is a pre-release, and one thing I noticed was that there isn’t a supporting block for the archway masonry. I mentioned this to Stuart, and said I could make something that could be added to the kit if he wanted.


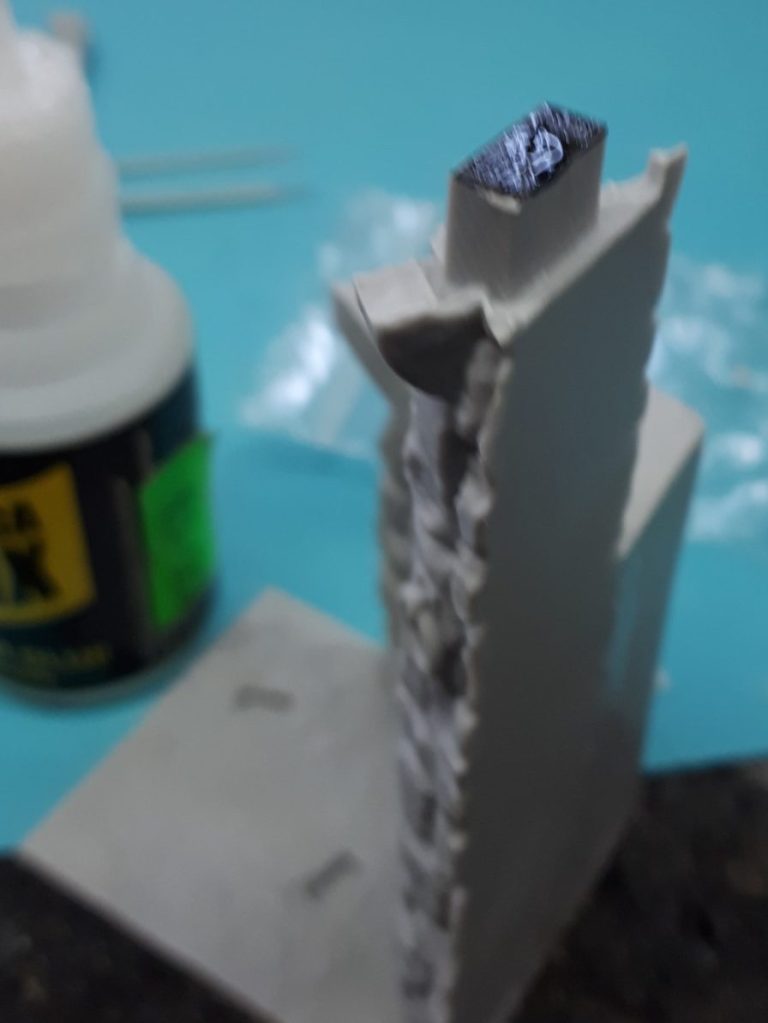
I assembled the walls up to the point shown in photo #8, putting some black paint onto the location block for the arch. While the paint was wet, I pressed that into some 5mm foam-board to mark the location I’d need to cut out to allow the block to slide through and locate into the arch.

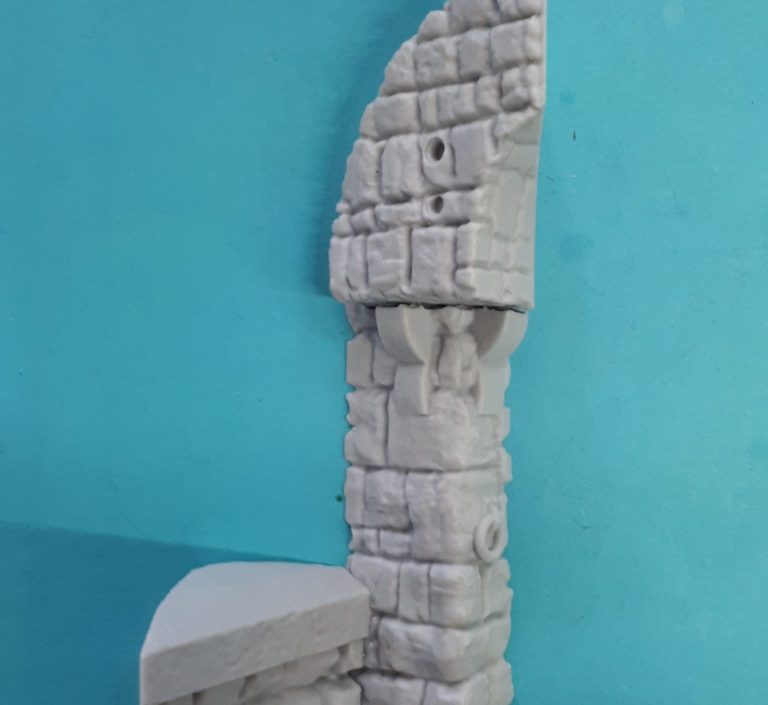
Photo 10 shows the arch dry assembled without the support stone, and photo #11 show the new piece added to check for size and shape.
With that done, I made a mould and several copies of the support stone, kept one for my own use and sent the mould and the copies off to Stuart.
It’s not that the kit can’t be assembled as it was, but just something that I felt could be added being that the kit wasn’t really released yet.
Photo #9 shows the new support stone, cut out of the foam-board and shaped to match the wall it was to sit on.

Photo #12 shows the lovely little casting for the torch that fits onto the wall above the Mercenary’s head. For some reason I decided to drill out the gaps between the iron cup that would hold the burning fuel that would light the area.


And then to painting.
Reverting to times gone past, I decided to make a start on the face. I used my trusted mix of Mars Brown and Titanium White oils over a flesh coloured acrylic undercoat, starting the oils off with a 50:50 mix of the two colours to establish a mid-tone that was painted over the whole of the face. I then added more of the brown to deepen the colour in the shadows, using a small brush to stipple the areas once a spot of paint had been added so that the colour already on the face was blended in to the small amount of darker colour that had just been added.
It can take two or three additions of tiny spots of paint to each area to build up the shadows, wiping the blending brush regularly between each addition of the darker paint to remove any excess paint from the bristles.
The same method was used to build up the highlights, adding tiny spots of the Titanium White to areas that would catch the light. The difficulty here is that the Salet style helmet will hide a lot, if not all of this work, so I’m glad I took photos – in this case number #13 to show the effect of the paints so far.

This was allowed to dry fully, and then I would add some darker shadows and possibly top off the highlights with more white.
Whilst this was happening – the drying of the face that is – I began painting the body casting.
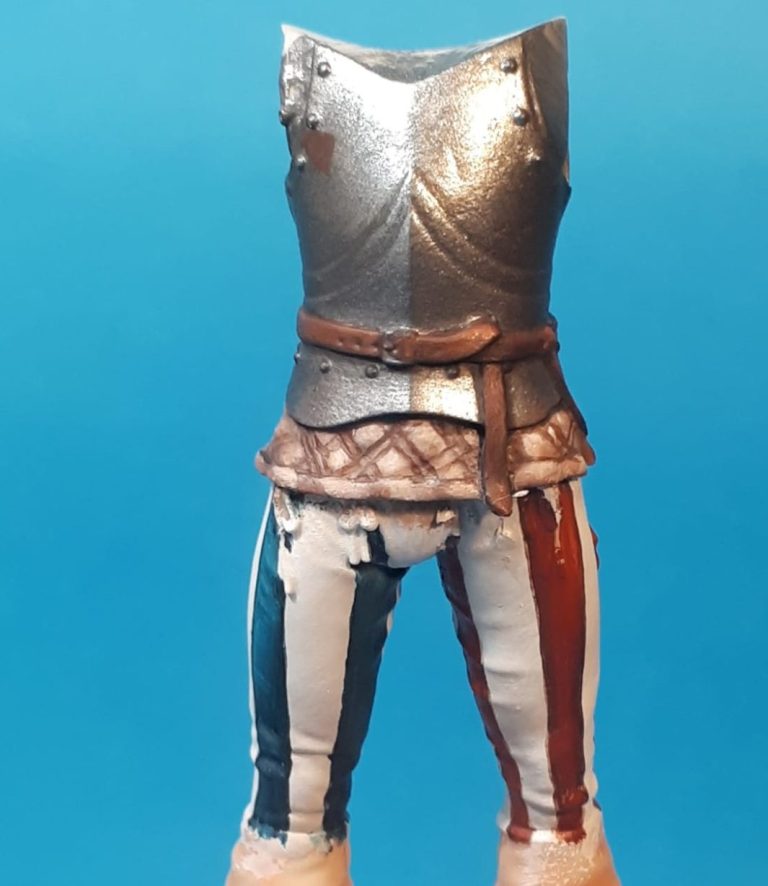
Photos #14 and #15 show what I did regarding colouration, beginning with the armour areas, using a dark grey acrylic undercoat before adding Darkstar metallic acrylics. I began with a dark steel colour, blending in some bright silver and then once that had dried added highlights from a Molotow silver ink pen.
Just a note on the Molotow pens. They’re available online form Cass Art, cost about £6 each and are similar to a pump style market with a hardened nib. They are available in 1mm, 2mm and 4mm nib tip sizes and a refill is also available, but that will cost around £18.
Why do I mention this, well the Molotow silver is like a liquid Chrome, the grind of the metallic pigment is so fine that it does create a mirror-like effect, perfect for the brightest of highlights on metallic sections of models.
The trousers were pretty simple, starting with an off white colour acrylic, I painted on three or four coats to build up a solid ground, then began adding very thin coats – almost as thin as a wash mix, of lighter and lighter colours by adding water and some pure white to the original off white mix. By gradually moving to just the areas that would have the highlights, I formed mid-tones along the way, building the lighter colours up by occasionally adding a little more pure white and a bit more water to retain the thin consistency of the paint. This is a time consuming process, but I prefer using the acrylics for very pale colours as opposed to oils, which I fins get too much of a build up of paint on the surface of the model.
Once the acrylics had dried overnight, I could add the stripes, painting – in the case of the red – a thin line of Carmine oils on either side of where the red line needed to be. I then added in between those lines the Crimson and finally a little bit of orange to just brighten the red up a little. The colours were blended together using a small soft brush, and the beauty of oils being that any stray bits of paint that went outside of the lines could be removed with a clean brush dampened with a little White Spirit.
Photo #16 shows the five pieces of the groundwork base that comes with the model all fixed together. I did harbour thoughts of extending the groundwork so I could add a couple of half Gabions from the Bash Models range, but somehow they didn’t look right when placed near the wall section, so I decided to shelve that plan and just use the kit parts as they were.


In photo #17 I’ve begun the process of painting the groundwork by priming the wall etc with Halfords Grey Primer. Once this was dry I added a couple of coats of a sand coloured acrylic, then started in with the oils.
I added some White Spirit to some Vandyke Brown so that the paint flowed a little bit better, this colour was used to cover the whole wall and arch section, and left to dry off a little for half an hour.
It doesn’t dry much, but a bit of the White Spirit evaporates off, and it had done it’s job in getting the paint into all the recesses of detail.
I used an old T-shirt to dab and wipe away a lot of the Vandyke Brown from the raised detail, then used a large flat brush to add Mars Yellow to the stonework, using what I can only describe as a drybrushing action, wiping the brush on the old T-shirt to remove any paint it had picked up off the surface of the model. I repeated this to build up the yellow colour, then swapped to Buff Titanium, using the same method. Finally some Titanium White was stippled onto the upper surfaces that would catch the light the most. This was then dried in the drying cabinet for a couple of days as the paint would be rather thick and needed the extra day to dry fully.
Photo #18 shows a close up of the upper wall and arch. I’ve added several thin washes of Vandyke Brown to the stonework, and also painted in a shadow under the arch itself. Once the washes had dried, I glued on some little bunches of greenery, using Acrylic Matt Medium to fasten them in place. The Matt Medium doesn’t dry as fast as superglue, but it does dry off in about fifteen minutes, it’s long enough to be able to adjust the positioning of the greenery, plus the Matt Medium dries clear and without any white residue. Also in this shot is the torch, now painted up with rust colours and some Mars Black added to give the appearance of soot both on the upper areas of the torch, and on the wall behind it.
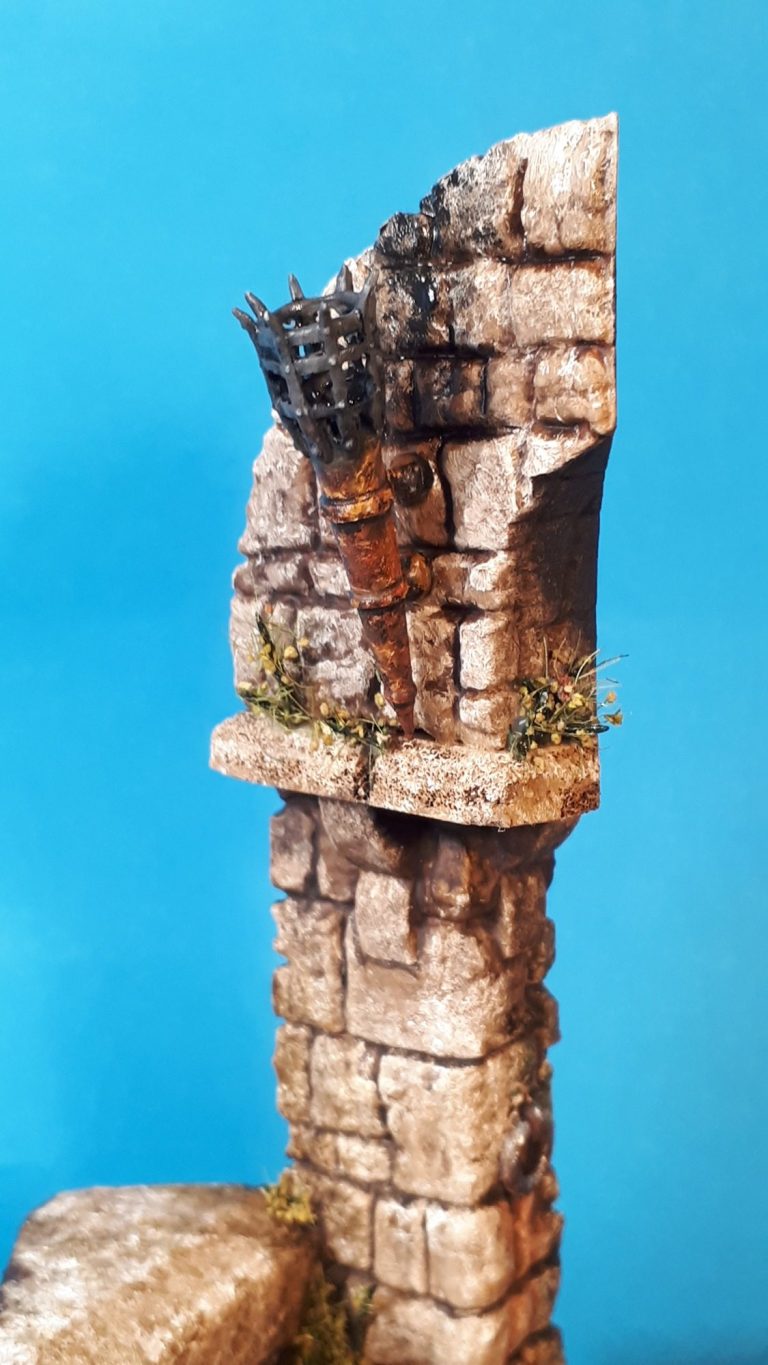
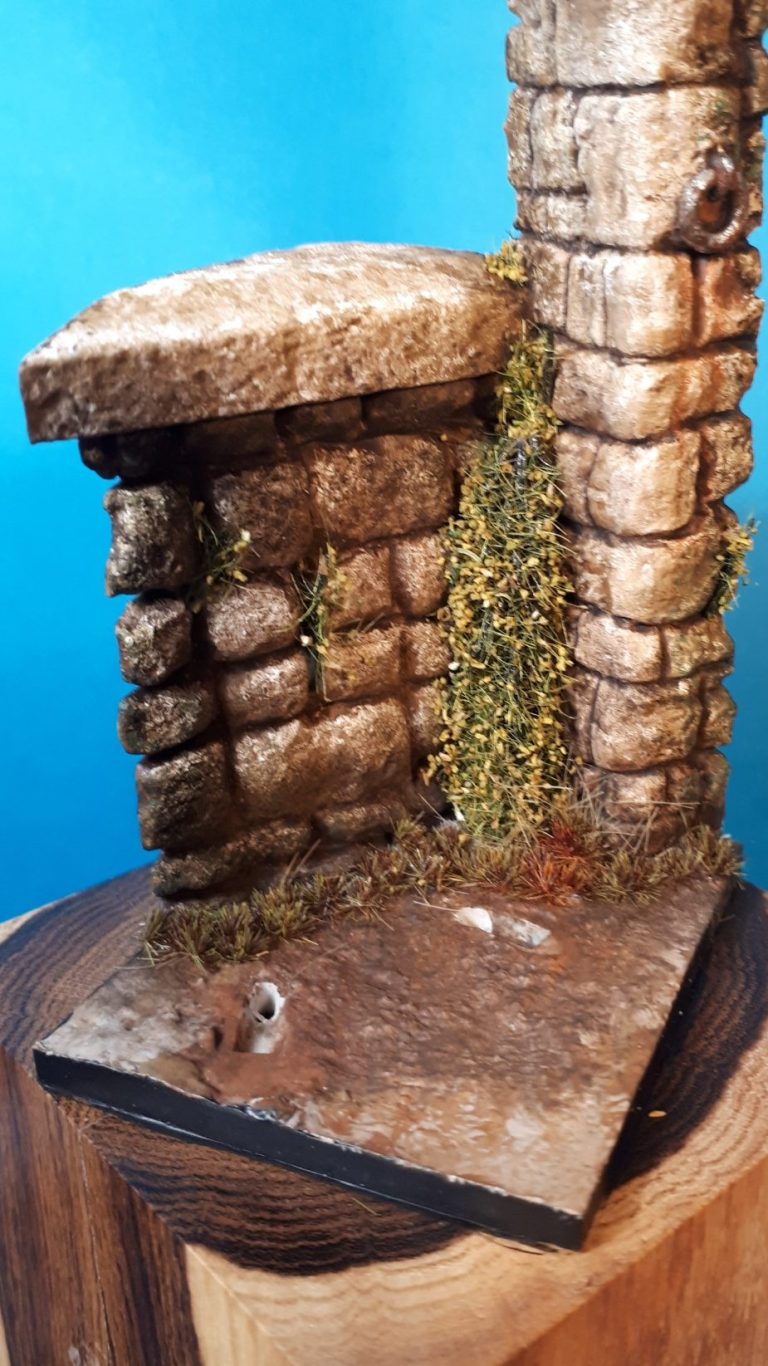
Photo #19 shows the lower part of the wall, again with some greenery and static grass added. Although I have loose Static Grass, which is great for larger areas, I do prefer the ready made little tufts of grass that have become available over the last five or six years. Again I use Acrylic Matt Medium to fasten it in place, even though it does have self-adhesive stuff on the underside.
I’ve also painted the area in front of the wall, I used acrylics for this, getting a sand colour established as an undercoat, and once dry wet blending various earth colours on the model to give a rough texture to the section. I added some Burnt Umber oils directly under where the figure stands matching the direction of light that the shadow under the arch depicts.
Photo #20 shows the archway and wall prior to the figure being fastened in place. All the greenery has been glued down, with small pieces added here and there, Rusty drips have been added to the area directly under the torch, and some staining on the stones beneath the iron ring set in the wall. I drilled two holes through the base and into the wood plinth ( bought from Oakwood Studios ) where the figure stands. These holes will accept the wires that have been fastened into the legs of the figure through the soles of his feet, and should help hold the whole thing together.


Back to the figure now, and the upper body and cloak. Just a reminder, photo #21 shows where I’d got up to, with the face painted and little else done apart from a coat of primer in the form of acrylic flesh tone and a lot of Isopropyl Alcohol.
Oh yes, here I go again, I didn’t take any other pictures before I glued the upper part of the figure onto the lower part. However all I’ve done is paint the leather shoulder / chest protector – Burnt Umber shadows, Mars Brown mid-tones, some Light Red for highlights, and a little wear and tear with some Buff Titanium. The hair uses exactly the same colours with some Mars Yellow added in to the scheme between the Light Red and the Buff Titanium.

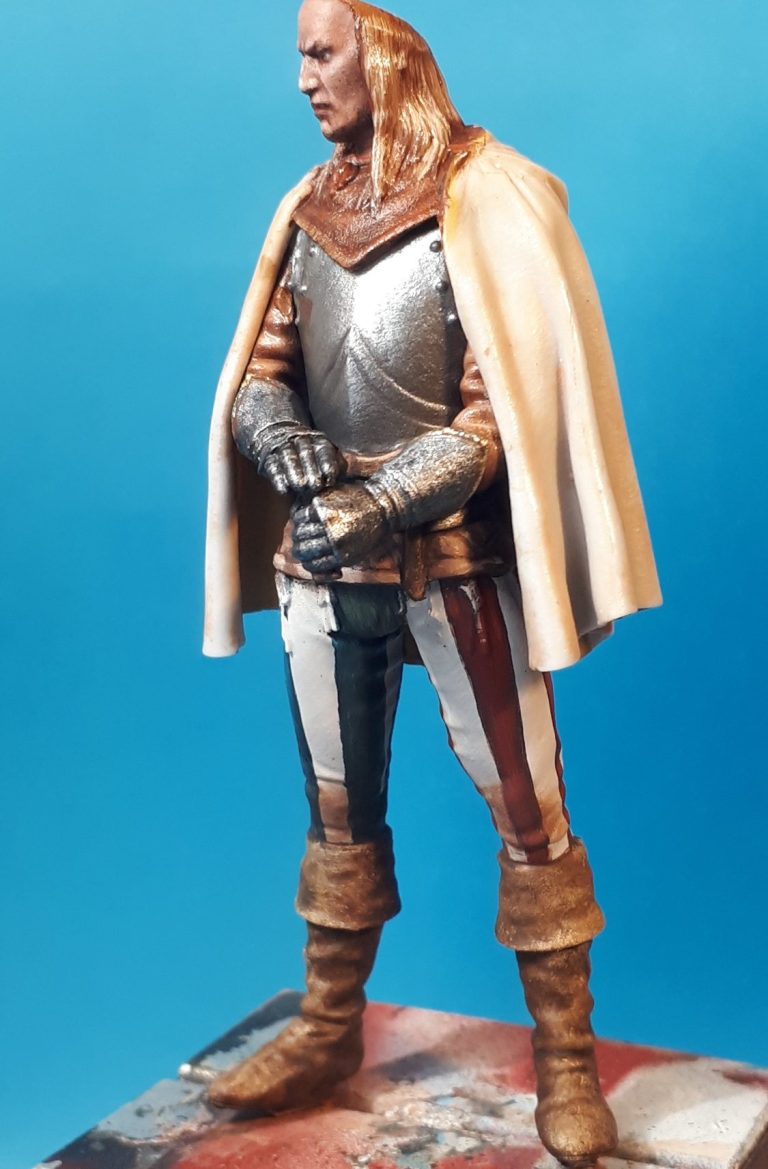
Photos #22 and #23 shows the main casing having been fastened to the head / cloak. The cloak had been undercoated with a cream colour in readiness for it’s painting with oils.
These oils have been added in photo #24, the outside of the cloak being painted to resemble undyed wool, beginning with a mix of Mars Brown and Mars Yellow, adding this just to the deeper folds, then blending in some Buff Titanium to lighten the mix a lot, and adding this to the main parts of the cloak, blending it in to the darker colour that’s in the deeper creases. I added small dots and lines of Titanium White to the areas that needed highlights, blending these in to the Buff Titanium with a small soft brush.
Although it can’t be seen very well in this shot, I painted the lining of the cloak and the lining of the hood in green beginning with Olive Green for the shadows, and blending Chrome Green into that build up mid-tones. To give a worn appearance I added Buff Titanium to the areas that I wanted as highlights, again blending this in with a small soft brush.


I’d painted the sword and scabbard separately, the scabbard in similar colours to the leather chest / shoulder guards, and the sword with a dark steel metallic colour, adding some mid-tones of a brighter silver and topping off with the Molotow pen.
The Salet helmet was the last thing to paint and I remember years ago, when I was researching the shield design for the Hussite Hand-gunner, that I’d seen a partially painted helmet similar to the one on this kit.
It took a little finding, but the picture is shown in photo #25 and is taken from the book Arms and Armour of the Medieval Knight by David Edge and John Miles Paddock ( ISBN 0-86124-414-1 ) and is shown at the bottom of page 99. I’ll add here that this is an excellent book with so many pictures of surviving pieces of armour and weaponry, it’s well worth searching out and adding to your reference library.
SO, having found the picture, I had to imagine an item that hadn’t been in existence for several hundred years, but was relatively new, perhaps only painted recently…… and try and reproduce that in miniature.
I wasn’t trying to produce an exact copy, just something similar in look, as it’s a relatively small part of the model.
The helmet was painted with the same metallic colours as the sword blade, then the white squares added with acrylic paint, and finally the red lines, stars, crosses etc. all with acrylic paints and using a very fine brush.
Once that had all dried thoroughly I added an oil wash with some Mars Black.
The final shots show the helmet fastened in place, hiding some of the hair and some of the face, but there’s more on show than I thought there would be.


Final thoughts.
Sometimes a picture of a figure just “speaks” to you, in my case very often it says “Buy me now !” However this one not only said that, but also urged me to get the components out, assembled and to get some paint on it.
Buying models, well, I’ve decided that I’m an unbuilt kit collector, more than a painter now, but it does give me a great choice of “what to paint next”
It’s very nice though when a model like this comes along and not only enthuses me enough to start it, but also to get it finished in a relatively short time ( I think it’s taken a month and a half, in amongst working on other projects too ).
Stuart has a very large range of kits, with a broad spread of subjects, and although it’s a long time since I’ve painted one of his Napoleonic subjects, I did thoroughly enjoy the Dacian half figure and this German Mercenary.
I can recommend his kits, based on the half dozen or eight that I have made and painted in the past, his website is Stormtroopers.co.uk or you can see him at a few of the UK shows here and there.


We need your consent to load the translations
We use a third-party service to translate the website content that may collect data about your activity. Please review the details in the privacy policy and accept the service to view the translations.