
Swamp Dragon, an attempt at scratch-building
Sculpted in 2022
The enthusiasm I felt having made the heavy conversions of parts copied from the Creative Beasts Ice Dragon – three part of the kit copied for my own use and never with the idea of selling or giving them to anyone else - pushed me to wonder if I could make something ( perhaps a little more complex ) from scratch.
I know the mechanics behind sculpting a figure from nothing more than an armature, although I’ve never had the time or the inclination to try.
So beginning by sketching out a couple of ideas, and I had myself an idea of what wanted to do.
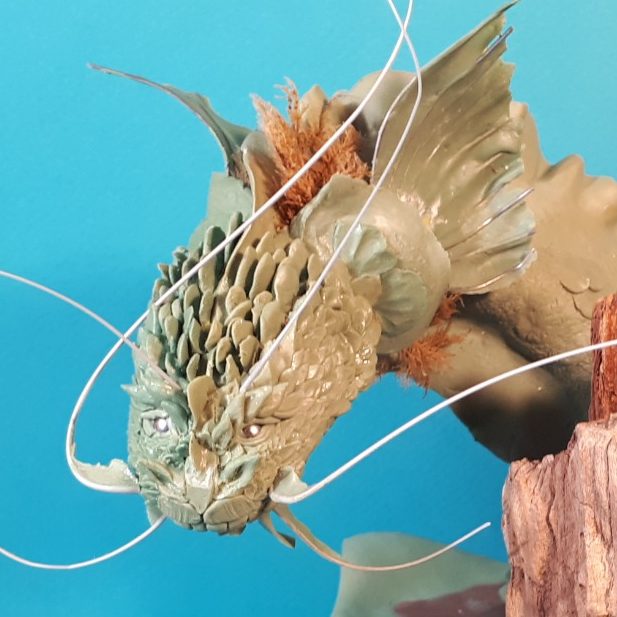
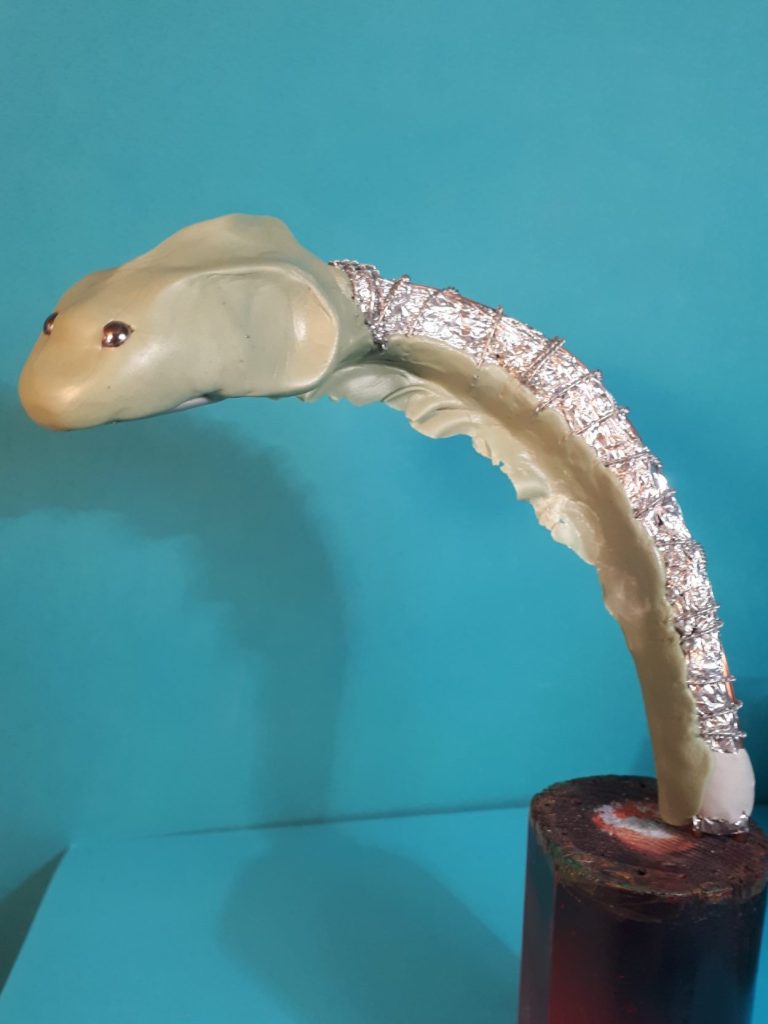
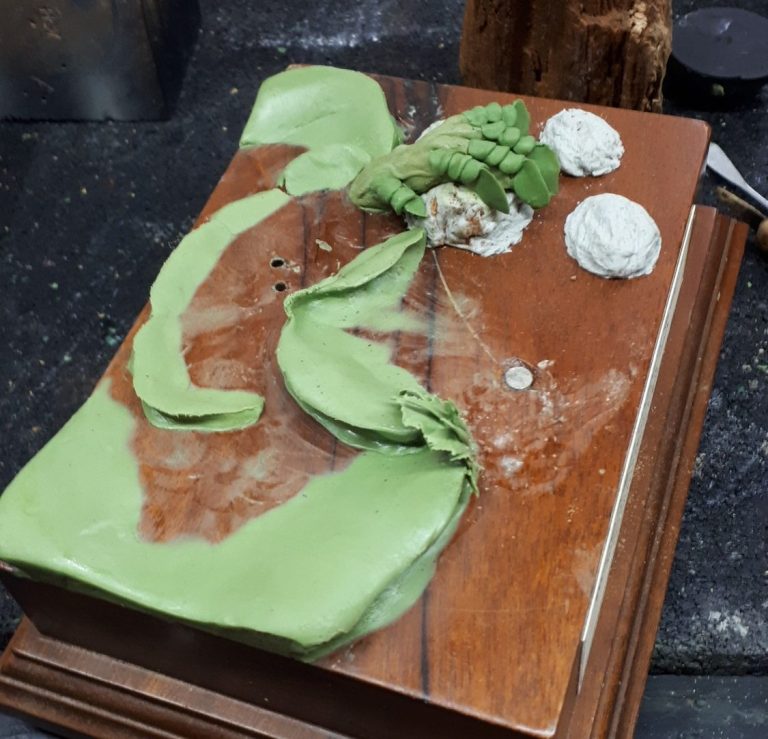
Photo #1 shows the initial armature with some putty added.
The armature itself is a coupe of thick wire sections from a coat hanger that have been twisted together, then a scrunched up piece of tinfoil added to that with some superglue to fasten it in place, and a further thinner aluminium wire twisted around the outside to allow the putty to grab onto the armature.
The head of the dragon has been formed over the front of the wire / foil construct, and eyes added in the form of a couple of ball bearings pressed into the putty whilst it was still soft.
The surface of the putty is smoothed out by adding water to the surface and shaping it with my fingers.
I’ve added a strip of putty to the front of the neck too, and again water is used to smooth the surface of the putty, and using a “pinching” action with thumb and forefinger, I formed up a thin web-like protrusion running down the centreline of the neck.
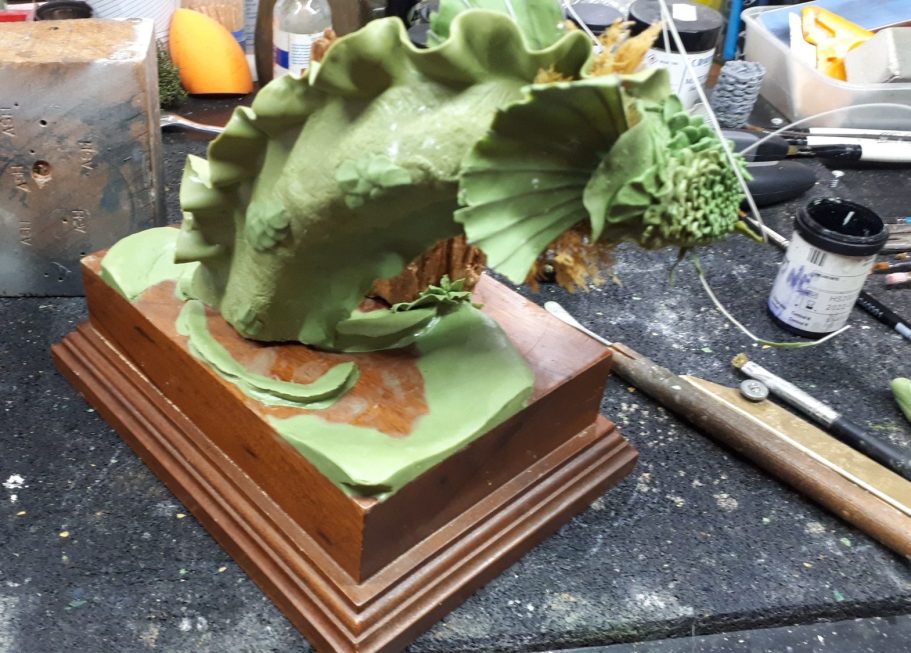
In photo #2 a lot more putty has been added.
It might be worth mentioning at this point that the putty used here is a mix of Magic Sculpt and Duro. Whilst it doesn’t appear very green in these shots, the Duro does affect the colouration of the grey Magic Sculpt to a certain degree, and so if you see this at shows, then it does appear a lot more green that in these pictures.
Whilst the main area of the neck was initially smoothed to match the head and front of the neck, I then used a small section of Loofa sponge to add a texture pattern to the skin.
The rippled flare along the back of the neck was formed the same way that the one on the front of the neck was done, by using plenty of water and then pinching the soft putty between my forefinger and thumb, to make the wavy looking section.
Also in this shot, I’ve added putty around the eyes, and given the dragon a lower jaw.
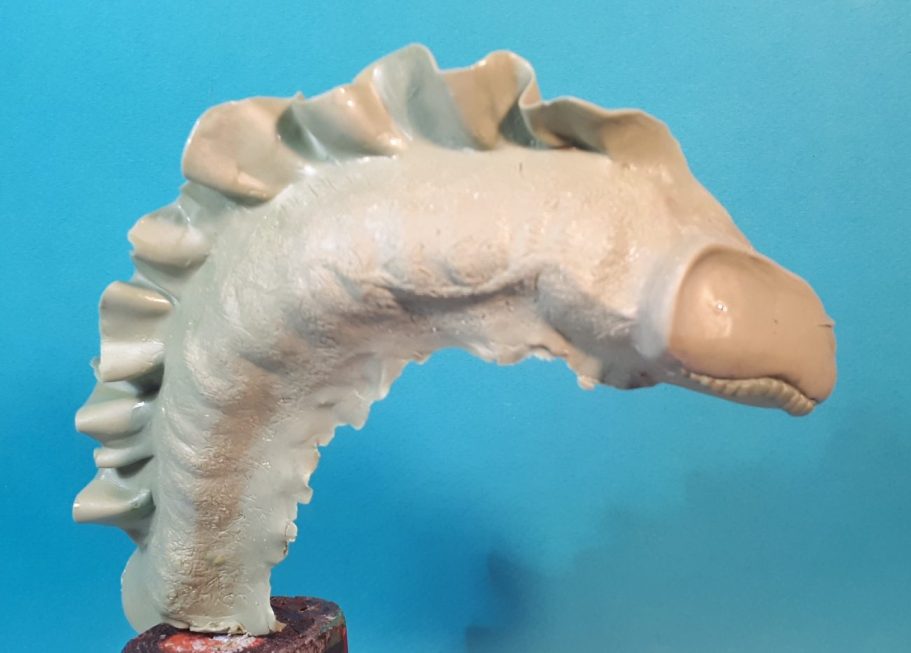
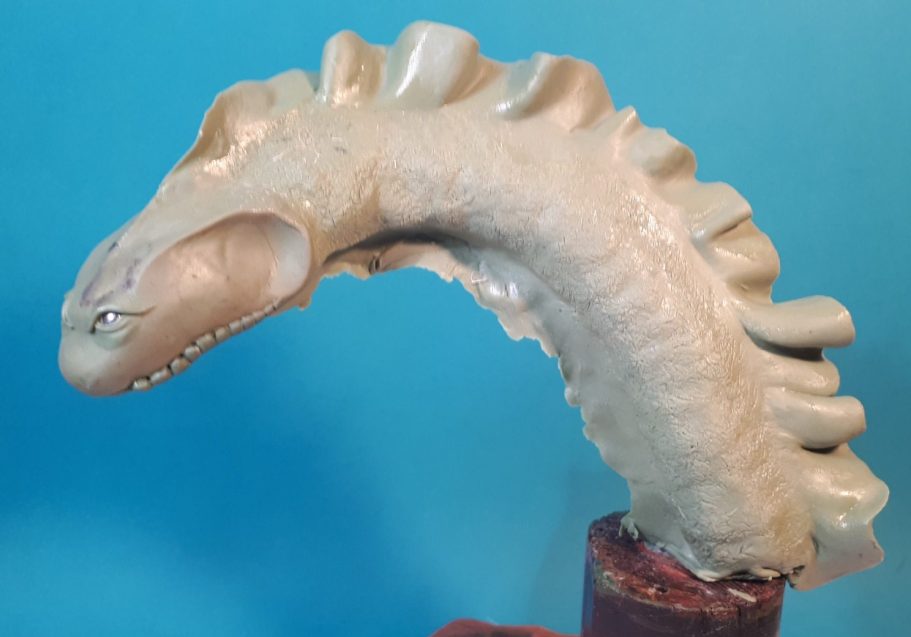
Photo #3 shows the dragon from the other side, the skin texture continuing on this side and the lower jaw and the underside of the neck being perhaps a little easier to see from this angle.
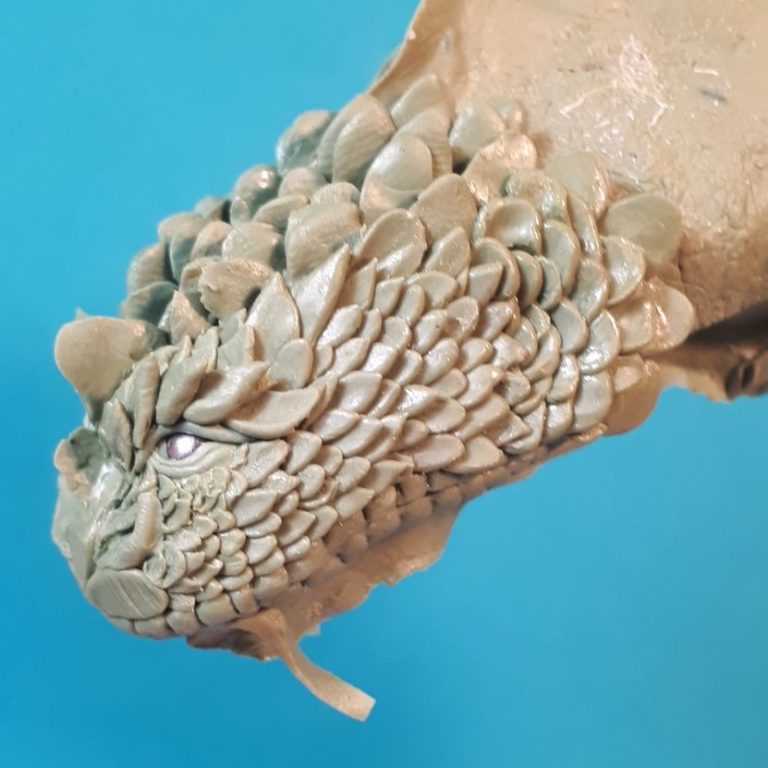
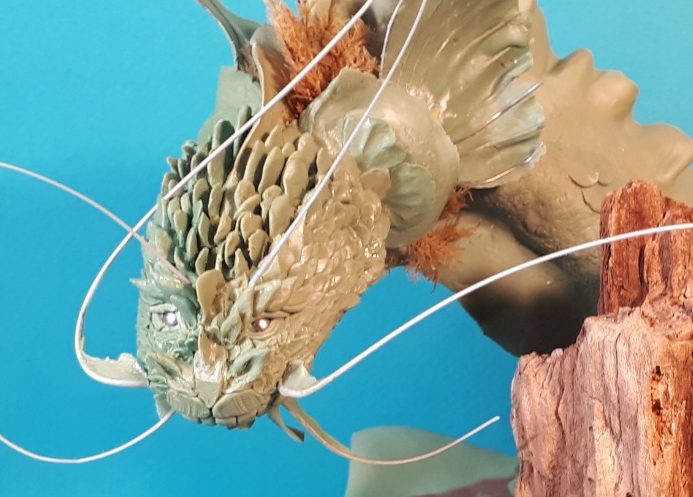
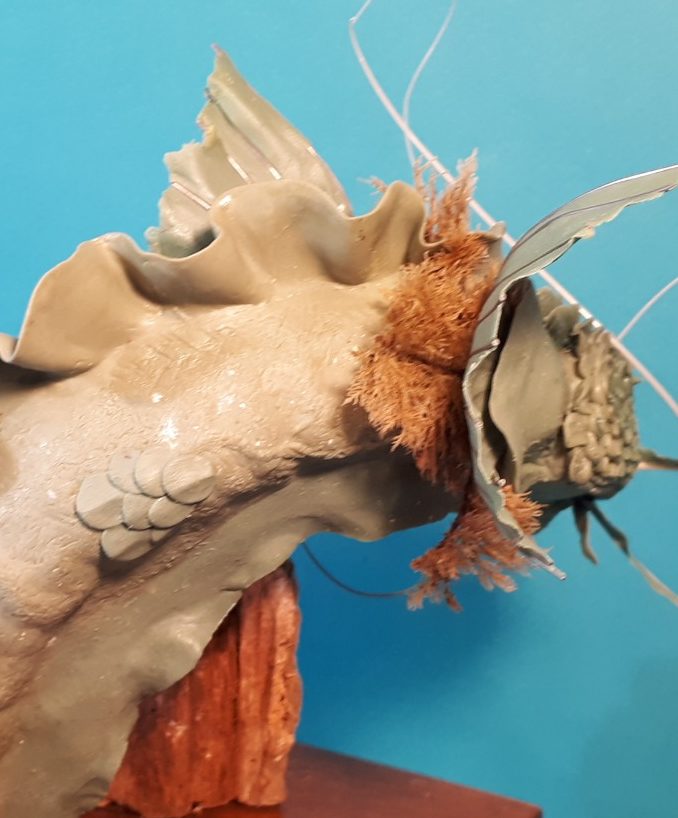
In photo #4 I’ve added a lot of small scales to the head and also some to selective areas of the sides of the neck. The scales develop into small spikes and horns on the top of the head, and the eyes are now appearing to be recessed quite a way into the sides of the head.
The head can be seen in more detail with the close-up shots in photos #5 and #6.
I now began to realise how difficult it can be to match up one side of the head to the other, and began regretting adding so much detail to the left hand side – which I did first – because I had to replicate the size, shape and spacing of them on the right-hand side.
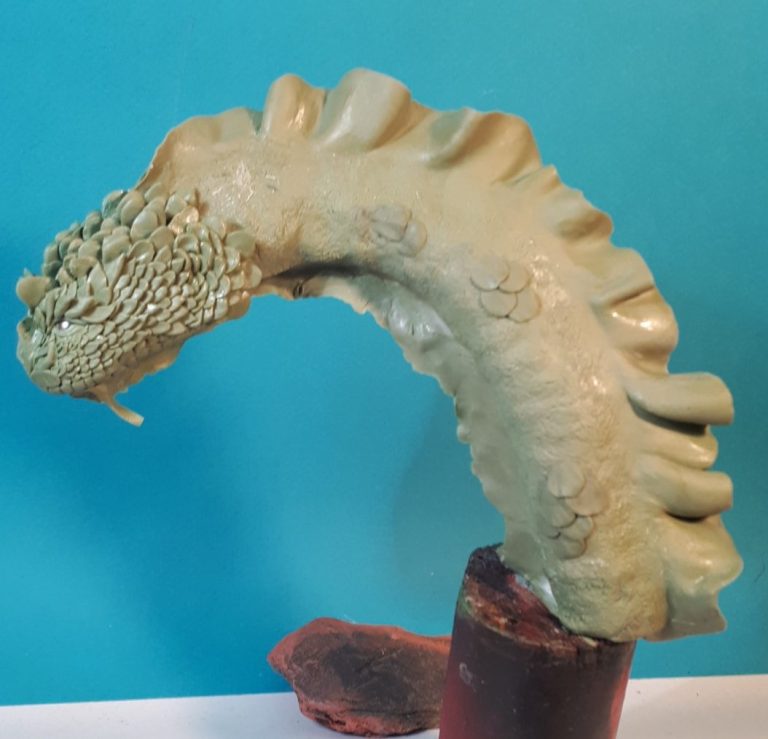
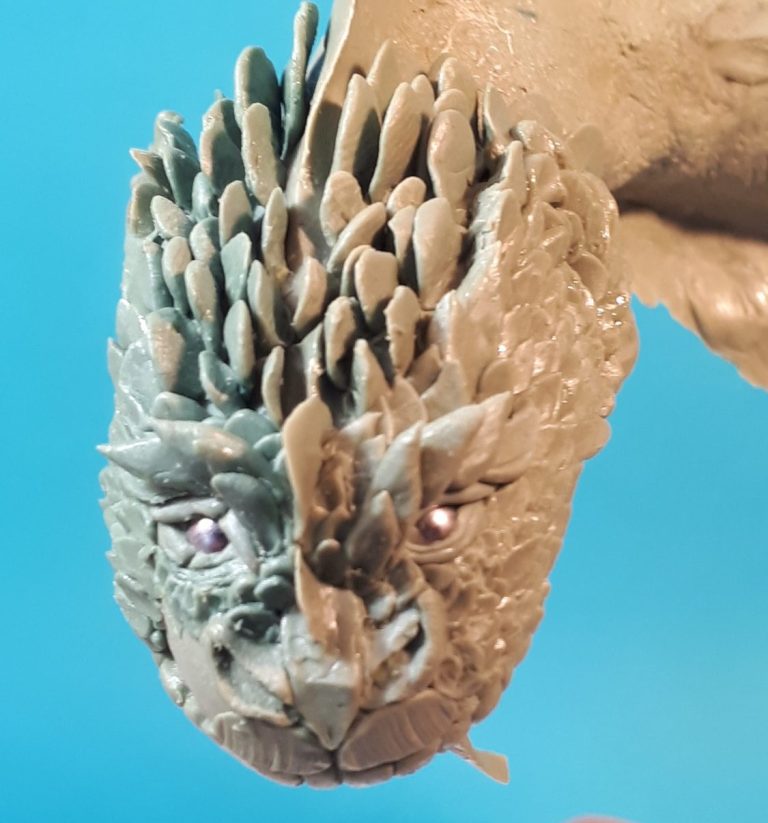

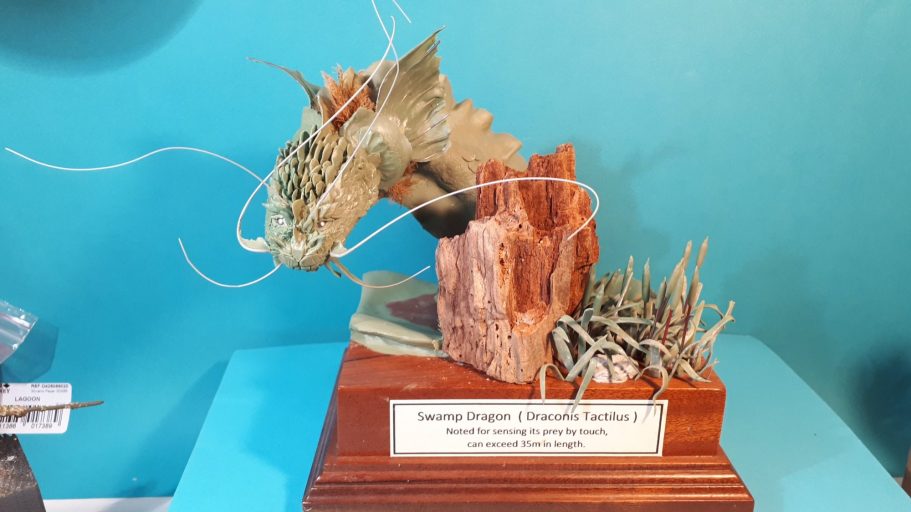
Photo #7 shows an overall view of the almost finished dragon.
The whiskers re stretched plastic sprue with fillets of putty at their bases to form webs. Enlarged ear-like fans have been added to the sides of the head – vision being poor in a swamp, so hearing and vibration detection is probably more useful in catching prey – well, that was my thought at least.
I’ve added a piece of wood to the base as well, this allows the feeling of movement to the piece, the dragon coming around the wood in search of something it’s hunting.
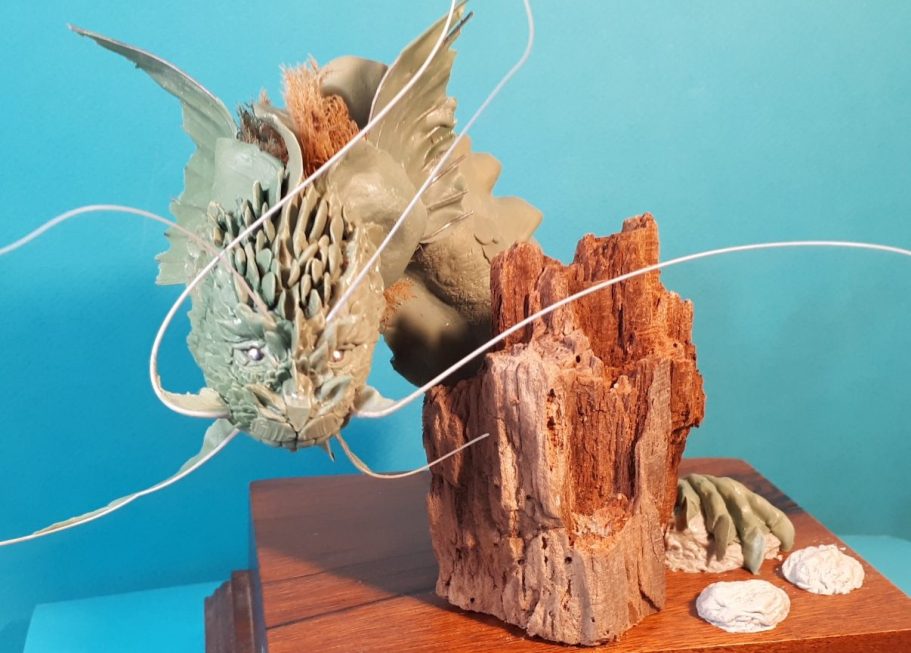
The wood itself is a piece of rotted beam that I’ve had for some years, just waiting for the right idea to use it on. It’s a bit crumbly and needed soaking with varnish to stop further deterioration, and make sure any woodworm left in there is immobilised.
As this sculpture was being made with competitions in mind – particularly SMC at Veldhoven, where a class is offered to enter “greens”, models which are sculpted but left unpainted ( or in the case of commercial sculpts, the entry of a primed casting is allowed, simply because some moulding processes can destroy the original ).
Sorry, lost track there – as this was something I wanted to enter in competition, I made the wood part removable, it being held in place with magnets. My thinking being that a judge could then remove it to see the sculpture fully. A notice in several languages was made ( good old Google translate ) to advise judges of this was placed in front of the piece when put in competition.
Back to the sculpting though.
Not particularly visible in this shot is the left hand / paw that is to the right of the rotted wood, along with a couple of rocks that will appear to be sticking out of the water.
The paw and the rocks are a bit more visible in photo #8 along with some preserved moss used as primitive gills ( like those of an Axolotl ).
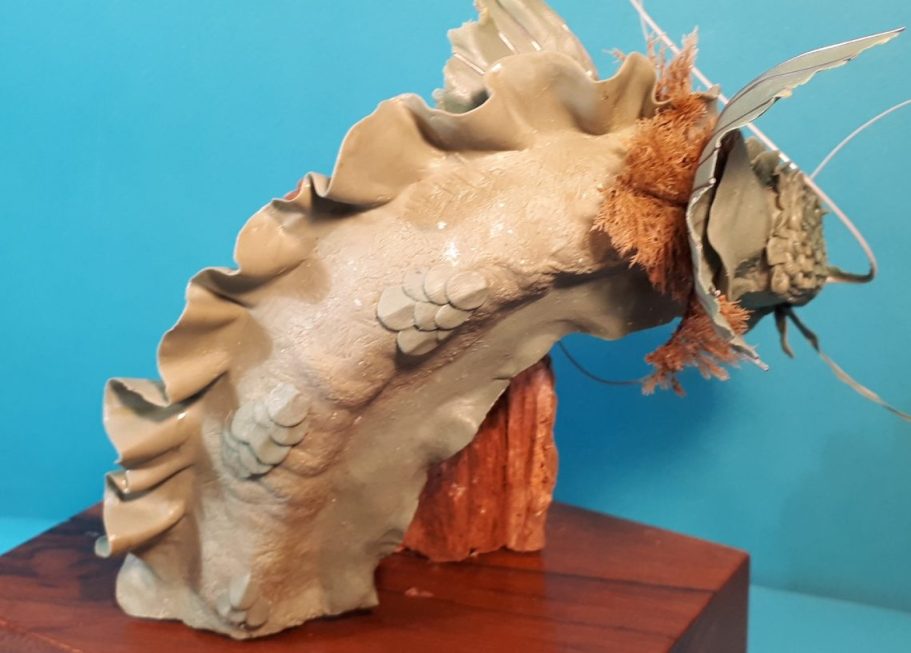
Photo #9 shows the back of the sculpture at this stage, a bit boring, although the additional scales can be seen that have been added to the sides of the neck.
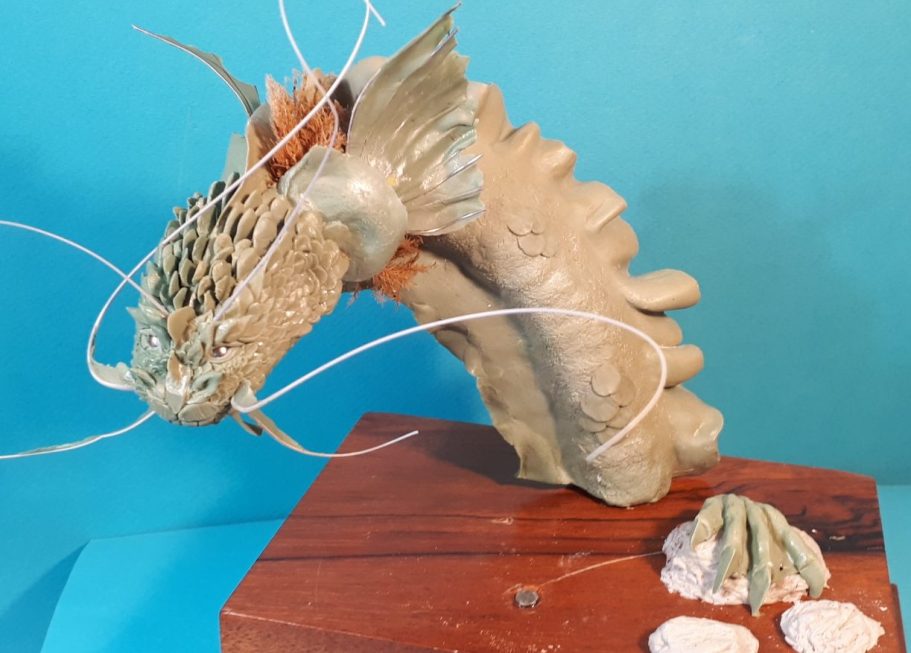
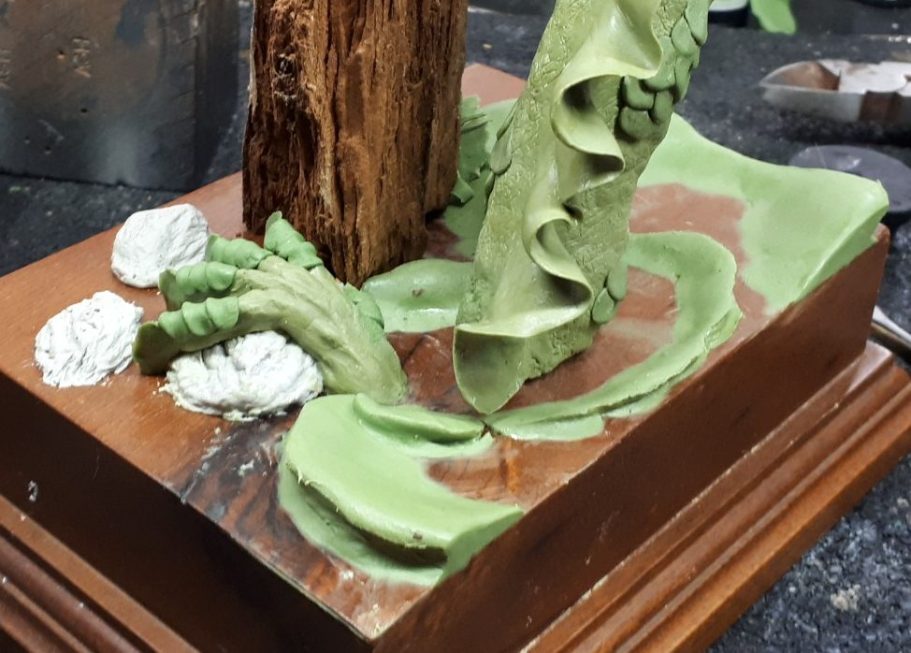
Photo #10 shows the sculpture with the rotted wood removed, the small magnet can be seen in the base, and the gaps between the base of the neck and the wood plinth need filling.
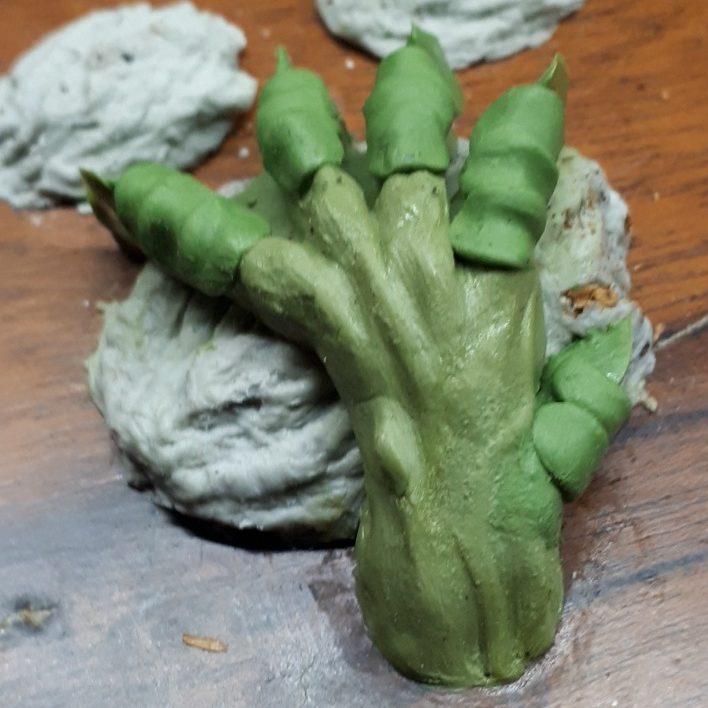
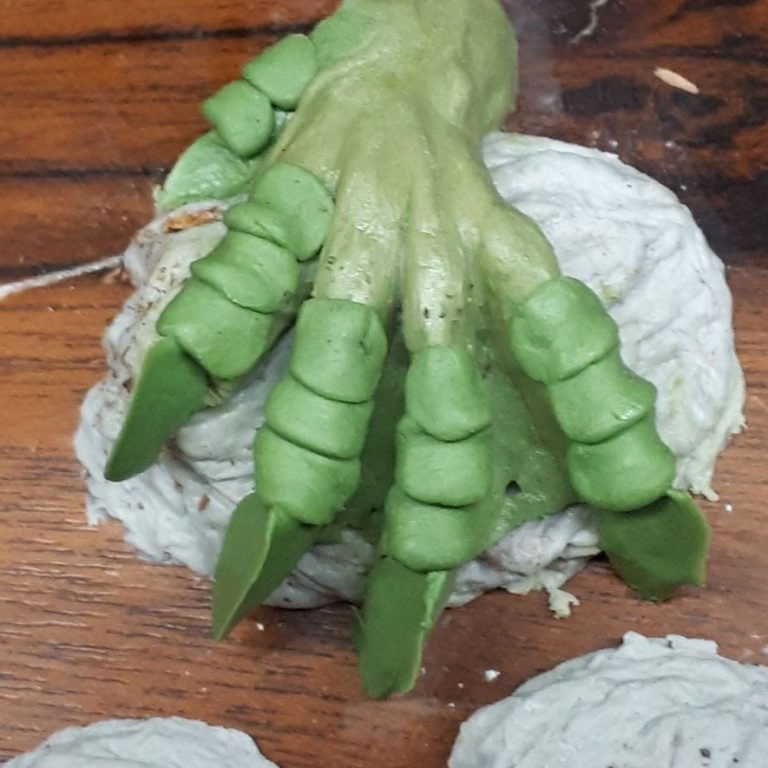
Photos #11 and #12 show close-ups of the paw.
Now the bit that gave me a bit of a headache – the waves caused by the dragon’s movement.
I thought that it’s be good to show that the swamp water is being disturbed by the dragon moving to look around the rotted wood, although the waves caused would bounce off the wood and also the dragon’s neck.
Photo #13 shows the waves made out of more putty, and without the rotted wood and the dragon itself in place, they look rather random and maybe a bit odd.
Photos #14 and #15, with the dragon in place, the waves become a little more logical in their placement, and once the rotted wood is back in position, they look a lot better.
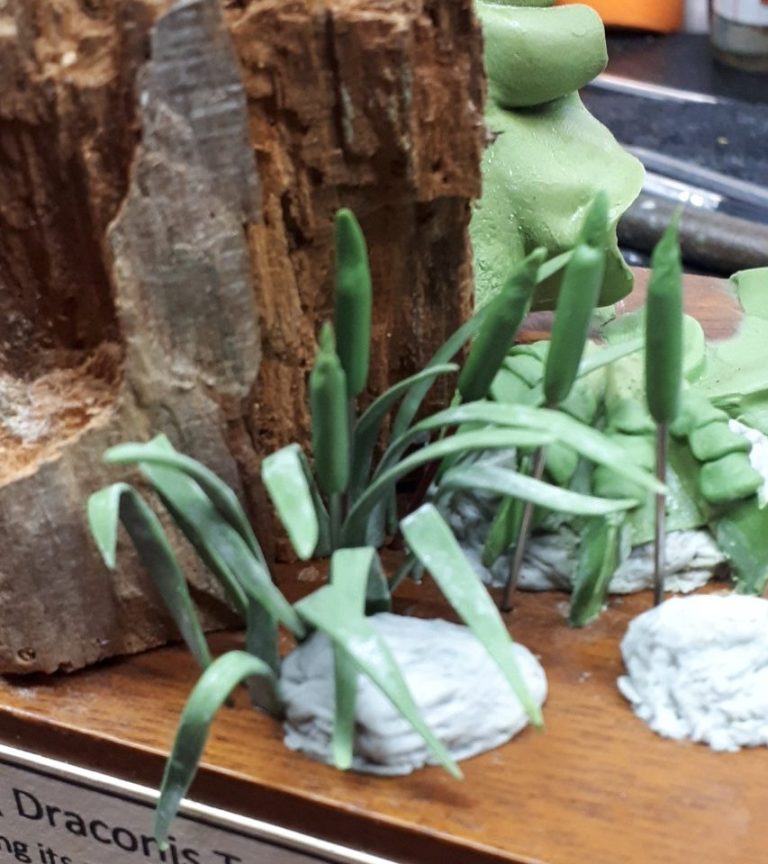
What swamp would be complete without some vegetation, and in this case some bulrushes to give the dragon some scale.
Photo #16 shows the beginning of making and adding these, the long leaves being flattened spikes of putty, bent into shape and glued in place once they had cured. The bulrush seed heads on their long stalks were made from short sections of copper wire with a bead of putty around the top and shaped into the seed heads. Once dry these were fastened into holed made with a fine drill.
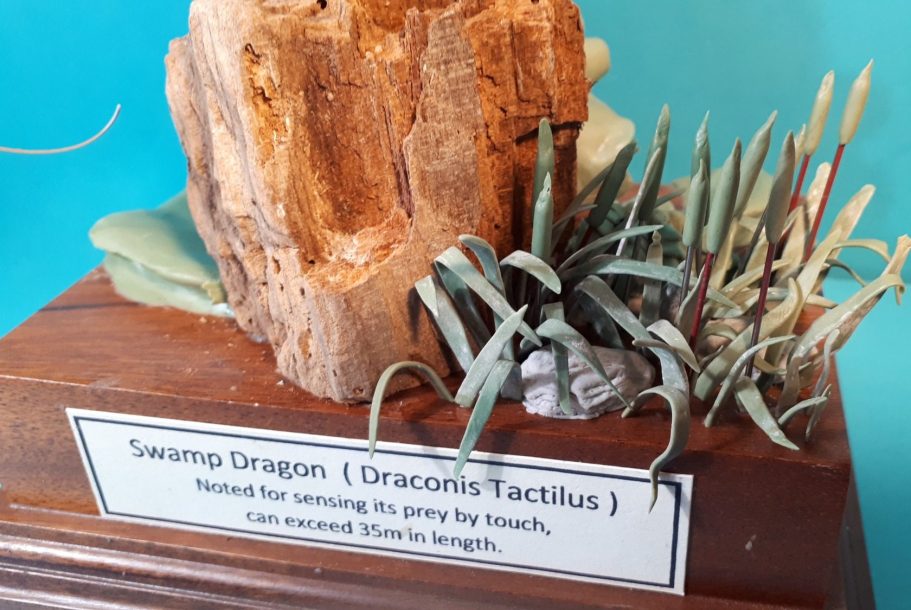
And of course a nameplate -something I don’t often mention.
Photo #17 shows a simple printed nameplate, with the common name and the Latin name of the dragon – Swamp Dragon ( Draconis Tactilus ) - a note as to why the Latin name was given to the species along with potential size that may be encountered in the wild.
The same shot also shows the vast amount of bulrushes that were added – a tedious and time consuming task.
The final shot shows the finished piece, which I am very happy to say gained a Silver Medal in the Masters “Greens” class at the World Expo 2022 that was sponsored by the group of people that organise, run and host the SMC show every October in Veldhoven - Margot and Robert Crombeecke and their excellent team.
Final thoughts.
OK, sculpting isn’t something I do very often, and although I really like pushing putty around, there are so many excellent kits out there…… a lot of which are in my loft, I really have to think carefully about what I work on.
Simply put, I’ve got so many ideas buzzing around for kits, that producing an original piece, even if it were to be made into a mould and kits cast off it, really doesn’t get much chance of realisation.
I know I should sculpt more, and maybe in the near future I will.
For now, I’m content with this as an original piece, and I’m happy to leave it unpainted to show off the sculpting, rather than covering the putty up.
I’ve sketched out several more dragon species, so maybe I’ll return to make them at some point, and think far enough ahead to enable them to be made into kits….. Maybe.
We need your consent to load the translations
We use a third-party service to translate the website content that may collect data about your activity. Please review the details in the privacy policy and accept the service to view the translations.