Spanish Conquistador conversion
Using VLS's 1.9th scale German Mercenary Bust
Article in Military Modelling magazine in 2002
It never ceases to amaze me, looking around at shows, or gazing enviously at show reports in magazines, how many different ideas people come up with for conversions.
Some changes are simple, so subtle that unless you've made the same kit, you might not even notice the changes. Other's of course change the model so radically that the base kit used may be almost impossible to recognise.
I've been saving this kit from warriors for a "rainy day", and to be honest, it's taken about four years for the right amount of atmospheric damp to materialise.
It's not a model I've seen a lot of, up and down at shows, in fact I think I've only seen two others, both in show reports from across the pond, and both had been converted to quite a degree.
I also wanted to convert mine, but not too much, thinking initially to keep him in the Thirty Years War that the sculptor had intended.
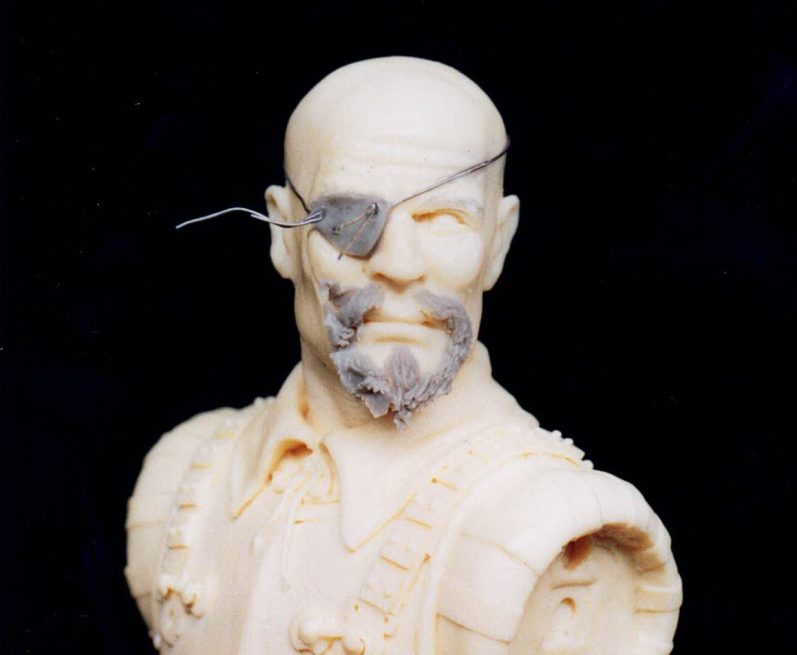
Of course good intentions are not always going to work, and after cleaning him up, I was wondering just what I was going to do to make him that little bit different. I'd already thought of adding an eye patch, and possibly a full beard. Losing the arms at the elbow say, oh the things I could do.
In the end of course, playing around with the putty, and opting for the less is more theory ( does that mean I really am lazy ? ), I decided to add just a goatee beard, and the eye patch, leave the arms as they were, although I wasn't to sure about the sword hilt, and then add paint to that.
All in all fairly simple really.
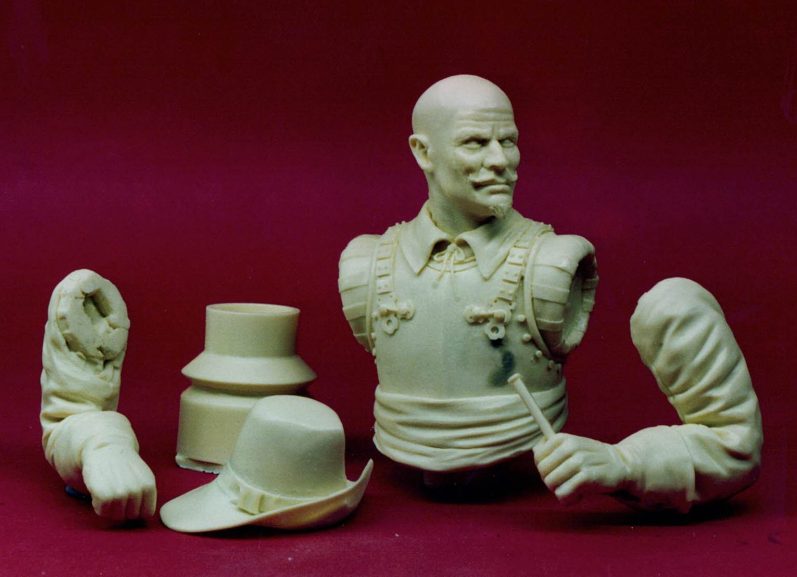
The base kit of course does allow for quite a few options, simply because there are so many parts.
Both arms are separate, as too is the hat, which unusually actually comes as a proper hat, fitting over a bald head. options then for leaving it off or sculpting in a helmet, or for that matter, adding hair.
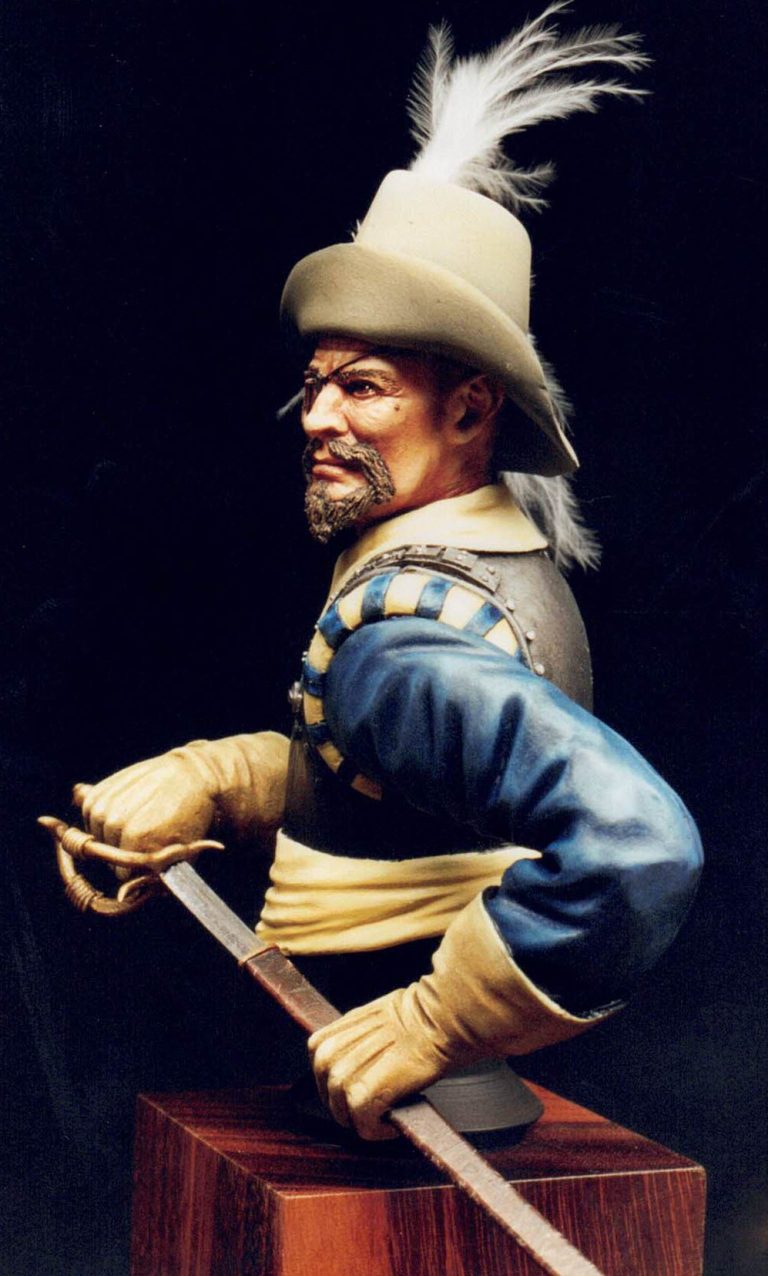
The sword comes as several components. The blade, fist guard and pommel are all separated from the right gloved hand, as too is the lower part of the scabbard from the left hand.
The model is several years old of course, and both casting and sculpting has evolved since then.
At the time of it's release though, this must have been a very good kit indeed.
Even now it's not at all bad, although the mould gates are rather heavy, and the sculpting of the arms is perhaps a little on the naïve side as some of the folds in the cloth look to be a little basic.
The sleeves can be resculpted of course, but I chose simply to round off some of the harsher lines to soften the look of the cloth.
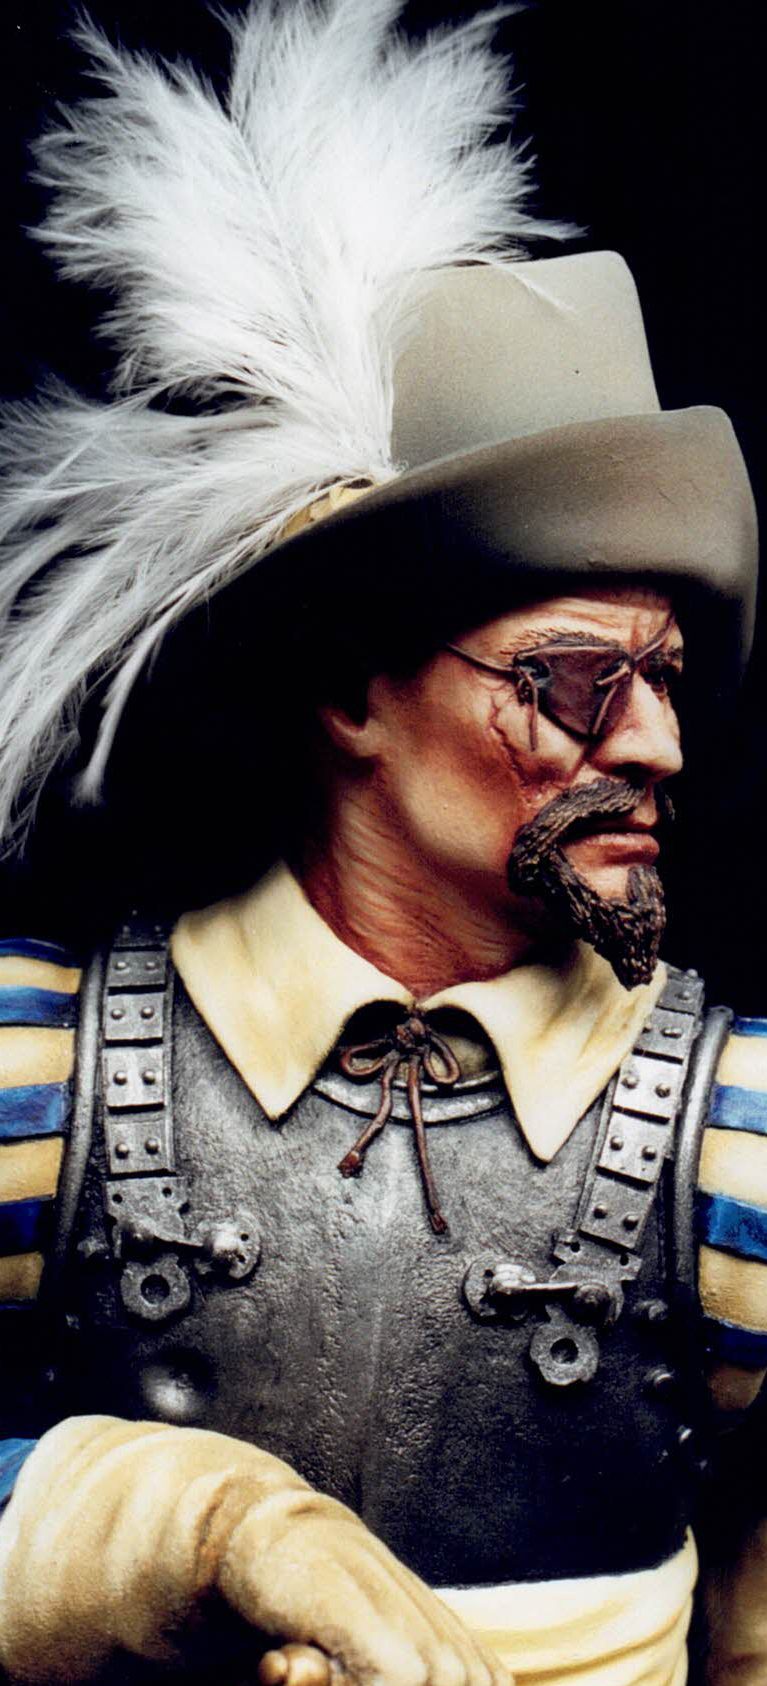
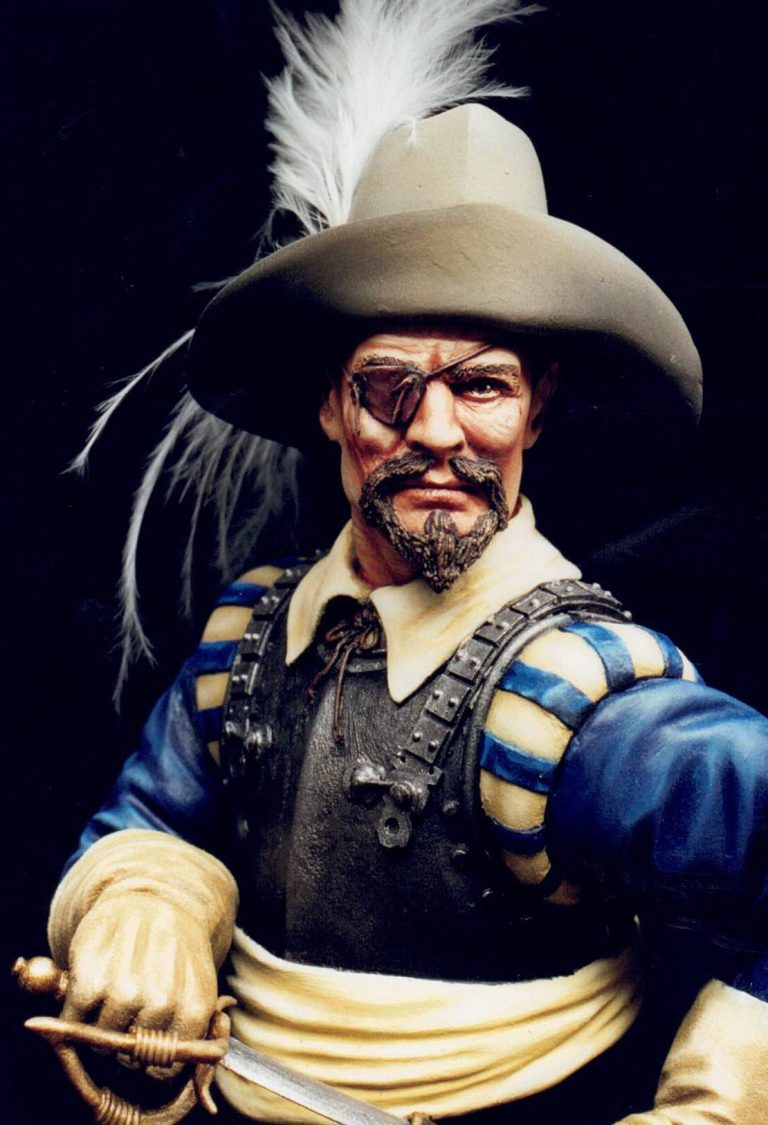
The eye patch was a ample addition. This being just a blob of Milliput pressed into place and teased into shape with the end of a cocktail stick, Before the putty hardened I added a length of lead wire for the cord holding it in place, pushing the ends of the wire into the milliput, and adding a couple of loose ends - from some offcuts of the wire, to show how it's tied in place.
I glued the wire to the sides and back of the head with small spots of superglue, just so that it stayed put rather than slipping further down the head once the hat was in place.
Magic Sculpt was used for the beard, pressing this into place on the desired areas, then sculpting the hair detail in with a sharp scalpel blade.
I've found that Magic sculpt is better for such things as hair and the like, it's greasier and stickier nature performing better usually that the Milliput. However, even though I use a lot less milliput these days, I don't think that the Magic Sculpt will completely replace it.
Once the putty had hardened on the beard, I trimmed it a little to neaten it up, gave all the castings a good wash in soapy water, and then primed the model to see how it all looked.
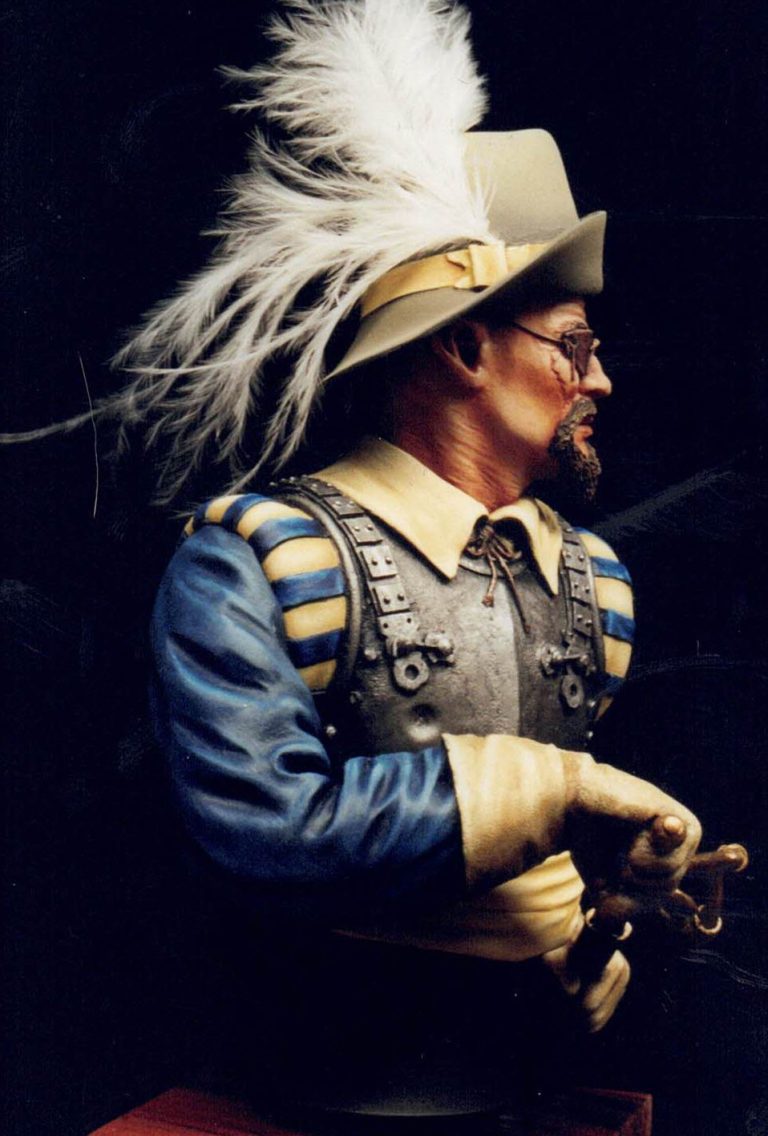
Yes, definitely more Spanish now with that beard.
I decided to glue the sword blade and the pommel to the hand, but left the arms separate from the body, as too was the fist guard, as this latter part would slide easily over the blade once everything was painted.
As usual I began by painting the face, and this model depicts quite a rugged character. I enjoyed emphasizing the wrinkles, doing this by painting with oils in three tones as usual - shadow, mid tone and a highlight, then allowing these to dry.
Then deeper shadows can be applied with a very fine brush to pick out the deeper wrinkles using thinned Burnt Umber oils. Then almost pure white oil paint, again thinned with white spirit, was used to highlight these same areas, along with the point of the nose, chin and cheekbones.
The single eye was painted in too at this point, adding a dark brown to build up the iris, and a lighter brown just inside that. Yellow ochre was used to highlight, and a pure black pupil added over that. Finally a tiny spot of white was added for the catchlight.
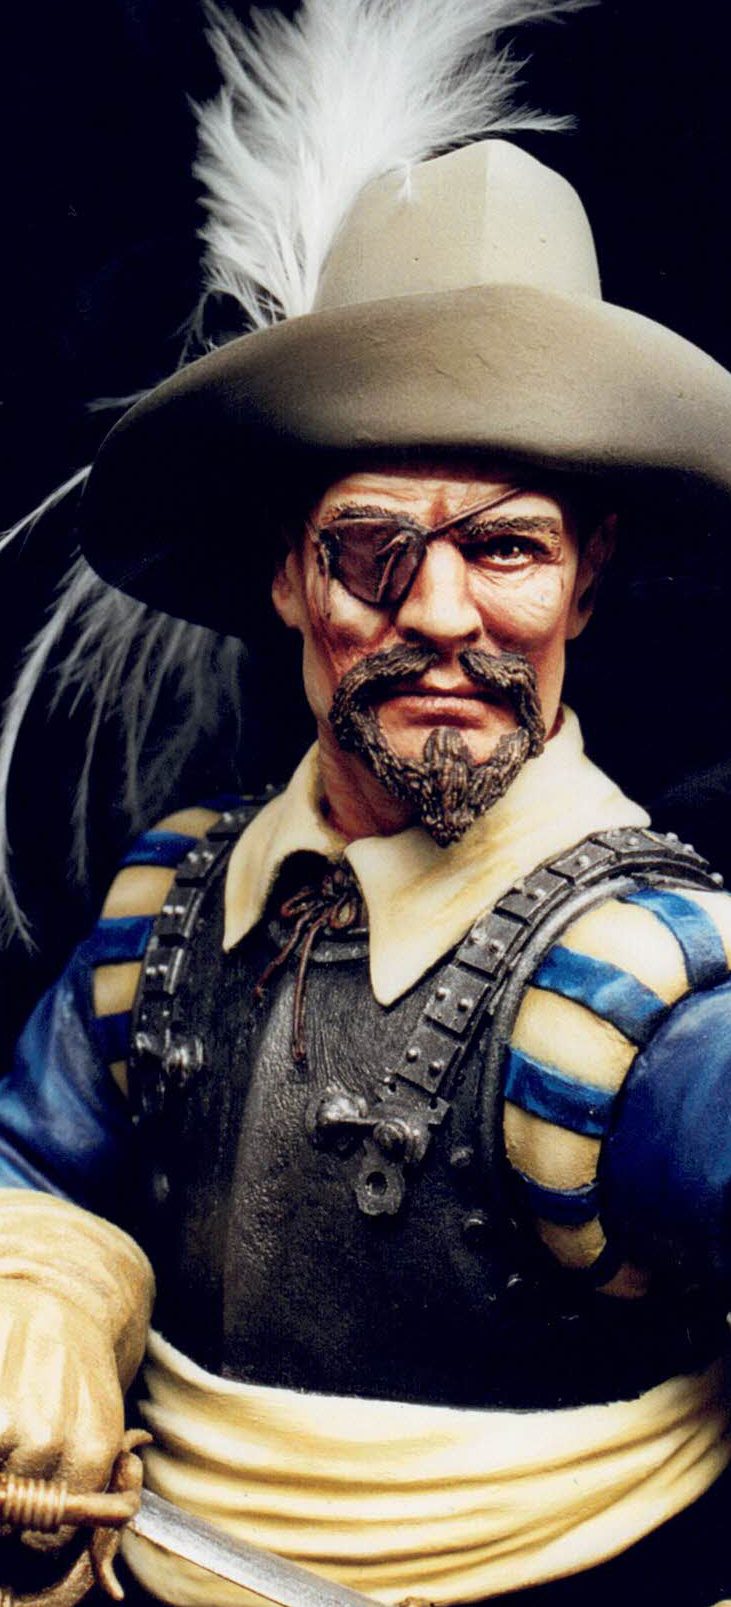
I employed the airbrush for the brown on the hat, using thinned Humbrol Brown Bess over an initial coat of Matt Black.
The brown colour was then lightened with small additions of Desert Sand and White to build up the highlights. The band was added in after allowing a couple of days drying time, this being painted in by hand and using an undercoat of GW Orc Brown acrylic, over which I added Yellow Ochre oil paint. This in turn was highlighted with white and shaded with very small amounts of Mars Orange.
As the airbrush was out, and against my better judgement - I do hate masking things off - I masked the face and airbrushed the breastplate. To dirty this down, I then added thinned down Black oil paint in squiggles and dots, stippling these to fade them into the metallic finish a little. Heavier shading around the arms and rivet detail was also added using the black oil paint too.
After removing the masking, I painted in the linen coloured areas at the shoulders and the collar.
Lighter colours always need a good solid undercoat, otherwise any patches of dark colour is likely to show through. Sometimes this can be used to hint at staining on a down at heel character. However I didn't want that effect here, and so several thin coats of white acrylic were used to build up a solid undercoat ready for the oil paint.
I mixed up three colours of the oils used here, the shadows being Raw Umber with a little Yellow Ochre and a dash of Titanium White. The mid-tone being made from a greater proportion of the white and yellow, this time with only a dash of the Raw Umber, and the highlight being almost pure white with just a hint of the yellow.
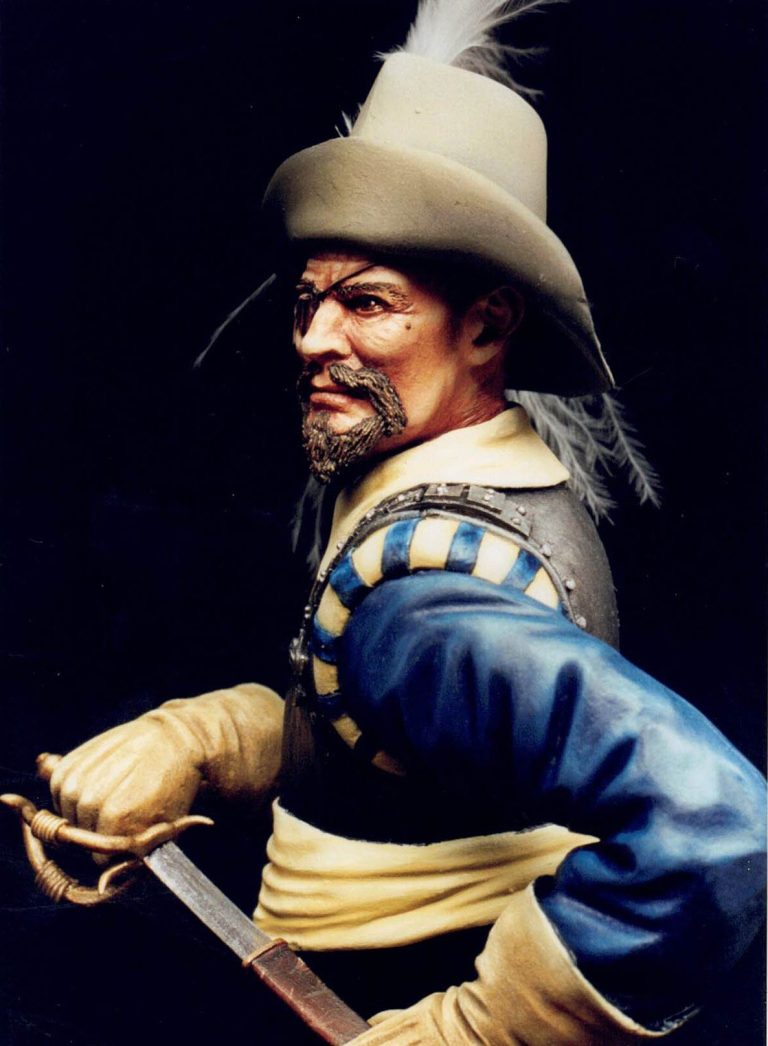
This was than put to one side to allow it to dry fully, and only when I was sure that it had hardened completely did I begin applying the blue.
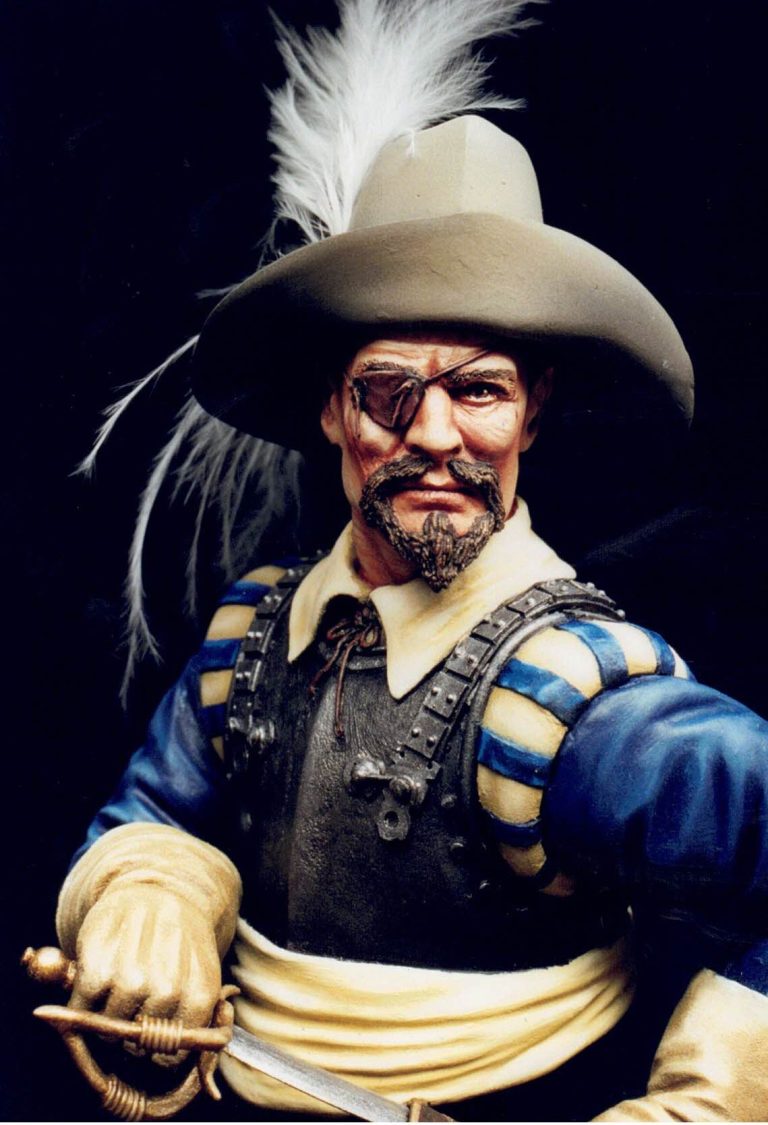
First I undercoated with GW Midnight Blue, a single coat of this as it's a good strong colour. Then I applied Prussian Blue oil paint, adding mid-tones and highlights by simply mixing in very small amounts of Titanium White on the surface of the model. This takes some patience, adding small spots of white and then blending them in to the blue, and the secret is to constantly wipe the excess paint off onto a clean, dry cloth - don't wet the brush with thinners until you're sure you've finished and it's time to clean the brushes.
The idea is to stain the acrylic blue with the oil paint blue, which in turn can then be mixed with the white. If you can see any brush marks, then the paint is too thick and needs taking off with a clean dry brush.
I did the sleeves, the ribbons on the shoulders and the waist sash using this method, and with the same colours, again allowing all this plenty of time to dry before moving onto the gloved hands.
A bit of a cheat with these though. I used the same colours as on the collar, dirtying the Yellow Ochre and Titanium White with a heavier presence of the Raw Umber, which whilst differencing the gloves from the collar etc, still tied the areas together.
To finish off, I painted in the gold and silver parts on the sword and knuckle guard, using a mixture of enamels with inks over the top for the highlights.
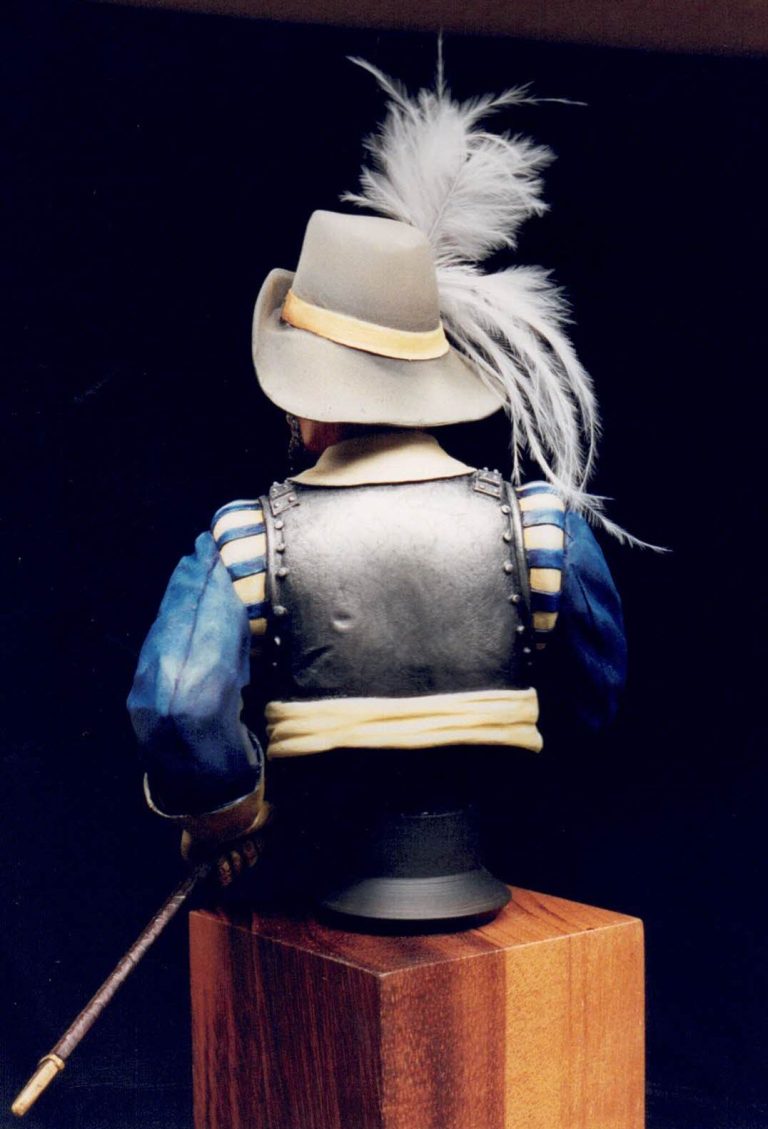
Glueing things together once everything had dried caused no problems, and the underside of the bust, and it's attendant pedestal were painted black to complete the painting.
A plinth from Armstrong bases and a nameplate were added to add a final touch, but it still seemed to lack something.
Oh, the feather of course. Nearly forgot, that's why it looked incomplete. For this I used white turkey feather, bought in a pack from a fly-fishing shop, the same place that I get the deer hair "grass" I use on figure models groundwork now and then. fishing tackle shops usually stock the "lead" wire too.
The last words
It's an old-ish kit admittedly, and perhaps not quite as refined as some of the newer offerings on sale at the moment. But I think it would be a mistake to rule out the kits of a few years ago as "past it".
I'm pleased with how this model turned out, and have asked myself why I left it on the shelf for so long.
My partner seemed to like it too. However she is biased because it's painted in her favourite colours. All the same, the older kits from Warriors, now VLS are certainly worth checking out if you can find them.
Hopefully this proves too that with a few small additions of putty and a little imagination, alterations can be made without having to chop up limbs, change heads etc.
We need your consent to load the translations
We use a third-party service to translate the website content that may collect data about your activity. Please review the details in the privacy policy and accept the service to view the translations.