Saab Draken in Austrian Millenium Livery
1/72nd scale plastic kit from Hasegawa
Painted in 2024
Although I’ve done a Saab Draken in 1/48th scale, I thought I’d try one slightly smaller, as I do really like the shape and the history behind the airframe.
The scheme is on a Austrian aircraft, one of 24 Saab J 350OE Draken’s that were ordered in 1985.
The aircraft were split to form two squadrons, one based at Zeltweg and the other one at Graz-Thalerhof.
The aircraft were selected from existing stock that Sweden had, although they were upgraded, one being the addition of the Blown Canopy that was introduced on the J 35F airframes. In 1999 five more aircraft were purchased, to be cannibalised for spare parts, and the striking livery that this aircraft displays is to celebrate the 1000th anniversary of the name Osterriech – the original name for Austria.
Whilst this aircraft was painted with this livery in 1996, it continued to carry this scheme until the type were retired in 2005 in favour of the Eurofighter Typhoon.
As a note here, in the references I used for this article ( see note at end ) the livery for the Austrian aircraft seem to be a two tone dull grey colouration, a lighter colour at the front third of the upper airframe with a darker grey covering the rest of the aircraft.
Like it’s Swedish cousins, the large numbers are displayed on the upper surfaces of the wings, but in yellow.
I got this Hasegawa kit off the Veteranus Auction site on Facebook along with two other Hasegawa kits, and to be honest I’d seen the same kit available on Ebay and really wanted to get one, just not at the cost of £60 plus that was required for the Ebay purchase.
This was a lot more reasonable, although one of the three kits in the auction lot had faulty decals ( the Greek livery F104 Starfighter ) which would need sorting out – but that’s a whole other article.
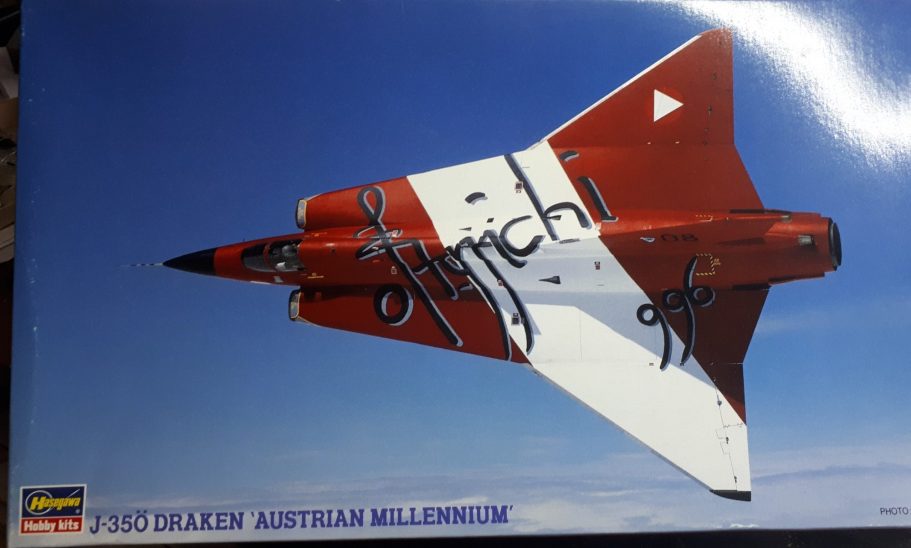
So, this kit for Hasegawa – a quality offering, nice box art – see photo #1 – and enough parts to make it interesting. Fit of those parts is pretty good too, with no filler necessary and very little clean up too.
I wasn’t keen on the detail of the exhaust components and chose to replace these with an aftermarket offering from Aires, the kit part from them being number 7198 and costing around £10 including delivery.
I was going to replace the Pitot tube and AoA probe and ordered them from an Ebay seller too, but they took a little too long to arrive ( my impatience and not the sellers fault ) so used an Acupuncture needle as the kit part was quite thick.
The advantage with the acupuncture needle is that once glued in place they’re very flexible and will spring back into a straight line if accidentally knocked.
So my thanks to Dr Mario Delgado for letting me have a few of them.
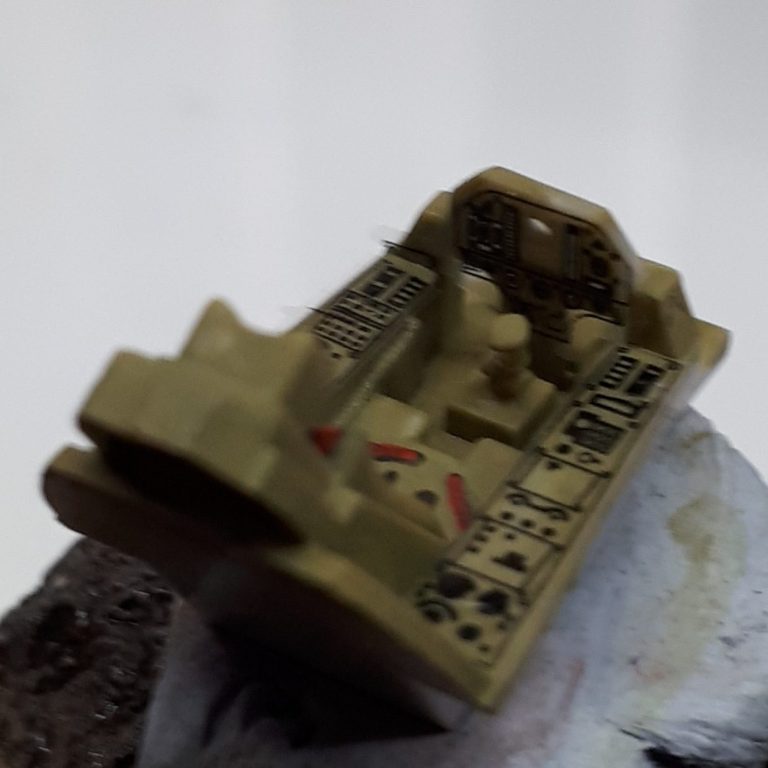
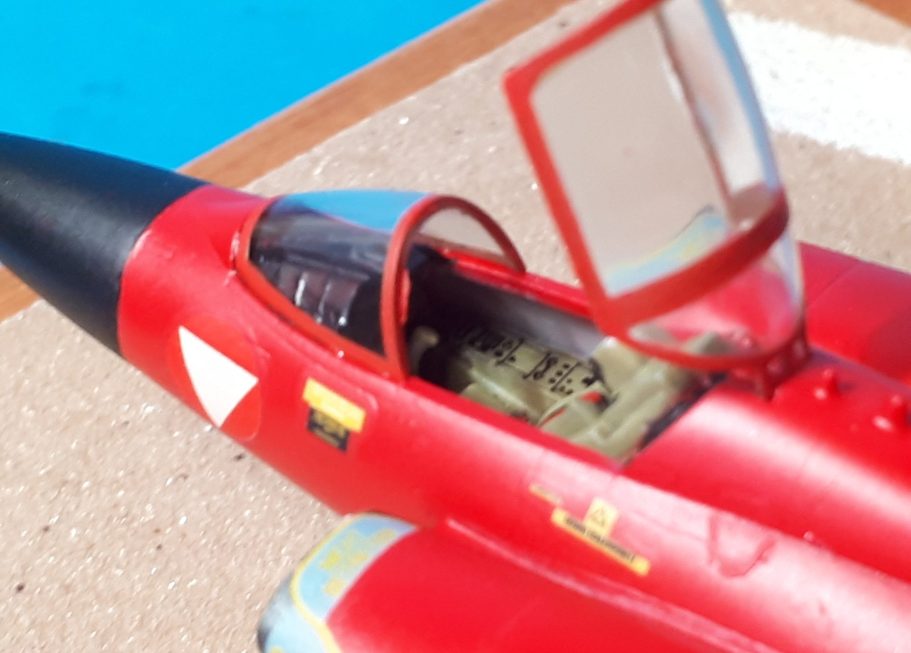
The assembly follows the accepted norm, in that the cockpit is put together first and will require painting – photos #2 and #3 prior to it’s being fastened into one side of the fuselage, and the opposing side being glued into position.

The kit parts are acceptable, although there will be aftermarket offerings I’m sure. However, painting the seatbelts on with a fine brush and adding the decals adds enough interest I felt, and the only effort I felt in doing the assembly and painting was the fact that this is so much smaller than the 1/48th scale kit.
See, size really does matter !
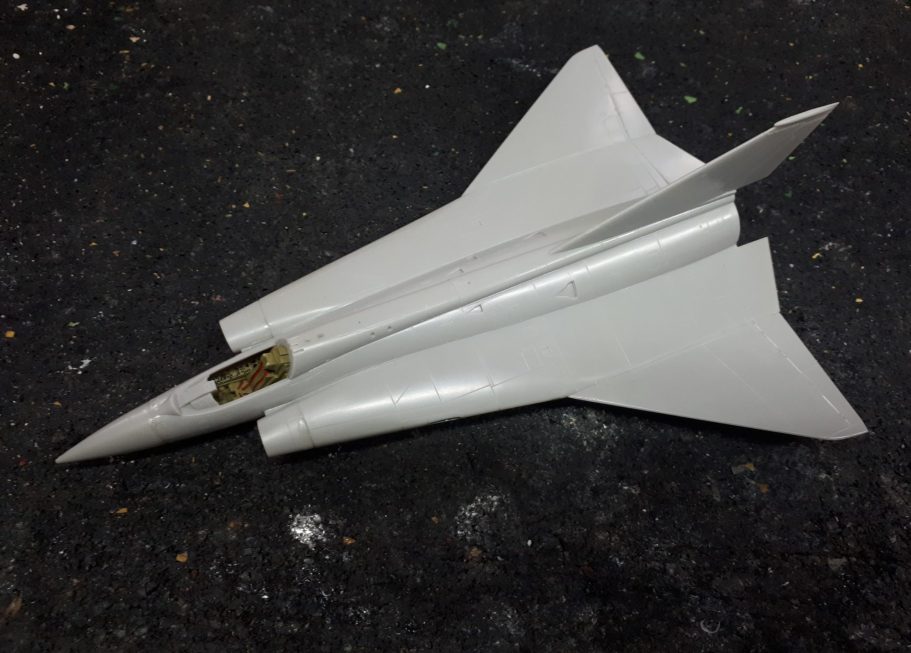
Photo #4 shows the cockpit in position with the two fuselage halves fastened together and the tail and wings glued in place. There was a small amount of sanding necessary on the joints between the upper and lower fuselage halves – yes, it’s no in fact the normal left and right halves, but an upper and lower half that joins along the lateral plane.
The nose cone and the intakes have also been added and I’m just waiting at this point for our very efficient post person to deliver the replacement set for the exhaust.
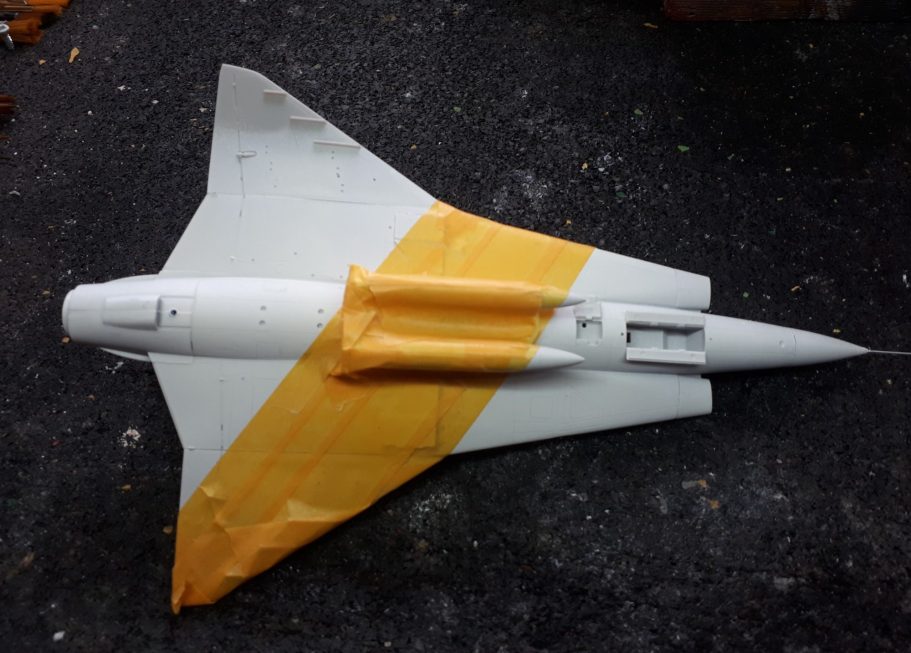
Oh look, there he is, and photo #5 shows the back end of the aircraft fastened in place and some masking tape added.
OK, prior to this I’d masked off the open cockpit with some small sections of toilet roll, sprayed three coats of white primer onto the airframe, and let this dry fully overnight.
Adding the masking to the underside so that the red areas could be applied with an airbrush was fairly easy – just the front section of the fuel tanks causing any fun, but the upper areas were a different matter completely.
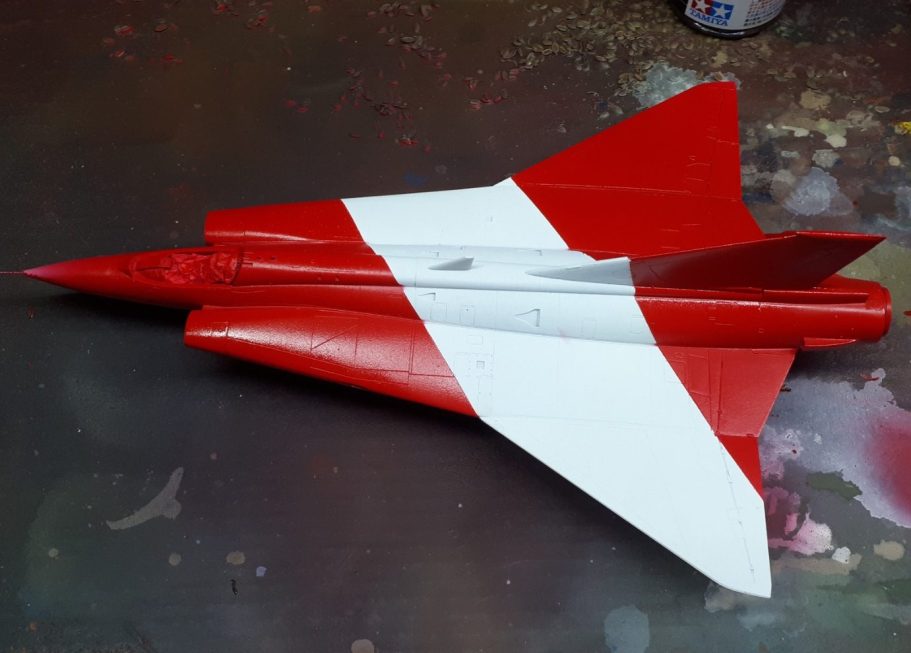
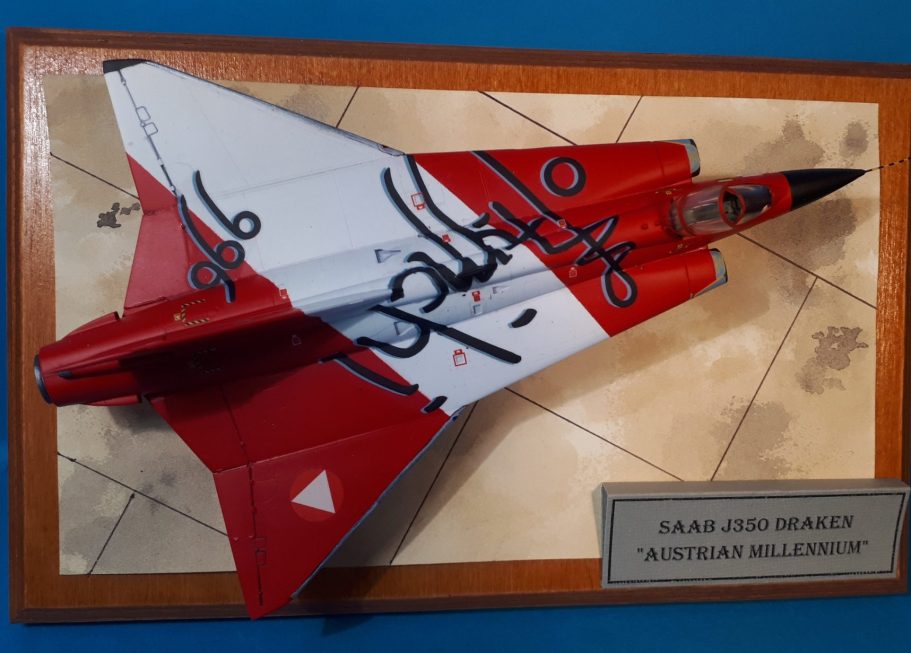
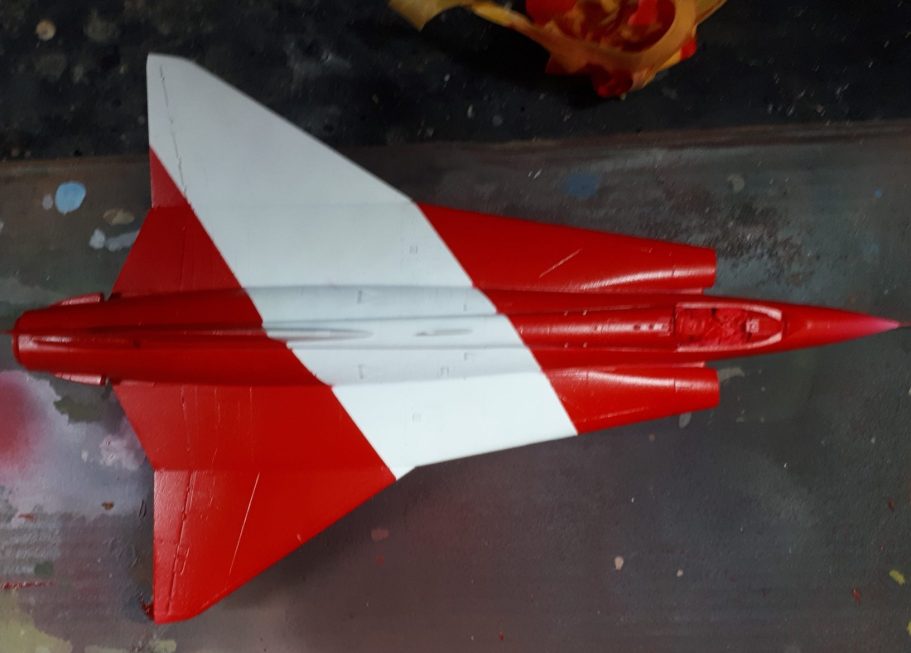
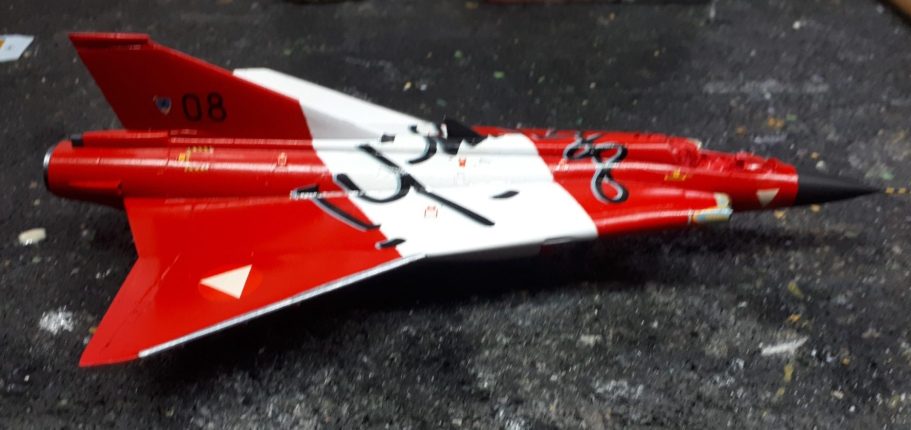
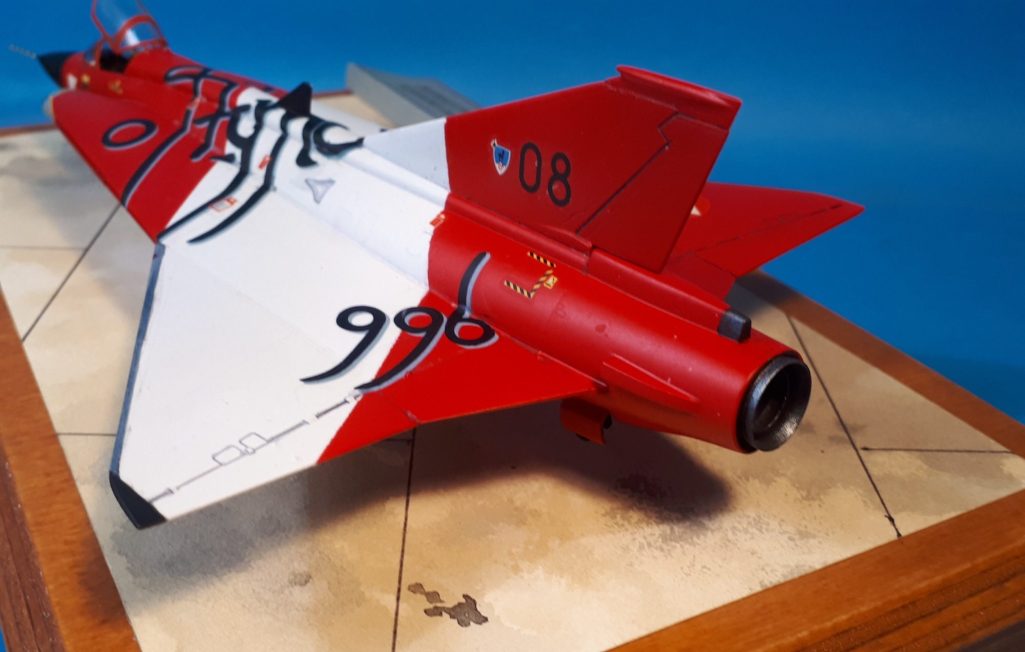
Whilst photo #6 shows a nice red and white scheme having been completed, the box art ( and instruction sheet for that matter ) show views of the aircraft from directly above with the split of red and white paint forming two straight lines across the upper body of the aircraft. To get this to work the masking doesn’t follow a straight line at all, having to change angle as it passes over the centre of the fuselage at the front and it strikes a very steep angle to negotiate it’s travel over the upright tail fin.
So looking at this shot more closely, you can see the change on the leading edge of the rear red area as it crosses the front end of the tail fin.
I have to own up that some interesting curse words were used whilst putting that masking on.
However, it was worth it, as photo #7 shows the straight line when the airframe is viewed from directly above.
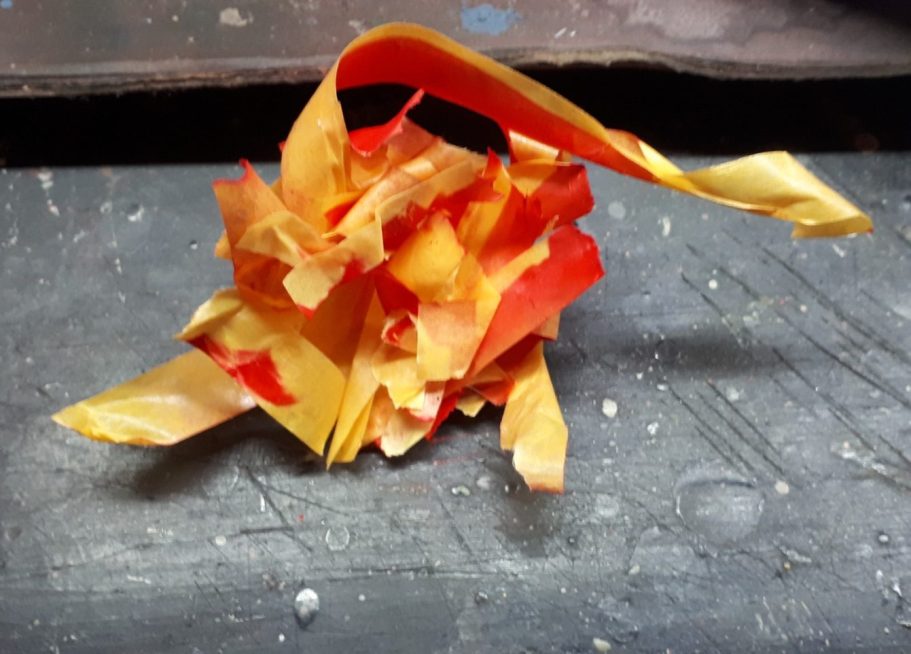
And just to confirm, photo #8 shows the mass of masking tape used to do the painting – I’ve not found a way to reuse this stuff yet, but there must be something that can be done with it……
Well apart from, as someone suggested, that this looks a little like a Chinese Lion. Can’t see it myself, they must be either taking too much, or not quite enough, medication.
Decals
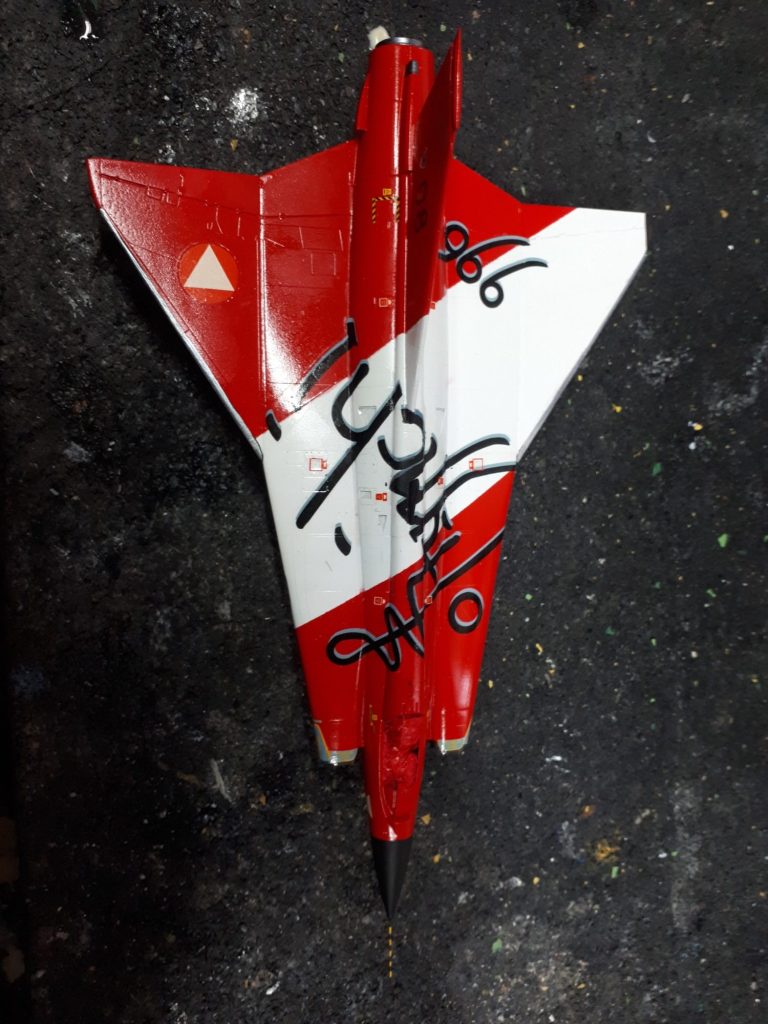
Photo #9 shows the decals applied to the upper body, and Micro Sol and Micro Set having been used to help them settle into place.
The decals are the usual high quality of film expected from Hasegawa, and conform well to the areas where they’re applied. The problematic one was the large single decal on the upper airframe.
It’s half the size of the aircraft, and has to go onto one wing, across the central body and over onto the other wing, with a small fin that is on the centre of the body in the way.
Even taking my time and a lot of care, the decal still broke up into three or four pieces and whilst positioning them together was not hugely difficult, I was left with having to mix a grey paint and use some black acrylic to retouch any breaks in the design.
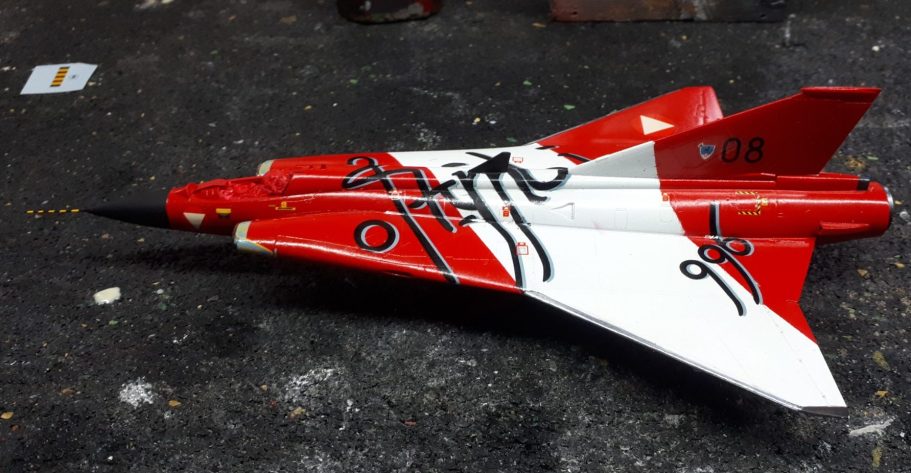
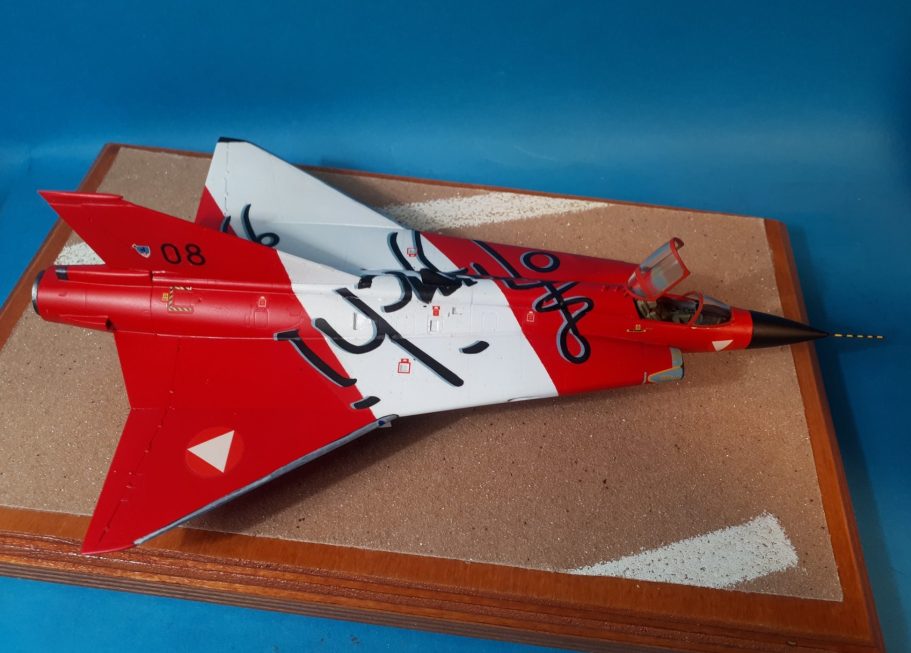
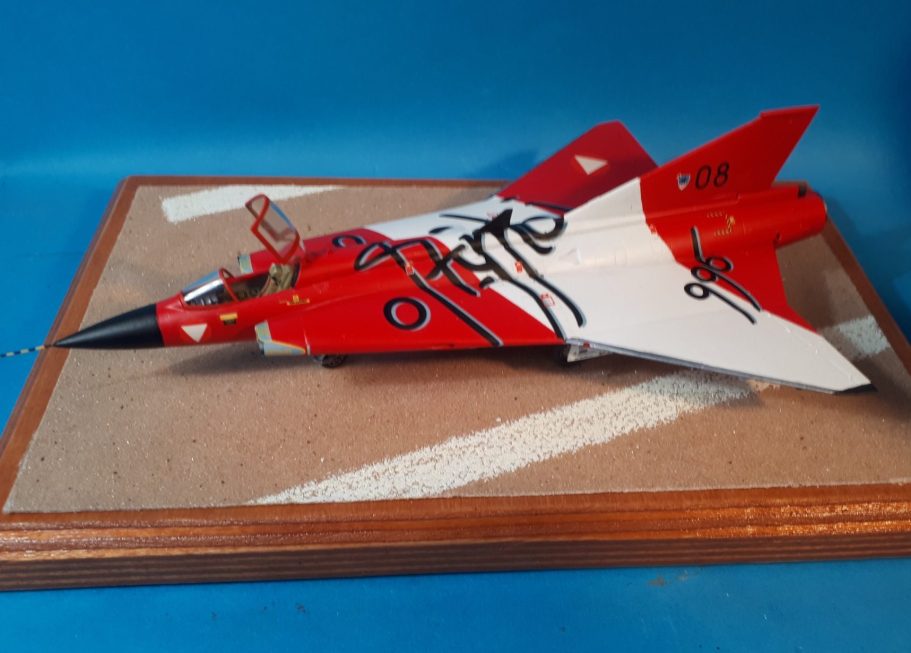
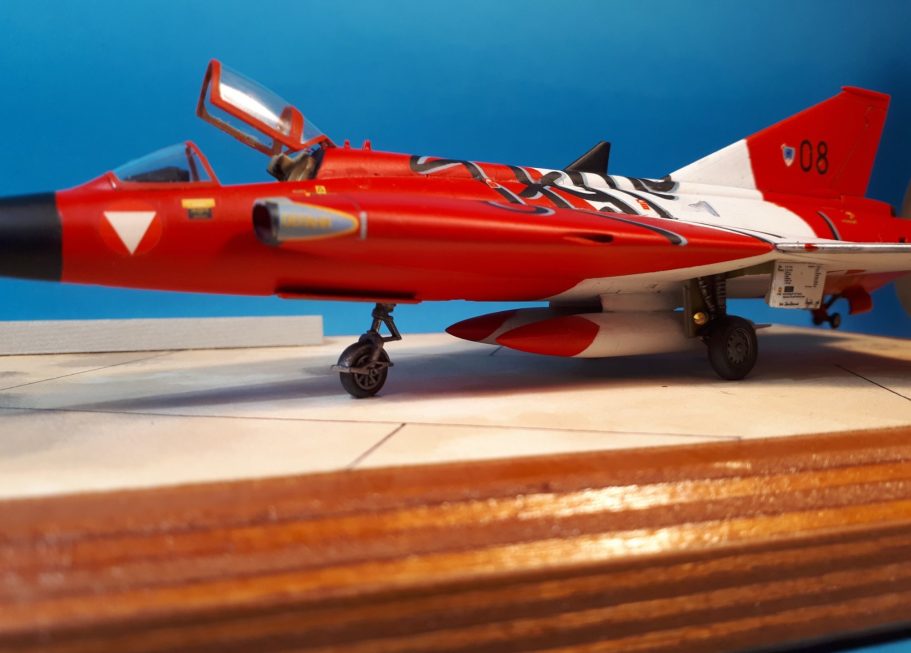
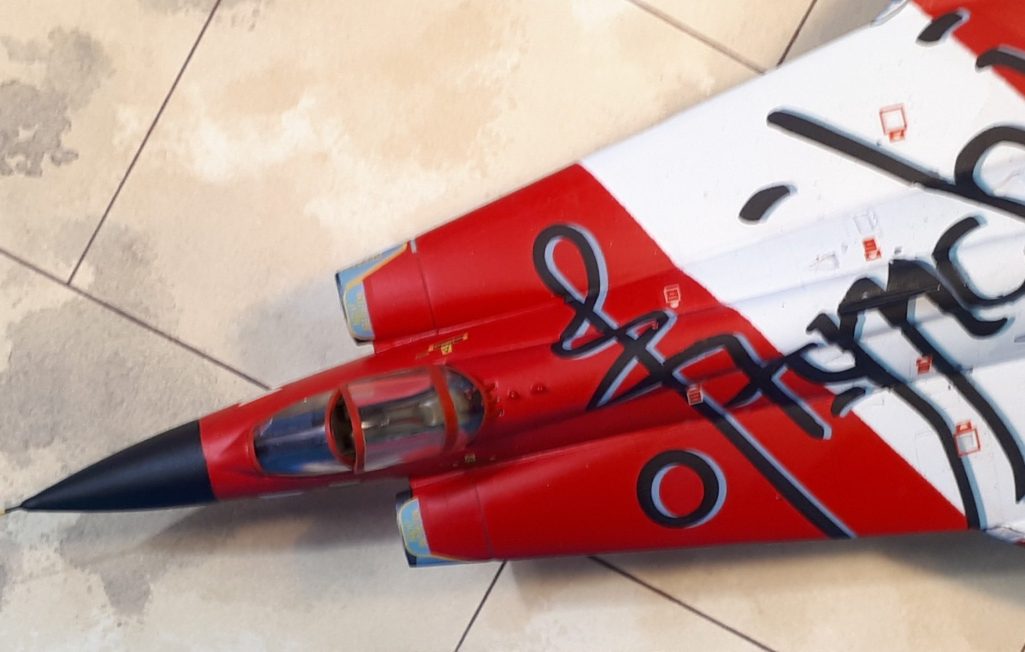
Photos #10 and #11 show side views with the cockpit masking still in place.
I’d allowed the decals forty eight hours to dry fully, then sprayed three thin coats of Mr Models Matt Varnish over the whole model, allowing each coat to dry fully before adding the next one.
This blended the decals into the rest of the aircraft and evened out the finish.
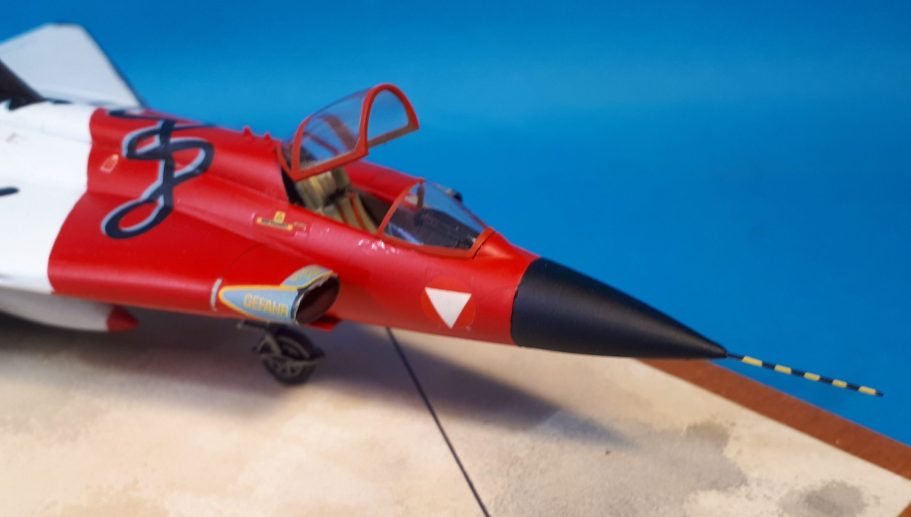
The canopy glazing was painted with green frames ( to depict the inner surfaces, and then red over the top of that to match the colour of the outer areas, the rear section of the canopy being glued in the open position to better show off the inside of the cockpit.
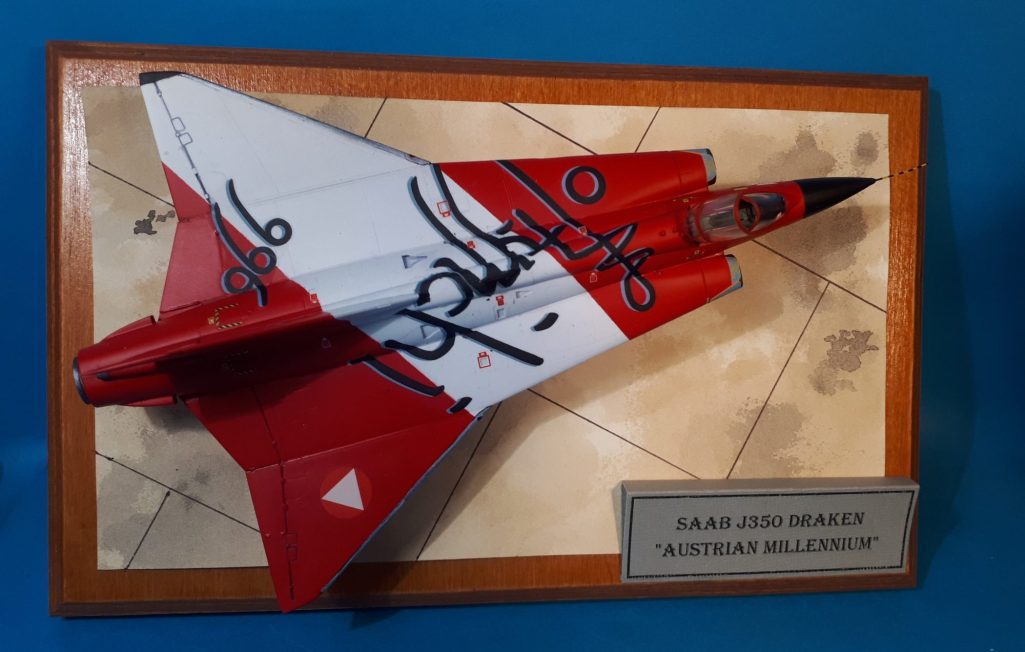
The rest of the pictures show the finished model on a wood plinth, the runway section being a stained piece of photocopy paper – various brown and black acrylic paints being watered down and used to make an irregular blotchy pattern on the paper, and after drying fully, lines to depict the concrete sections were drawn on with a black biro and a straightedge.
I printed off a nameplate, forming the excess card into a triangle when viewed from the side to make the nameplate sit at a slight angle, and fastening it in place with some double-sided tape.
Final thoughts.
I enjoyed putting this together and painting it.
There were one or two challenges along the way, but they were things I gained knowledge from that will be used on other projects.
Masking over complex shapes and compound curves, not to mention making lines appear straight when viewed from a particular angle was interesting, to say the least.
Dealing with a large decal was fun, I’ll probably do that differently next time !
Working in a much smaller scale was refreshing, and quite a lot faster to put the model together to get to the part I like – the painting.
My thanks then to Dr Mario Delgado for the needles, to Nikki and her team at Veteranus Auctions for all their work putting on so much variety of models to drain my bank account and for people that send their models in to be put up for auction.
I never thought I’d make a 1/72nd aircraft kit, but the opportunity to do this one was a lot of fun, refreshing and I think turned out not half bad.
Reference – Saab 35 Draken ( Flying with the European Air Forces ) by Fredrik Edvardsen
We need your consent to load the translations
We use a third-party service to translate the website content that may collect data about your activity. Please review the details in the privacy policy and accept the service to view the translations.