
Greek Laconian Hoplite - A joint effort
1/9th Resin bust from El Greco
Painted by Thomas and Adrian in 2019
Matt Grech of El Geco Miniatures sculpts some lovely studies of different historical busts, this I think is perhaps one of his best, although I’m willing to be corrected. However, it is one of his that I really like.
Although I bought this bust in 2012, it remained on the “to do” shelf or patience for some time, in fact I eventually got it back onto the bench for Thomas to have a go at refreshing his painting skills in 2017.
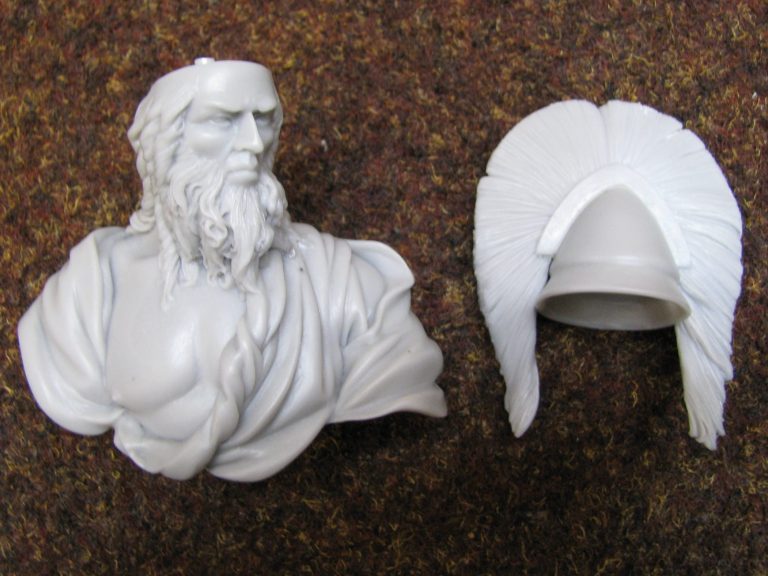
The bare parts are shown in photo o#1, very simple and fitting together perfectly. Casting is first class, and no faults of any size were found, just a couple of mould part lines that really were minimal and very easy to clean up.
So why let Thomas paint it, well, it’s just something that caught his eye, and we both thought it would be a good platform to work on.
Thomas is pretty sure of himself with skin tones, but he wanted to have a go with clothing, and this piece offers quite a lot of complexity in that regard.


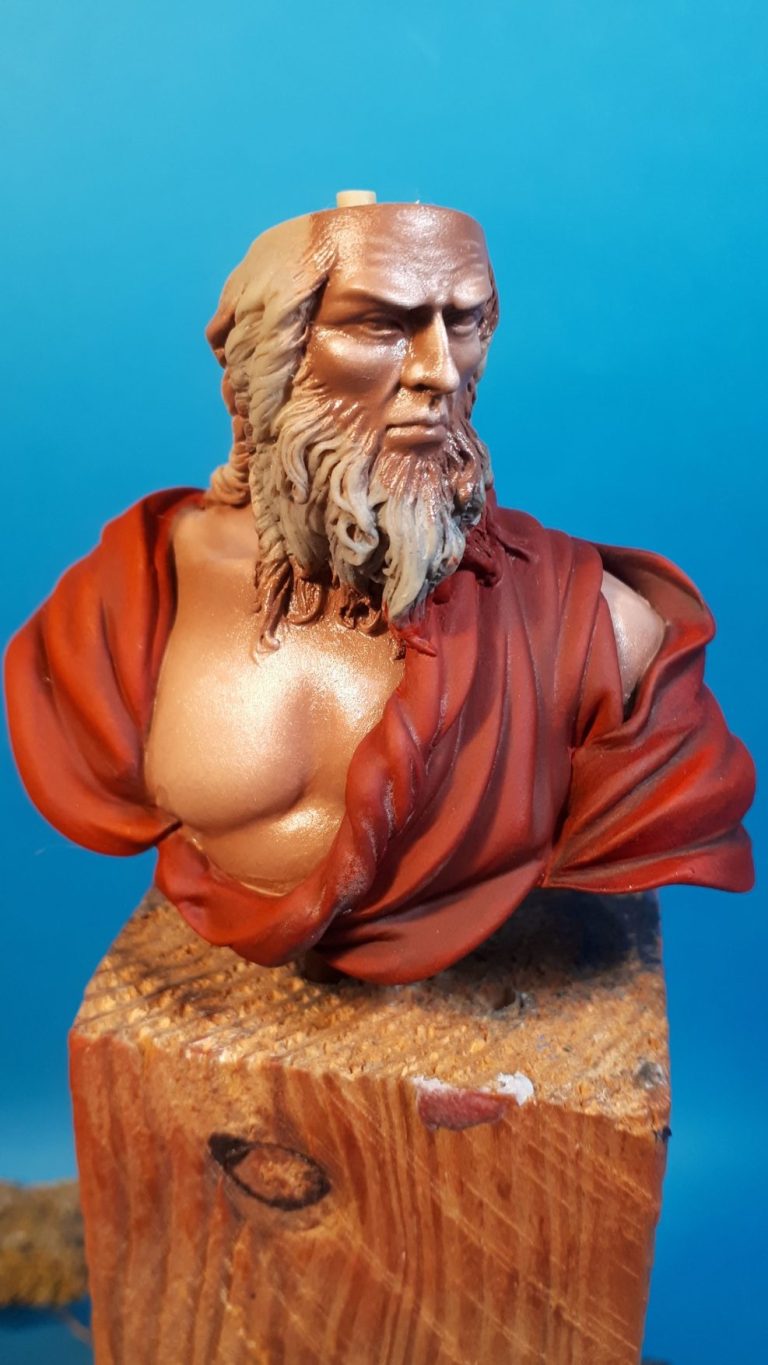
Photo #2 shows the first stages of painting the cloak. It’s been painted with a flesh coloured primer mix – the usual small amount of paint with a good quantity of Isopropyl Alcohol mixed in to break down any oils on the surface of the model, and aid adherence of that initial paint application.
In all honesty, the paint amount in this mix is quite minimal and really is only there as a marker for which areas have been painted, and which need to be done.
With that primer coat dried off, a couple more layers of the Flesh Coloured acrylic are added, this time thinned with some water ( add a drop of detergent in to help break the surface tension of the water ) and each coat of paint being allowed to dry fully before the next one is applied.
After that Humbrol Crimson acrylics are applied, again thinned with some water to aid flow and with a spot of Tamiya Flat Base ( X21 ) added to make an absolute matt finish to t he paint. Each layer of paint was allowed to dry fully before adding the next.
The two coats provided a solid base for the oils that were to follow.
The oil application was next, this being a mix of Carline oil paint with a little Burnt Umber added to add opacity and darken the already dark red.
Scarlet – a very bright red oil was spotted on areas that would need to be built up to mid-tones and highlights, and finally a very small amount of Buff Titanium was added to give a worn and faded effect to the areas that need to be lightest.

And that’s where Thomas had to leave it for a couple of weeks while the model dried and he attended to some work commitments.
Once Thomas had some more time, he began painting the flesh areas, photo #3 shows he hasn’t lost his touch, and beginning by recoating the flesh with the acrylic Flesh Tone ( mixing the first coat with Isopropyl Alcohol to allow it to flow over and stick to any of the red oil paint that was there ) and then a couple more coats to establish a solid colour, the could then add oil paints.
Just two colours have been use din this shot, Mars Brown, which is difficult to get hold of now, but Burnt Sienna or any red/brown colour could be sued instead, and Titanium White.
A mid flesh colour is mixed from the two paints and then applied over the whole of the flesh areas, then some Mars Brown is added in small amounts with a fine brush to areas that will be in shadow – on the face this would be the corners of the eyes, under the nose, cheekbones and chin. A soft brush is used to blend the darker colour in to the lighter mid-tone, regularly wiping the excess paint onto a soft cloth to stop any contamination of dark and light paint getting into the wrong places.
More Mars Brown is added to make some of the more recessed areas darker, and then Thomas began on the highlights.
Again a fine brush is used to add paint to specific places on the model, using pure Titanium White and once in place, the paint is blended into it’s surroundings with a small soft brush.
More white is added to build up particular areas – the scowling brows, the nose and nasal flares and the upper areas of the cheekbones and upper lip.
All this work is continued onto the chest and shoulders, and with a sigh of relief, from Thomas the flesh areas are done and can be allowed to dry.
Again the model needed a few days to dry off, and Thomas had work, and then general life getting in the way of continuing.
The bust remained like that for several months, and whilst sorting through a few other part painted pieces, I happened to pick it up and thought “He’s not done a half bad job on this, I’ll finish it for him, because he’s really not got that much time at the moment”

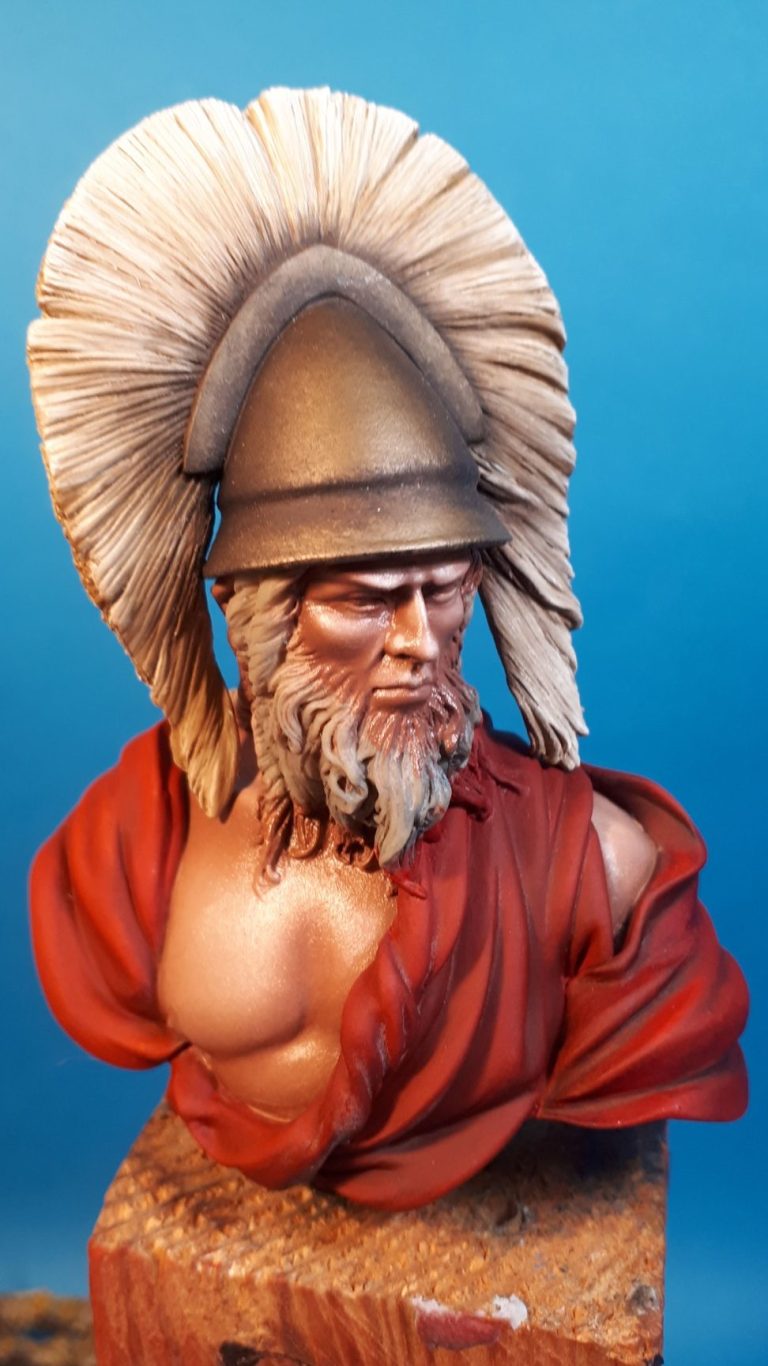
So photo #4 shows the helmet having been painted, beginning with an undercoat of Chaos Black, after which Stormtroopers Printers Inks ( now sold by El Greco in a powdered form ) were mixed with a little White Spirit to act as a carrier, were added to the metallic areas and allowed to dry in a heated cabinet. I began with a mix of Bronze with a little bit of Mars Black oils added, then built up mid-tones with more of the bronze and then moved onto two shades of gold for the highlights.
I use separate brushes for applying metallic colours so that no flecks of the metal pigment get transferred onto “flat” painted areas of a model.
The Printers ink dry with a matt finish, and are very delicate. You can’t really touch them and rely on not coming away with some of the inks on your fingertips. This shot shows the helmet with the inks freshly dried, but the final shots show a much more shiny and polished effect gained by adding several thin coats of Tamiya Smoke lacquer ( mix it 50:50 with water so that the fresh coat doesn’t attack the previous ones ).
In photo #4 I’d also begun work on the plume, and photo #5 shows this initial application of paints having dried fully, along with the flesh colours being dry and taking on a matt finish.
The plume was painted with some Vandyke Oils added at the base of the hairs where they join to the helmet, and then working in some Mars Yellow and titanium White oils to build up mid-tones and highlights.
Whilst the Mars Yellow is added in a combing motion working from the helmet towards the outer edge of the hairs, once I began adding the Titanium White into the mix, lightening the yellow gradually, I reversed the paint strokes to work from the edges of the plume back towards the helmet.
I’ve mentioned before about wiping the brush between strokes to attempt to stop contamination of lighter colours with the darker ones already on the model, in this case I didn’t try to get as much of the darker paint off, so that the Vandyke Brown did affect the lighter colours, but without making them look muddy.
It’s a fine balance, and takes a little trial and error.
In this shot I’ve also added some deeper shadows around the eyes and painted the eyes in. It alters the appearance of the face a great deal just making these small changes, the face becoming sterner, and the glance more concentrated.
Framing the face also helps the painter judge whether the flesh tones are OK, and in this case with the helmet done, the undercoating of the beard with white lifts the face in some manner to allow the contrast to be inspected more accurately.


Whilst painting the beard with the white undercoat made the face more appreciable, I actually liked the idea of it being a very pale colour – it somehow seemed right.
I hadn’t planned this, in fact I was going to go for a blonde colouration to tie in with the plume, however in photo #6 I’ve adapted the white undercoat to a more grey tone – adding Corax Grey from the Games Workshop range of acrylics, and blending in some Sepia oils for the deeper shadows. Final highlights were very restrained additions of more of the Skull White acrylic.
Also visible in photo #6 is the reason I dislike varnishes. Looking closely at the rope-like twist of material just below the beard, you may be able to spot a pale frosting, almost granular looking surface to the paint in the deeper recesses of detail.
This was before I discovered a spray paint that would give a good effect, and what has happened here is that in trying to get rid of the slight gloss finish to the clothing – I don’t think Greeks of that period did latex cloaks – the Tamiya X21 Flat Base, even when mixed 50:50 with water, and painted on very thinly, still manages to puddle slightly in the deeper recesses and form this highly irritating frosted effect.
It’s almost impossible to get rid of, although attempts at adding a Carmine / Burnt Umber oil mix, thinned slightly with White Spirit, does take the edge off, I can still see it on the finished model, and to coin a phrase, “it makes my teeth itch”.
I might have been tempted to add more shadow colour to the areas, but then I would have been altering Thomas’s work a lot, and opted to leave it partially disguised. This after all was a practice piece for him and not ever going to be considered for entry into a competition.
I discussed it with him however, and he agreed that whilst visible, it didn’t “break” the overall finish, and whilst we’re at it, how much does this appear to no longer be a Greek Warrior or statesman, but Zeus himself.
It’s possibly that grey beard, but he was right, Zeus it definitely was.
So the finished shots show the bust mounted on a small upturned cup that has been made from some Greek Olive wood, with a printed nameplate announcing his identity.
Final words.
I’m lucky, I truly am, that my son enjoys the hobby of painting models alongside me. He’s got a wickedly keen eye, and it’s always worth giving him a model I’ve painted for him to check. He points out any faults and offers ideas for improvement, and his opinions are worth listening to. He knows what he’s on about.
This bust was pleasing on several levels – Matt Grech is a great sculptor, he puts a lot of character into his pieces, and the production values for his range at El Greco are very good.


Seeing Thomas return to painting was great, it was good to see he’s not lost his touch, and nice for father and son to connect once more over something we both have a passion for.
And for me to finish off something he’d started was pleasing too. To present him with a finished piece that we’d both put something into felt good.
As I say, I’m lucky, and although life does get in our way sometimes, there is a joint fascination with models that we can always find a common ground with…… along with a strange drain on both our bank accounts.
Cetero oporteat sensibus his eu. Has ex vidisse perpetua, vis partem mollis mandamus at. Ea nam legere mentitum prodesset, no quo lucilius liberavisse, te oratio debitis omittantur eos. Sea ea iusto detracto, ut scripta sapientem suavitate cum, nam deleniti perpetua intellegam an. Ei per officiis detraxit probatus, vim at graecis tincidunt.


Cetero oporteat sensibus his eu. Has ex vidisse perpetua, vis partem mollis mandamus at. Ea nam legere mentitum prodesset, no quo lucilius liberavisse, te oratio debitis omittantur eos. Sea ea iusto detracto, ut scripta sapientem suavitate cum, nam deleniti perpetua intellegam an. Ei per officiis detraxit probatus, vim at graecis tincidunt.
Cetero oporteat sensibus his eu. Has ex vidisse perpetua, vis partem mollis mandamus at. Ea nam legere mentitum prodesset, no quo lucilius liberavisse, te oratio debitis omittantur eos. Sea ea iusto detracto, ut scripta sapientem suavitate cum, nam deleniti perpetua intellegam an. Ei per officiis detraxit probatus, vim at graecis tincidunt.

Cetero oporteat sensibus his eu. Has ex vidisse perpetua, vis partem mollis mandamus at. Ea nam legere mentitum prodesset, no quo lucilius liberavisse, te oratio debitis omittantur eos. Sea ea iusto detracto, ut scripta sapientem suavitate cum, nam deleniti perpetua intellegam an. Ei per officiis detraxit probatus, vim at graecis tincidunt.

We need your consent to load the translations
We use a third-party service to translate the website content that may collect data about your activity. Please review the details in the privacy policy and accept the service to view the translations.