The Old Gnome
1/10th scale resin kit from MDP ( Model Design Products )
Painted in 2011


If you’ve seen Poste Militaire’s “Rainy Mountain Charlie” bust, then you’ll know exactly what I mean by this being a fantasy version of it.
I really liked this kit as soon as I saw it, and was pleased to be able to paint the box art for Martyn at MDP, but on the condition that I got a copy of the kit for myself.
It’s not often that I paint the same model twice, I find it difficult to engage with a “second go” when there’s so many other cool kits waiting to be painted.
However, this one merited the effort, but I’ll focus the article on the one I painted for the MDP Box art.
The casting is pretty much flawless, just a couple of minimal mould part lines to clean up, but nothing to bother most modellers.
It’s a good job really, because there’s a lot of surface texture going on amongst the different areas of the model – clothing and skin have a lot of moulded in detail that the sculptor has taken the time to add.

On a badly cast model, that would be a problem, because fixing a mould part line and then replicating the texture is never easy, and sometimes nigh on impossible.
But as I say, not a problem to be encountered on this kit, the components are really well produced.
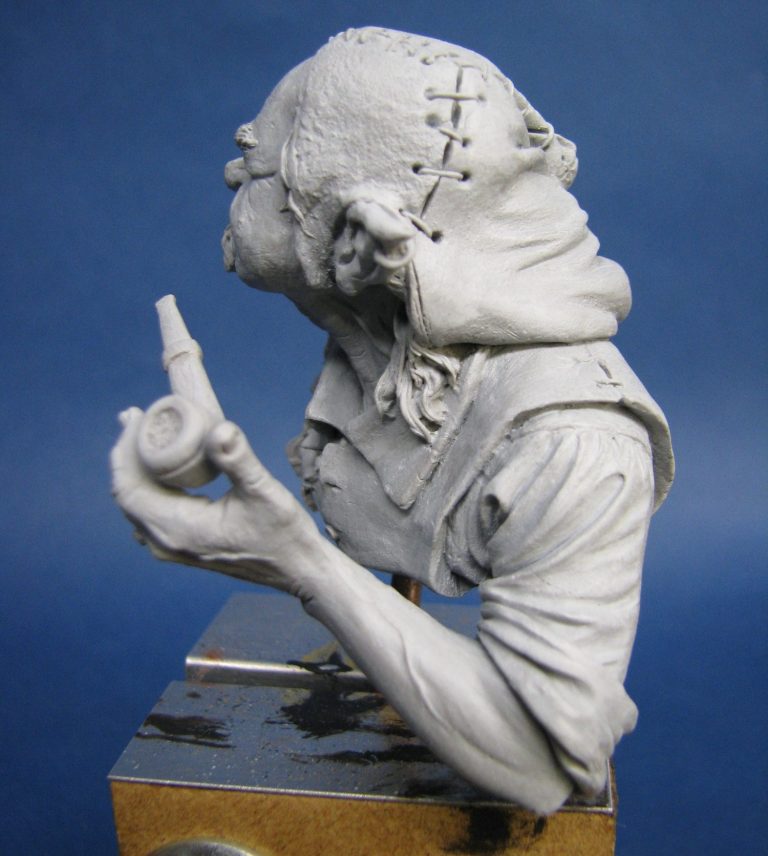
Photos #1, #2 and #3 show the kit assembled temporarily for the camera. The arm will remain separate during the painting stages to allow access to the front of the body and face. I’ve primed the parts with a thin coat of White primer from Halfords in preparation for the undercoat colours to be added.
The pipe and left arm are separate, and the joint between the arm and sleeve allow one to slot into the other and in such a way that no filler will be necessary.
I’ve mentioned that there are moulded in textures, and to be honest, this will be a study in adding different effects to even the flatter sections of the model. But I’ll get to that soon.


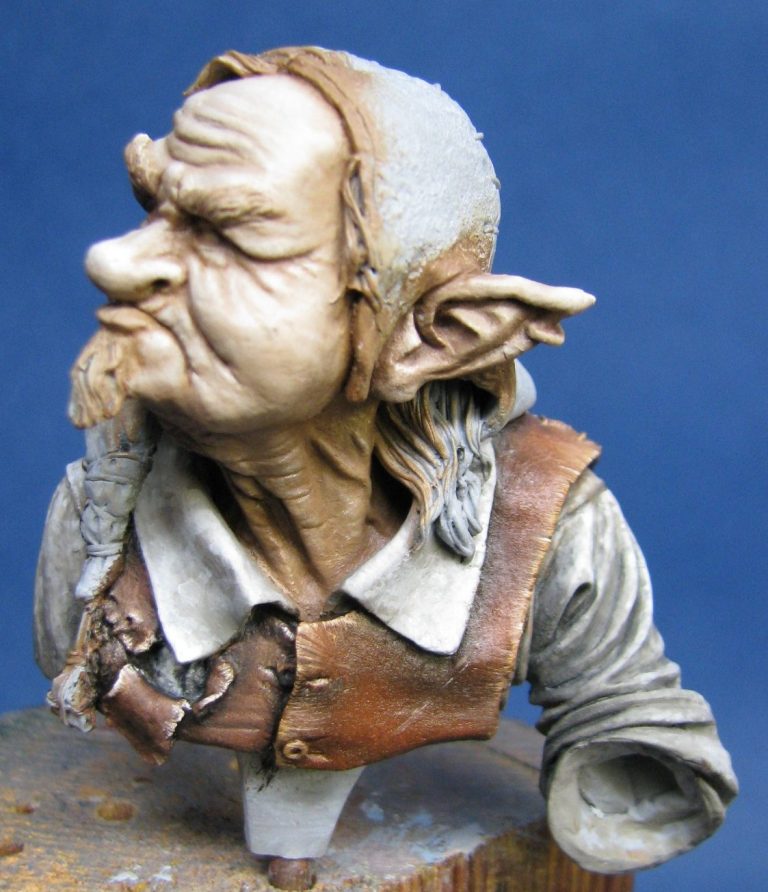
Photo #4 shows the face having it’s initial coat of flesh colour added. An undercoat of Games Workshop Bronzed Flesh was used here, with a mix of Vandyke Brown and Mars Brown oils to establish the darker areas, and Titanium White oils added to bring up the mid-tones and highlights.
The blending was done by adding small spots and lines of the white oil colour, and then using a soft brush to gently merge the light colour into the darker oils surrounding it. By adding smaller and smaller spots and lines, the highlights were built up, the colours changing gradually from light to dark.
This was then allowed to dry fully in a warm, dust free place for several days.
Also in this shot, but maybe not as obvious, is the mottled colouration of the right sleeve. I used acrylics for this, beginning with a couple of coats of a mid-grey colour, and allowing those two coats to dry fully. Over them I added a third layer of the same colour, but this time heavily thinned with water so that it really was only what could be called a wash.
Whilst this was still wet, I added small irregular splotches of paler grey, working gradually to pure white. This gave the effect of an old, stained item of clothing – exactly what I was aiming for.
The effect is possibly more visible in photo #5 on the left arm. Once fully dry again I added thin washes of the initial mid-grey to the creases to help define the shape of the arm and how the cloth falls or is creased by his pose.


Photo #6 and the collar is matched up to the sleeves with the patchy, mottled grey / white and in this shot I’ve also painted the leather waistcoat.
I reverted to oils for this, using an undercoat of GW Swamp Brown with a little Tamiya Flat Base added, and then added a mix of Mars Black and Mars Brown oils as an initial coat, blending in more mars Brown, then some Light Red and finally some Mars Yellow to build up mid-tones and highlights.
To make the waistcoat look old and well-used I added scratches and some cracking along the edges using Buff titanium and Titanium White on a fine brush, and then returned with some of the dark brown mix to put fine lines within some of the pale scratches to hint at deeper cuts.
More of this can be seen in photo #7 which shows the back of the waistcoat, and where I’ve added a few dark lines hinting at scratches or cuts in the leather, followed by a pale line underneath the dark line, which then appears to look like a scratch in the surface of the leather – almost smoke and mirrors chaps.


Photo #8 returns to the face and here I’ve added some Carmine oils to the cheeks and nose to make them appear rosy. I used a very small amount of paint on a fairly large soft brush to apply the Carmine, in a similar way to how a lass adds blusher to her cheeks.
Carmine is a really strong pigment, and so a very small amount of the paint is needed, even to effect a large amount of change in the colour of the cheeks / nose, and it’s not possible to get rid of it once it’s on, because it stains the underlying paint.
Photo #9 shows the face from a different angle, and although the eyes are relatively small, they do repay dividends with a bit of careful painting…..Or alternatively some not-so-careful painting and a fair amount of cursing and gritting of teeth.


Back to adding textures in photo #10, and the beginnings of painting the hat. In this case the yellow section was painted with some Sand coloured acrylic and then coated with Mars Yellow oils with just a hint of Burnt Umber added to give a slightly darker colour to begin the painting with. After that mid-tones and highlights were made with more Mars Yellow, followed by Titanium White and using an old brush to stipple on the paint and not trying to blend the colours too much.
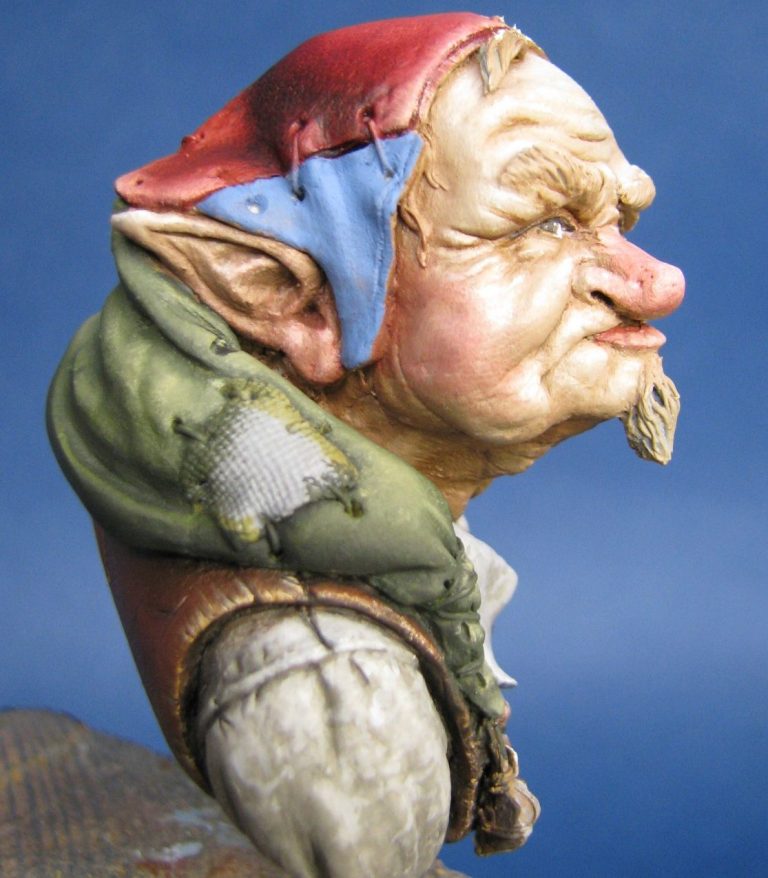
Photo #11 and the red area of the hat has been painted. For this a mix of Carmine oils with some Prussian Green over the top of Humbrol Crimson acrylics. Highlights and mid-tones are built up with the addition of more Carmine, and then some Scarlet, and finally adding some Buff Titanium to the edges to make the section of cloth look worn.
I’ve also undercoated the blue section, using GW Enchanted blue and a spot or two of Tamiya Flat Base mixed in. The addition of the Flat Base provides a very matt finish to the acrylic paint which then helps absorb some of the carrier from the oils. This along with soaking out excess carrier from the oils when laying them out by putting the oil paints onto a piece of card or paper and leaving the paint for fifteen minutes or so, and finally be putting the model to dry in a heated area, all serve to make the oils dry with a matt finish.


Photo #12 – although you could see that it had been painted in the last shot, this picture shows the green section a little better. Again an acrylic undercoat mixed with the Tamiya Flat Base was used, and then covered with oil colours, in this case a mix of Chrome Green and Mars Black, when Chrome Green ( a very strong pigment ) and finally a little buff Titanium for highlights.
Photo #13 isn’t showing much progress really, although things are coming together. This is the point where the painting slows down, as all the little details need putting in.
Neater painting practices are necessary, and if you look back at the earlier shots, you can see that paint from some areas has crept over into places where it isn’t needed.
This is OK and whilst my painting of initial stages isn’t as neat as it could be, it’s the method I use and means that I have to plan the order in which sections of the model are painted. It’s also why I tend to paint models in sub-assemblies, rather than gluing everything together prior to painting.
The rest of the pictures show the finished model fastened to a brass tube, which in turn is slotted into a hole drilled into the top of a square plinth from Oakwood Studios.
There’s a lot of details that have been painted on – the patch on the hat, the pipe with its tobacco almost burnt out and turned to ash, the small beard on his chin and matching eyebrows; all adding to the feel of an elderly, but wise old chap enjoying a quiet smoke.


So I mentioned about painting a model twice at the beginning of the article.
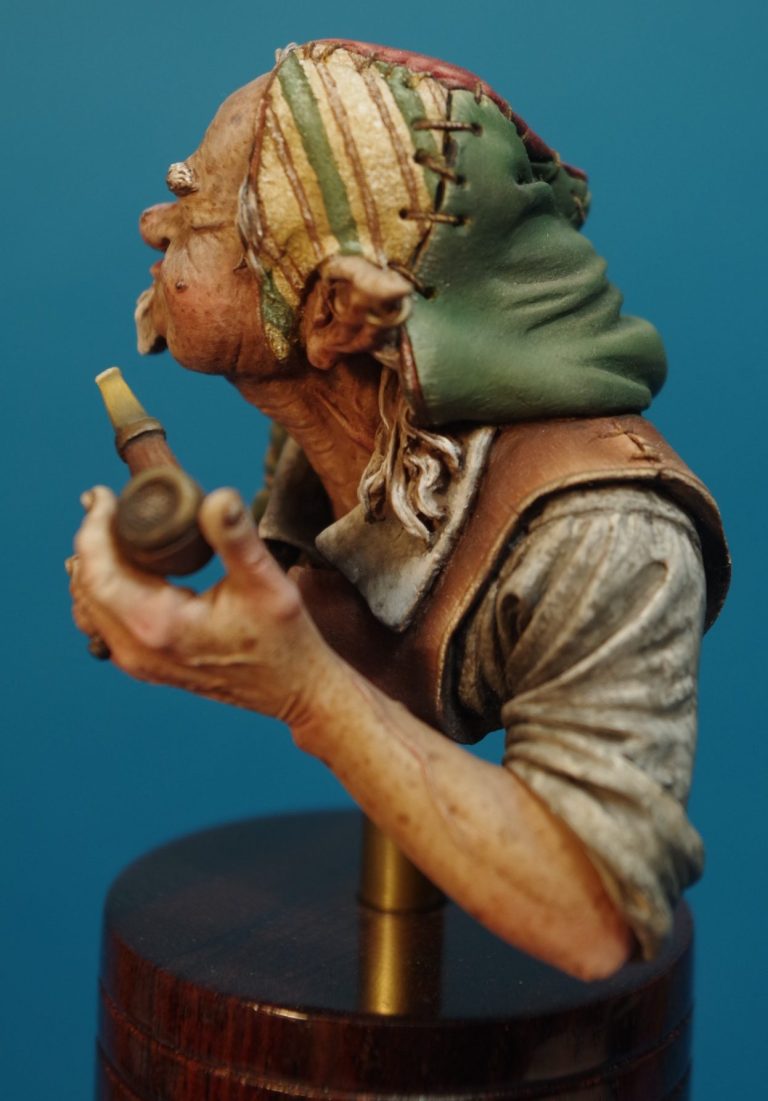
And I did manage to paint a second one for myself. There’s just a few shots here – with the finished piece on a round plinth supplied by Nick Tebbs, and I’ve painted the second one with slightly different colours.
Some areas I’ve simply pushed the shadows and highlights a little more – the shirt is one such area, and I’ve added age / liver spotting to the skin to promote the idea of his elderly status.
There’s not as much wear on the leather waistcoat, but I’ve added a check pattern to the patch on the hat and a little more texture to the upper areas of the hat too.
The yellow section of the hat gained some green stripes and the pipe got a bone mouthpiece effect painted onto it.
Final Thoughts.
Although I’ve not seen many of these painted and on display at shows, I know quite a lot were sold. - Deservedly so, as although small and compact, it’s a superb little character piece.
I’m glad I attempted the second paint-job, as I now have a very nice version of this in my cabinet, not having to give the second one away for Martyn to use on his display when he attends shows.
The kit is still available from MDP and their website is reached at Model Display Products

We need your consent to load the translations
We use a third-party service to translate the website content that may collect data about your activity. Please review the details in the privacy policy and accept the service to view the translations.