14th Century Mongolian Archer
1.9th scael Resin bust from Young's Miniatures
Painted in 2008
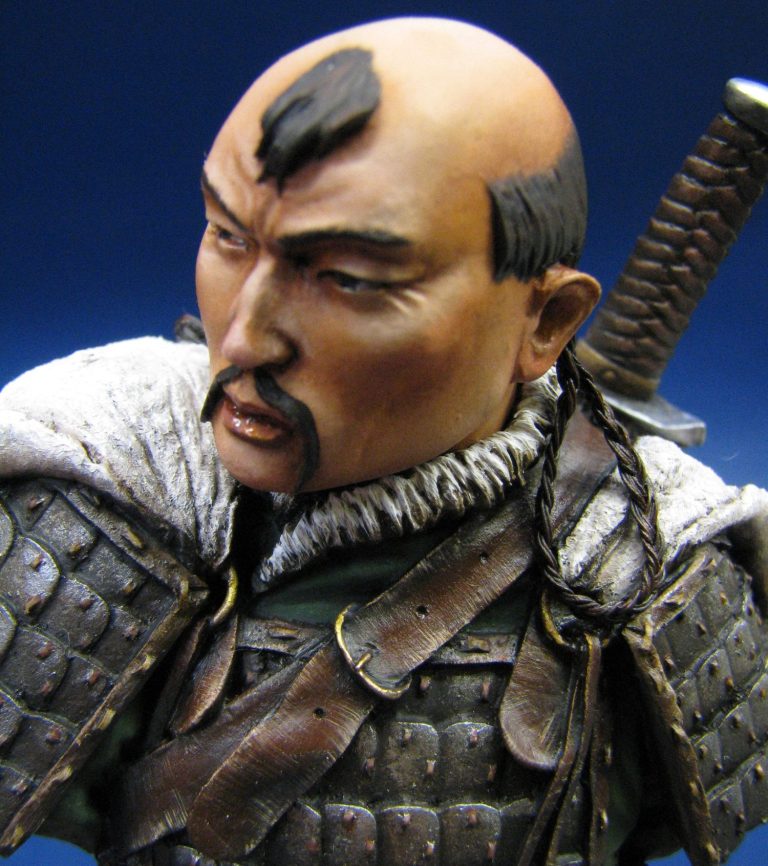

Busts tend to be thought of as a “quick fix” for a lot of us. There’s certainly nowhere near as much work goes into painting one as does a full figure, let alone the effort of assembling and painting a mounted figure. But there is a lot of satisfaction to be had; not to mention if you pick the right one, a stunning little model can still result.
Personally I like the idea of a quick project. Sometimes I struggle with protracted assembly and paint-jobs, and with a bust, it’s a little like a holiday break to do one of these to get me back into the mood after a couple of kits that have been hard work or perhaps a little less than straight forward.
Young Miniatures produce some lovely models, usually well sculpted and with distinct character / racial traits that to some might seem a little caricatured, but work well enough for me.
I was given this particular model by a friend – Ian Johnson – a chap who is particularly keen on all things Mongolian, and who’s knowledge of such is a little bit one the scary encyclopaedic side.
“Scary ?” you ask – yeah, ‘cos he’ll definitely pick up on anything that’s wrong.
Anyway, this was one of two he said he’d like to see painted, and I plumped for this, simply because I’ve not had chance to do one of Young Miniatures busts, and what better excuse than that ?
So eager was I ( hey, where’ve I heard that one before ), that the paint was hitting the model before I’d taken any shots of the bare resin castings.
I’ll have to give a brief description of them then…..
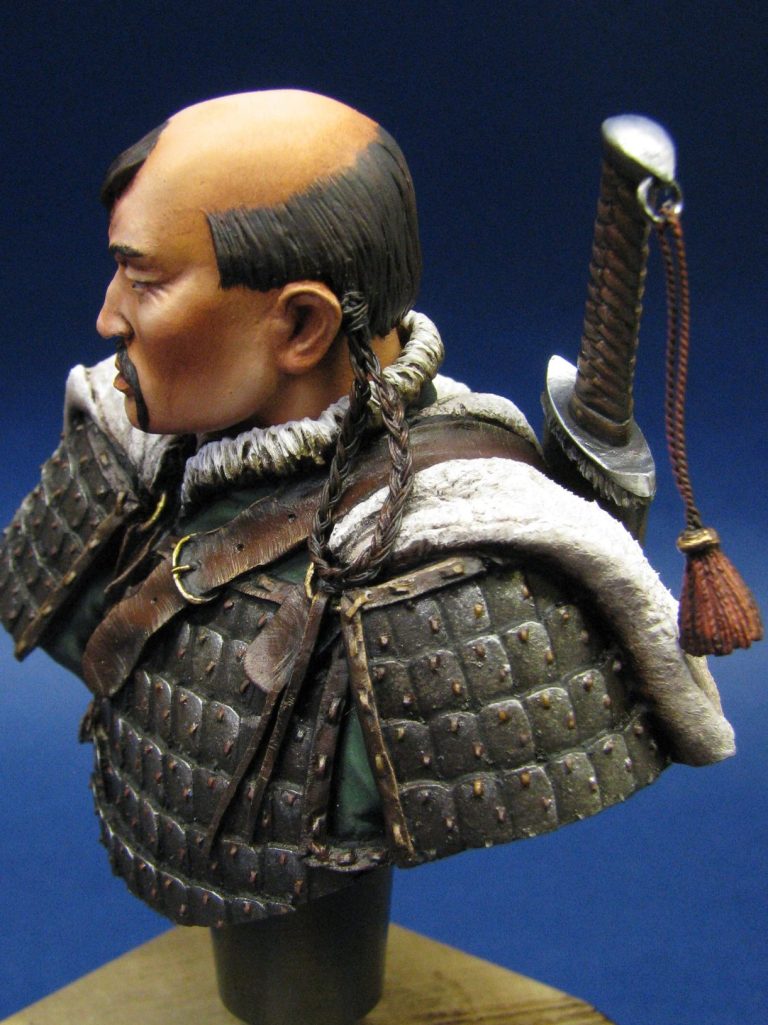
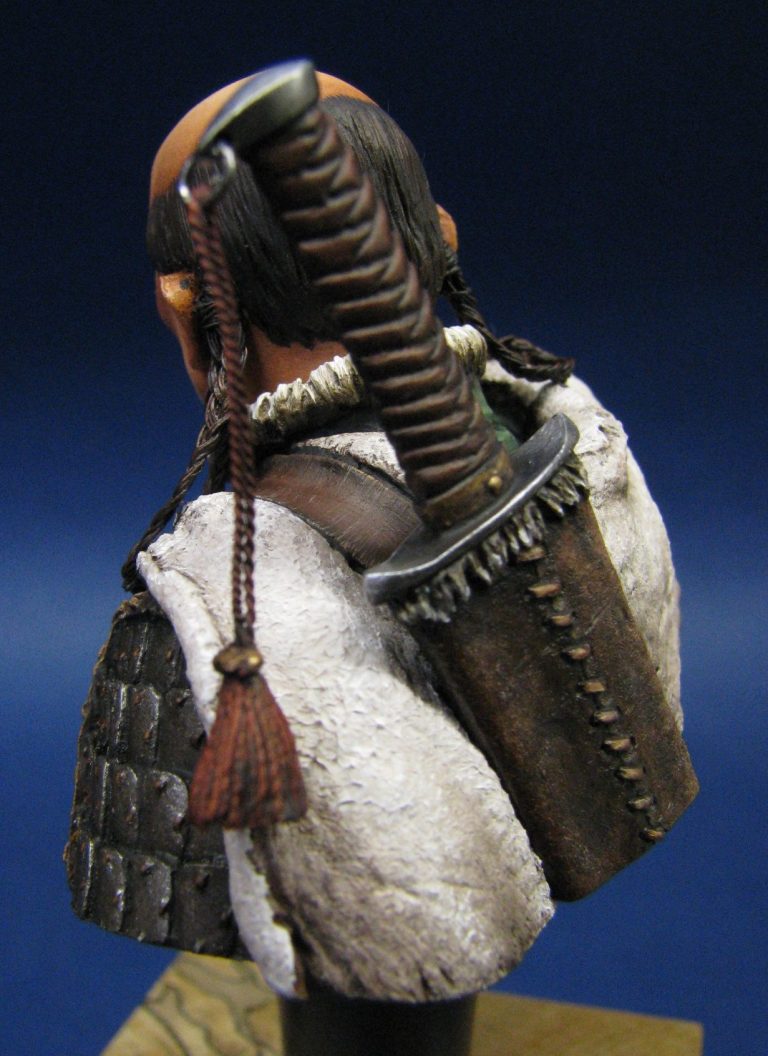
Inside a very nicely presented box wrapped in some thick foam packing was as complete a kit as you could ask for.
No, I don’t mean that it’s a surprise to get all the parts; I mean that there’s the components for the bust, a pedestal base big enough to use without a plinth ( if you so choose ) and a nameplate for on a plinth, if you decide to go that direction.
Sculpting is good, although I think that the racial anatomy of the face is perhaps a little too forced. But it does look the part. The armour is finely detailed, and the cloak ( or Deel ) is nicely textured.
The parts split is logical and helpful to anyone wishing to paint the model as individual pieces prior to adding glue – the head / neck is separate from the shoulders and slots into the collar recess with no need for filler. The scabbarded sword slots into a recess on the back of the deel, again no filler is needed but I did add some to hide the joint between the two parts underneath be bust – but any gap would be difficult to see when viewing the model normally.
There’s two little loops of plaited resin for the hair. These join onto the side of the head, but will need bending to conform to the shoulders of the model. I opted not to use these, but to plait some fine copper wire and use that instead.
And finally a two-piece base that can be used either in its entirety or split to use just the upper half – the choice is yours.
There is also a small brass etched nameplate with black infill to pick out the lettering of the name and a decorative border.
So that’s the parts described then.
Sculpting is good, as I’ve mentioned, as too is the moulding. There are the usual part lines to search out and clean off with a file and some fine grit glass paper, but certainly nothing that needs filler.
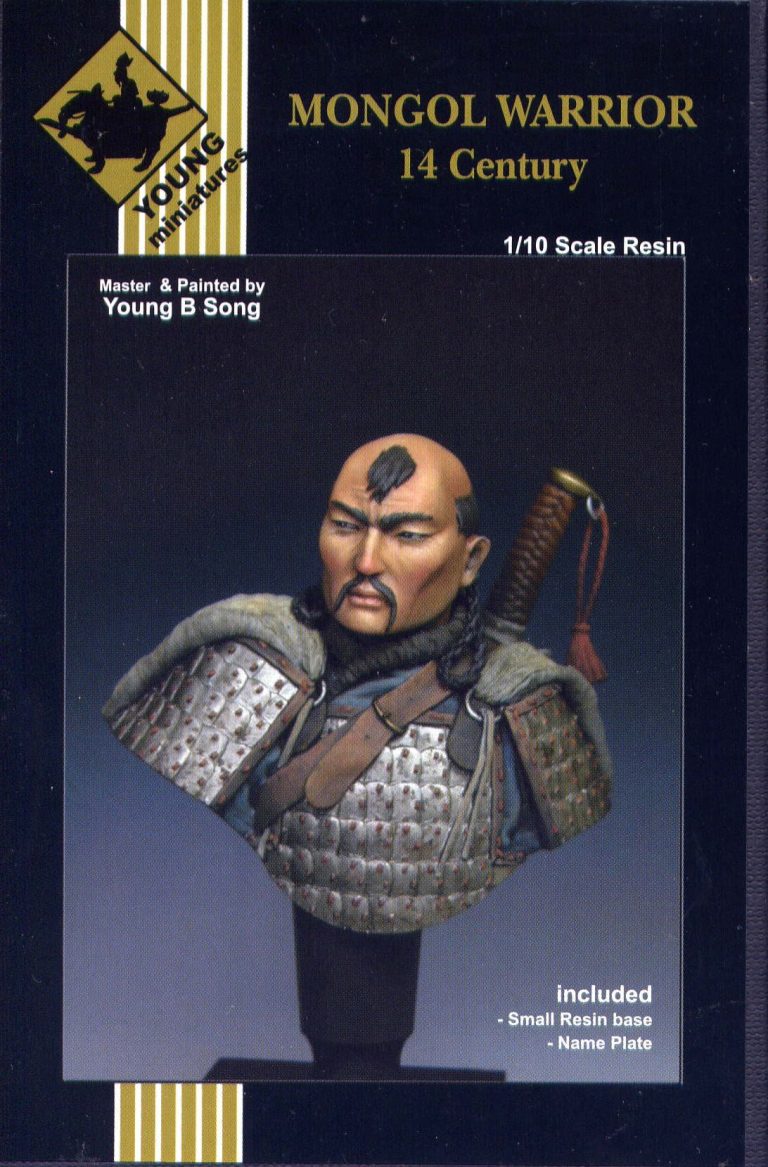
Photo #1 shows the box art, and to be honest there’s not much that can be done in a major way to make your version look different from that. I don’t mean to sound negative here, simply that it you’re looking to make any changes, then the best of luck.
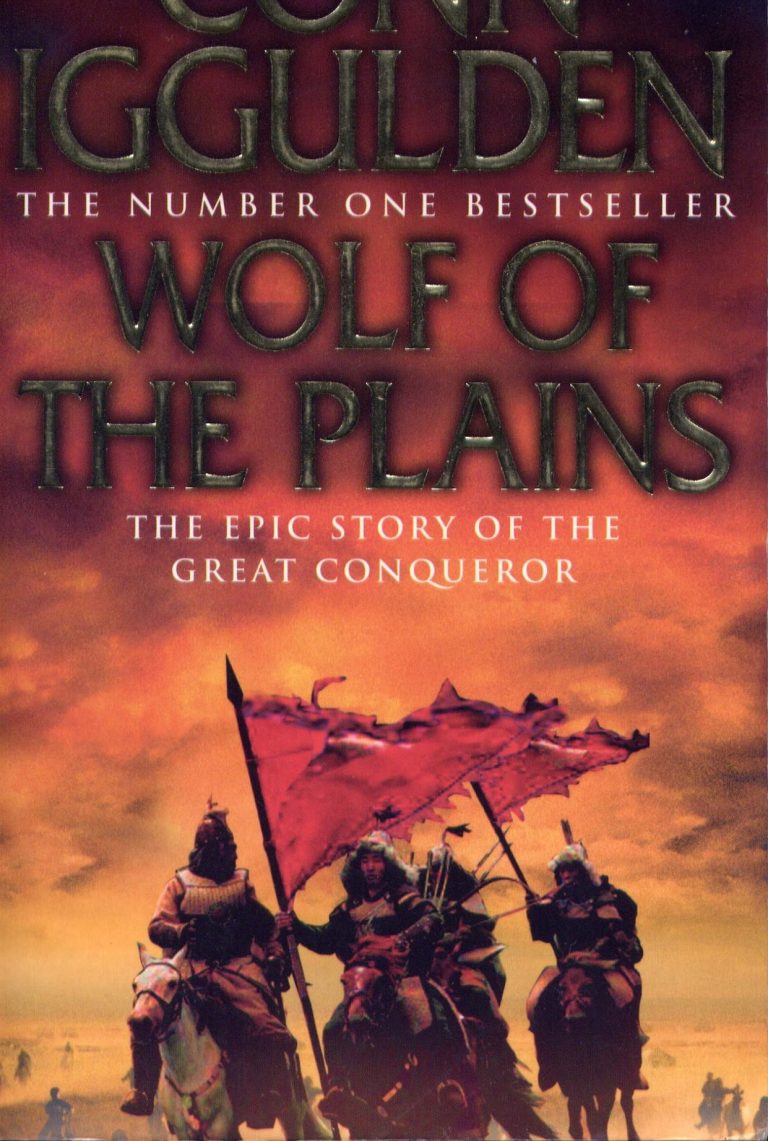
I’d been reading the Conn Iggulden books that dramatize Genghis Khan’s life, and stick quite closely to what remains historically of his growing up and bringing the Mongolian tribes under his control.
Obviously there is a lot of dramatized “filler” to round out the story and make it click along, but any major historical facts have been woven into a clever and gripping story. I’ve pictured the cover of the first book ( Wolf of the Plains ) which tells of Genghis and his brothers as they grow up through childhood and into young men. It’s a good read, and gripped me enough to make me go out and buy the second book when it cam out in hardback. This second book – Lord of the Bow – tells of Genghis’s life as he unites the tribes and although good, I think it moves a little too quickly through his years in command of the Mongol horde and it’s rolling battle through Eastern lands.
Enthused by this, and having taken a few notes that I thought might be pertinent to the painting of the clothing, I set to with my usual “bull in a china-shop” speed.
Hence the lack of a parts shot, and in fact the third picture shows how far I got with the paint prior to remembering that a camera shot or two might be of help !
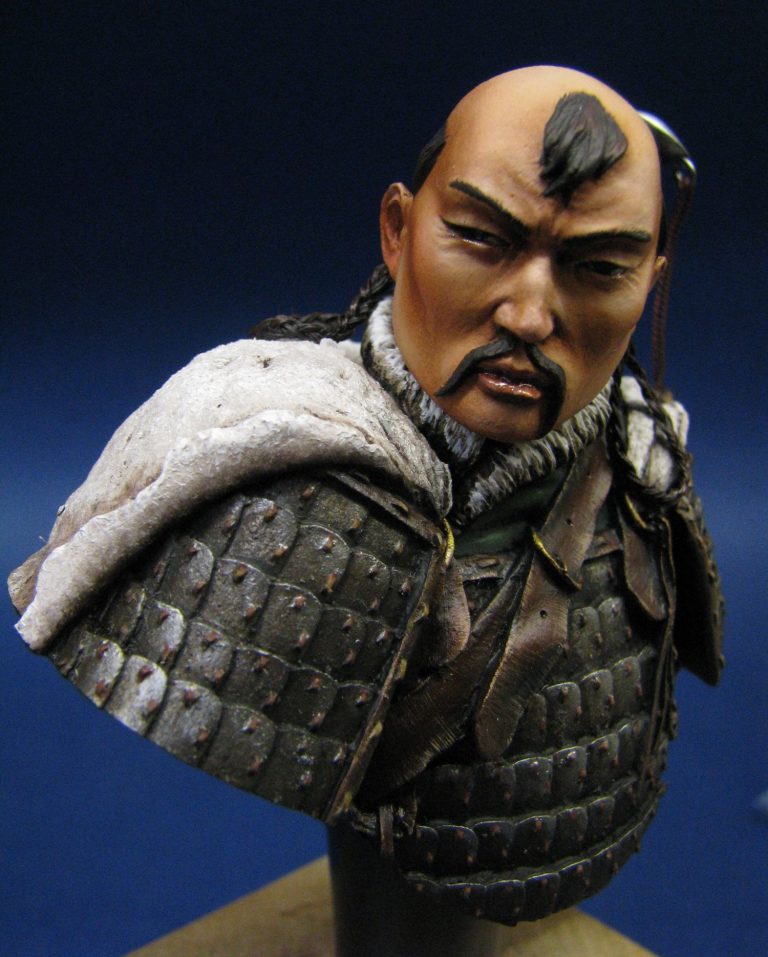
Photo #3 shows the armour finished. I do any metallic painting early on so that any stray flecks of paint will be covered up by paint that butts onto the armour areas. Hopefully this stops stray bits of metallic paint appearing ( usually as if by magic ) in the middle of an area that is supposed to be matt material, and making a sparkly announcement to all and sundry.
The base for the armour is Games Workshop “Chainmail” acrylic. It’s a fairly bright silver that needs toning down with some Chaos Black. I then added a very dark wash of Mars Brown and Mars Black to pick out the basic shadows, stippling this to make a dirty, pitted effect in the recesses of all those little plates.


Further shadows were painted on with pure Mars Black, getting just small amounts of this into the deepest recesses.
Highlights were added using some light coats of the original Chainmail acrylic, and topped off on the scales that would have caught the light the most with some Winsor and Newton Silver ink.
I sealed the whole area with a couple of coats of Tamiya Smoke acrylic, thinning this with some water so that it flowed a little more easily.
Next was the deel. This is an item of clothing, similar to a long coat that can be worn as a cloak and is made from felt – basically sheep or goat hairs shorn from the animals and repeatedly pounded, folded and pounded again with stones until a matted cloth is formed that can be sewn together in sections to make a garment.
It’s a dense, heavy material, and I should suppose it’s quite coarse too, or would have been in medieval times where processing might not be quite as refined as the present day.
I take it that some of these deels might well have been dyed, but that probably most of the warriors - particularly the poorer ones - would have been content to have one made of undyed cloth.
The warrior here can’t be all that down at heel – he’s got armour after all; but the priority for survival by any fighter would I think be armour and weaponry, then wealth and finery after that.
So, I began with a few coats of GW Commando Khaki acrylic as an undercoat. It’s a fairly pale colour, and lends itself well to being an undercoat for off white sections of models.
Over the top of this I added a fairly thick coat of a light khaki oil paint, made up from Titanium White and some Raw Umber, Mars Yellow and a little Mars Black.
The above colour didn’t want to be too dark, so the additional colours were added in very small proportions when compared to the white.

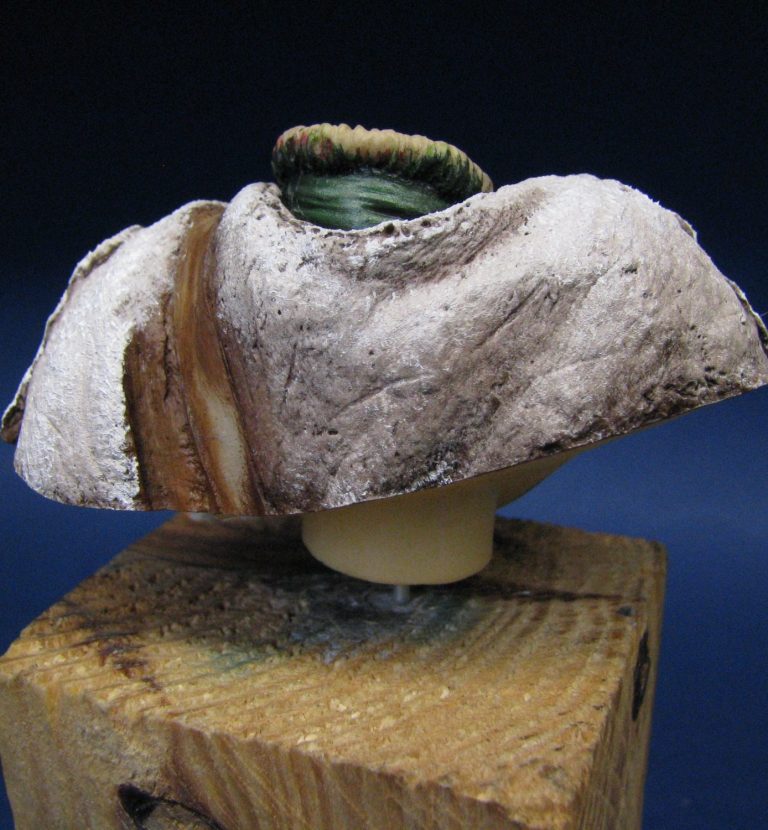
This was added to the whole of the deel, and then shadows built up with further additions of a dark khaki / black mix ( Mars Black and Mars Yellow ). This was faded into the mid-tone sections, and then I began adding pure Titanium White.
This is stippled onto the surface of the model, using quite a large brush, and allowing some of the mid-tone to mix with it to gradually change the colours from the light Khaki to an off-white. By adding more and more of the white, I finally got the upper shoulder area to be almost pure white, and because of the thickness of paint, there was an even better texture to the deel garment. See photo #4.
There was a down side to this texture, in that it would take about a week to dry in the heated drying cabinet.

Whilst that was happening though, I could move onto the face, as I’d kept all the parts separate while they were painted.
I began with a mix of W&N Flesh Tint, adding to this about half again of Mars Yellow and just a dab of Titanium White. This gave a distinctly sallow flesh colour mid-tone that I could paint over the undercoat of Humbrol Flesh colour / GW Bubonic Brown.
To add shadows I used a 50:50 mix of Mars Brown and Mars Yellow, the yellow dulling down the orange bias of the brown. Deepest shadows using Burnt Umber were added once the paint had dried. Whilst it was still wet though, I blended in some Titanium White to the highlight areas, changing the mid-tone to a lighter shade.
After drying and the deep shadows being added, I also used some thinned Carmine oils to make the cheeks look a little rosy, and therefore hint that he might be out in the cold.
The hair was a very dark brown mixed from Mars Black and Mars Brown, with highlights hinted at with some more of the Mars Brown. I left off the hair plaits at this point, determining to add them once the head was joined to the shoulders.

Impatient as always, I moved back to the body section as soon as I could, adding the shirt in an off white with acrylics. This didn’t look different enough from the deel, so as I didn’t want to copy the box art with a blue shirt ( see what I mean about not having much colour choice now ? ), I opted to paint the shirt green.
There’s not much area to go at here, certainly not enough to make a decent attempt at a pattern, so I left it a plain single colour, just using shadows and highlights to break the small areas up.
The belt gives the painter a bit more space to play about on, adding splits and scuffs to the surface with painted effects. The buckle isn’t so big either, but again a little playing about with some bright gold paint on the darker bronze and black colours used for mid-tone and shadow repay the painter with some small details that stand out.
The only part of this kit I felt was weak was the leather or cloth threads that join the armour plates. They’re very small and there’s not much to them, but they aren’t evenly sized, and some seem no to have been properly moulded. It’s a small complaint, and most folk wouldn’t notice on a finished kit, but the painter will if he’s trying to get a shadow, mid-tone and highlight on each one.
Photo #5 shows how I plaited wire. I used twelve threads of household multicore flex for this, having stripped off some old wire for the purpose. Tying a knot in one end of the twelve wires so that they stay together and then fastening them down to the workbench with some Blu-tac is the easy bit.
For those who don’t know how to form a plait, it’s easy. Split the twelve wires into three bundles of four, and fold the outer right one into the centre of the other two. Then take the outer left bundle and fold that over into the centre of the other two. Then the outer right one again, then the outer left one, and work down the wires keeping the bundles separate from each other as you fold them over each other.
This can be done with single wires or bundles of several threads, depending on the thickness needed. It’s more effective to use several thin wires if you’re trying to represent hair, rather than one thick piece of wire.
Also, don’t worry if one or two of the wires break as the bundles are repeatedly folded over each other. This thins the bundles naturally – as hair would thin out as you worked down its length, and although the plait might appear to diminish in thickness, that will appear more natural.
So, that’s what’s happening in photo #5, although in actual fact, the bundles shown here are made up of six pieces of wire each, and were too thick to be used – they looked over-scale. So I went back and made another plait with four wires in each bundle, which looked better, and used that.


These wires were then made into similar sized loops to the resin ones supplied with the kit, a single thread of the same wire used to fasten the loop at it’s uppermost point, and then painted and glued in place on the model. The soft copper wire lends itself to being bent into a natural form similar to hair that has been plaited, and is certainly easier to use than the resin loops included in the kit.
The sword and scabbard are a joy to paint, the scabbard has a rough texture on it, and I optimised on this by stippling different colours of brown and yellow paint on to make an organic stained look. The forged steel was painted with GW acrylics and topped of with that excellent W&N silver ink, and I have to admit to substituting some twisted wire for the resin cast thread to hang the decorative tassel on.
After that, the kit was just about done, and I added the upper part of the stand that’s included in the kit to the underside of the bust, with a very small amount of filler to disguise the joint, and then drilled and pinned the model to a plinth.
The little etch brass plaque was added to the front of the plinth, I did end up repainting the outer edge of this with some black paint, but otherwise, it’s as you get it.
Final thoughts.
Nowhere near as involved as the Pegaso Genghis Khan kit, this is still a nice model to add to the display cabinet. I quite enjoyed the simplicity of the piece, with enough detail to make him interesting to look at.
I’m ashamed to admit that my very favourite part of the kit will not get seen much, and that’s the sword. The metallic paint works well on the pommel – so much so that on the only occasion that he went to a club meeting I was asked by three separate people if that part of the kit was cast in white metal – so I must be getting things right !

The leather on the scabbard is good too – it looks thick and abused.
So, a good model then, and not one that will strain you to paint really either.
Thanks go to Ian Johnson for allowing me the pleasure of painting this model. He knows his stuff it would seem, and can pick a good ‘un too.
Kit available from:-
Historex Agents
Wellington House, 157 Snargate Street, Dover, Kent. CT17 9BZ U.K.
Tel. 01304 206720
E-mail Sales@Historex-Agents.co.uk
Website www.Historex-Agents.com
We need your consent to load the translations
We use a third-party service to translate the website content that may collect data about your activity. Please review the details in the privacy policy and accept the service to view the translations.