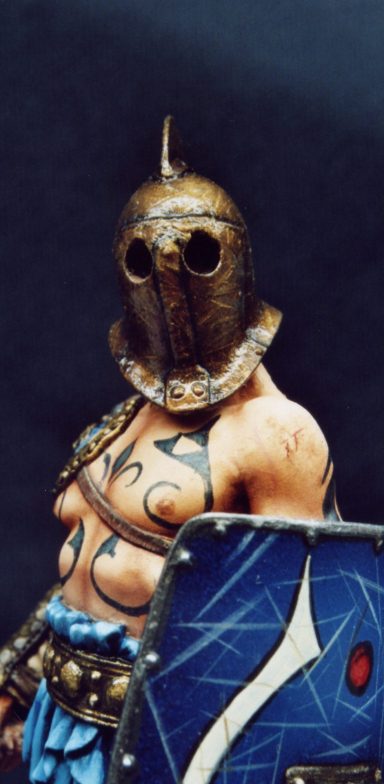

Rage, the Gladiator
75mm White Metal kit from Pegaso
Article in Military Modelling magazine in 2006
I did an article a while back about the Gladiators, just covering a few of the 54mm offerings.
There’s been several more from Pegaso alone, but as I’ve done a bit of work on this particular model, I thought that he deserved and article all of his own.
I’ve given the model the name of a character from a fictional novel by a guy called David Gemmell, although who’s to say that a gladiator with this name didn’t exist ?
The original model, when released by Pegaso, drew my eye, and I made a point of buying one from them at Euro 2005. It wasn’t until I started looking at the parts though, that the idea of removing the head and using the helmet occurred to me.
The idea was simple enough, but it would throw up a few problems. Not least was what the right hand and arm would now be doing; and dependant upon the choice made there, how would the anatomy be altered ?
Also, those eye holes are a bit large to have nothing at all behind them; what could I do to remedy that ?
I began by cleaning the model up, removing the mould part lines as usual, thinking what I could have the hand doing. The main components are shown in photo #1 at this stage. The only thing I could come up with, was having the model hold the sword, which fortunately is a full casting, even though it’s intended to be buried partially in the groundwork.
The problem here though was that the arm looked to be too far away from the body for the pose to now look convincing, and so there would have to be an alteration of the arm, dropping this in towards the body.
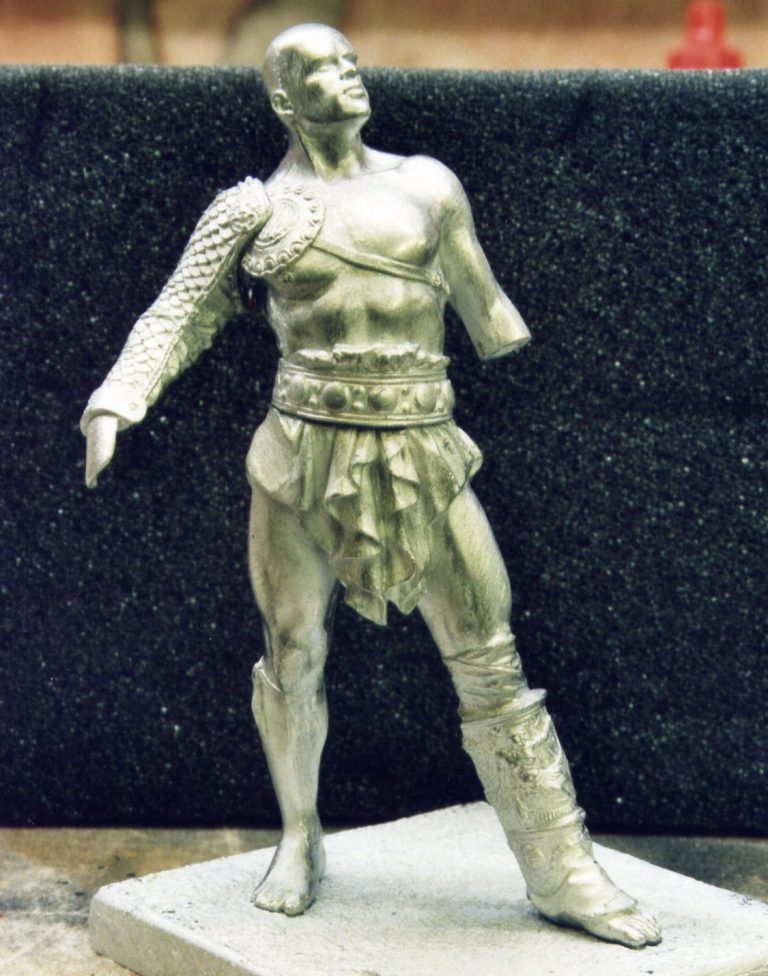

This in turn caused problems, as although it would be easy to add some flesh to the shoulder, if the joint between the arm and body components was simply angled out, the strap holding the armour over the shoulder would then be in the wrong position, and look as though the armour is trying to slide off. I’d have to make a cut down by the side of the strap, and bend the strap away from the arm, fill in the gap caused, and sculpt in some extra scales on the armour.
Being an out and out coward when it comes to things like this, I began by doing as much work as I could, without necessarily committing myself to having the model any different from it’s intended form.
I drilled out the helmet with as large a drill bit as I dared. Even then some cracks formed in the front of the helmet, although these were easily patched up with a little filler.
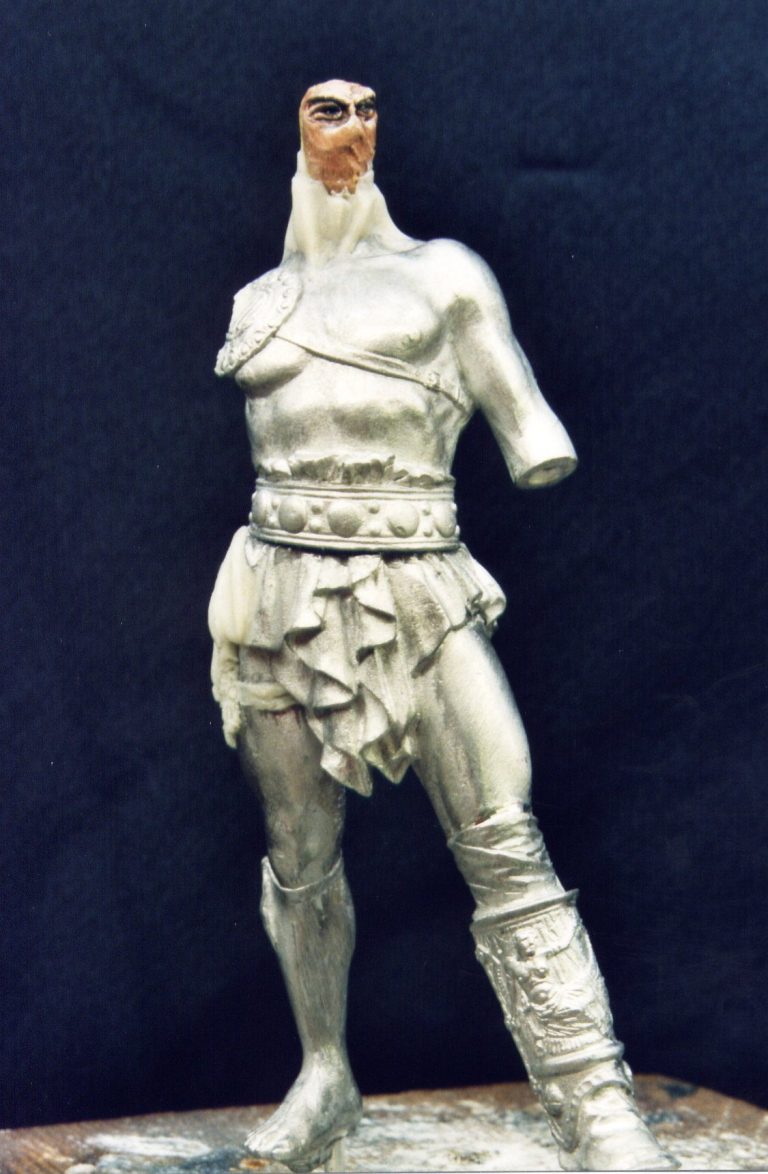
Next, I sculpted what is virtually a pair of eyes on a stick – see photo #02.
This would be all that was visible through the eyeholes anyway, and I made the eyes and the bridge of the nose, testing this inside the helmet a couple of times to see if it looked convincing. Photo #3 shows these being test fitted, although I’m not convinced that you get the effect I was after from this picture.
Now for the bit where I committed myself; I took a saw to the area next to the strap on the arm, sawing down to the circular decoration that would protect the armpit. I levered the cut wider using a small screwdriver, testing the fit and “hang” of the arm on the figure until I was happy with the positioning.
I’d still need to add some filler under the arm, to form of some of the linen padding that would be underneath the armour.

I removed the fingers from the hand, and glued the sword in place, wanting a relaxed grip, that would allow the sword tip to be dipped. I then added Magic Sculpt to the sword grip so that I could sculpt in the fingers gripping the sword.
The last thing I did was to remove the head. Initially I’d entertained the idea of drilling out the helmet enough so that I could trim the ears and possibly some material off the sides of the head so that I could use the one that’s given with the model. But having seen the size of the hole that it was possible to drill into the helmet, I’d have to trim a large amount of the head away, and it would be simpler to take the route that I chose.
Not only that, it’s a good spare to have in the spares box, so there’s no real loss.
The last alteration was to add the “eyes on a stick” to the body, setting these at the correct height for the helmet to sit at, and then re-sculpt some of the neck so that there was something to support the bottom rim of the helmet, see photo #4.
I did paint the eyes first, before adding them to the body, simply because it was easier to do than having them attached to the model.

Photos #5 and #6 show the model from different angles at this stage, and the other additions of putty can be seen. Material has been added to the loincloth to cover the blank area where the helmet would have been held against the hip, a bandage has also been added to the right leg, and a pair of ends sculpted for the ties on the lower left leg.

Photo #7 shows a close up of the helmet covering the “eyes on a stick”. With the benefit of good light and a means to turn the model back and forth, the trouble taken to drill out the helmet and add the sculpted eyes and bridge of the nose can be seen quite easily. However, this photo is about the best I could do ( and I took half a roll of film to get this much of the eyes to show ), but I don’t think that the effect I wanted has transferred to the medium of film all that well.
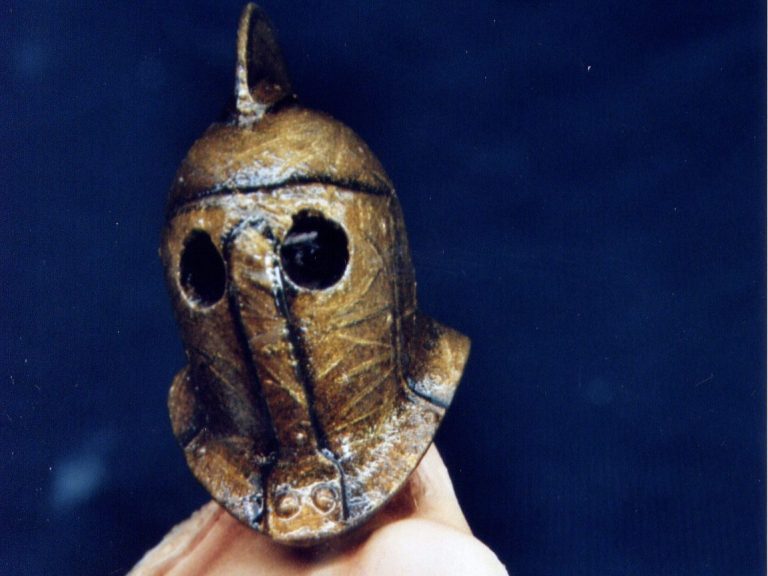
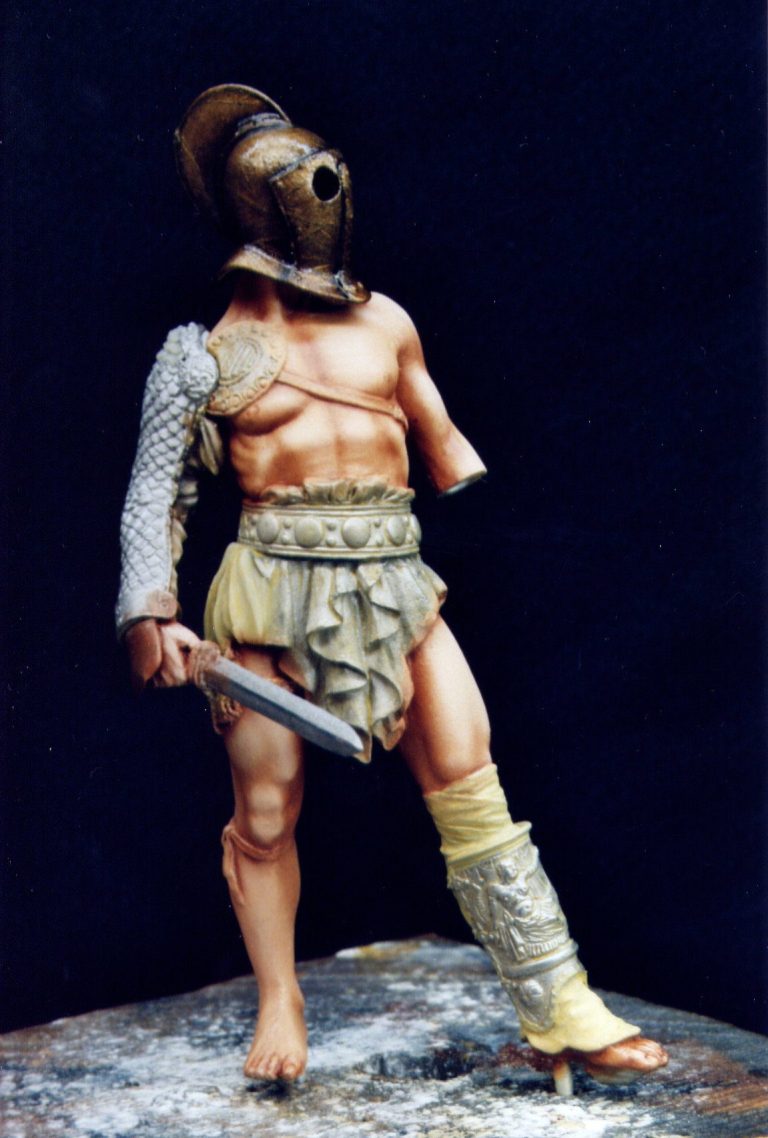
Photo #8 shows the model temporarily assembled so that I could gauge whether the sculpted areas looked O.K. He still looks a little odd without the addition of the left arm and shield, but the addition of these parts will come soon enough.
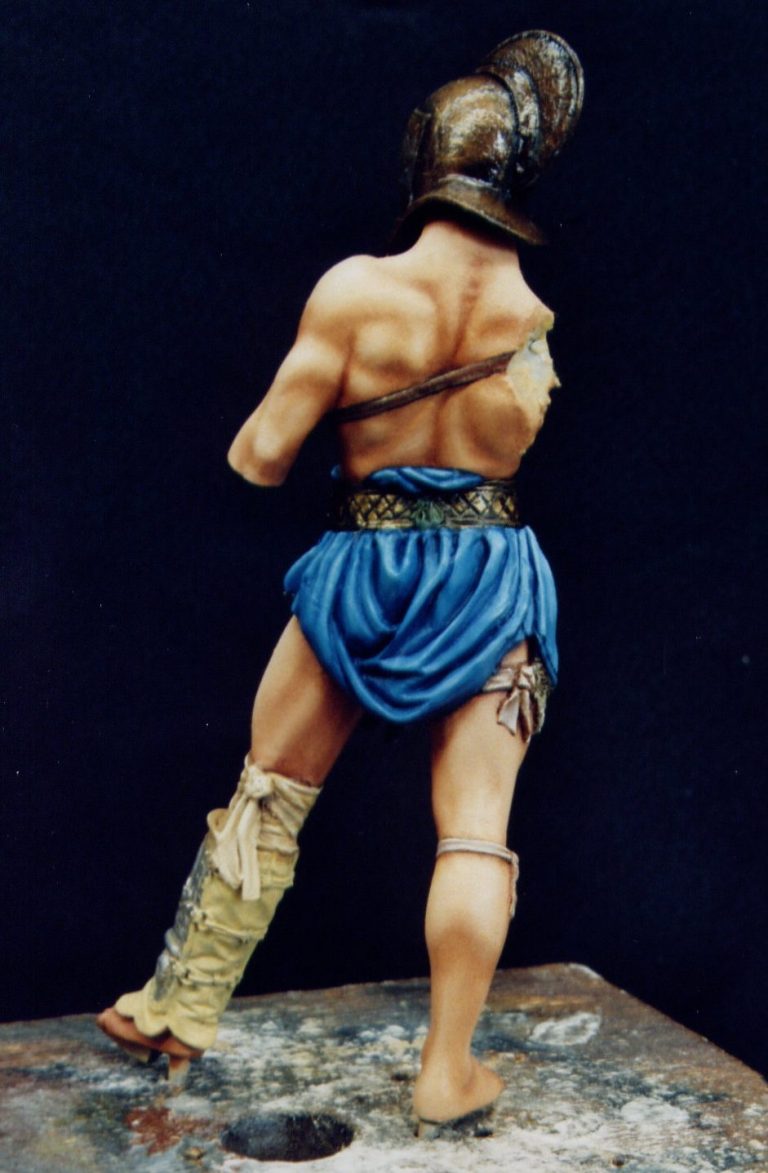
Photo #9 and #10 show a front and rear view of the model about half way to completion, with the loincloth, skin and some of the metalwork painted.
I used my normal method of oils over an acrylic base for the skin areas, adding a little Liquin to the mix so that a slight gloss finish resulted. This I thought would look like sweat at this scale, and I would later add some fine lines of gloss varnish where sweat has run down the body.
For the loincloth, I used an undercoat of GW “Moody Blue” acrylics, and then painted over this with Prussian Blue. For mid-tones and highlights I added varying amounts of Titanium White, blending these together with a fine brush.
I decided to depict the metal areas of the helmet, belt and leg armour as mainly bronze, and for this used a green undercoat ( GW forest Green ) and over this used Winsor and Newton Bronze Oil colour. I mixed this with some Liquin and also some Mars Black for the shadows, and then added W&N Gold to build up the highlights. Some small amounts of W&N silver ink ( I know, it’s water based, but it still goes over the dry oils O.K. ), to add a few extreme highlights to the metal.

The bandages and other cloth wraps on the legs have been rendered in various shades of pale brown / yellow. I meant for these to look like random pieces of cloth used to pad out the armour, or as bandages, and that they would probably be slightly less that clean. Thus I used Orc Brown and Skull White with a little Bestial Brown ( Funnily enough all GW acrylic colours – how did you guess ? ), to build up a mid-tone, that I could then add more of the Bestial Brown to for building up shadows, and then add highlights with more of the Skull White.
As I’ve used blue for the “theme” to my growing army of painted gladiators ( well the recent works at least ) I thought that I’d continue with this, and painted the loin cloth and the padding on the left leg with blue oils.
The loin cloth in particular is fun to paint, mainly because of all those wrinkles and folds. The highlighting and shadows too quite a while to add, and I found it easiest to paint on the darkest colour oils ( Prussian Blue with some Turquoise and Titanium White mixed in ), and then add more Turquoise and Titanium white to the mix for the mid-tones. Once these were built up, highlights could be added with more of the white, blending this into the previously applied colours, which were still wet.
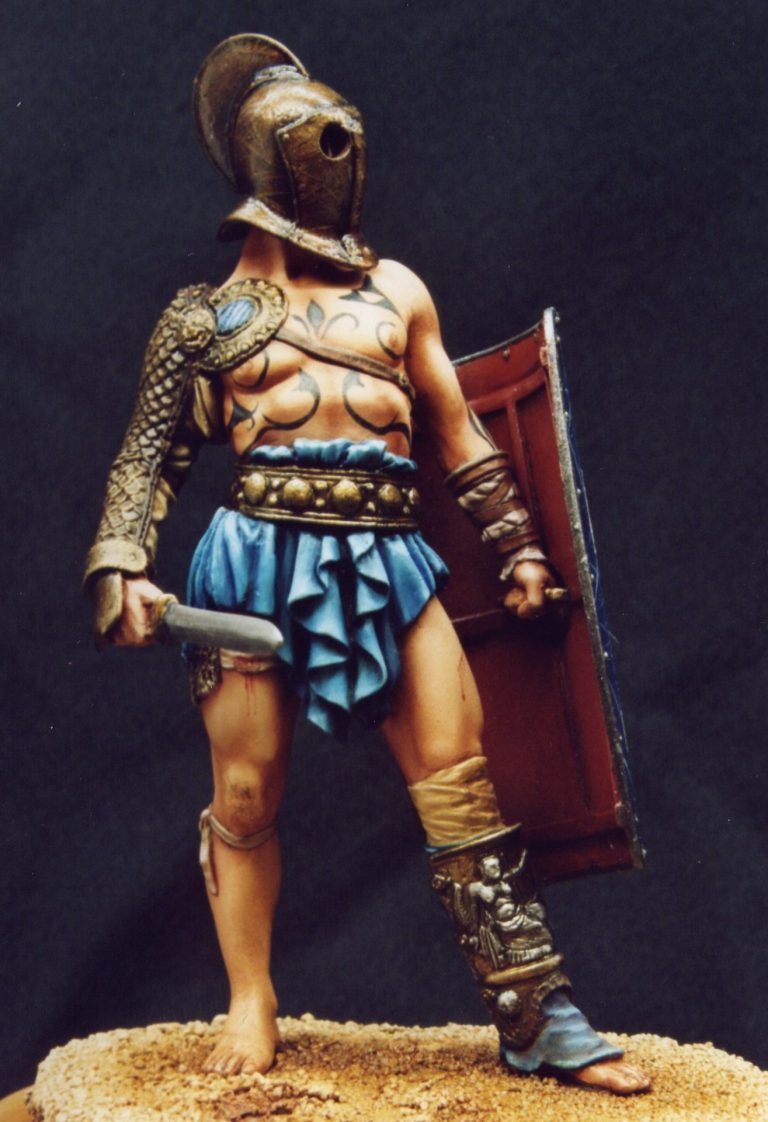
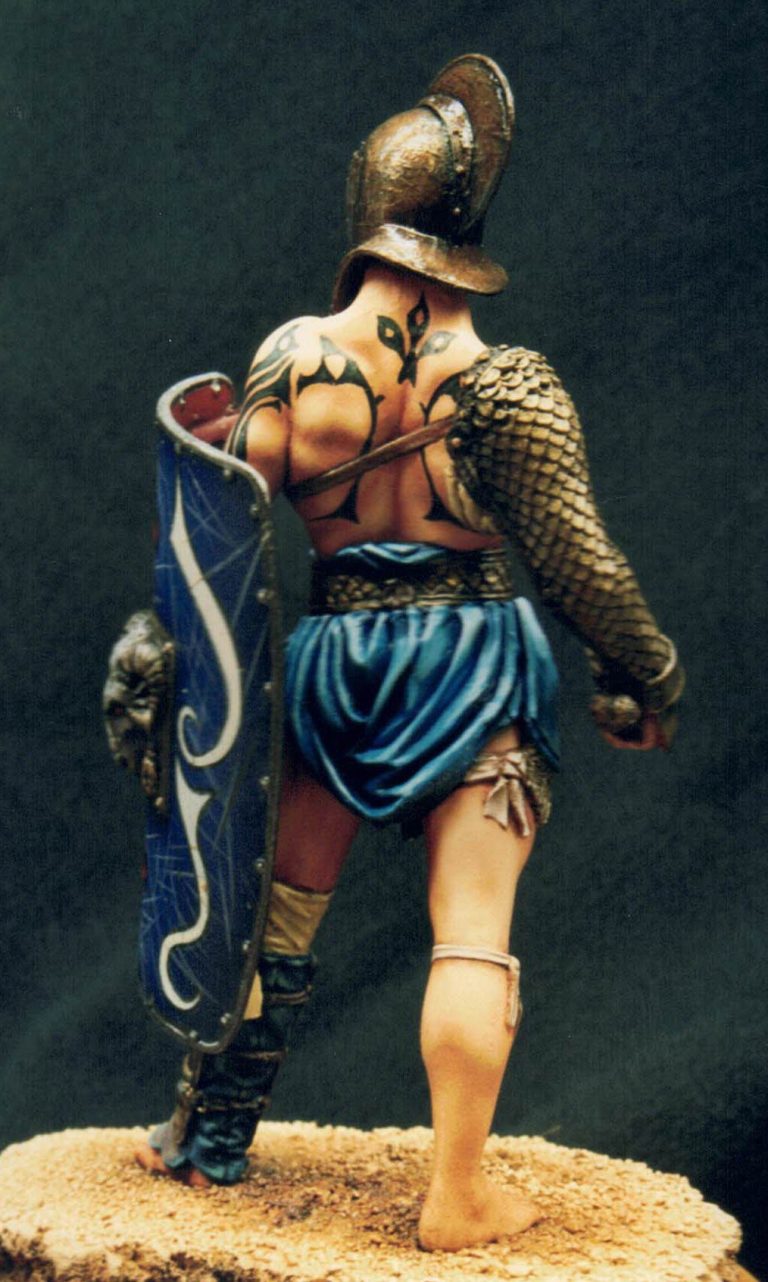
The detailed embossing on the leg armour was painted with some GW “Chainmail” acrylic, and then some shadows from Mars Black oils added in. Final highlights from W&N Silver ink were added only after the oil paint had fully dried.
I detailed the sword, thinking back to the style of weapon used in the Gladiator film, and added a wood grain effect to the tiny area of pommel and guard. It’s barely discernable on the model – and unless the pictures get blown up, I seriously doubt that most people would even notice.
The sword blade was painted with the same mix of paints as the silver details on the leg armour, and I tried to emphasize the shadows on the underside of the blade in the hope that the upper highlights are made to stand out more due to the contrast.
At this point – with the figure almost finished, I decided to start adding the glue.
A couple of touches of superglue to add the left forearm and hand, a couple more spots to fix the helmet in place ( go on, admit it, you can see it coming ). Um, that nicely painted little set of eyes……
The superglue frosted the areas of skin inside the helmet, and the Law of Sod being truly in full flow, I couldn’t get the helmet off to remedy the problem.
I know, I should have thought about the possibility, and used wood glue to hold the helmet on the figure, but I didn’t.
So to make good the mistake, I had to paint the eyes and skin tones again on the area inside the helmet, using a fine brush and only the space available through those two ( what I’d thought were initially massive ) eyeholes.
I’ve no need to tell you how small they shrunk when I was trying to do this; they seemed ludicrously tiny. However, I did manage to get a decent finish on them again, and dare say that it’s better than the initial paint job, daft as that might seem.
Usually I leave the groundwork until last, but in this case, I didn’t want to mess about with the figure after the shield had been put in place. So I made the groundwork now.
After selecting a plinth, positioning the model roughly where it was going to be and drilling location holes for the wire pins, I could begin making a small area of the arena floor.
It’s a relatively simple affair, and done so that it matches in with the other gladiators that I have in my collection. I simply mixed up some Milliput, and added this to a decorative wood plinth from Armstrong Bases of Peterlee.
By gently teasing away the edges of the putty with a scalpel so that the Milliput tore away in a ragged fashion, a random effect was left on the edge of the groundwork. I added some sand to the top, pressing this into place, and then painted over some thinned wood glue ( 1;1 mix with water ) so that the sand would stay put after the Milliput had dried.

So that there was a positive location for the model to sit into, the figure’s feet were pressed into the soft putty so that the soles of the feet were just below the level of the sand. The figure was then removed.
Once fully dry, the groundwork was painted with a thinned application of Mars Brown oils, adding to this some Mars Yellow and then Titanium White to build up the highlights. Shadows around where the feet would be were added to the groundwork once the model was glued in place, as too was a dusting of pastel chalks to add to the dry look of the sand.
Now for the shield.
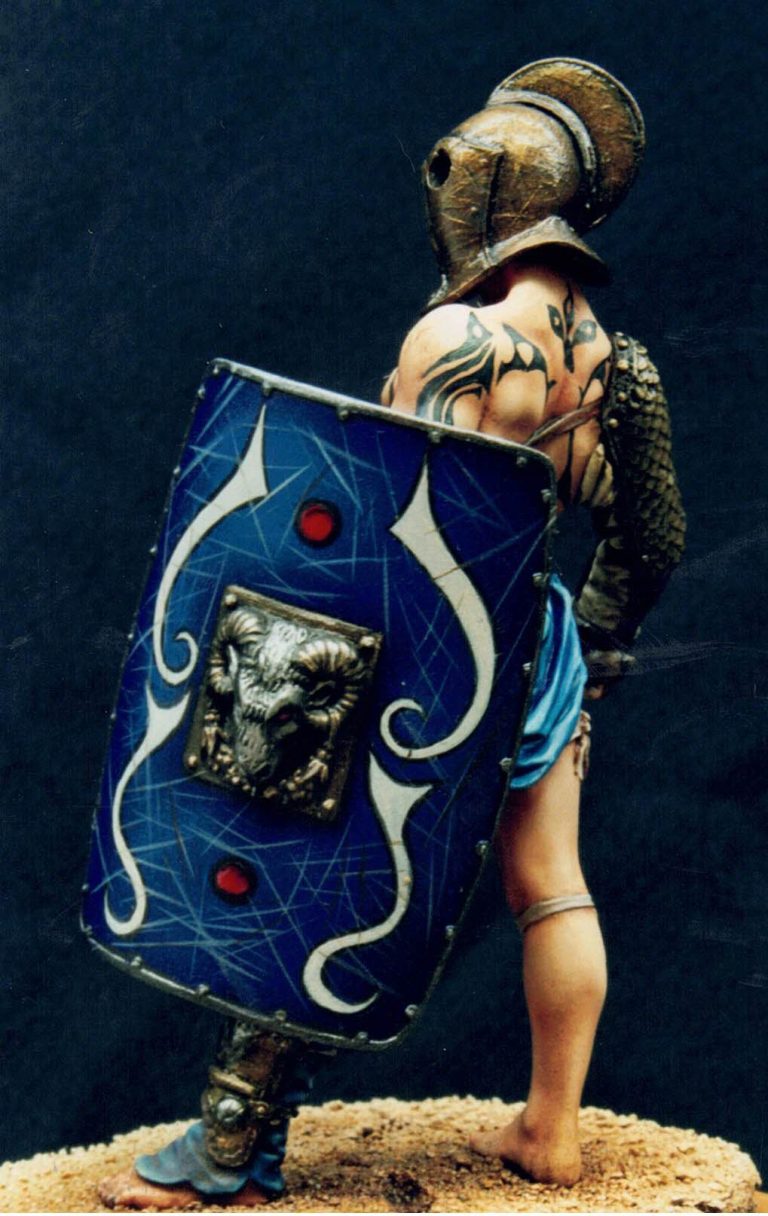
I wanted the figure to represent a Celt, and so carried the blue theme over onto the shield, but added some vaguely Celtic designs with black bordering to off-white shapes. Although I tried to make the shield look interesting with these, and with shadows and highlights on the blue areas, it was that massive a space, that it still looked rather empty.
After painting the shield boss with the same bronze and silver shades of colour used on the leg armour, I then added damage to the shield with lots of very thin lines of off white oil paint.
I wanted to make the shield look battered but not heavily damaged, as though there hadn’t been enough time for his opponent to get a good strike in on the shield, let alone to him.
The back of the shield was painted with a dark red/brown, as this is quite a prominent area, I thought that it might lift the monotony of the blue, without losing the idea of matching clothing.
Whilst the shield was drying, I returned to the figure to paint the leather areas of the belts, which were painted to look worn. I added Burnt Umber and Mars Brown oils to get the basic shadows and mid-tones in place, and then adding cracks and scratches with Mars Yellow and Titanium White to the edges of the belt.
The Tattoos were added just prior to fixing the shield in place, the swirling Celtic designs being done with a fine brush and a mix of Prussian Blue and Mars Yellow oil paints. I added some very basic highlights to the tattoos, but didn’t want to go too far and chance ruining the simplicity of their design.
I added some ground up pastel chalks to the areas of the model that might get dirty in a fight, hinting that the battle had been fast and furious. There was some added to each knee, the lower legs and a small amount to the left shoulder too.
I decided to add a couple of minor cuts to the model as well, making thin lines of a dark red with a mix of Mars Brown and Carmine oils. Small runs of blood were brought down from each of these, although “less is definitely more” in cases such as this.


Last of all, the shield was glued in place, after the model had been added to its groundwork.
Final thoughts.
This is a good model, just built from stock. Then again you can’t go far wrong with anything from the Pegaso range.
I realise that a lot of people will be making exactly the same assumption as I did; that by simply removing the head and adding the helmet, the model will look different. I expect a whole host of the same idea at Euro 2006; in fact I’ll be disappointed if there aren’t at least half a dozen.
I will be interested to see what these other modellers have done to get around the problems of what the model is doing now – with the right hand in particular, and all the different ways in which the pose is altered.
Just tilting or turning the head will alter the mood of the figure, giving him a different weapon or something else to hold will alter things further.
Just as a note though. I’m pretty certain that gladiators were pitted against differently armed and armoured opponents. Also that certain types of armament and weaponry were accepted as antagonists. Using a second helmet off this model as though he’s just fought against a similarly armoured chap is probably not accurate. I’m not one to say that it would never have happened, but I’m sure there’s plenty out there that would.
Maybe adding a trident and net – as though picked up as trophies, with the sword stuck into the ground as Pegaso intended might work ?
It’s been enjoyable making these changes, and hopefully I’ve been one of the first to try tackling the problems of what comes next. Maybe you can see where things could have been done better, and it might give you a few ideas of what not to do.
Hopefully I’ve pointed out a few of the pitfalls of what on the face of things seems a “quick fix conversion” into something that makes you have to alter quite a few other areas just for the idea to take shape.
Am I happy with what I’ve done ?
Well yes, I am. I do like the stock version though, and now that I’ve got the conversion out of my system, might just buy another one of these and do it straight from the box.
The 75mm range of models from Pegaso seems to be expanding nicely, and all the models I’ve seen in this range are well worth having a go at if the subject matter takes your fancy.

We need your consent to load the translations
We use a third-party service to translate the website content that may collect data about your activity. Please review the details in the privacy policy and accept the service to view the translations.