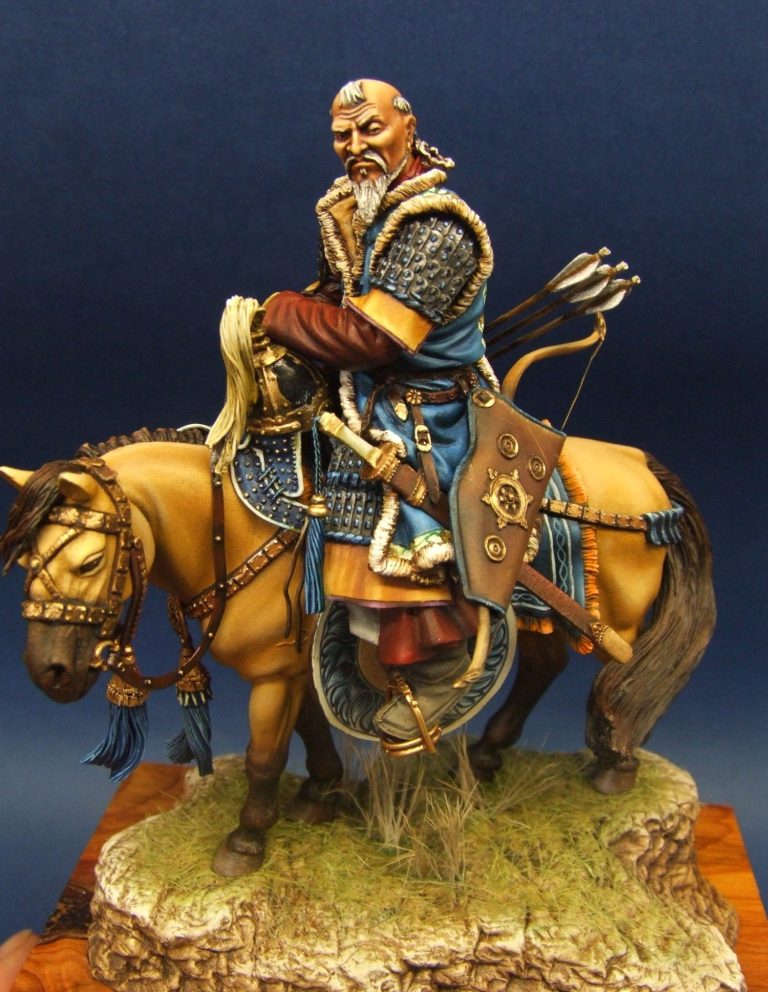
Genghis Khan
90mm White Metal kit from Pegaso
Article in Military Modelling magazine in 2007
When Pegaso released this model, several years ago, I was really tempted to buy it. The problem was the expense, compared to how much spare cash I had - well, there just never seemed to be a “right time” to get it.
Not only that, very few appeared on the show bench, but all the ones I did see were painted very well, and the intricate patterns kind of put me off.
Early in 2007 though a fellow convinced me that I wanted to paint this for him as a commission, and to be honest, I was a bit nervous at taking the job on.
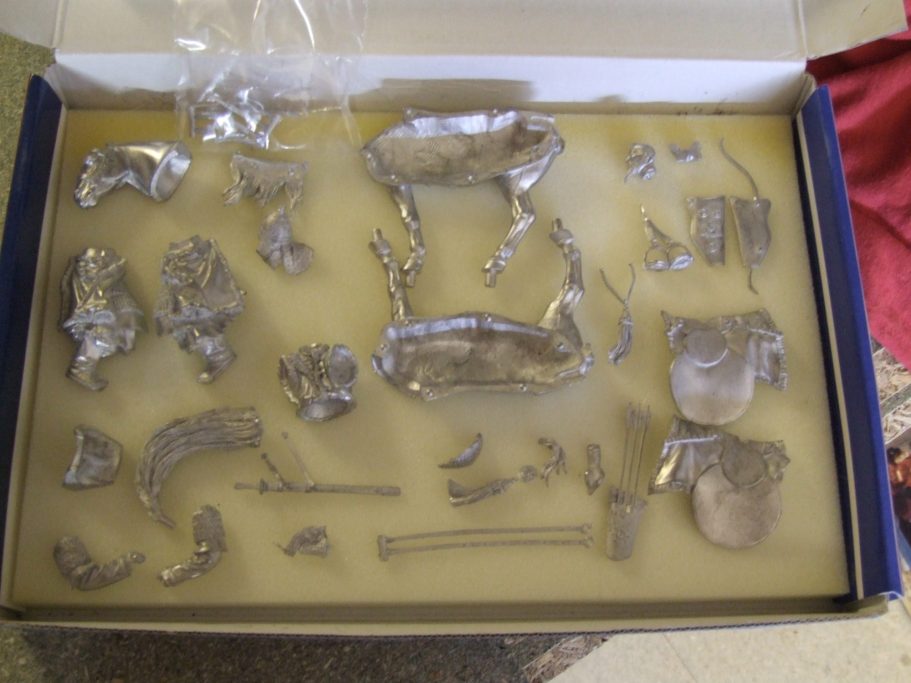
One of the reasons, regardless of the complex paint job, is the complexity of the kit – the parts are laid out in photo #1 and as you can see, there’s rather a lot of them !

Considering the age of the kit though, the sculpting finesse stands up well against present day offerings – a compliment to Victor Konnov who sculpted the master model for this piece. In fact, parts are very well rendered, and that face……Well, it really is a little gem.
Because this is rather a complex model, I’ll not give you a blow by blow account of how it was painted, but instead focus on a few points that might make things easier for you when painting similar pieces yourself.
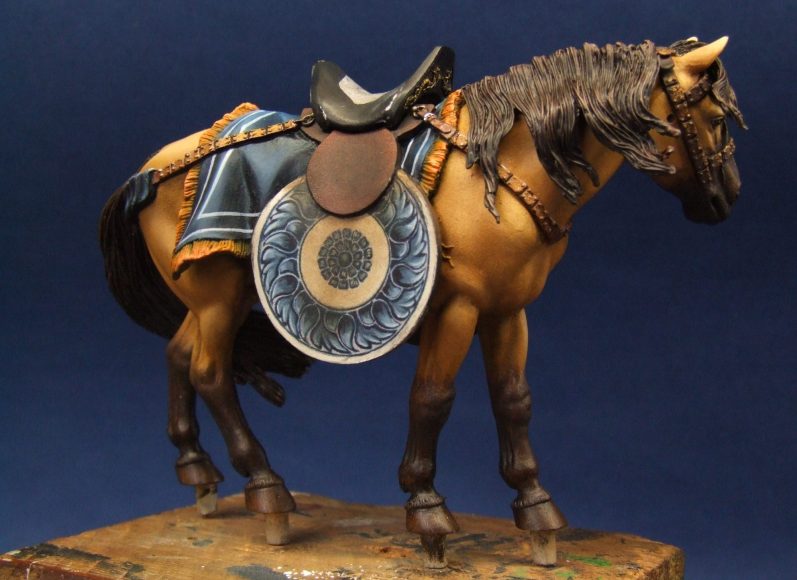
For instance, photo #2 shows the basic colours added to the pony. I used a very pale flesh tone for the undercoat, and then used just four colours to paint the main areas of the horse, these being Raw Umber, Mars Brown, Mars Yellow, and Titanium White.
The predominant colour of the horse is made up from Mars Yellow ( 4 parts ), with additions of the other three colours ( 1 part of each ). The shadows are added with more of the Raw Umber, and the highlights by adding more Titanium White to the main mix, and then topping off with more of the white added directly to the model and blended in with a soft brush.
By using a large, soft brush for all the blending, I managed to make a slight texture to the surface of the paint, thus hinting at the animal’s winter coat.
The paint was allowed to dry fully before moving on with any further additions.
In the mean time I wanted to start on the patterned areas of the saddle.
The main part here is a large disc on each side that hangs down level, or just below level with the boots of the figure. Having looked very closely at some pictures of highly detailed paintings from last year’s Euro Militaire ( 2006 ), I though I might have some idea how the painters of those pieces may have gone about getting a very highly detailed painting on an area that was relatively flat, but still rather small.
Basically what I did was to scan a suitable design into the computer, then reduce it in size using Photoshop. This was then printed out onto some very thin paper. Having got this far, it was a case of fastening the design onto the model.
And that all looked rather poo !
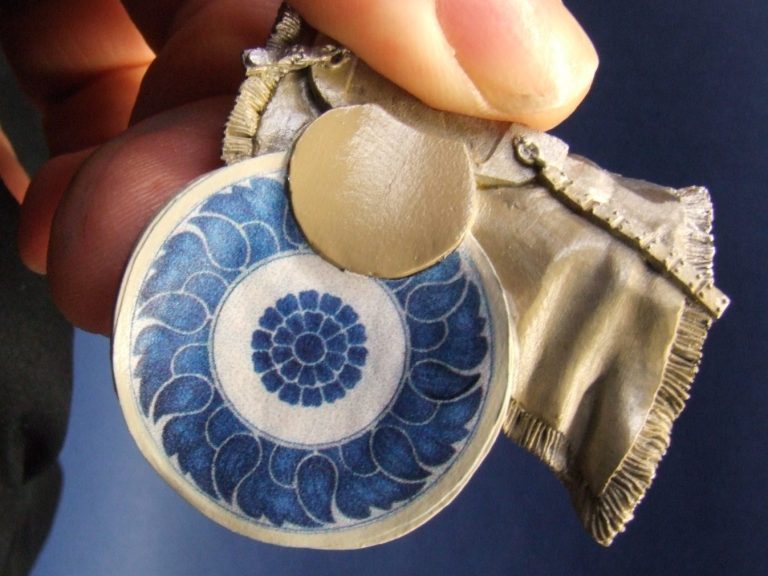
Well, to me it did, but this was only the first step of the process.
Photo #3 shows the design in place, and as you can see, the print quality is not very good; the lines from the print head can be seen, and if this gets wet, the inks will run. Added to that ( what, there’s even more ? ), yup, the print colour will fade quickly too.

But as I said, it’s only half the job. Now comes the skill.
All that fine detail has to be painted over, with all the colours added and enhanced to give the different patterns, plus give the design longevity if it’s placed in daylight for any length of time.
I used oil paints to paint all this, choosing Prussian Blue and Titanium White ( and mixes of these two ), applying them with a very fine brush and a small amount of White Spirit. The other problem by the way is that the paper will absorb the thinners, so I felt it best to add a coat of varnish to the paper prior to adding any paint.
Photo #4 shows the outer ring of the design having been painted with the mid-tone and the shadows / outlines, and photo #5 with the left half of the outer circle having been treated to the highlights and cutting back of the outlines.


Photo #6 allows you to see the original printed version on the left, and the one on the right - which has had the outer ring design completed.
Both of the discs have been fully finished in photo #7, although an outer border will be added later.


Back to construction.
Probably worth note here is how to join a mounted figure together so that it will have the maximum strength. Here in photo #8 is shown the upper and lower torso of the figure. Each has been filled – because there is a hollow in each area – with Milliput, and a wire inserted in the lower torso.
This wire goes through a hole that I drilled through the crotch of the figure, and will eventually seat into a hole drilled into the back of the pony. When I join the two halves of the figure, I’ll add a thin sausage of Magic Sculpt to the outer edge of the joint, all the way around, and as the two parts are forced together, this putty will squeeze out of the closing joint ( see photo #9 ). This putty will provide filler for any gaps that are left. Any excess putty can be cleaned off with a sculpting tool.

Construction and painting
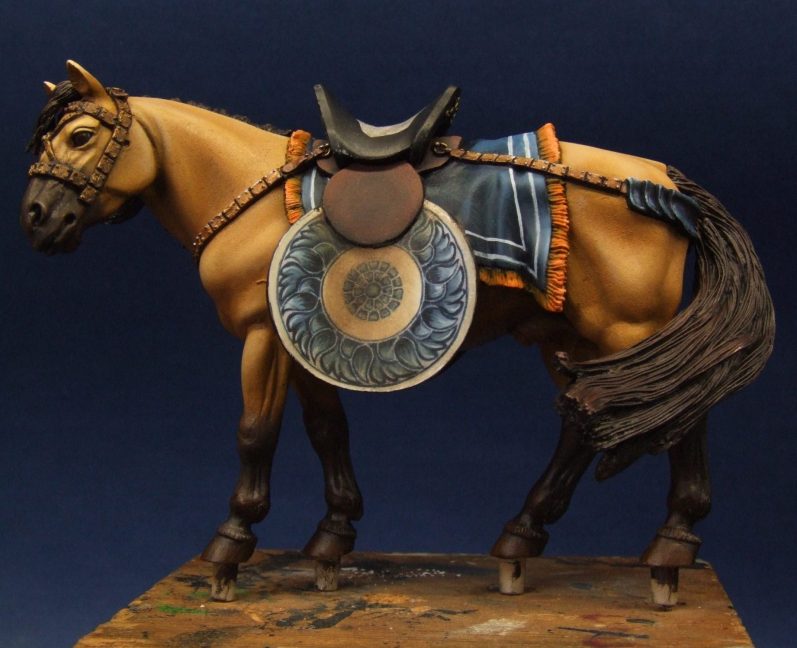
Photos # 10 and #11 show the saddle has been added to the pony. I have dried the saddle fully after painting, and then added some Payne’s Grey and some Mars Brown paint to make it look scuffed and grubby. Also in this shot is the beginning of the design on the saddlecloth, plus the other areas of the pony have been painted too.
The mane and the tail have been glued into place, filler added where necessary, and then painted.
The muzzle and the lower legs have been painted with a very dark brown ( Mars Black and Mars Brown mixed in equal parts ), the paint being added to about half way up the shins ( in the case of the legs ) and then a soft brush used to stipple the paint and make it travel further up the legs whilst blending it into the lighter paint that is already dry. The same method was used on the muzzle.

In the next shot ( photo #12 ) I’ve completed the face. The usual mix of W & N Flesh tint, Mars Yellow and Titanium White have been used, but with slightly more of the yellow to hint at an Eastern complexion. The paint is still wet in this shot, hence the light catching the glossiness of the paint and reflecting it back at the camera.
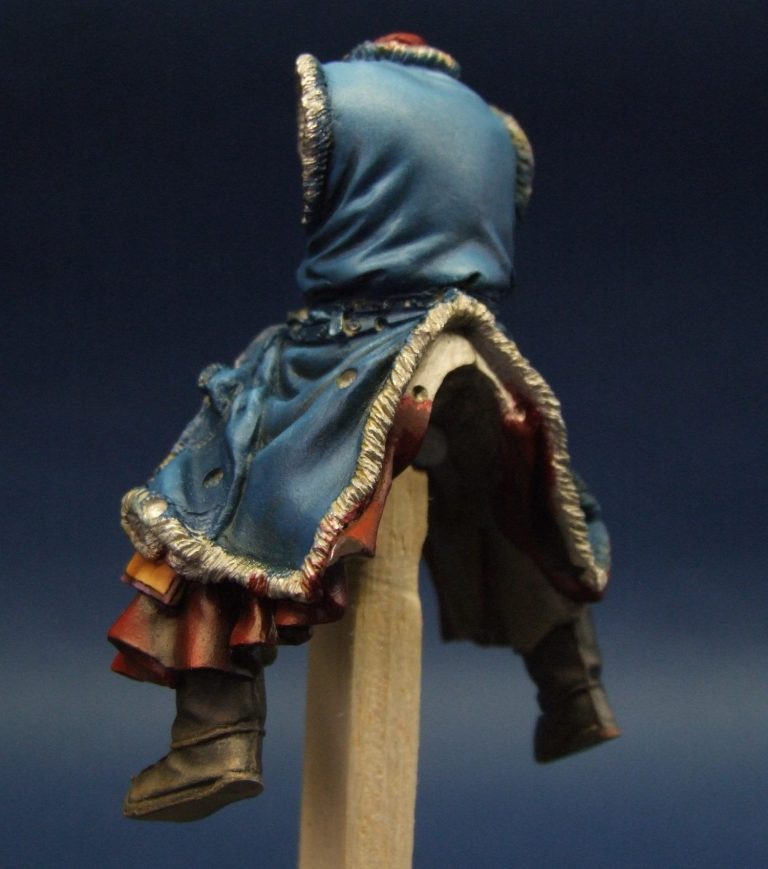
Photo #13 shows the main parts of the figure being painted. I began by working up from the boots, as the clothing overlaps on the figure in the manner of slates on a roof, the lower articles of clothing being covered by ones further up the figure. I’m still in the process of deciding how / what pattern to add to the coat. I don’t want something too ostentatious, he’s supposed to be on campaign, and I think Genghis would have reserved his most gaudy clothes for holding court in his tent.
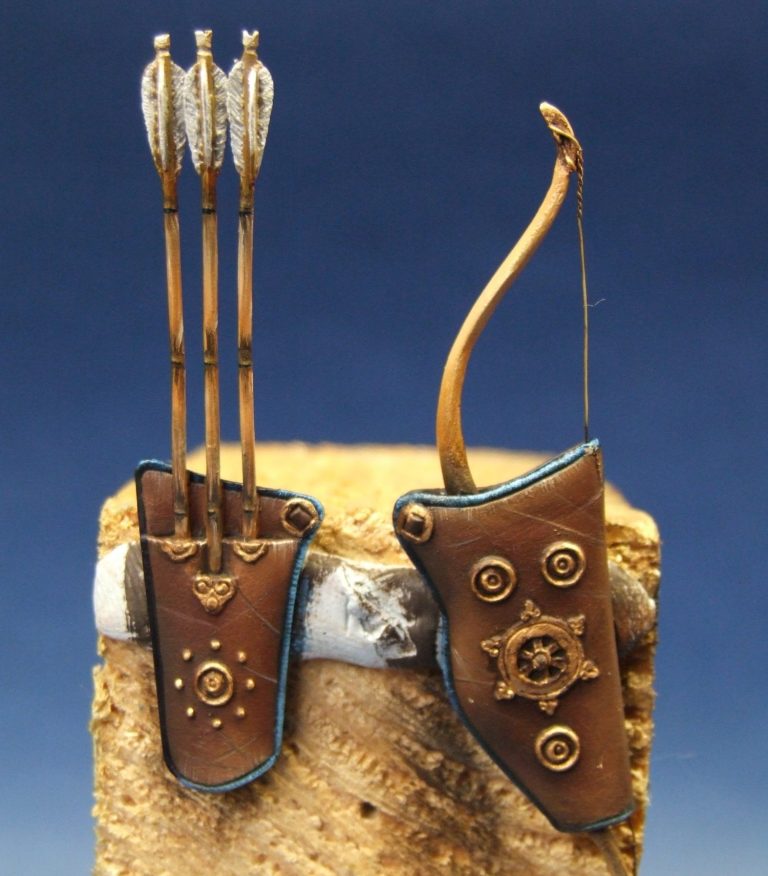
The next picture ( photo #14 ) shows the arrows and the bow case. The arrows have been painted in the style of those used by wealthy Samurai – where the shafts of the arrows would be cut and fletched in such a manner that when place in a holder, the leaf scars matched. Very expensive in its day; as after all, these were a disposable item, but it hints again at this man’s wealth.
Moving to the bow case, The handy thing about this item is that it comes in two pieces, one with the back of the case and the bow, the other is just the front of the case. This allows the modeller to add a bowstring – in this case from some very fine electrical wire, and to make the bow look separate, because there is a very small gap between the bow and the front piece of the case. I’ve painted both the cases to look like leather items, and being that they would be in use a lot of the time, and thus functional items, have added scratches and scarring to the leather areas.
The blue edge is there to tie them to the colours of the rest of the model.
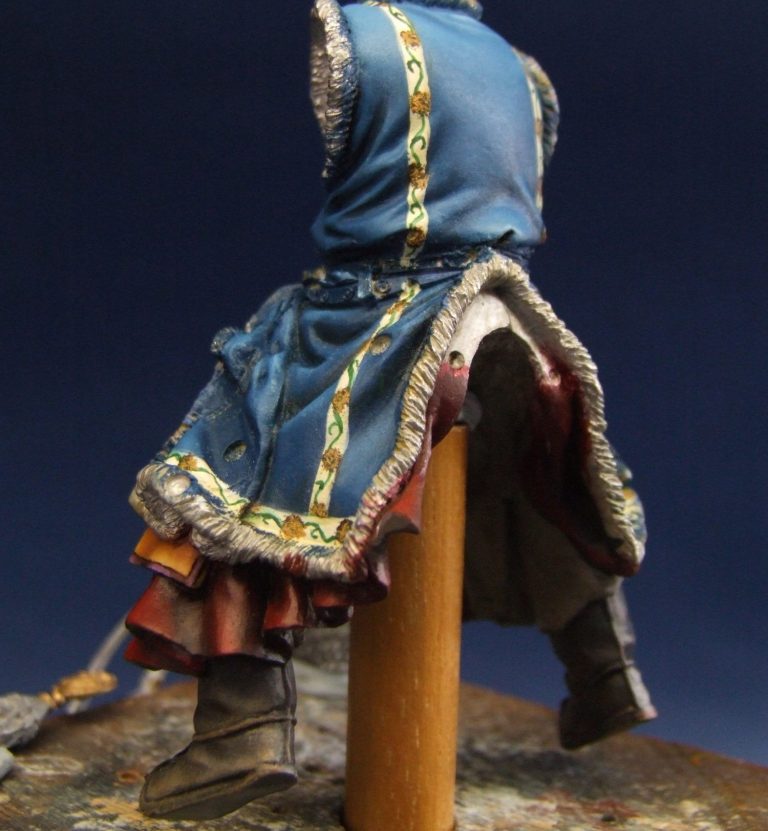
Photo #15 shows a front view of the main figure castings, again it shows that I’ve worked from the lower areas inside, to the outer areas at the top; the exception here being the armour, which I’m about to add with acrylics.
Moving around to the back of the same parts, in photo #16 I’ve added thin braiding decorations to the model. These are completely hand painted, and I got the idea from some pictures of present day nomads, photographed wearing traditional costume. I liked the minimalistic approach to the decoration.

Yes, O.K. I’ve mentioned how the bow and arrow cases were done, but photo #17 shows a block of wood that I use for holding smaller components whilst they’re painted. I find Blu-tac invaluable for fastening them down temporarily, the trick being to paint the backs of each part with a dark colour acrylic ( and let it dry fully ) then place them like this to paint the visible portions. If both sides of an object are to be on show, then I can paint one side, let it dry fully, then flip it over and do the other side – the Blu-tac will not affect the paint if it’s over a good primer coat.


Nearing completion now, and the pony has been added to the groundwork. This isn’t the rather gory groundwork that comes with the kit – and which the chap who asked me to paint this specified he didn’t really like – this is some home made groundwork, constructed from a mound of Milliput ( should’ve bought shares in that company ! ), and textured with a small stone. The pony is in place only temporarily, to show how it will look once finished, but there’s some static grass and deer hair to add before it’s fastened permanently in place.
I also really liked the wood plinth that I got from Dave Armstrong at Armstrong Bases to display this model on. It’s a very nice piece of wood, the grain being absolutely lovely. Shame to put a model on the bases he supplies sometimes !
Photo #19 shows the addition of the main figure castings to the pony. The arms were added shortly after this, along with the weapons and the reins, and really that was about it.

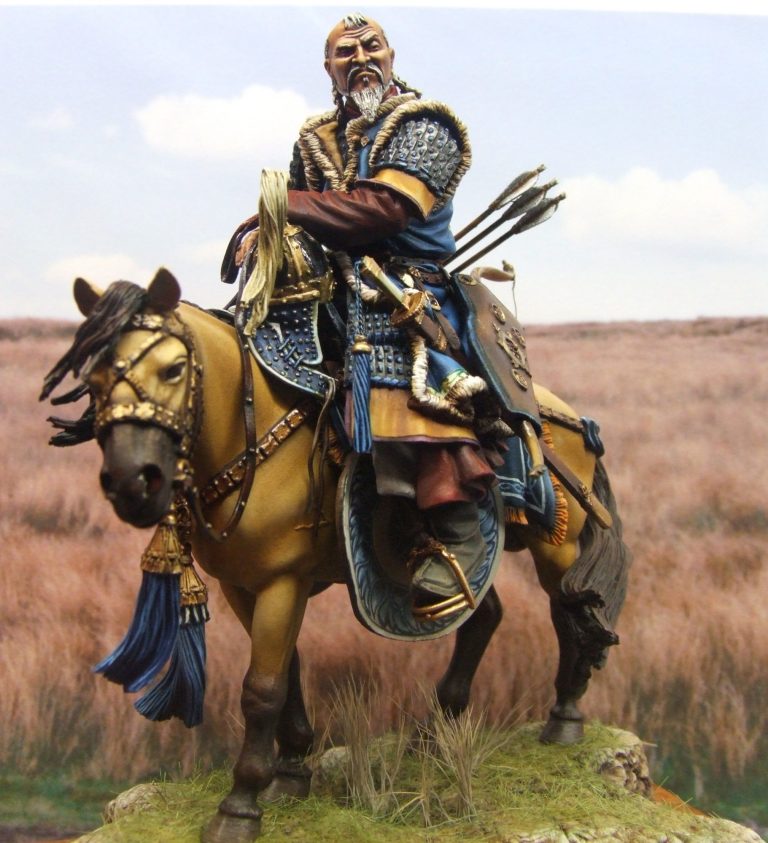
The final shots show the finished model, although I do like this shot with the scenic background – Genghis and his hordes didn’t quite make it into northern England fortunately, but he doesn’t look too out of place with a background picture of the moors between Lancaster and Clitheroe, taken last winter.
Final words.
It took me a long time to get the chance to paint this figure, and even then, it seemed to stay on the workbench for quite some time. It’s certainly not a piece for the faint hearted, although there are things you can do to cut corners with the flat areas - as far as complex designs go at least. The whole thing is a balance between giving a very colourful, almost clashing paint scheme, or erring on the functional and duller colours that would probably have been the choice for regular use.
As I’ve mentioned above, the kit certainly stands up well to the standards set by current kits, and is something that could occupy the modeller for quite a lengthy period.
My thanks to Ian Johnson for letting me loose on this one, from what he’s said, I think he’s pleased with the results.


References:-
Mongol Warlords – David McNicolle – ISBN 1 86019 407 9
Storm from the East ( BBC Publication ) – Robert Marshall CN 4355
The Mongols ( Osprey MAA 105 ) S. R. Turnbull & Angus McBride
The Grammar of Chinese Ornament – Owen Jones - ISBN 1 85585 383 3


We need your consent to load the translations
We use a third-party service to translate the website content that may collect data about your activity. Please review the details in the privacy policy and accept the service to view the translations.