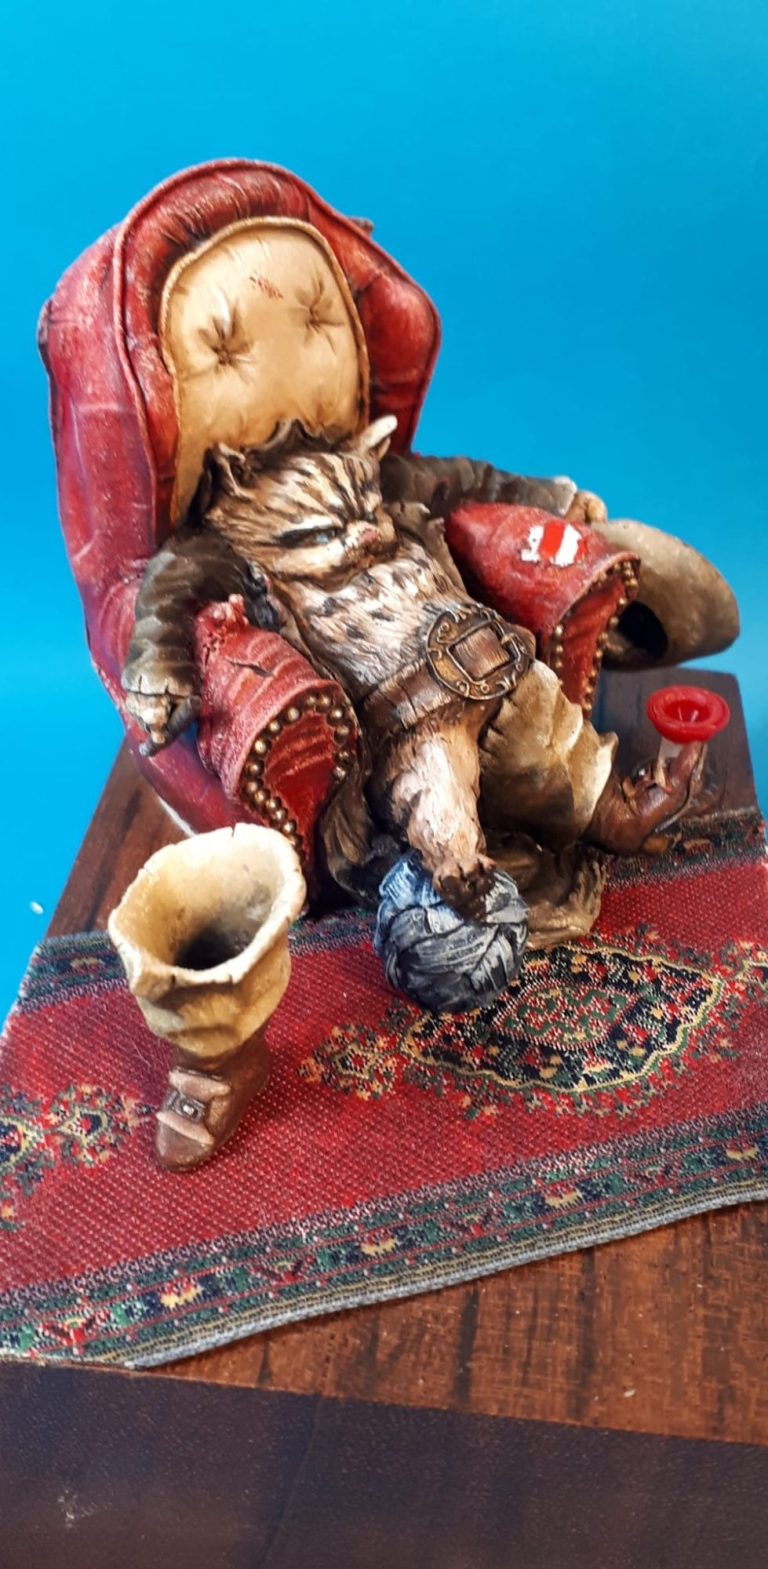

Puss in Boots
1/6th scale Resin kit, Maker
unknown
Painted in 2021
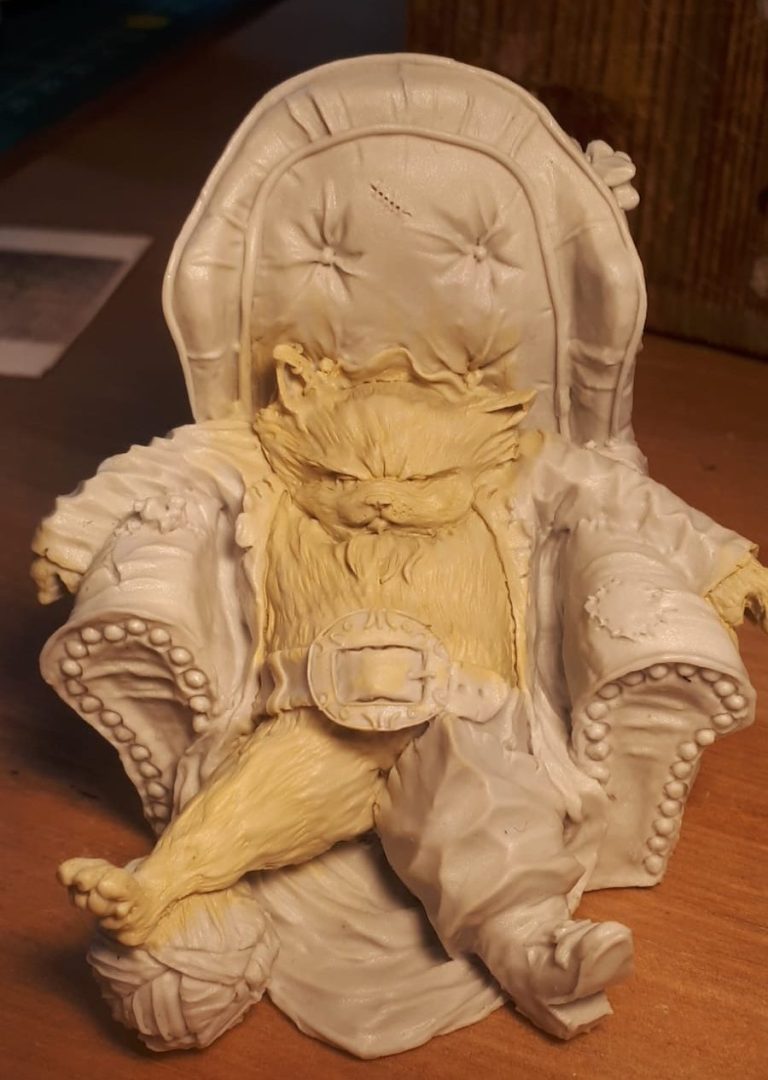
Seeing this kit just reminded my of our cat, mainly because he’s quite lazy. Collapsing on any chair, especially if it’s recently been vacated, so it didn’t really take much to make the purchase whilst at SMC in Eindhoven in 2021.
Usually I start one kit that I’ve bought straight after the show, and this was 2021’s “home, out of the box and on the bench” effort.
There’s not many parts to the kit, the main casting being shown in photo #1 and there’s a separate hat, discarder boot and rapier along with this.
I’d primed and undercoated at this point, adding a pale cream colour to the cat in preparation to adding oil paints.
Photo #2 and whilst most people might be swayed by Disney’s ginger puss, I decided to paint a rendition of our Bengal cat – alittle more difficult than I’d thought, because most of his distinct markings are on his sides and back.
In fact apart from facial markings, there’s a bit of spotting on the stomach area and some of the banding on the back leg can be seen, but they don’t go all the way round, so the inner / front of the rear leg is actually plain.
The main colour is Buff Titanium Oils laid down as a mid-tone, with some darker areas along the edges for shadows, and Titanium White added for highlights.
I didn’t blend the colours so much as comb them on wet on wet, leaving lines of colour to mimic the fur coat of the cat.
Markings were added with spots and lines of Burnt Umber oils whilst the lighter colours were still wet, allowing me to blur the edges a bit.
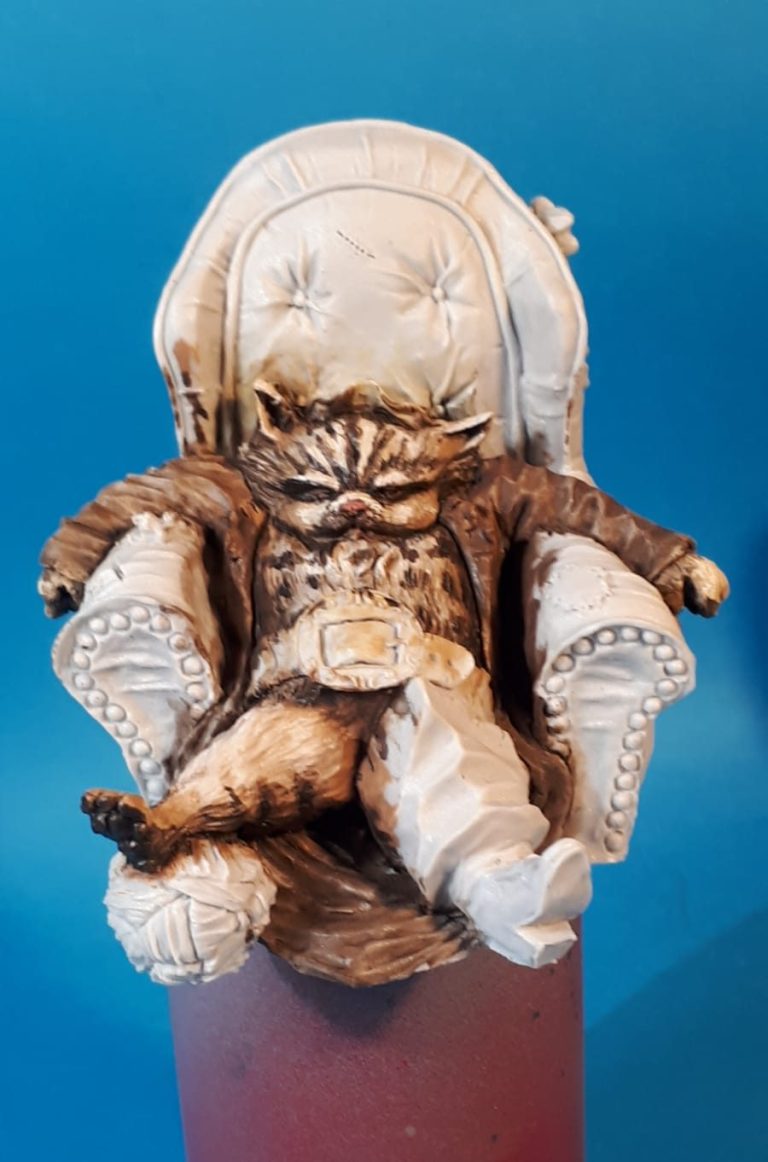
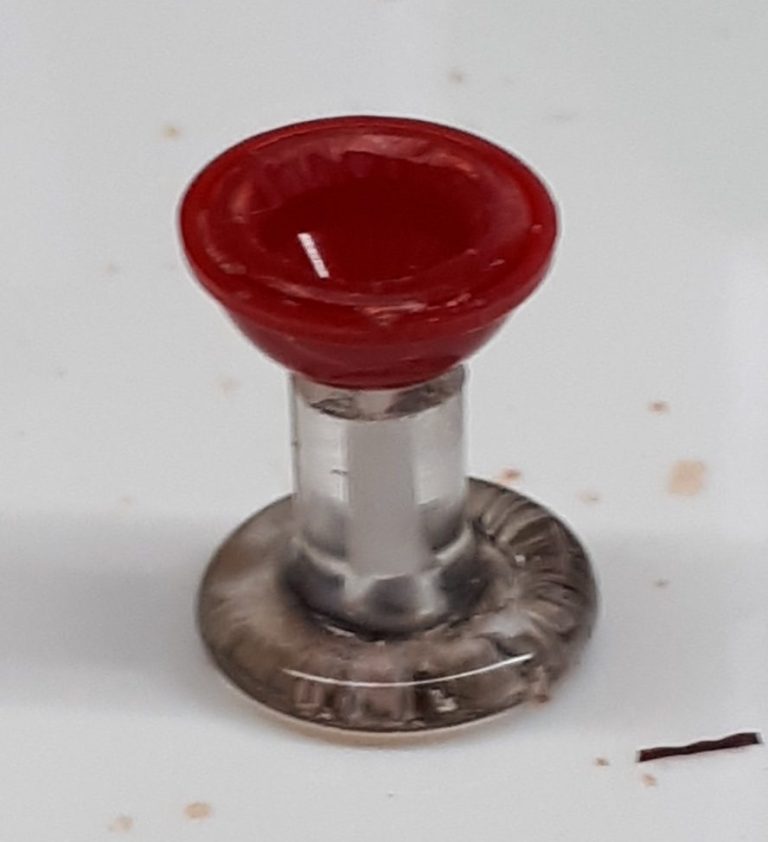
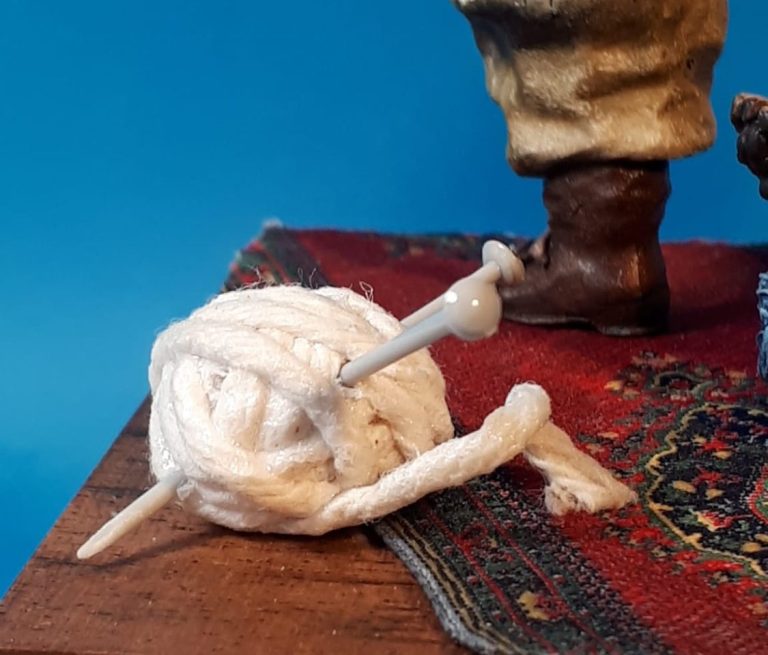
Photo #3 As painting moved forward, I was thinking of what sort of setting I’d make for this model, I didn’t want anything too complex, and settled on a portion of wood floor covered with a section of carpet, perhaps a goblet that had previously held a drink, a ball of wool with a knitting needle or two stuck through it……
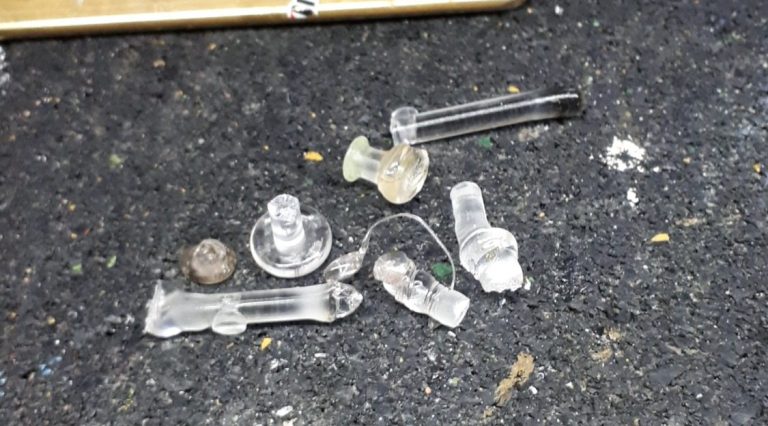
The goblet needed to be scratch built, and I settled on a red tail light of a 1/24th scale truck model that I found in the spares box, coupled with some clear sprue for the stem and the base being the flattened section of that same sprue, having been heated up over a naked flame and then squashed down onto a tile.
It’s a heavy looking item, something a cat could push off a table top and not manage to break….. If you’ve had a cat, you’ll know what I mean.
Photo #4 shows the several attempts at making the base for the goblet – not all ideas work the first time, and fortunately I keep a small stock of straight sprue pieces that have been culled from the various plastic kits I’ve assembled over the years.
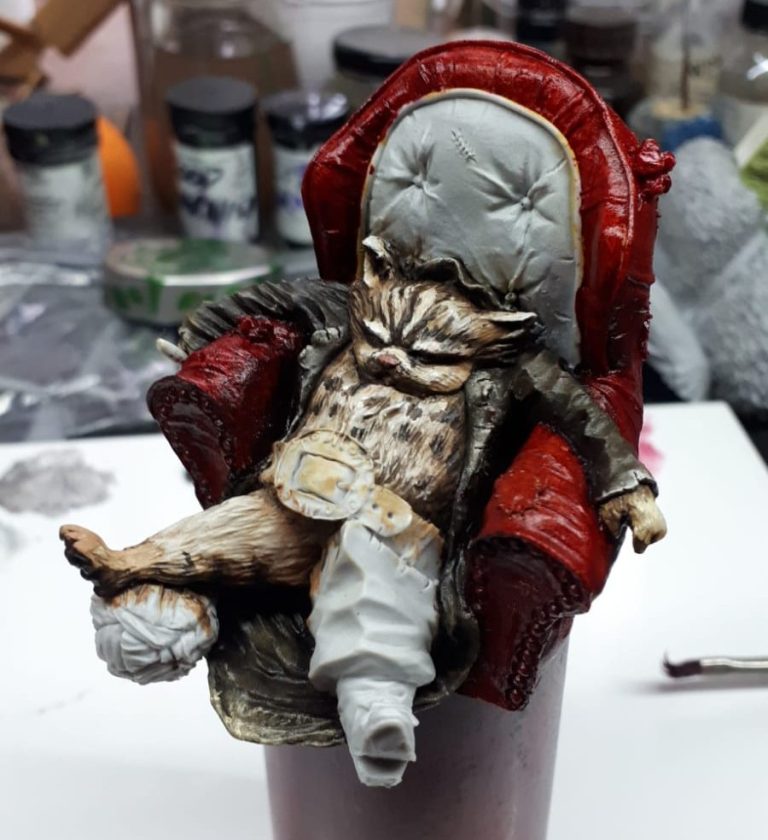
In photo #5 the painting of Puss and his armchair have progressed a little, his coat having been painted to resemble a leather item, and the chair treated to several coats of burgundy acrylic, leaving a grey panel on the seat back
Photo #6 and I wanted the chair to have a worn leather appearance, so applied a coat of Carmine oils over the burgundy acrylics, adding a little Burnt Umber to some of the darker shadow areas and blending it in with a soft brush.
Scarlet was used to build up highlights, and then Buff Titanium was added with a Hog’s Hair brush – stiff bristles – that wouldn’t blend the paint, but leave it in small spots and scratches to look like heavily worn leather that is losing it’s outer colour.
Some longer scratches were added by painting on thin lines of the Buff Titanium, and then putting a line of Burnt Umber directly above them, the lighter colour appearing to be where the scratch is parting the leather slightly and catching a highlight.
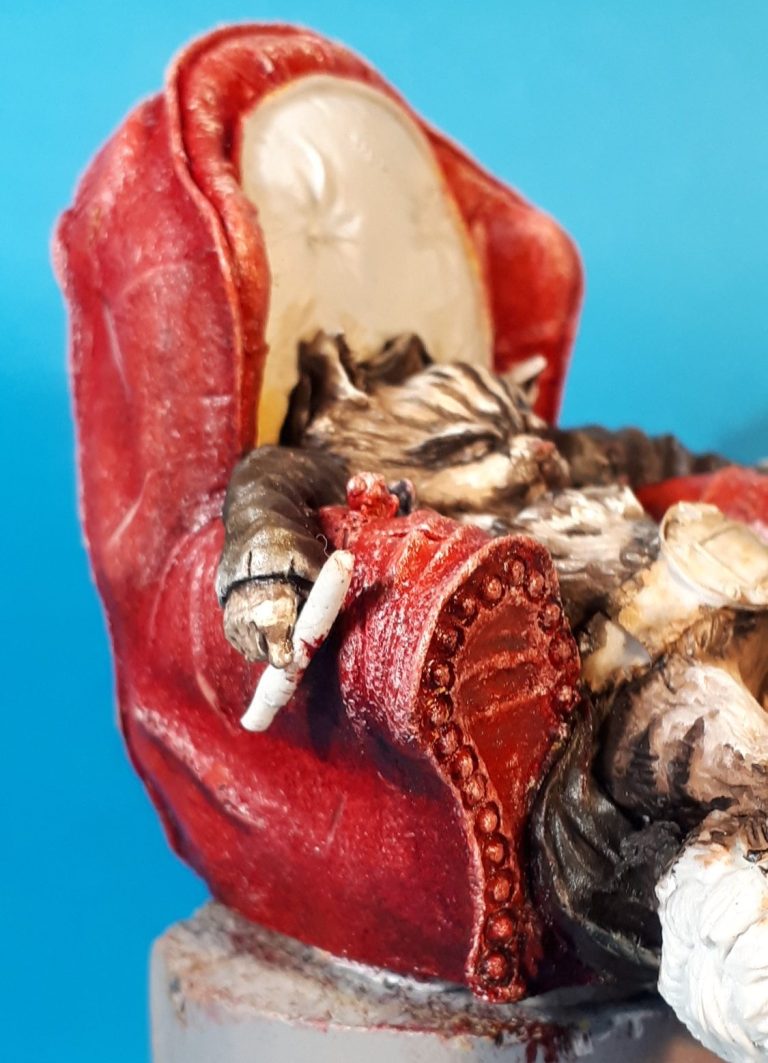
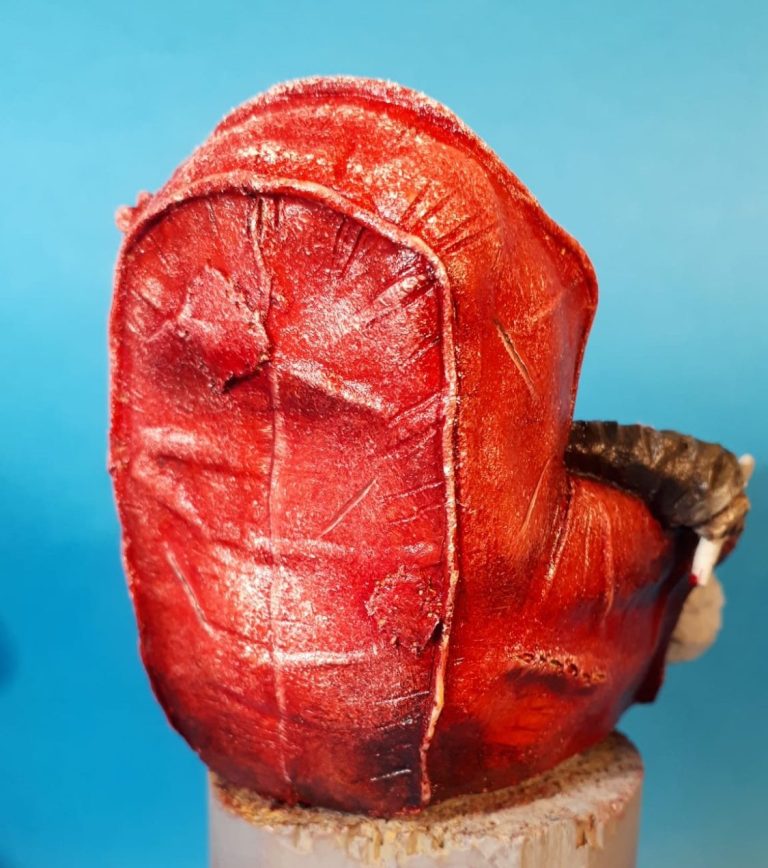
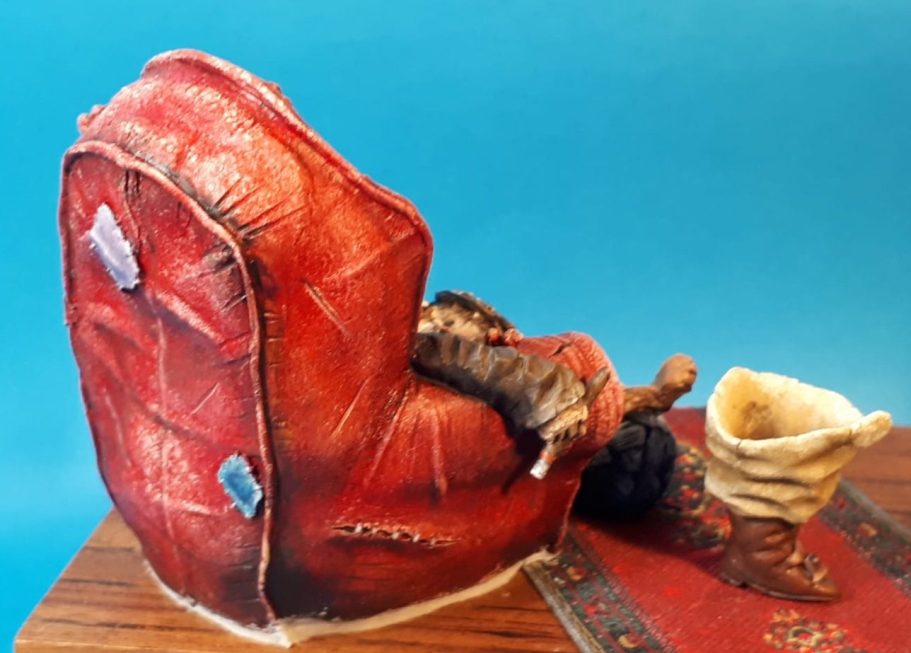
Photo #7 shows the back of the armchair which has a fine texture sculpted all over it, but unfortunately on my example, it also had a really bad mould part line running up the middle of the back.
In this case I. if I’d tried to clean the mould line up, I’d have been left with a broad band of flat resin, which would have looked odd. Filling one half of the mould line to match levels would have been an idea, but then replicating the surface texture would have been very difficult too.
As the line wasn’t particularly straight I opted to include it in the painting, rather than try to hide it, and made it look like the leather of the back of the chair had been torn apart and then mended ( badly ) and so painted a highlight running down the raised side of the mould line.
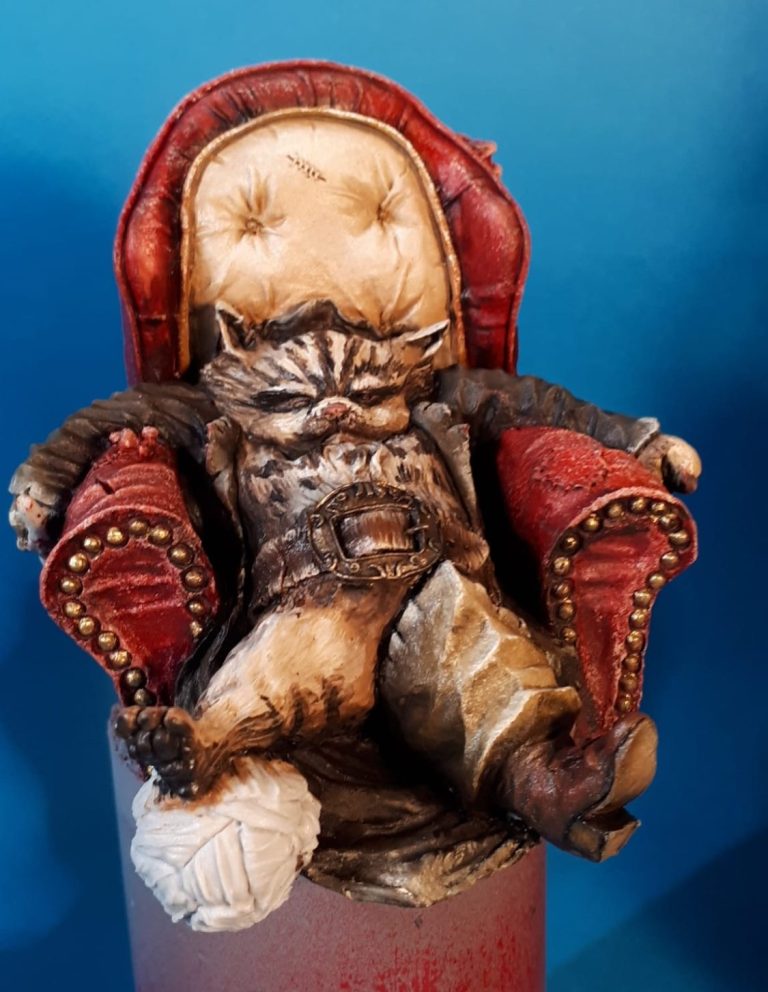
Photo #8 shows the left hand side of the chair, with the colours continuing and looking just as distressed.
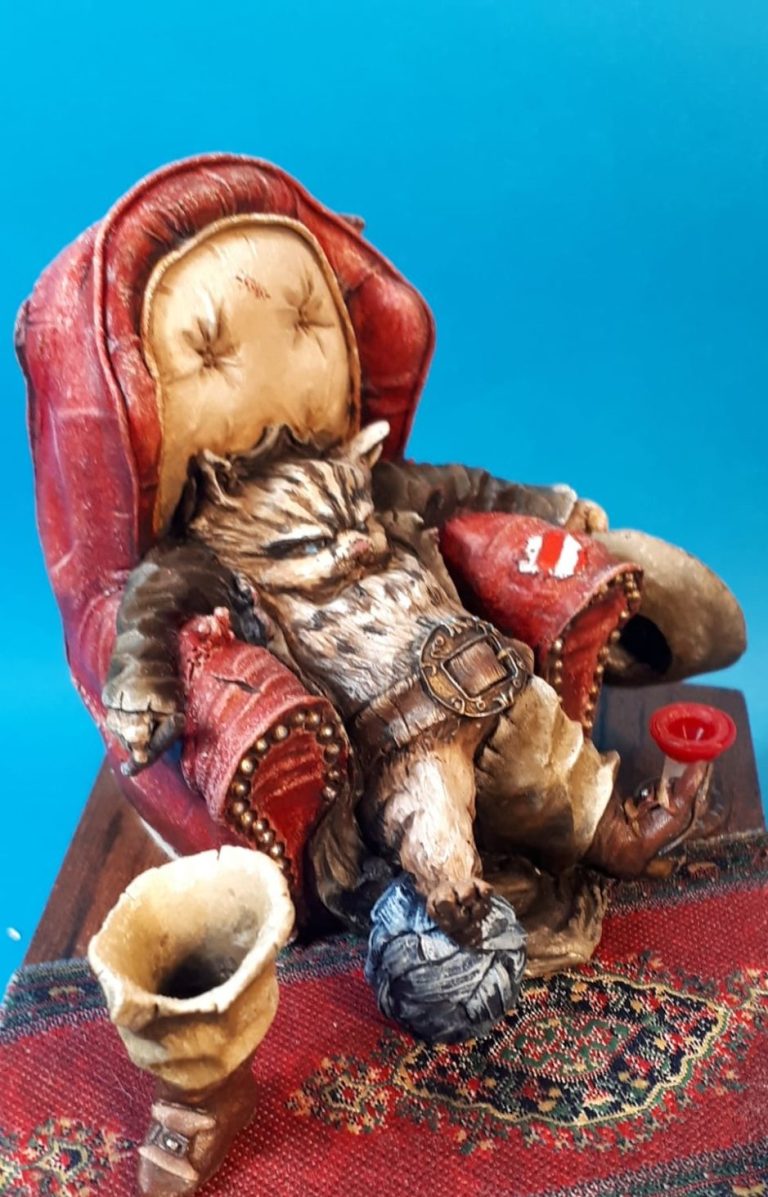
Photo #9 and the model is looking close to complete. Brass and gold colours have been added to the upholstery nails around the front of the chair arms, Puss’s boot has been painted and the insert on the chair back has been painted with some cream coloured oils.
His belt has been given a rather distressed look too, with a gold belt to match the upholstery pins.


Photos #10 and #11 show views at this stage from the side, there’s a distinct banding of colours beginning to show here, working from his booted foot in brown, then cream, then the paler belly and face with dark brown patterning and finally the cream of the insert at the back of the chair. The red frames the colours holding the eye of the viewer and bringing it back to centre on the character.
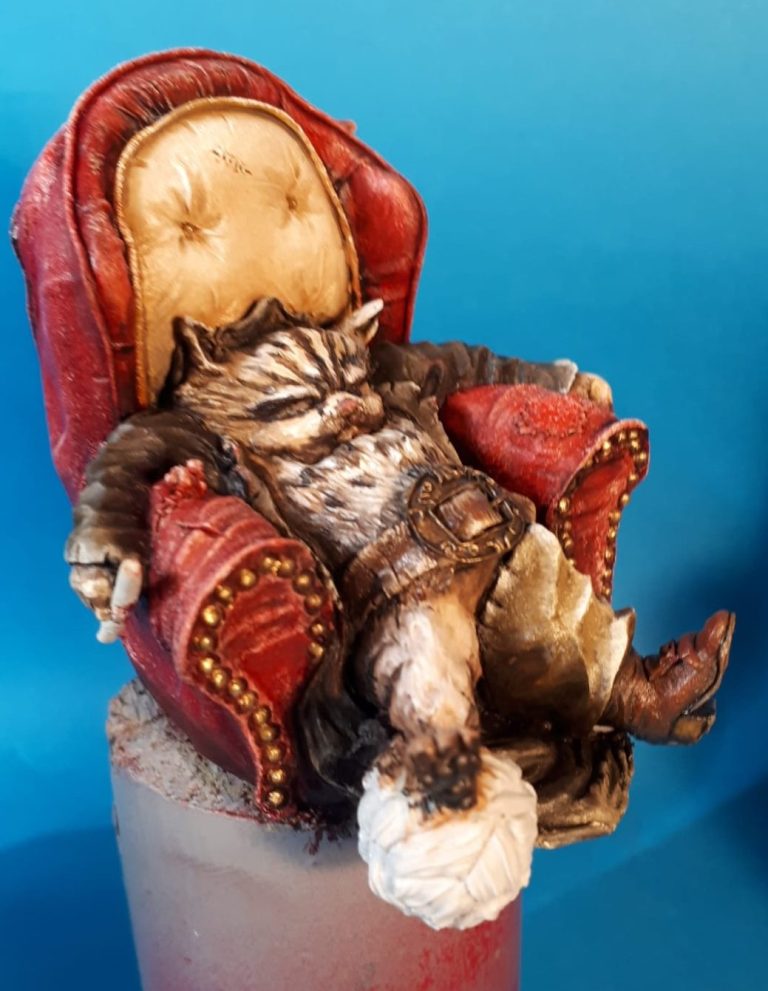

Photo #12 returns to the back of the chair, and it looks better now that the oils have dried and are looking a lot less glossy. The lighter colour used to represent wear and damage stands out more and seems to work better now.
I added a few touches of Burnt Umber to deepen some of the shadows, in particular the mould line at the back of the chair, and some patches at the bottom corners of the back, plus under the chair arms.
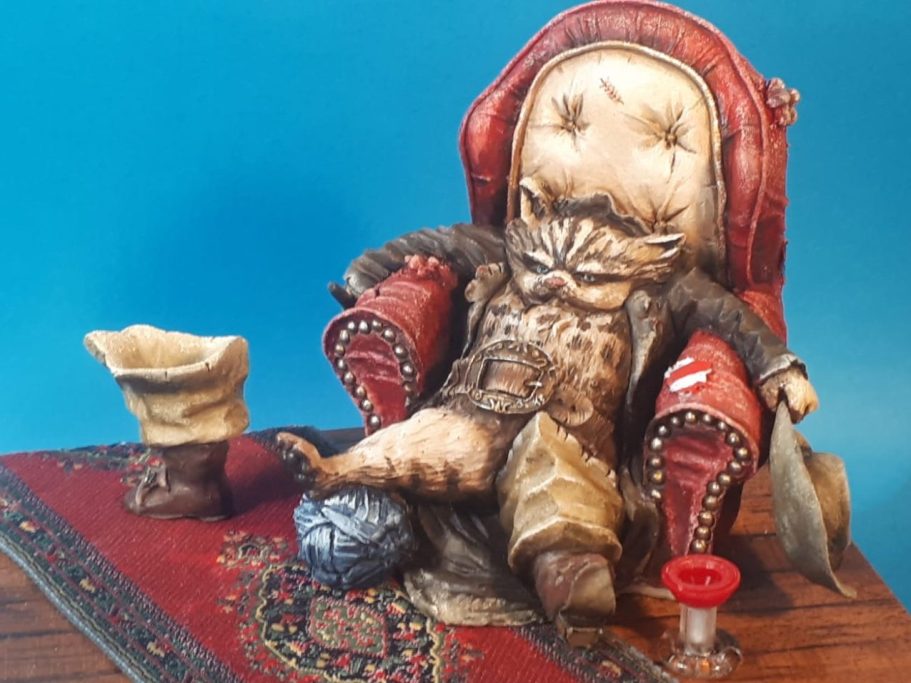
Photo #13 shows the final setting being laid out. The top of the wood plinth from Oakwood Studios was painted to represent wooden floorboards, and a section of dolls house carpet was fastened in place with some double-sided tape and then trimmed to the shape of the top of the plinth.
The armchair presented a further problem, in that it isn’t actually flat. I had the idea of adding some castors to the bottom, but then realised that I’d have to add some kind of decoration to the bottom edge to hide the unevenness of the casting.
I’d still have a problem though, because the marginal thickness of the dolls house carpet provided a further unevenness for the chair to sit on, so took the easy way out of adding a sausage of Magic Sculpt putty around the bottom edge of the chair and pressing it into place, and trimming away the excess putty that was squeezed out, adding the piping at each corner to match what was on the chair.

In the final shots I’ve blended the colour of the chair onto the putty, and painted the separate boot , the ball of wool that his foot is resting on, and added his hat and the goblet.
I also made a ball of wool from some string and made some knitting needles from stretched sprue, placing the thicker end of each “needle” close to the naked flame, which melts the plastic again and causes it to curl back on itself and form into a dome – also useful for making rivet heads.
The rapier in the kit was something I wanted to replace and used a hat pin with a large glass bead head, adding a twisted wire hilt and fist guard from some soft lead wire and wrapping the hilt with some very fine copper wire taken from some electrical flex.
This was then glued into a hole that had been drilled into the upper side of the chair back.
Final thoughts.
Although there’s a few defects in the casting, and some of the cat’s features are simplified – the face and paws could be a bit better – it’s still a very nice kit, and one that I enjoyed painting.
I don’t think it’s the best figure I’ve painted recently, there wasn’t enough space for me to do what I’d planned regarding painting a Bengal cat, but that’s my fault for not just sticking to a generic moggie.
Using the mould fault on the back of the chair to integrate it as part of the model should always be considered – mould faults on faces can sometimes be turned into wounds or scars that give a different spin to the character you’re depicting, and in this case the extra damage fits in well with the test of the “well used” possibly “previously loved” appearance of the armchair.
So overall I like this kit, there’s a lot more could be added – A fireplace and a side table for a bottle and the goblet maybe – I chose to keep things a little simpler.
Highly recommended if you have even the smallest affection for our feline friends.
We need your consent to load the translations
We use a third-party service to translate the website content that may collect data about your activity. Please review the details in the privacy policy and accept the service to view the translations.