German 38(t) Weapons Carrier
1/16th scale plastic kit from Hobbyboss
Painted in 2023 - 2024
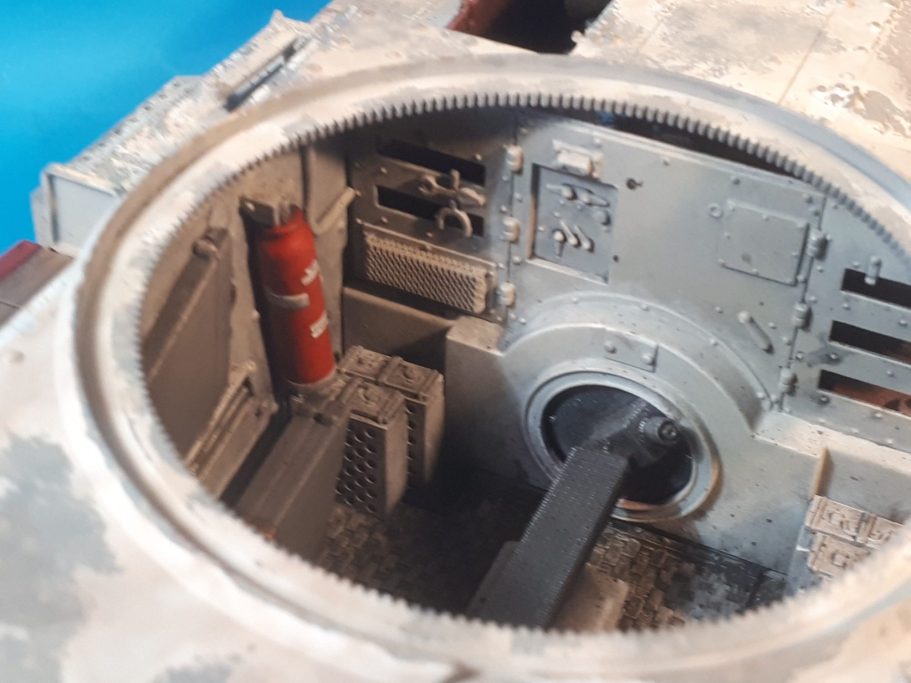
I began a Hobbyboss 1/16th Tiger I kit some time ago, with the thought of cutting it up to produce large scale “wedgies” as setting for figures in that scale.
Needless to say that I’ve got no further than the assembled tank in a storage box.
And being the type of modeller that I am – “Oh look another kit to start !” and having accumulated one or three other AFV kits in this scale, I thought I’d assemble another one – like you do.
As it was, I thought I’d go for something a little smaller and less ambitious, and again had the initial idea of cutting this into four sections of the hull with the turret as a fifth section to add figures to.
As it had a full interior, maybe I could replicate the hull walls and have a sixth display with a driver figure inside….. Oh the plans were many and varied.
The kit
The instruction booklet is very well set out and clear, and as far as I can tell – I’ll add this early on, when you’re adding the photo etch to the drive cylinder things, there is a mistake, telling you to use both parts ( from memory part A4 ) from the etch fret to the first set of cylinders you assemble. In fact only one of these is added to that side, and the other part is added to the opposite set of cylinders.
All in all there are six etch pieces to go around the two cylinder sets ( right and left ) there are four of one type of etch part and only two of the others.
I‘m sure you’ll understand when you begin assembly.
This is the only mistake I noticed in the instructions.
As for the plastic parts, fit is very good with the location lugs being quite tight in some cases, sometimes so tight in fact that you might question whether you’ve got the components the right way around, and in some cases you feel that glue might not be totally necessary.

Photo #1 shows the box art, it doesn’t really give you a sense of the size of the box, but I can tell you it’s big. It contains a lot of parts, mainly for all the internal detail, and of course all those separate track links.
Some sprues are repeated – the ones holding the road wheels for example are on four identical sprue trees.
All sprues re clearly labelled, and all parts are numbered so that identifying them is trouble free.
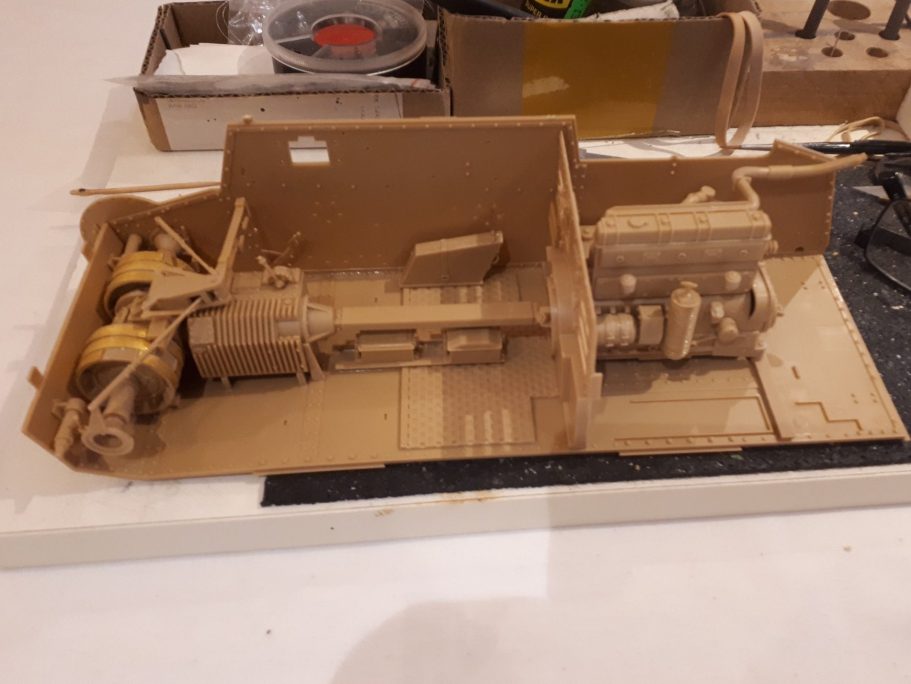
Photo #2 so easy and trouble free in fact that I’d got this little lot assembled before thinking “I’d better take a picture.
At this point the engine is not glued in position, and the central drive shaft has a lug on it to slide into the engine, with two pins on the hull that the rear end of the engine locates to.
I left the engine separable from the hull to ease painting, just clipping it in place for this shot.
You can perhaps guestimated the size of the kit from the partial inclusion of a set of glasses on the right of the picture.

Photo #3, my apologies for the fuzziness, I hadn’t checked the shot before continuing, however it does show the photo etch bands around the cylinders that I noted as being mistakenly numbered in the assembly instructions.

Photo #4 is a close up shot of the engine assembly.
Although I’ve got a “walk-round” book on the 38(t), it doesn’t give the modeller much help with any wiring that could be added to this area. I take it there must be glow plugs for the diesel engine, and other electrical connections, but as I’m unable to identify what or there they might be from the references I have, I thought I’d stick to what was provided in the kit and not start adding spurious bits of wire and cabling “for the sake of making it look busy”.

Photo #5 shows the engine removed from it’s location and a couple of light layers of Halfords White Primer added.
After this I then sprayed the whole thing with Grey primer, concentrating on getting the paint on the underneath of parts, then sprayed more White Primer from above so that the grey formed initial shadows within the hull area.

Photo #6 is a fuzzy picture of the engine. Again an initial coat of Grey Primer was sprayed on, then a dark metallic was used to coat the whole engine, with a lighter colour sprayed from above to create initial highlights and shadows from the mix of the two colours.
Granted a lot of this will be lost with washes that will be added later, but it does give an overall start to the effect I wanted to have.
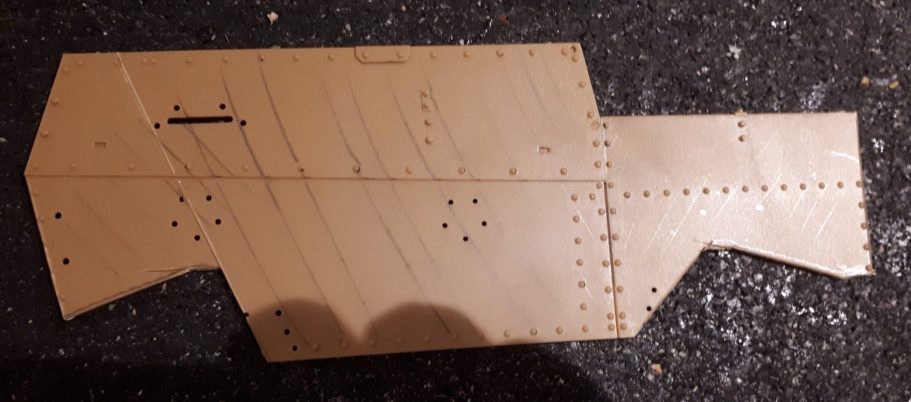
Photo #7 shows a section of the left of the hull that I’ve cut off the single component forming that side.
I decided that it would be too much trouble to replicate the hull walls and floor to make a separate internal view of the vehicle, and took the alternate route of having a cut-away on one side. Shown here is the section I removed, allowing for the suspension and wheels to remain on the vehicle in order to support that side.
Initially I’d considered having some other way of supporting the left side of the hull, or even removing the two middle road wheels, but discarded these ideas, and so the strange shape of this “waste” piece of plastic.
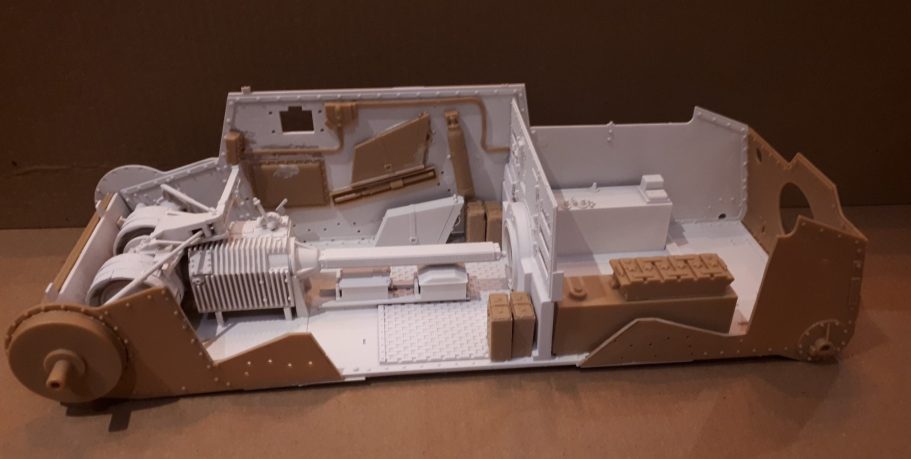
Photo #8 shows the hull with what remained of the left side fastened in place, the location holes for the suspension units visible and hopefully enough of the side panel removed to give a good view of the interior.
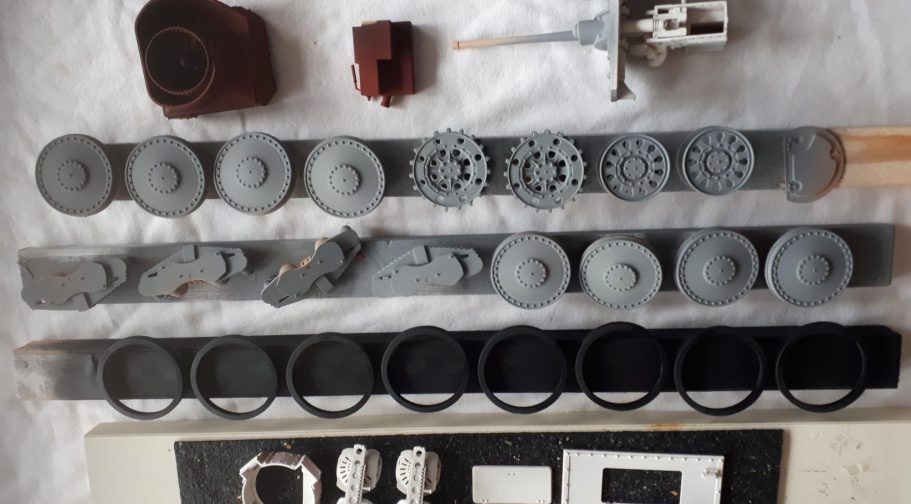
Photo #9 shows my method of holding the components for painting, using long pieces of wood with blu-tac to fasten the parts to them, or double sided tape in some cases, and then using spray cans to add the colours.
It’s surprising how accurate you can be with a conventional spray can without having to resort to masking, the hull front with the machine gun fitted was done without any masking, the outer surfaces hit with a grey colour, and the internal areas with white.

Photo #10 shows a close up of the cooling fan and one of the fuel tanks that will be added to the hull later.
One thing to note if you’re going to paint these as sub assemblies, DON’T glue the rear panel to the hull before final assembly and insertion of the engine and this fan assembly.
I glued the rear panel on, and quite honestly it’s a pig to get the engine and this fan to fit back into the space they need to go in if that panel is fixed in place.
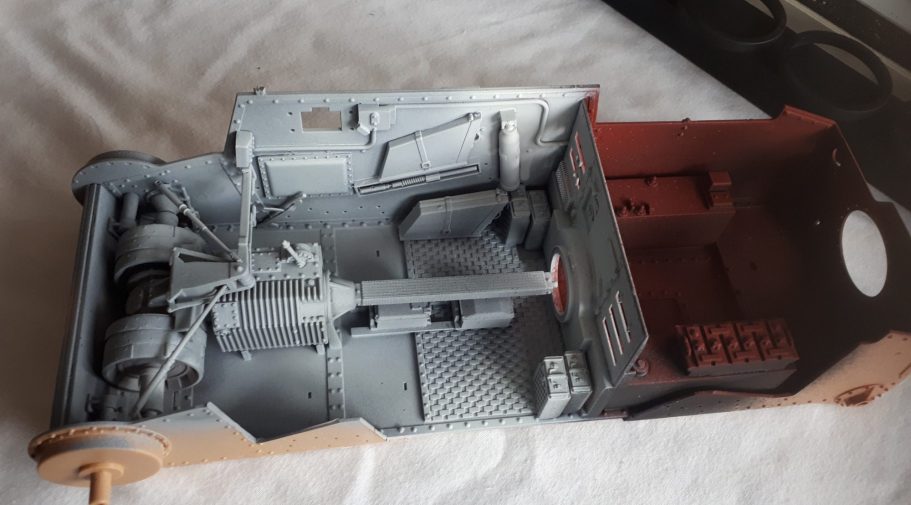
Photo #11 shows the hull painted, the engine area being coloured with an initial coat of Black primer and then Red primer sprayed on to create the highlights.
The effect of the grey followed by white primers can be seen on the forward section in this shot too.

A close up of the front section at this point is shown in photo #12, although there’s a fair amount of detail to be added with a brush, plus some grubbiness and chipping to be painted on too.
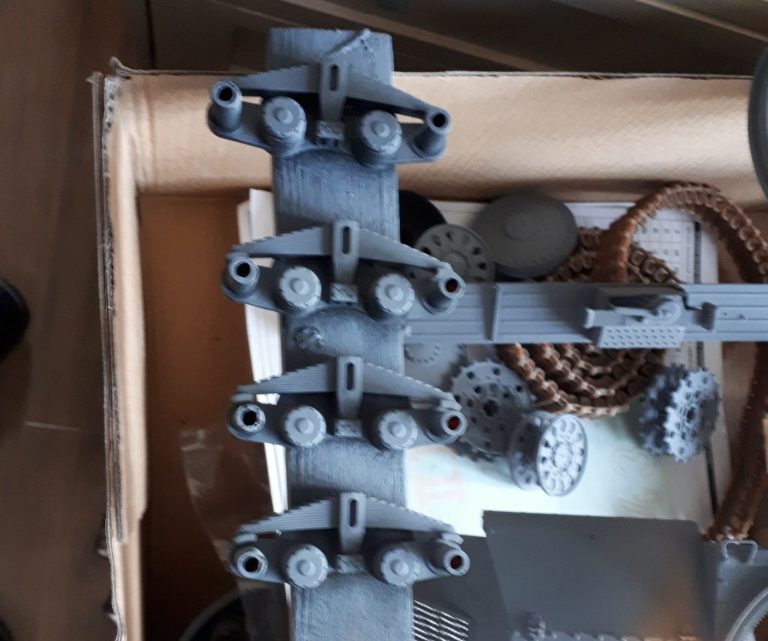
Photo #13 shows the suspension units, these have been primed and will be painted and then have weathering added.

Photo #14, lots more black and then grey primer added to the suspension, wheels and turret assemblies.
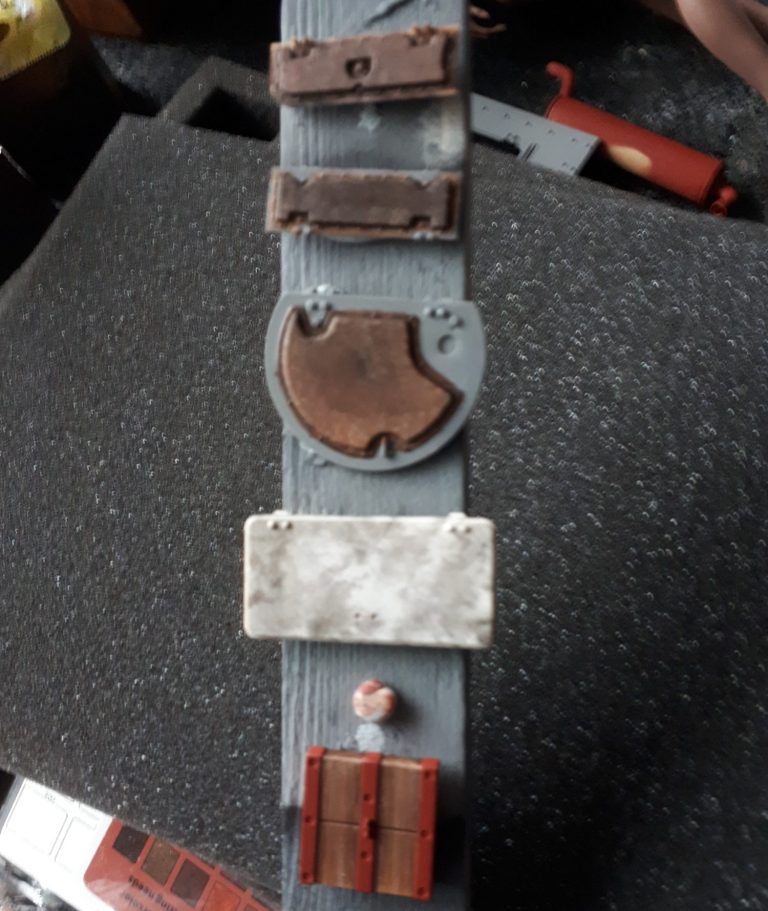
Photo #15, and some detail painting begins. Leather covered padding on the inside faces of hatches, made from an initial coat of Vandyke Brown oils, followed by lighter brown colours ( see my method for painting leather in the “How To section of the website ). Also in this shot is some thinned Vandyke Brown oils being added in a clouded pattern to the inner surface of the forward drive hatch, and wood effect added to the jacking block.
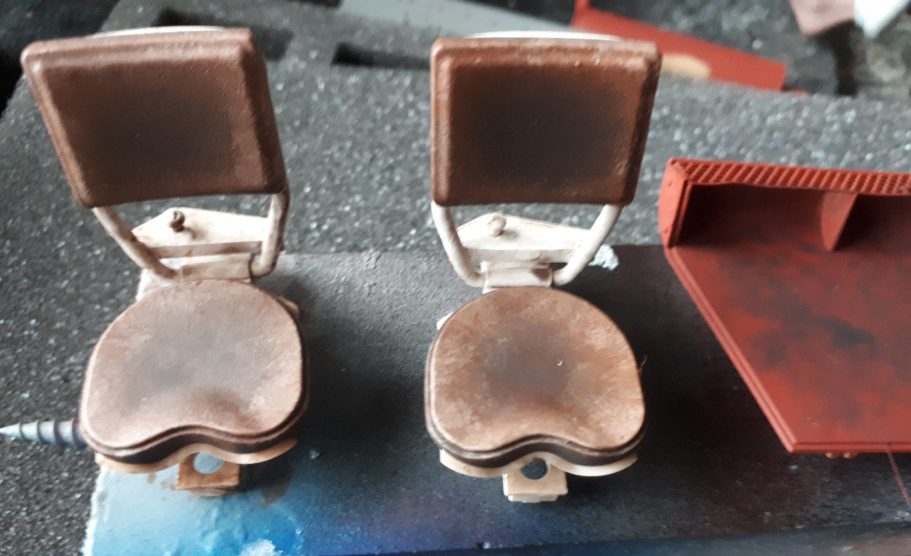
Photo #16, and after grey and white primer has been added to the seats, I painted on oil colours to represent the leather back and seat sections of the chairs.
The grubbied up inside of one of the engine hatches can also be seen in the right hand side of this picture.

Photo #17, and with a lot of the details and weathering added, the inside of the tank is looking a lot more realistic.
After an interesting selection of curse words were used, the engine and fan assembly have been shoe-horned into position and glue applied.

Photo #18 shows a close-up of the forward section at this point. I need to see if there’s a decal on the sheet for the fire extinguisher, or for that matter, any other decals that need adding before fastening the top of the hull in place.

Photo #19 and a close up of the engine bay.
One disappointment was the joint line on the oil filter (?) with it’s little red handle on top. I couldn’t get rid of that line that runs up the side of the two parts once joined, and its presence is glaring to me in this shot.
Black oils, thinned heavily with White Spirit have been added to make the area look well used and dirty, probably most noticeable on the “red lead” coloured sections, but there’s quite a bit been added to make the engine look well-used too.
Masking, Blu-tac and Marmite….
Photo #20 shows the rear deck of the tank, having been temporarily been fastened in place with blu-tac along with all the other panels.
I used kitchen roll and masking tape to seal off the paintwork done on the inside of the tank, and gave the outer areas a coat of grey primer.
I wanted a tank that had been whitewashed for winter operations, but with spring coming and heavy use, the whitewash had chipped and worn off quite a lot.
So here I’ve added Marmite with a fine sponge over the grey primer, then sprayed Tamiya White through an airbrush in a cloudy pattern. The marmite can be seen under the white paint as the textured sections, and will prevent the whit paint from sticking to the surface of the tank in those areas.


Photo #21 shows another shot of the rear deck, the discoloured sections of Marmite being visible yet again in this picture.
The white paint is given about half an hour to dry, and then a soft brush, soap and water is used to wash the panels of the tank to see what paint is removed.

Photo #22 shows two of the road wheels that were treated in the same way, now having been washed and you can see the random pattern that has been formed with the removal of some of the white paint.

Photo #23. I’ve not spoken about the turret, this is because having looked through my references I saw that the hull of the 38(t) was used as an ammunition carrier, with the turrets being removed. Some turrets were employed as static defences, and to allow more of the internals of the hull to be visible, I thought I might build a base for the turret to be mounted on separately – a chance to use more of the figures I have in this scale perhaps.
Photo #24 and returning to the inside of the hull. I’d used black and some Vandyke Brown oils to add deeper shadows and dirt inside the drive compartment, but added some more Mars Brown oils, again heavily thinned with White Spirit to the forward section, splattering some of the Vandyke Brown onto the floor to look like grease and oil drips and splashes.


Photos #25 and #26, with the seats in place, and it’s definitely coming together with the addition of the seats.


Photo #27 shows a side view at this point. Busy and whilst colourful, it still looks functional and “well used”

Photo #28 and the child in me – impatient and enthusiastic – just has to see what it all looks like when put together.
In this picture the hull plates are only balanced in place and the wheels temporarily pushed onto their location pins.
Whilst the camouflage looks very clean at this point, that will all change soon, but I have to admit to being happy with the show so far.
The engine hatch on the far side will be open, again allowing the viewer to see inside the vehicle.

Photo #29 – mud and muck !
Weathering is not my strong point I have to admit. In the back of my mind it hides detail that I’ve spent ages assembling and painting, so this here is a bit of a downturn in the modelling process.
I mixed up fine sand, white glue, some acrylic paint and a little water into a gloopy mess and used an old hogs-hair brush to slap it onto the applicable areas of the tank and wheels.
Photo #30 is he beginnings of sculpting a jacket sculpted from Magic Sculpt, that might, just might end up on the model. It depends how it turns out.

We need your consent to load the translations
We use a third-party service to translate the website content that may collect data about your activity. Please review the details in the privacy policy and accept the service to view the translations.