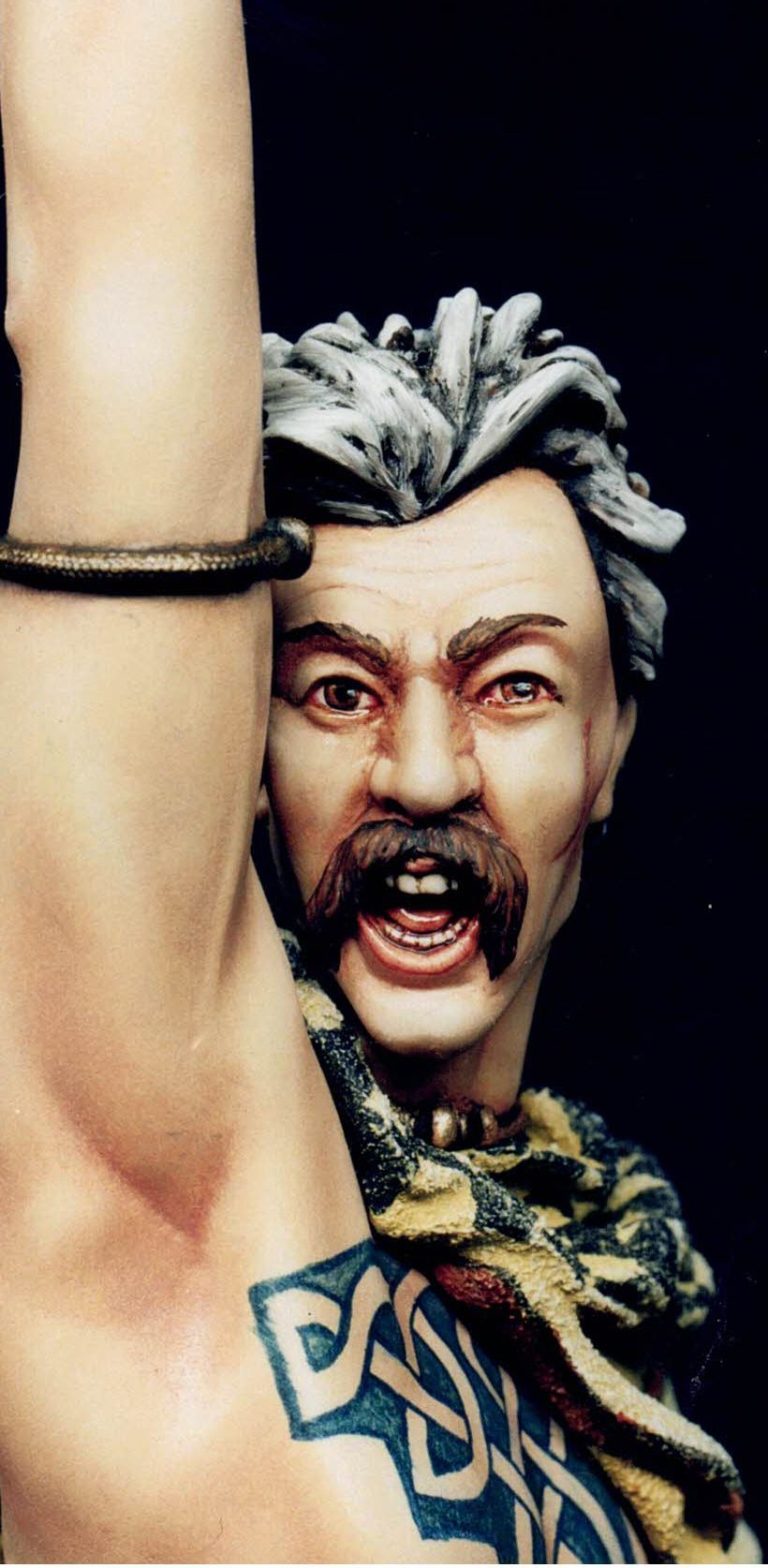

Celtic Warrior
1/7th scale Resin bust from PiLiPiLi
Article in Military Modelling magazine in 2009
I got this some time ago from Lee Van Quang - the talented sculptor who runs Pilipili - and fully intended to do an article about it.
Although I painted it quite quickly, I only seem to have had the time recently to look at my notes, and compile this article, almost two whole years later.
The constituent parts of the kit can be seen in photo #1, all being cast in Pilipili's very soft and carvable resin. At this point I had jumped the gun, by drilling holes into some of the parts to accept wire holding pins, and also fastened the hair and head together, filling the joint at the hairline on the forehead with some Milliput.
The raised forearm / hand is also in place, although this is just being test fitted at this point, and would be painted separately to the rest of the body.
The parts do need some amount of cleaning, not because of mould faults, there's precious few of those, but simply the mould plugs and fillets that Quang uses to make sure that the parts are cast as near to perfect as is possible. He is helpful to the modeller by marking the waste material with hatching lines, but some can be quite awkward to remove - the one in the socket for the neck to sit into is a little awkward to get out, and I'd advise the use of a drill here to gently ream away the unwanted resin.
This in turn will create quite an amount of dust, and I'd advise the wearing of a dust mask ( at the very least, better still a filter mask ) whilst you do this.
Not being a skilled pattern maker, I can't really say whether these resin fillets and plugs are an absolute necessity, but it does make me wonder is perhaps one or two novices might have bought the model and put it to one side because of the difficulty.
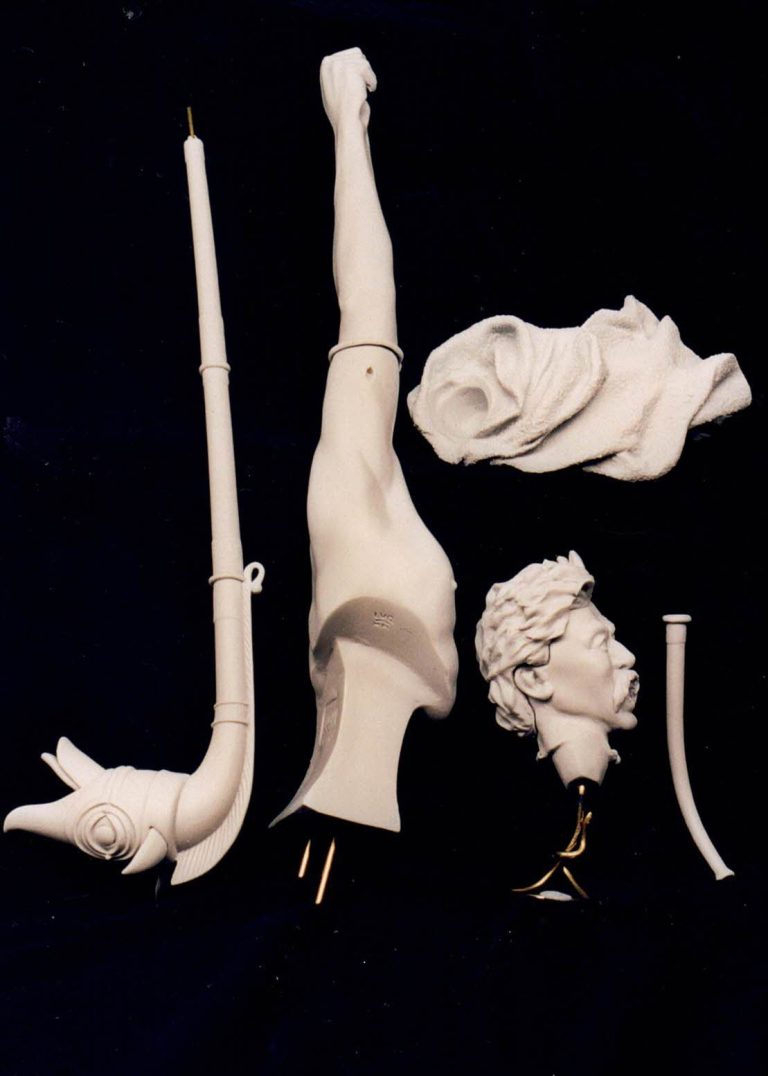

That would be a real shame, because the rest of the model just slots together, and the result is not only stunning, but huge as well.
I haven't mentioned the packaging this model comes in yet, simply because I was quite stunned by what came out of it. The box is just about the usual size that Quang's full figures come in, say about 20 cm long, 10 cm wide and 4cm deep. Proportionately, it's not a box that would stand out as being huge, if put on a shelf next to say an Andrea or Pegaso kit box.
The artwork is the usual fare from Pilipili, a model assembles and painted by Quang, with a couple of views of the finished kit, and a small amount of historical information, just to whet the appetite.
When you open the box, the parts don't even leap out suggesting the size this thing will be, granted the model is almost half a figure, and the raised arm makes up a lot of height when test fitted, but once the horn is assembled and put in place, the model just seems to go on fro ever and ever.
The actual height is well over 30cm without a wood plinth, as I say, quite astounding from such a relatively normal sized box.
The way that the parts are split will mean that a fair amount of time invested in test fitting the parts will be rewarded when you come to glue things together. The cloak / body joint in particular is one such, and it might even be advisable to add a smear of putty to the body casting at this joint, spreading the putty out over the outer edge of the joint, and then dusting this with either talcum powder or French chalk, before pressing the cloak casting into place.
The cloak can then be pulled away from the body, hopefully leaving the putty in place, attached to the body casting, and then left to dry. The excess putty that has squeezed out of the joint can be cleaned up once fully cured, thus ensuring that there are no gaps, and that no touching up of the paint is necessary.
To begin the painting, I primed all the parts with Humbrol Matt White, having thinned this with Cellulose Thinners and using it through an airbrush. I find that for larger models this is a particularly fast way of getting an even coat of paint onto the model, and that for resin in particular, the Cellulose Thinners grabs the surface of the model very well indeed.
Undercoating the skin areas was next, beginning with the usual Humbrol Flesh Tone acrylic. Over this, once dry, was added the mid-tone flesh mix of oils. This is made up of a mix of Windsor and Newton Flesh Tint, a little Mars Yellow and a little Titanium White, the ratio being roughly 4:2:1 parts respectively. This is only a rough guide, and all my skin tones differ intentionally. After all no two people have exactly the same skin tone.
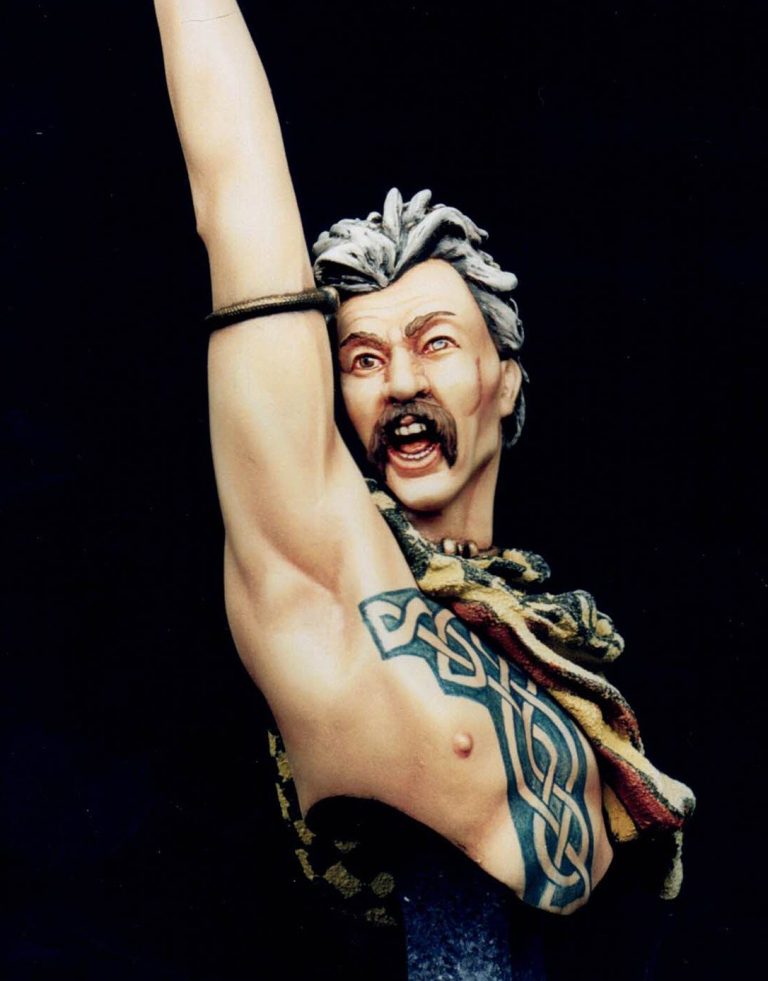
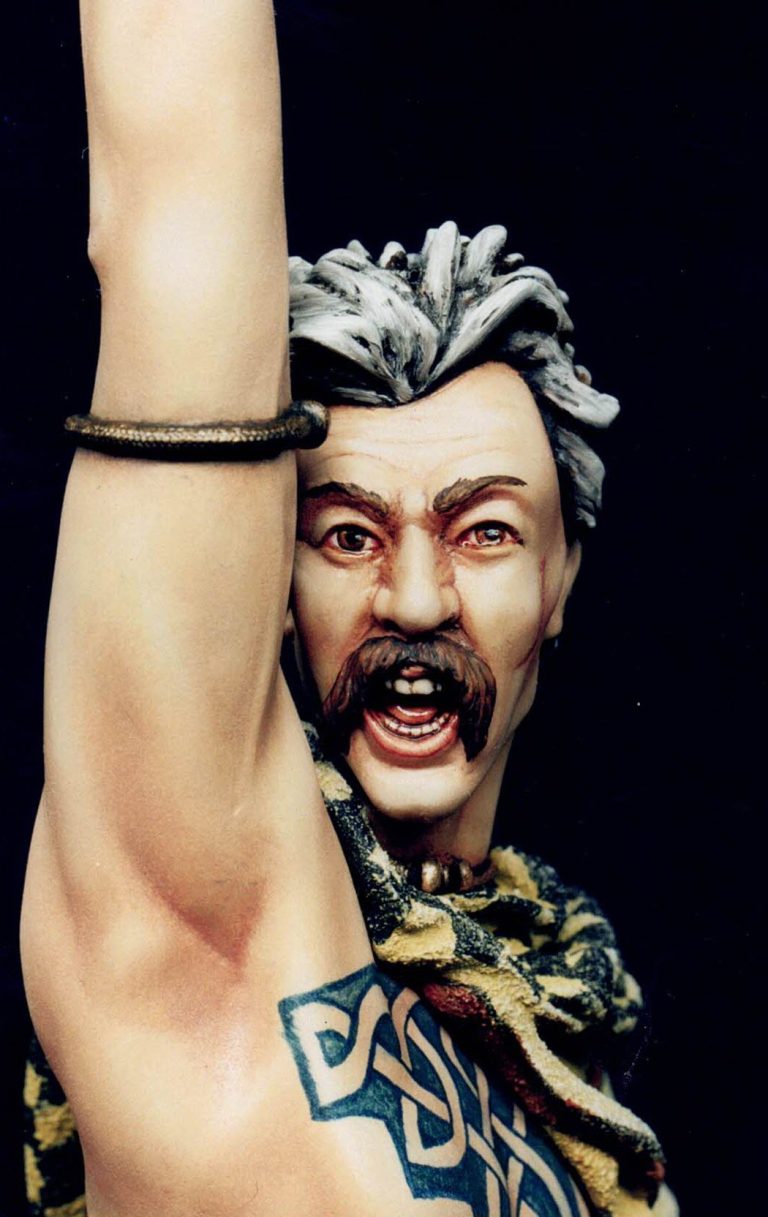
The mid-tone was painted onto the model with a large brush, and then using a second brush of similar size, the skin area was stippled to remove the majority of the paint. I used an old T-shirt to wipe off the excess build-up of paint on this second brush, so that the excess paint was pulled off the model, but also there was a slight texture added tot he skin.
For the shadows, I used additions of Burnt Sienna, adding this with a small brush to the areas I wanted, and then stippling with a medium sized brush so that this darker colour mixed with the mid-tone.
Highlights were added with Titanium White, again stippling these additions so that the paint mixed into the mid-tone.
There's quite a lot of skin area to cope with here, and it might seem a big job to do all at once. I've found that oil paints can be stored in the fridge - covered on the pallet with small squares of cling film ( saran wrap for our American friends ). This slows down the drying time even more, so that the paint's won't have dried up should you be having to spend a couple of days painting the model. Placing the model in a container and placing it in the fridge will keep the paint already on him wet too.
I left the darker shading around the eyes and ears, and under the chin, until the main flesh areas had dried fully, adding thinned Burnt Umber to these places and stippling it in so that it gradually fades out to the less shadowed areas.
The cloak is fun to do, this being one that I thought I'd go a little daft with, adding patterns to the inner and outer faces.
I'd initially thought to just do the whole thing with a checked pattern, going for off white and black squares. However, it would then have ruined the effect of Quang’s sculpting in that it would be very difficult to distinguish between the inner and outer faces of the cloak. The sculpting does add a lot of animation tot he whole model, and I thought that maybe by making the two areas different, so that there was a definite inner and outer face to the cloak, that the effect of it billowing in the wind would be enhanced.
I started by painting the whole cloak with a thin coat of Mars Yellow and Titanium White oils, adding more and more of the white to this to build up the raised detail. There isn't much finesse to this admittedly, as the cloak has such a rough texture sculpted onto it, that apart from drybrushing the raised areas, there's not much else can be done.
Once this had dried, I began adding the black squares, using some Mars Black. I thinned this slightly with some White Spirit, although I had to be careful here, because if it was thinned too much, then it would just run around all that rough texturing and render the squares in a very uneven manner.
By beginning at just behind the right shoulder, I could establish a fairly true square, and then by adding vertical lines of these, the pattern could be allowed to stretch and deform as the cloth stretches and follows the contours of the folds around the body.
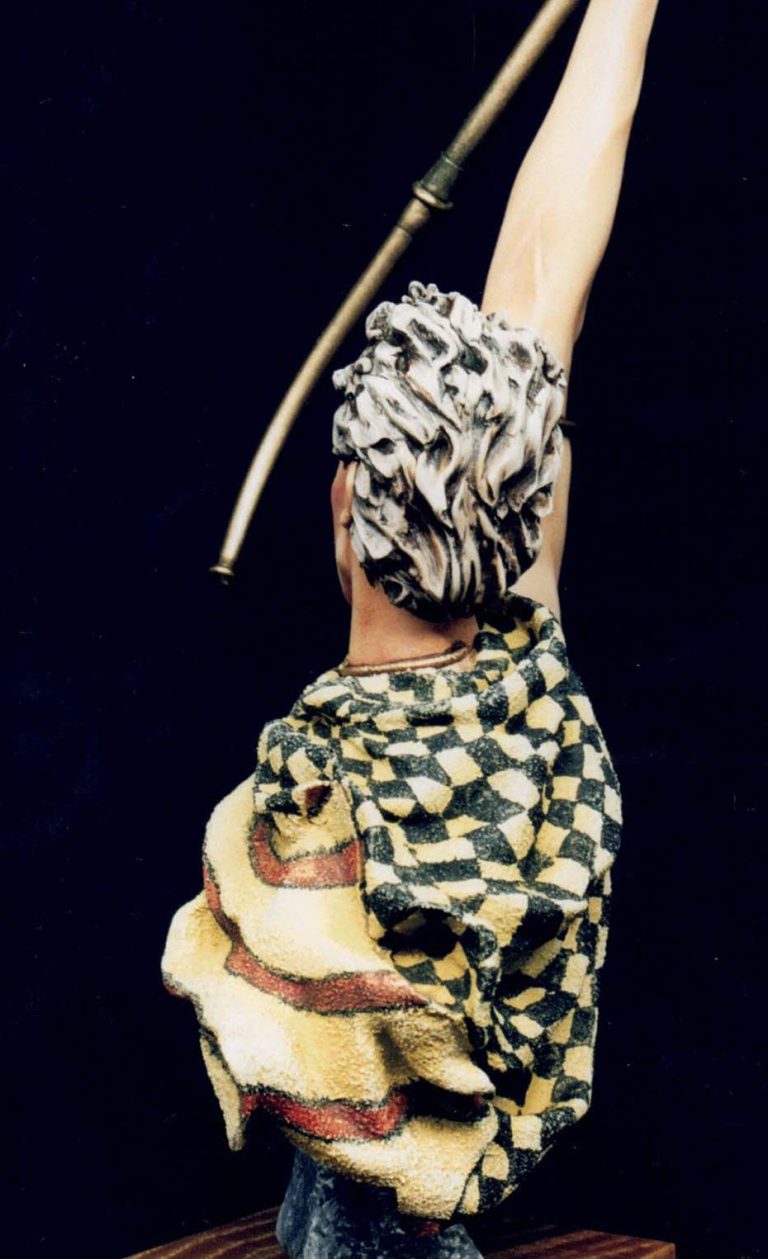
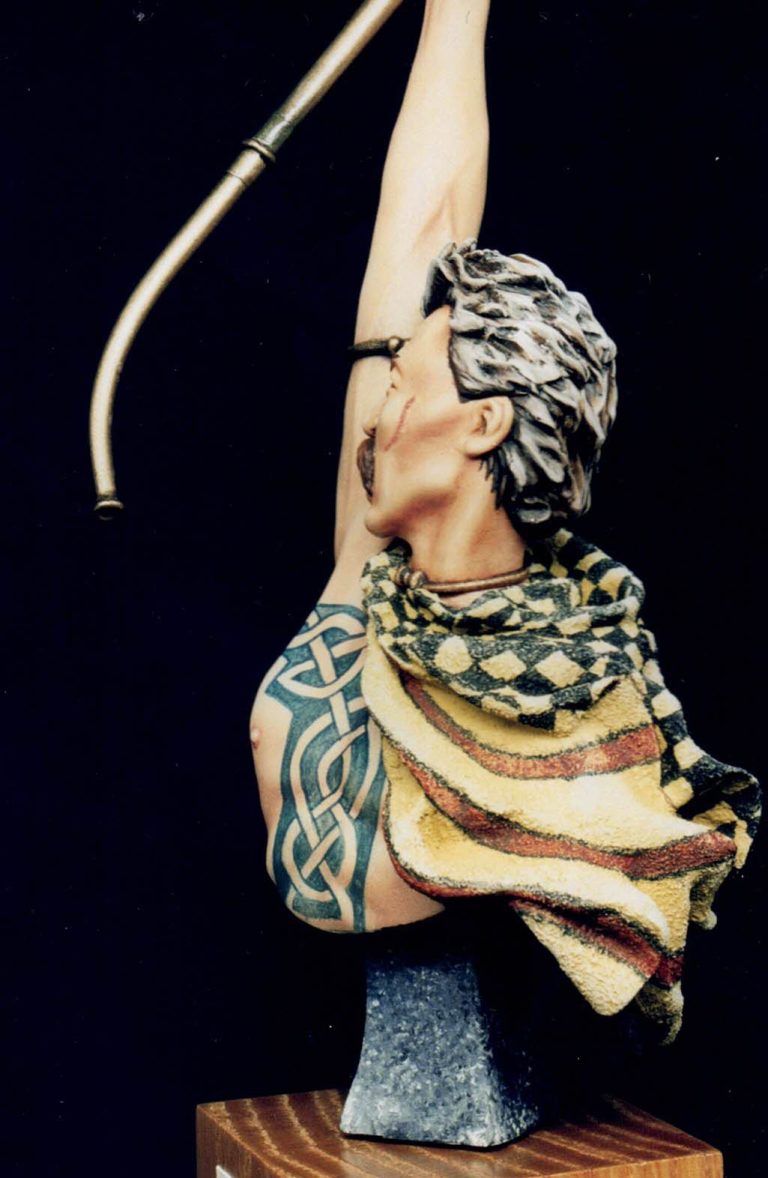
After working my way around the model, by the time I got to the front, the squares were becoming more like diamonds, and I had to be careful that these did not become too distorted to be believable.
This took hours of work to complete the squares, possibly ten hours in all, although I didn't bother timing it properly, I do know that it took more than three evenings to complete.
The inner face in comparison, was much easier, as I chose to add lines to the cloak in a brownish red. I used some Mars Brown for this, thinning the paint quite heavily, and then neatening up the lines once they were dry with some more of the Mars Black.
The hair was a bit of a problem. I wanted it to look like it had had lime added to it, as it is sculpted to be quite spiky, but I also didn't want to paint the hair blonde.
I began with some Burnt Umber oils, and stippled this into alll the recessed detail. I then used a cloth to wipe off most of this paint, stroking the cloth over the model in the same direction as the hair would be combed.
By selecting a large, flat brush, I could then begin adding the white to this, letting the paint build up quite a bit so that brush marks were left on the casting, further enhancing the illusion of hair.
As the paint was quite thick, this took some time to dry, and so I busied myself with the horn.
Initially I'd thought to paint this with a brush, but having done the priming with the airbrush, I decided that it might look better if the metal was rendered with the airbrush too, after all it would leave a smoother finish.
I began by painting the whole horn with Humbrol Matt Black. Then the gold was added, beginning with some Testors Gold mixed with some Matt Black. This built up the shadows quite well, and by adding just the Testors Gold on it's own, I could further build the mid-highlights up.
The final highlights are added with some Humbrol Silver added to the Testors Gold, allowing this to dry fully for an hour, and then polishing it all with a soft cloth.
The shine was added by painting on seven or eight coats of Tamiya Smoke acrylic, thinned with some water.
I used Humbrol Crimson Acrylic for the red areas on the eyes and the tongue of the horn, coating the eyes with some Tamiya Clear Red to make them shine.
To finish off a bust, I usually paint the underside and stand black. On this occasion though, I thought I'd have a try at rendering some stone ( No I have no idea why I wanted to do this, I was simply playing about with what effects I could get ! ).
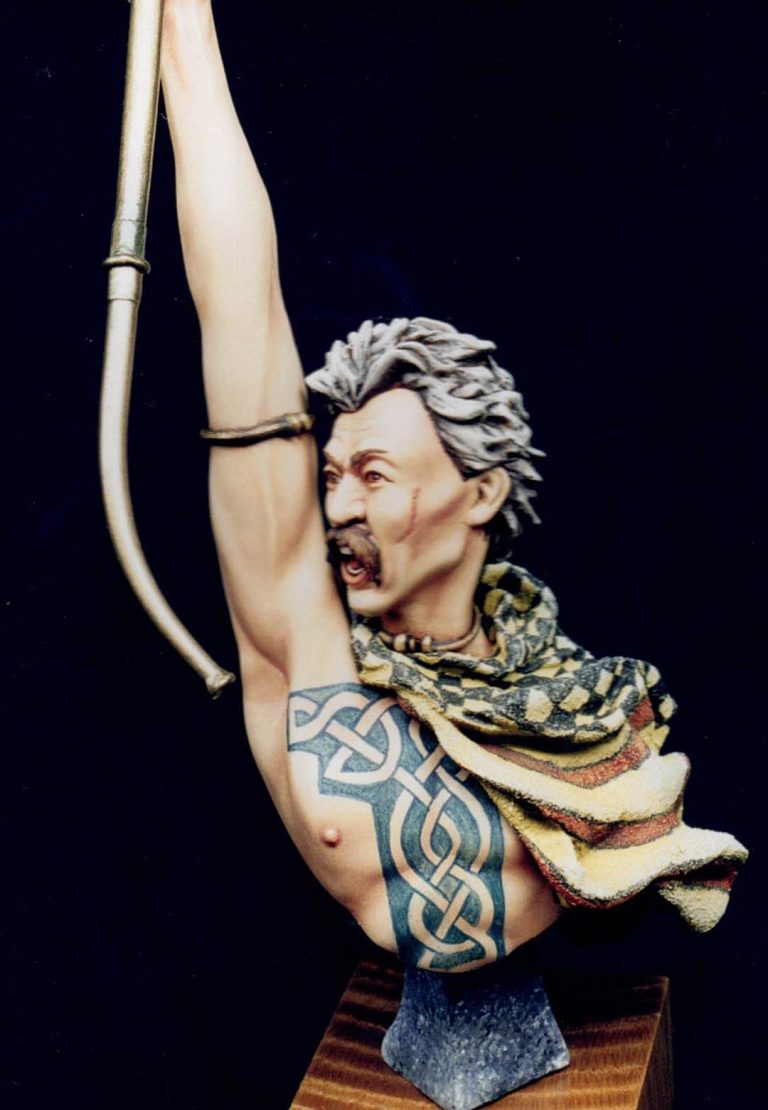
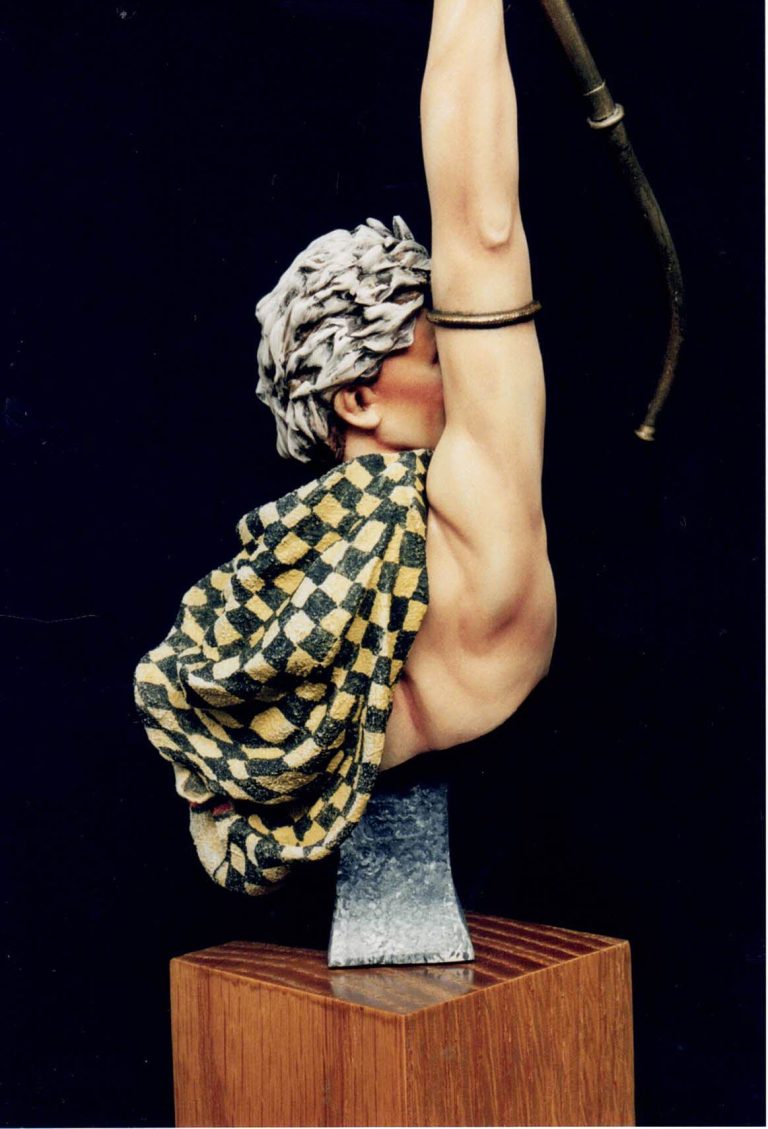
First of all I painted the stand with some white acrylic, and then added a dark Grey oil paint over this. Then a large brush was used to add small amounts of Titanium White to the stand, allowing this to build up, but stippling each area a minimal number of times so that the paint didn't have chance to mix too much.
I was quite pleased with the result, it looking like a grey flecked marble.
The gold torque and armband were painted last, using some more of the Testors Gold, but this time using a dark green ( Olive Green ) oil paint as the shadow, and a very small amount of silver for the highlight.
Display
This is the difficult bit really. As the model is so long and tall, he really deserves, and would look exceptionally good, in a long tall display case, all by himself.
Unfortunately, I don't possess one of these, and whilst my wife is very understanding about my hobby, a line is drawn at the four display cases already dotted around the home.
So he has to go in with the rest of the models.
This is a shame really, because either I have to take a shelf out so that he can have hold of the horn, and that would mean losing display space, or use the thoughtful design of the model to allow the horn to be removed from the model for transportation.
And that's how he is, most of the time, being displayed complete with the horn in place at shows, and at home looking like he's hailing a taxi, as the horn is kept separate so that he fits on a shelf.
Conclusion
It's a lovely model. The fit of parts, considering the way that Quang has chosen to try and follow difficult break lines - thus making things easier and better detailed for the modeller, is very good. Yes, there is a small amount of filler involved around the cloak / body, and also at the hairline, but it's a minimal amount.
The model has a great deal of presence, not least because of it's size, but also with the animation of the face and the billowing cloak.
Take care to get the arm aligned correctly, otherwise the anatomy will look a little odd, there is a pegged socket, but a small amount of play is allowed for, and test fitting this part especially will pay dividends to the finished piece.
I do seem to have whinged a little about this model. Although I think it is an excellent addition to Quang’s range.
My observations aren't meant as criticism's, but more as signposts to guide anyone who's got this model and not yet built it, or will buy it in the future.
It's well worth the effort once it's finished, and will stand out in any collection.

We need your consent to load the translations
We use a third-party service to translate the website content that may collect data about your activity. Please review the details in the privacy policy and accept the service to view the translations.