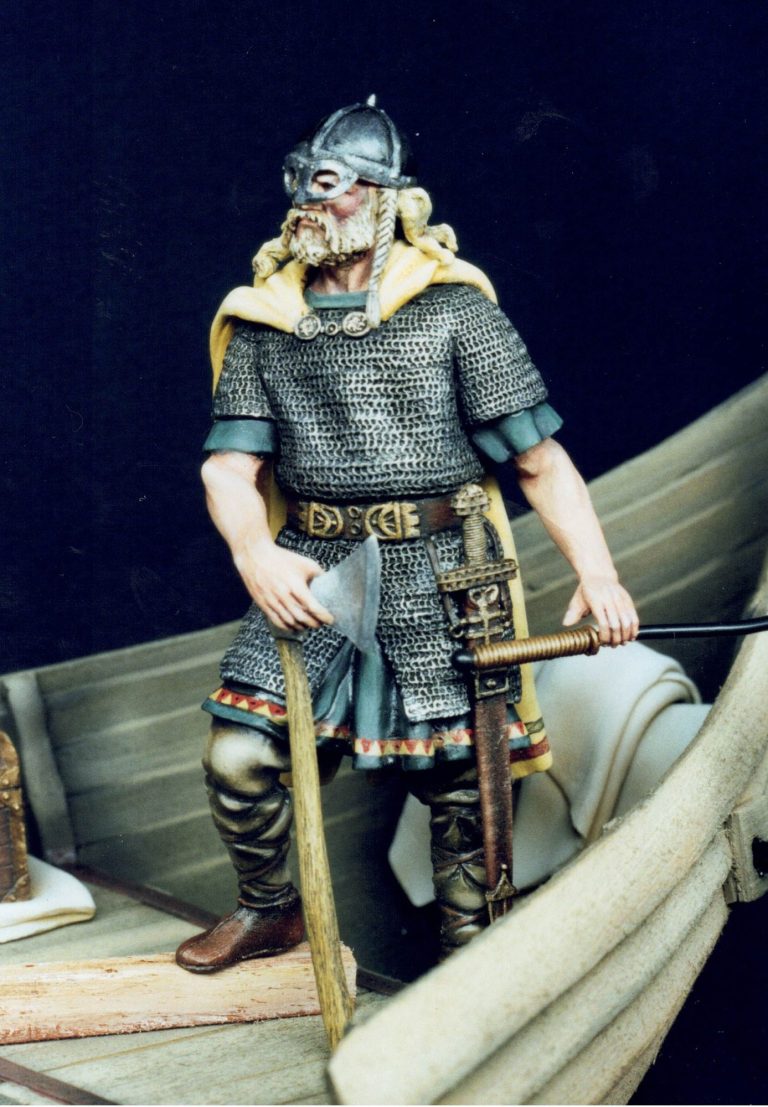
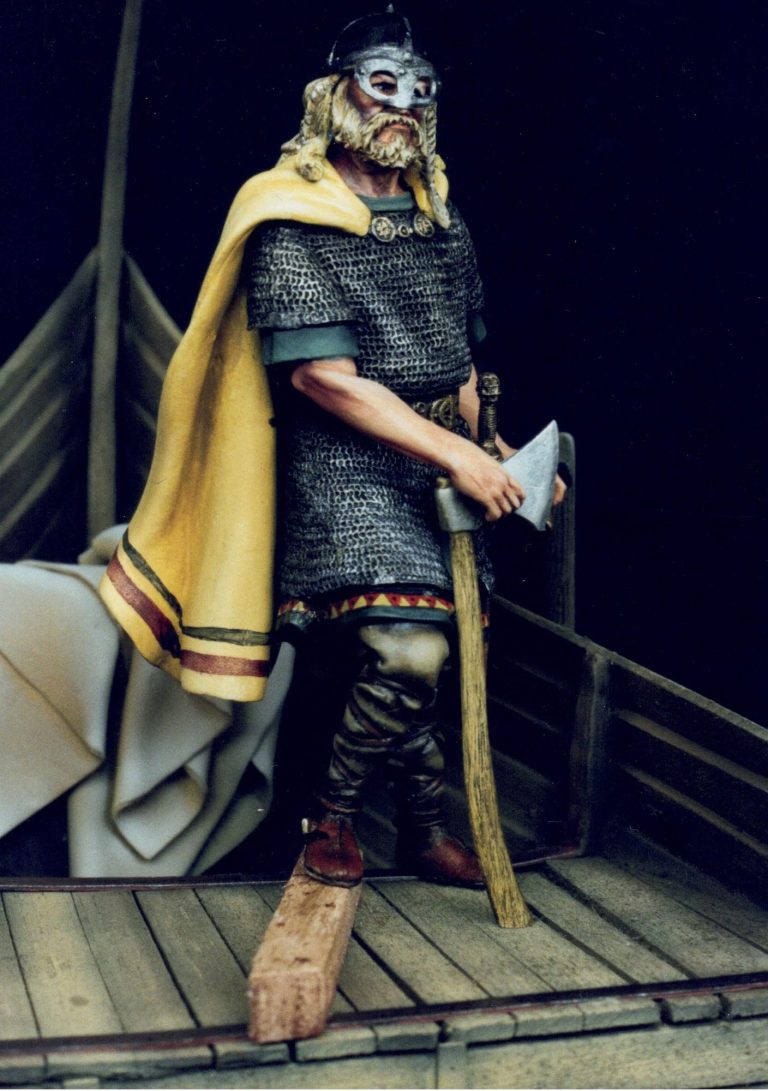
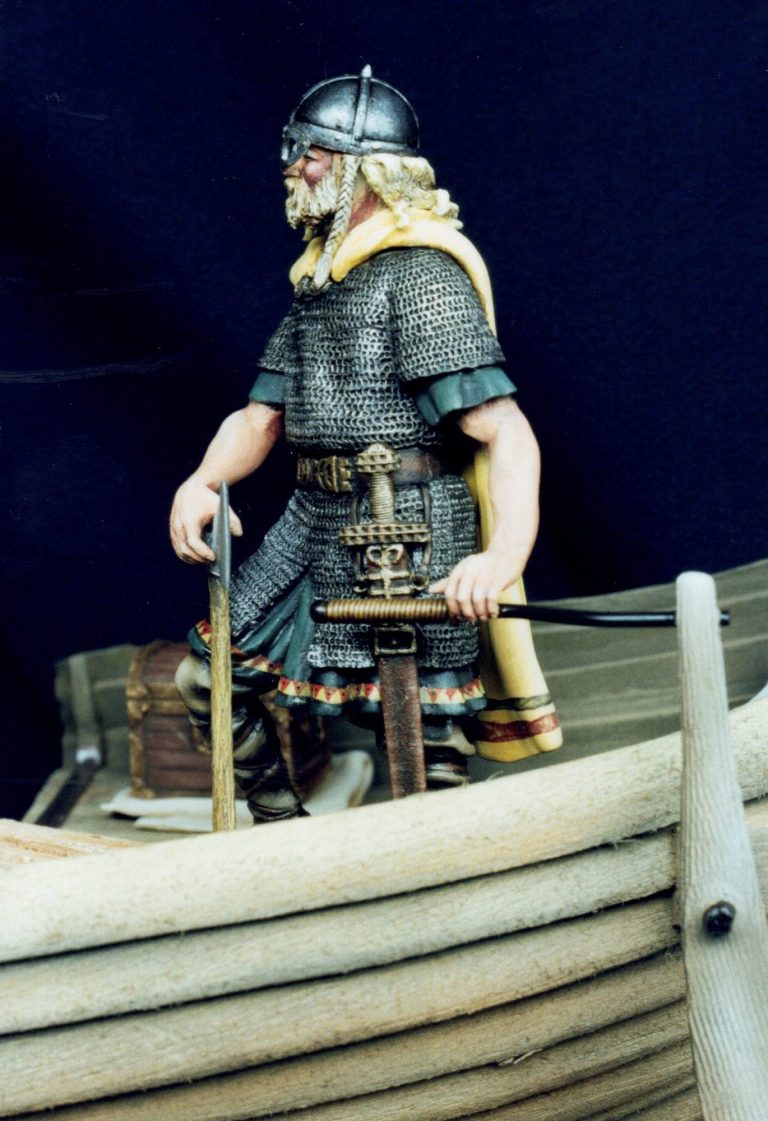
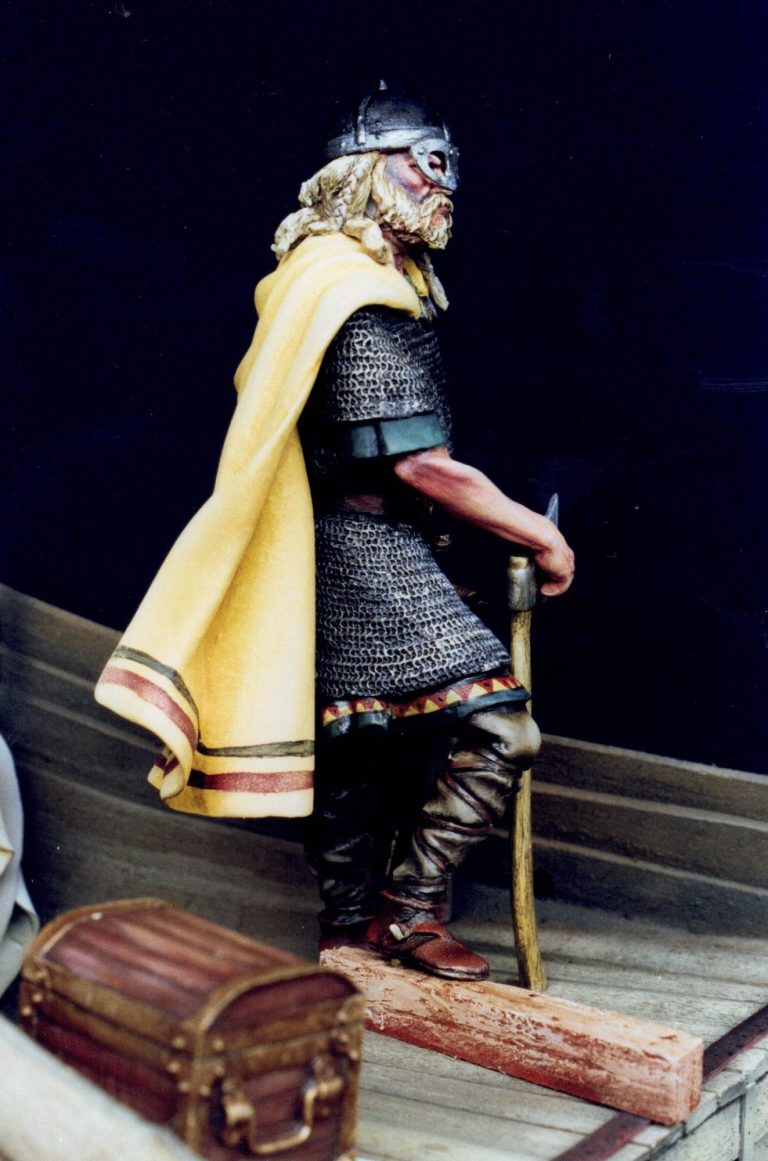
Viking Jarl
90mm White Metal figure from Andrea Miniatures with a scratch-built section of Longship
Constructed and painted 2008
This is a model that I really liked the look of when I first saw it, but has, for some unknown reason, been constantly put to the back of the "to be painted" pile.
A shame too, as it's one that looks well with a few coats of paint.
Having seen the resurgence of acrylic paints over the last few years, I decided to paint quite a bit of this model using that medium, especially the face, rather than my usual oil paints.
I must admit that I prefer using the acrylics on smaller scale figures than this, but thought I'd give it a bash to see how rusty I've become.
First though the model.
As seems to be Andrea's habit, this model comes in a colourful wrap around slide case, with a selection of photos of a completed kit to whet the modellers appetite and give a few hints and tips for possible paints to use.
There's several motifs cunningly hidden on the back of the box that can be used for shield designs, although there's plenty of books on the subject of Vikings, so you don't necessarily have to use one of the ones suggested by Andrea. But it's a nice idea of theirs.
The model is well protected in a foam lined sleeve, the smaller parts being in a couple of bags to prevent them going astray.
Fit of parts is good, the breakdown being relatively simple, the model being moulded in one piece except for the cloak, a part to fill in the back of the mail shirt above the knees, three parts for the hair, the arms each being separate, as too are the shield, axe and sword, and finally a base with a rock moulded on to take his raised foot.
If I was to be picky, I'd ask why the insert to cover the back of the lower mail shirt isn't detailed except along its bottom edge. This omission isn't in any way detrimental to the model if it's assembled as per instructions, but if the detail that's missing was actually in place, then the option of leaving the cloak off, sculpting a little bit of detail in around the neck where it attaches, and hey presto a simple conversion for the modeller.
As it is, the lack of detail on this filler means that the modeller islooking at having to sculpt in a fair amount of mail, which is off-putting to the average Joe. But as I said, I'm being picky.
I've two more whinges, one is about the musculature on the right forearm.
Maybe I'm wrong, but the muscle attaching the radius bone to the elbow does not stick out at the side as shown on the model. Certainly not if the hand is gripping in the position the model is posed in.
It's a minor niggle, and one that I'm sure can be sorted out with a small amount of work with a file.
The second niggle is the right leg. The upper portion above the knee which appears somewhat flattened. For a fellow who's got such muscly arms, this leg seems to be either wasted or vastly undersized. A bit of Milliput could be added here to remedy the problem.
The casting is very good, with just a few restrained mould lines to clean up with a file, and a couple of pips to take off where the metal has been poured into the mould. Nothing major though, and all as one would expect from this manufacturer.
I'll congratulate Andrea here actually, as I've usually found that leg bindings on models, particularly in this scale tend to suffer from bad castings. The sample I have is clean, there being just a line for the moulds parting down the inside of each leg. This saves a whole load of remedial work. Well done Andrea.
There's an instruction sheet included with paint suggestions and a potted history of the Vikings too.

Not bad value for money at all, and just enough to get the creative juices flowing.
The face
Acrylics. Ho hum. Having seen the dark shading effects so in vogue the moment, I thought I might as well have a go at doing that whilst using the acrylics - in for a penny in for a pound. And was pleasantly surprised at how easily I seemed to get back into the flow of using the acrylics.
Beginning with a couple of light coats of Humbrol Flesh acrylic over a white primer, I used a very thinned down shadow colour of Games Workshop's "Swamp Brown" adding a lot of water to make it seem that there was hardly any paint actually being used.
After about ten coats of this being used to build up the shadows in the usual areas on the face, a little black was added to the brown, along with some more water to thin it back to the same consistency, and then the shadows were darkened further with this mix.
The secret of this method really is in keeping the paint thin. I've managed to get water marks on mine, this usually cause by applying too much paint, and because it's so thin, you tend not to notice until it's dried, with the attendant "tide mark".
There's no sure fire way of getting rid of these blemishes, painting over them can mess up the paintwork even more, a brush dampened with isopropyl Alcohol - a solvent for most acrylics - can remove the marks, but sometimes attacks the good areas of paint too, and further washes of paint may or may not hide the faults. I left mine, mainly because I was happy with the rest of the face, and the spectacle faceguard hides most of the sins.
With the shadows completed, I moved on to the highlights. These too are done with very heavily thinned paint, a lightened shade of the flesh tint being used first, then followed with pure white on only the very tip of the nose, the cheekbones and the brow of the face.
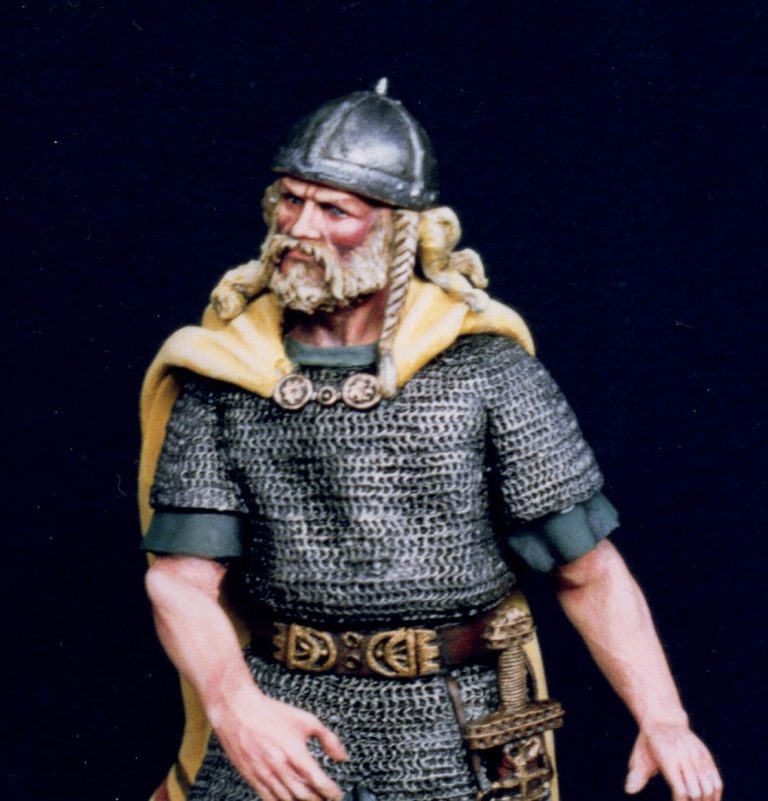
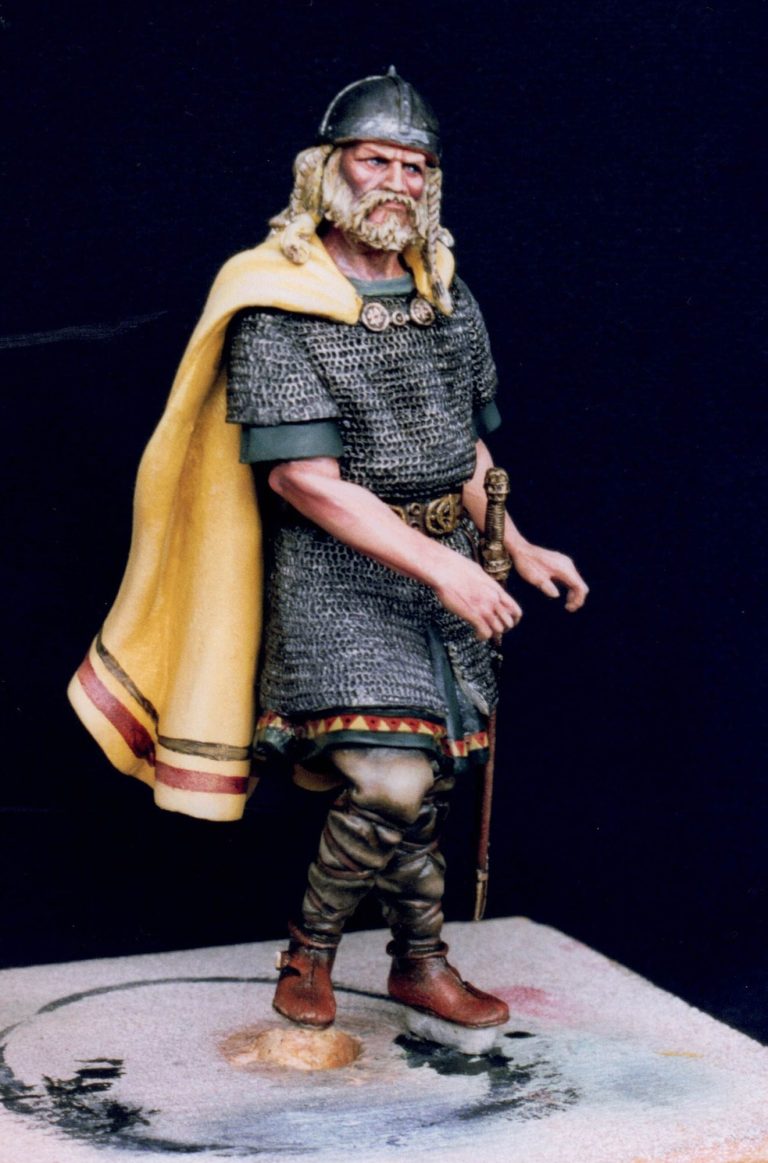
The hair, shirt and trousers were done in much the same way, the hair tending more towards dry brushing to allow the detail to stand out, but otherwise using the same method of thinned shading and highlighting over a solid base colour.
On the mail I reverted somewhat to my old ways ( Yes, I know, the acrylics didn't last long ). I undercoated in a dark mix of acrylic
"Chainmail" from GW letting this dry fully before adding the shading with a mix of Burnt Umber and Black oil paint thinned with White Spirit so that it flowed into the detail.
The cloak too was done in oils. this is because I haven't figured out a way of making the acrylics look like a rough wool. I undercoated in acrylic though ! The oils used were Yellow Ochre with White stippled on to give the highlights and the texture.
The leather shoes were also oils, again to get the rough suede texture, using Burnt Umber, Burnt Sienna and Light Red for the colours here.
It's possibly worthy of note that the sword ( from the detail on it's hilt ) seems to be copied from the 9th Century "Sword of Ireland" as shown in the Osprey book "Viking Hersir" by Mark Harrison and Gerry Embleton ( front cover and also plate H ). Which seems a rather grand weapon for our Chieftain to have to hand.
Also worth mentioning is how well groomed the better off Viking warriors were. Apparently combs were commonly carried, even small pairs of tweezers to extract errant hairs and small gilded spoons to remove earwax ( don't I give you some useless information ? ).
Anyway, I painted the hilt of the sword up to match the one illustrated in the Osprey book, but left off the earwax - seeing as his ears are covered by his hair.
I returned to the cloak once it was fully dry to add the two decorative lines of colour, and I was going to dirty it a little around the hem, but decided that with this information about the apparent cleanliness of the well-to-do Vikings, it would probably be more accurate to leave off the mud.
So really, all of the above is pretty standard to what I’d normally do except of course the acrylic flesh painting. And that’s where I’m up to in the photos so far. Now for setting the scene.
Now for setting the scene.
Whilst the rock supplied with the kit that is for the right leg to rest on is just fine, I wanted something a little more eye-catching. With this in mind, I remembered a Conquistador figure I’d some years back, posed standing on a dock with water lapping below.

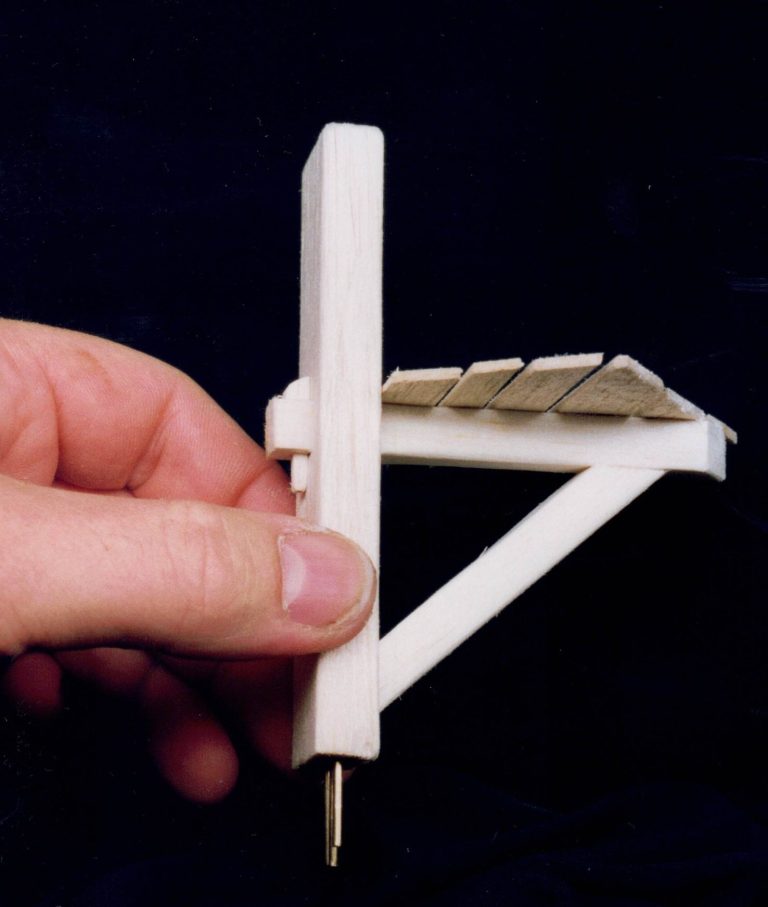
That’s it thought I, I’ll do another one of those and see if I can improve on the dock and the lapping waves.
So we’ll call this photo #3 where I’ve built an upright stanchion, added a horizontal beam through it in a mortise and tenon joint ( See, school woodwork “O” level coming in useful there ), and a beam at forty five degrees to help support things. Planks were added to the top for our hero to stand upon, and things were looking pretty good.
Photo #4 shows another view of the woodwork, and I’ve added lines into the main support to show cracks and shakes in the wood.
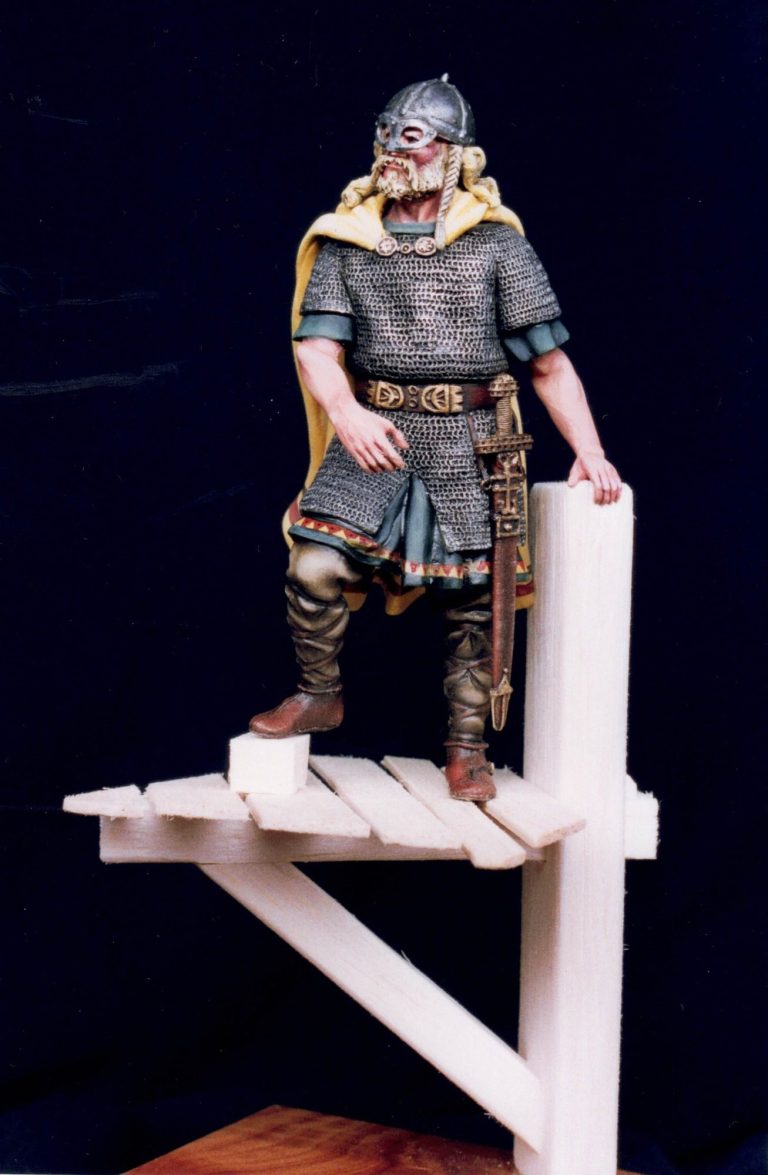
Photo #5 shows the figure standing in place, the top of the upright having been trimmed to support the left hand.

Photo #6, shows the same pose from a different angle, and I’ve put a small block of wood under the right foot to support it temporarily. This will be replaced with something more in keeping with a Viking Chief – some form of treasure Probably.
Ah, but all was not well.
The Conquistador figure I’d done this scene with many years ago was larger – 120mm in fact – however he was made of resin, not white metal.
Gravity was taking hold ( I blame Sir Isaac Newton, gravity being his idea in the first place ) and the Viking was simply much too heavy for the single support I’d built….
Oh dear, how sad, never mind. I’ll think of something else.

Now around this time Andrea had come up with a wonderful idea for a 54mm Viking ship – the full shenanigans of a complete ship, crew etc.
It was out of my league price-wise, but maybe I could built a bit of boat to go with this figure.
Now I’m no shipwright, and “O” level woodwork does not extend to the construction of seagoing craft….. Well, not at my school anyway.
So I was kind of making this up as I went along ( Shh, don’t tell anyone, they’ll never notice ).
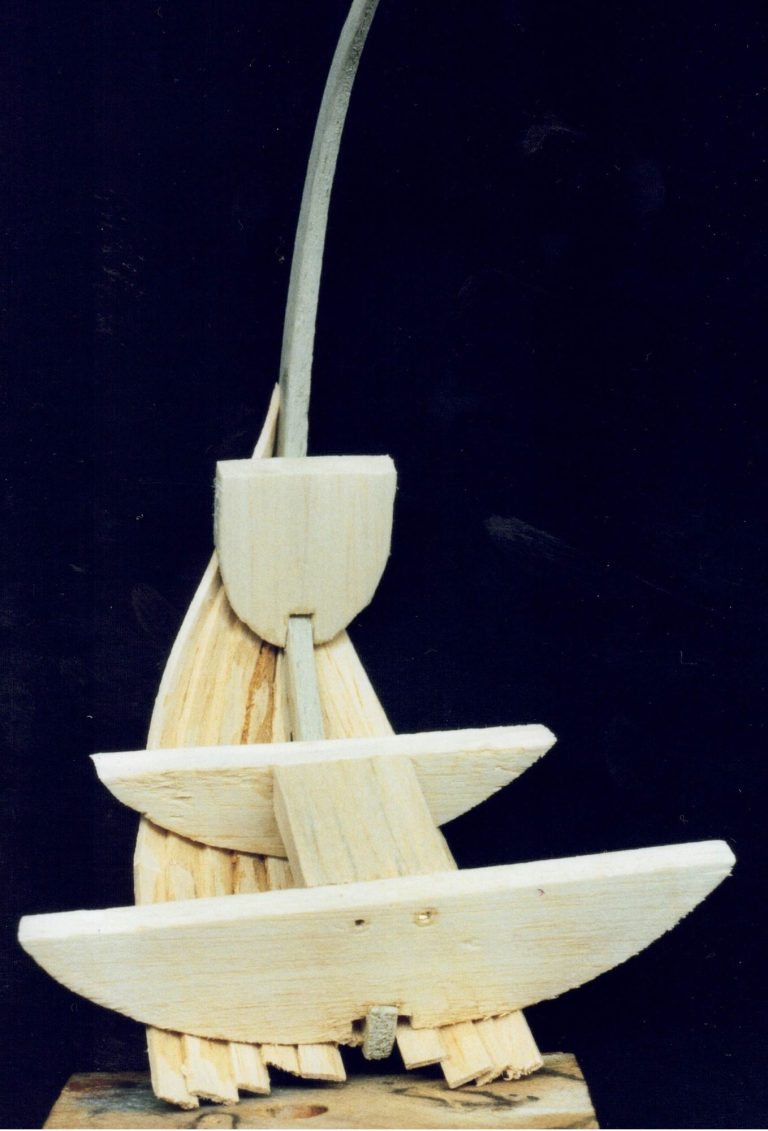
In photo #7 I’ve begin by laying down the keel, cutting out cross braces, which are very much simplified, and I’m beginning to add the hull planking.
I had to cheat though.
I was using Balsa Wood, why I didn’t use plasticard, I cannot imagine. However, Balsa Wood strips, no matter how thin, are not as bendy as you think, and certainly not flexible enough to form into the shape I wanted for the hull planks if the strips were cut straight.
So I cheated by cutting them from a Balsa sheet by making a curve at one end that would go towards the prow of the boat.
This might be noticeable in photo #8, and simply put is the only way I could get the shape I wanted.
My apologies to shipwrights everywhere.
However, it seemed to work, and in the final shots you can see the completed ship with a resin treasure chest and out hero at the steering oar.
Oh, that’s something I haven’t mentioned – Starboard and Port on a ship.
Starboard is the right hand side of the ship if you’re standing at the back of the vessel and looking forward. That’s because most people are right handed and so would have the steering board ( Hence Starboard ) on the right for ease of use.
because you wouldn’t want to damage the steering board when coming in to dock, the vessel would always have it’s left hand side ( if you’re at the back again and facing forward ) to the dock, hence calling that side Port, because that’s the side you’d unload at into the port.
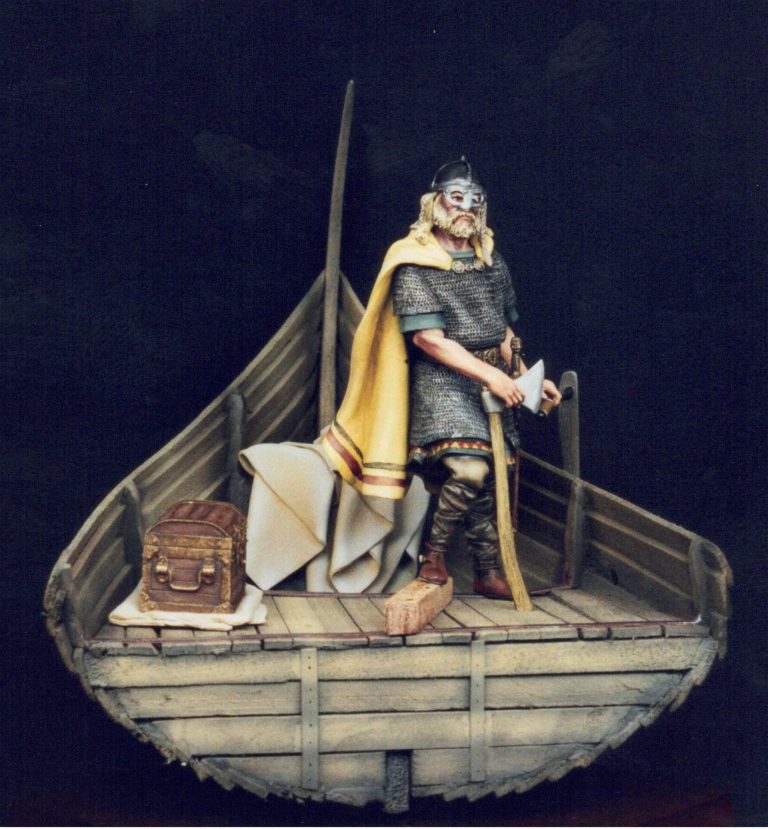
However, our little Viking is left handed, so he’s had his boat built the opposite way round, he’ll have to dock with his Starboard side.
There you go, I’ve explained which side of a boat or ship is which and dug myself out of a hole because the model is cack-handed…… No one’ll notice, honest.
Once built, the balsa wood needed sealing and painting.
Sealing, you ask ?
Well, it’s very absorbent and it doesn’t soak up colours evenly due to the different densities caused by the grain.
Hobby balsa stock tends to be a bit rough at the best of times when dealing with the thinner “planks” that are sold in sections approximately 300mm long and 100mm wide. So whilst each piece was gently sanded before fastening into place, they needed sealing with a water and white glue mix.
It’s similar to how you’re treat plaster groundwork castings prior to painting, simply mix up glue and water so it’s the consistency of milk, and brush it onto the model. Give it about half an hour and then add a second coat just to make sure there’s plenty getting soaked in. Try not to leave any pools or dribbles, as these will dry slightly raised from the rest of the surface.
After about 48 hours the balsa should be ready to paint. It’ll probably have a slightly glossy surface, and some fibres of the wood may have risen, but these can be removed with some very gentle sanding with fine grit abrasive paper or a pad.
If there’s a lot of the fibres sticking out, then removing them and adding another coat of the glue / water mix is advisable.
As for painting, it’s probably best to find a spray can with a sand colour paint in it and spray the whole thing.


That’s what I did in this case, and then I used oil colours to add shading and weathering to the planks.
The folded tarpaulin and chest were added after the wood areas had been finished and then the figure was added last of all, placing him so that I could drill holes through the deck and into one of the solid cross-braces in the carcase of the boat.
Summing up.
Apart from the right arm musculature, it’s a lovely kit, the fact that I went to such lengths to build a base for him seemed worth it, and I’m pleased with the overall pose and effect.
On reflection, would I have been better building the front end of the boat and then I could have had the figurehead too, and maybe just had his left hand on the rail of the ship.
Maybe that would have been a better idea.
But I still like it as it is.
Perhaps next time I’ll do the front end….
We need your consent to load the translations
We use a third-party service to translate the website content that may collect data about your activity. Please review the details in the privacy policy and accept the service to view the translations.