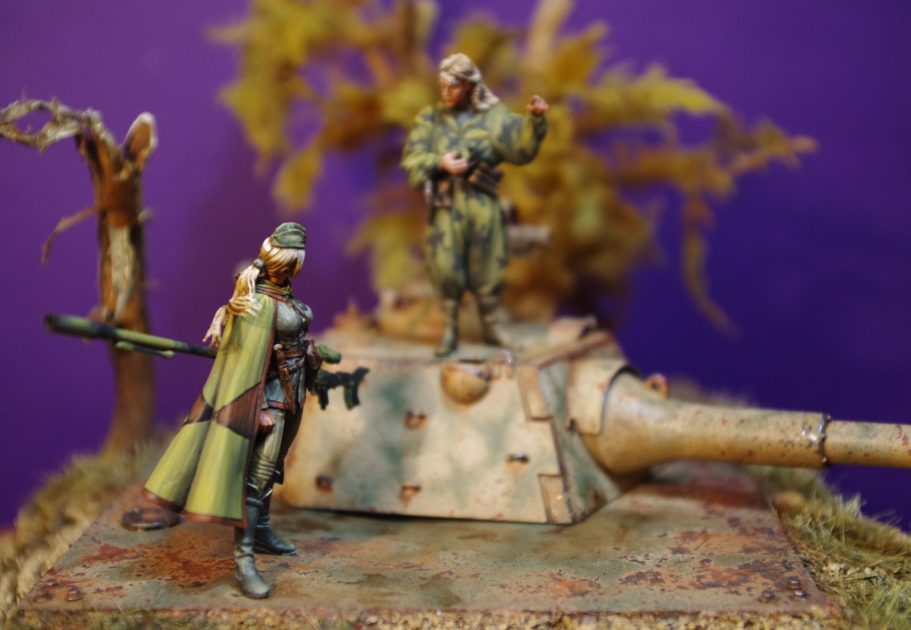
"What If ?" E50 Turret diorama
Using Trumpeter, Mauser Earth, Alpine and other bits
Painted in 2017

I suppose you could say this is what happens when you have spare bits from a kit – the Trumpeter E50 – that are just too good to stay in the spares box.
I’d replaced the Schmalturm turret on Trumpeter’s E50 with a fixed upper superstructure, so that’s why this vignette sort of grew from those few spare parts, with a couple of figures that deserved rescuing from the Grey Army shelves.
Let’s start with the figures.
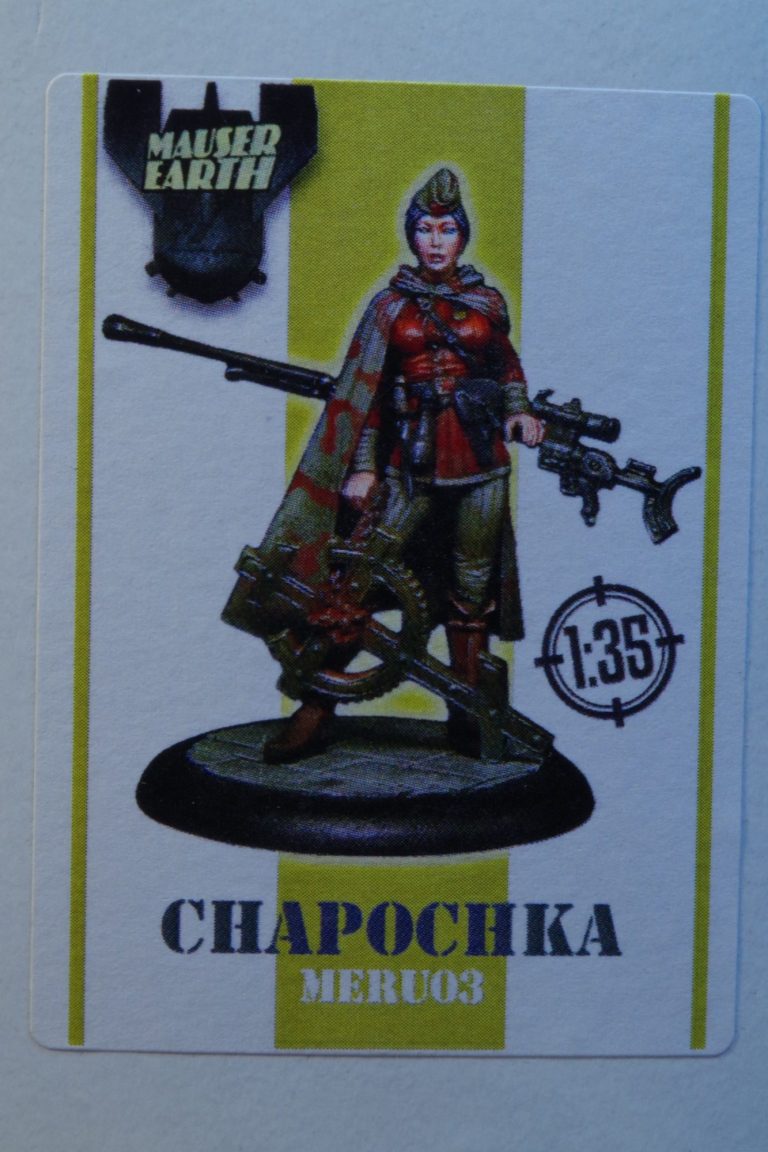
The first one is the one that I really had wanted to paint for some time. Mauser Earth kits are hard to find now, although they produced some really good ones in both 1/35th scale and also 1/16th.
This one is an alternative WWII fantasy female figure, the box art being shown in photo #1.
Cast in resin, there is a little bit of work to clean the parts, and care must be taken because some of them are very fine castings that would be easy to break or damage.
I planned to use the kit straight out of the box, although I’d be losing the chain and cross emblem that she has in her right hand.

As usual, I was so keen to start painting that there are no pictures of the unpainted parts, and photo #2 shows the clothing having been painted in an olive green.
I’ began this process by priming the whole main casting as you see it in photo #2 with a flesh coloured acrylic, heavily thinned with Isopropyl Alcohol. A green acrylic from the GW Foundation colours was then painted on, using a couple of coats and thinning it with an equal amount of water to let it flow better.
Over the top of this I added Olive Green oils, mixed with just a little Mars Black, making sure that the dark colour got into all the deeper recesses of detail.
By then adding more Olive Green mixed with a very small amount of Buff Titanium, I could build up mid tone areas, and then add more Buff Titanium to make the highlights.
The close up in photo #3 shows the leather areas of belts and pouches added, using Mars Brown oils as a base colour and adding Light Red and then some small touches of Mars Yellow to bring out the details.
The boots were a very dark brown – mainly Mars Black oils with a small amount of Vandyke Brown added, and painted over a GW Chaos Black acrylic undercoat. Mid-tones and highlight areas were built up by adding very small spots and lines of Titanium White oils and blending these into the dark brown with a soft brush.


Photo #4 shows the cloak and head having been painted and glued in place. The face was my standard Mars Brown and Titanium White mix of oils, and the quality of the sculpting does help the painter here. What isn’t perhaps as noticeable in this shot is the fine wire extensions I’ve added to the hair. I used stripped down electrical flex for this, drilling a hole at the back of the neck and gluing about twenty strands of the wire in place, and then trimming it to length.
Photo #5 shows the back of the cloak and the hair a little better, although the hair has been painted by this point.
The cloak has had a splinter camo pattern painted on, adding the green over the whole of the cloak using the same colours as on the rest of the clothing but adding some Chrome Green to build up a brighter overall colour, then once that had dried fully, elongated triangles were painted on with Vandyke Brown oils, and Mars Brown vertical lines were then painted within the dark brown sections to add a little bit of interest.
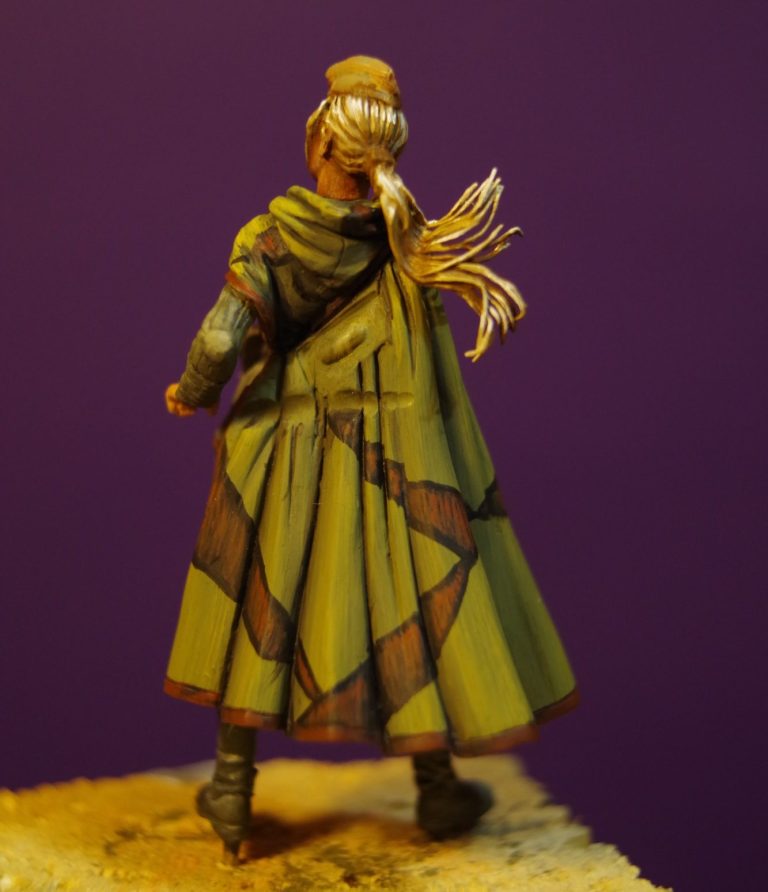
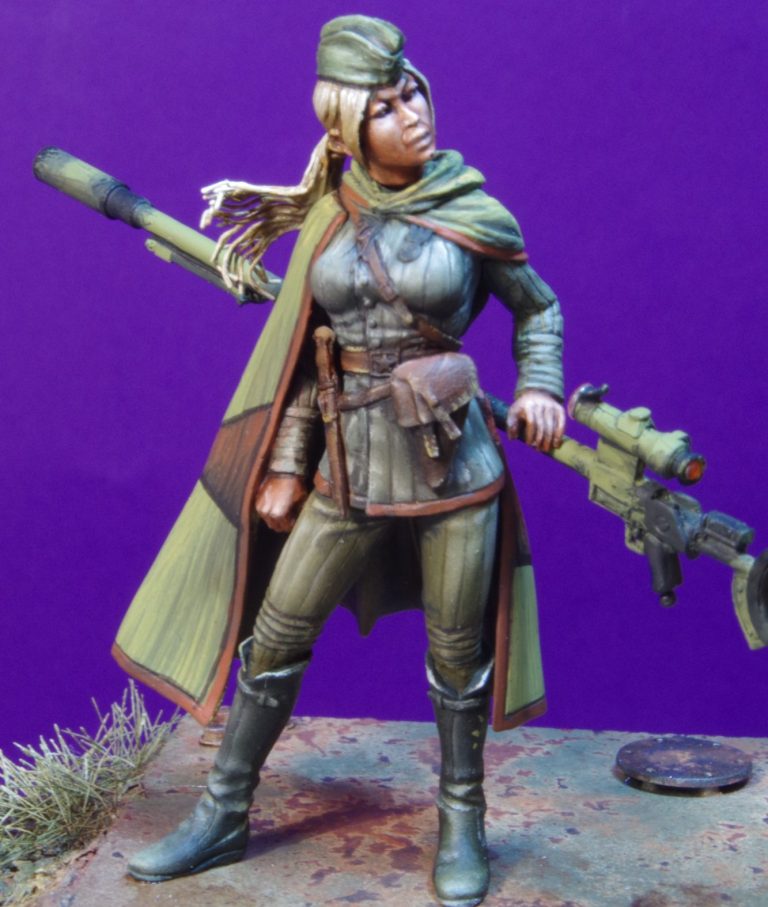
Photo #6 gives a closer look at the front of the figure, the wear on the leather being a little easier to see in this shot.
In photo #7 the first figure is complete, with the anti-tank rifle painted and glued to the figure’s back.
The rifle is a great casting, and I painted a camo pattern on that by adding an overall green acrylic from the GW foundation colours range, then adding Chaos Black to some areas with a fine sponge. The only alteration to the gun is that I fastened “Little Lenses” lights to the front and back of the sights on the gun to give a little shine to the optics.


Photo #8 shows the back of the figure now completed.
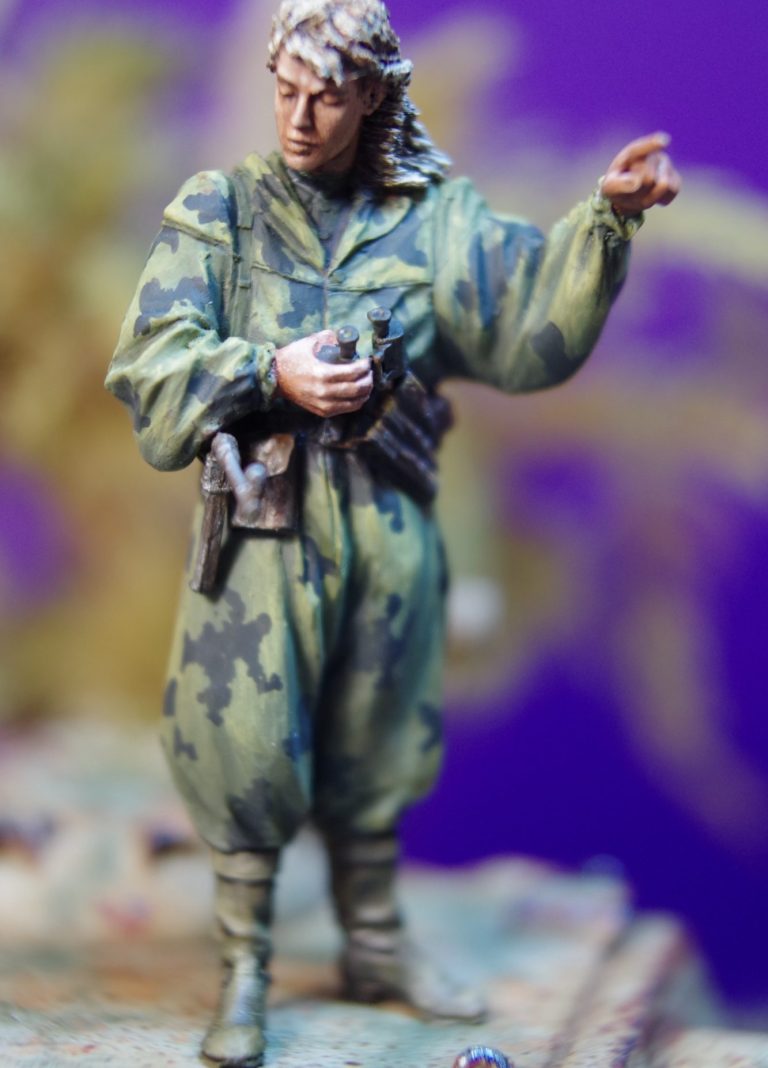
Starting the second figure in basically the same way, I used one of the female sniper figures from Alpine Miniatures. This is a historical figure in 1/35th scale, but fitted in well with the idea I’d had for a “what if ?” continuation of WWII.
Photo #9 shows the figure having been primed, but with the original head removed and a bare female head from the Hornet Heads range put in it’s place. I added some hair with Magic Sculpt, then added the primer.


The clothing is pretty much complete in photos #10 and #11, having used a similar green acrylic as an undercoat as on the first figure, shading this with some darkened green washes and then adding very dark green for the “Mickey Mouse” style camo pattern.
Although I feel I’ve improved when painting random camo patterns, it’s still a strain to not make them uniform. I guess it’s my innate OCD coming to the fore.


The finished figure in close up is shown in photos #12 and #13, the flesh areas being painted with a mix of Mars Brown and Titanium White as I usually do, and the leather areas being done in a similar manner to those on the first figure.
The brilliant thing about using oils is that just a slight difference in the first colour added can make the finished item look completely different once the other colours are added and blended in.

Now the whole reason this all came about was the spare turret from the Trumpeter E50. It looks a lot like a Schmalturm from a late panther tank, the turret actually having been produced towards the very end of the war and if memory serves, one was recovered by the allies and instead of preserving it ( come on, that would be the logical thing to do ) some bright spark thought it would be best used for target practice on a gun range….. I’m tempted to say F***ing idiots, but it’s no use now bemoaning the facts that there have been some right nodules with positions of power.
However, Trumpeter have done a decent job of reproducing the turret, and the only thing I changed out was the main gun barrel, opting for a turned aluminium offering.
Seen in photo #14 is the assembled turret, which has been primed with a grey spray paint from Halfords, then a coat of metallic silver added and finally a coat of “red lead” coloured paint, again all from Halfords spray cans.
The jar of Marmite and the sponge….
Well, in between spraying on the red lead colour, I used the sponge to dab on some Marmite on areas that would be a little worn. It’s applied quite lightly, and will be left in place until the final camouflage colours have been applied. In fact I added a bit more Marmite on top of the red lead colour so that some of the camouflage colours would look worn and chipped too.
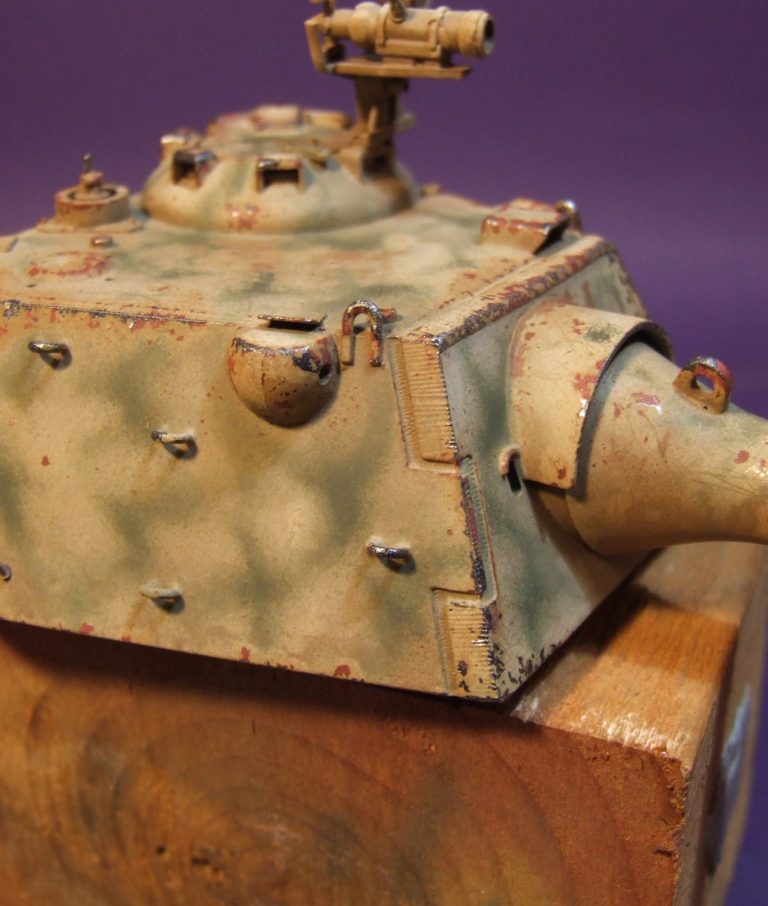
Photo #15 shows the camouflage colours having been added, I used Tamiya Deck Tan and Nato Green, thinned with Isopropyl Alcohol and sprayed on through an airbrush at relatively low pressure – about eight psi in the case of the green so that I could get a fine set of lines, albeit in a random and scattered manner.
Once these paints had had a chance to dry – say for half an hour – a soft brush and some detergent was used to wash the turret with warm water, gently cleaning each area and watching the paint come away where it had covered the spots of Marmite.
It’s a quick and effective way of producing a vast amount of paint chips, but the results are difficult to control and the outcome is a bit random. It’s a case of practicing the method to see how much Marmite is needed and the coarseness of sponge to use.


Photos #16 and # 17 show close-ups of the turret, and the fine detail that the chipping has added can be seen a little better.
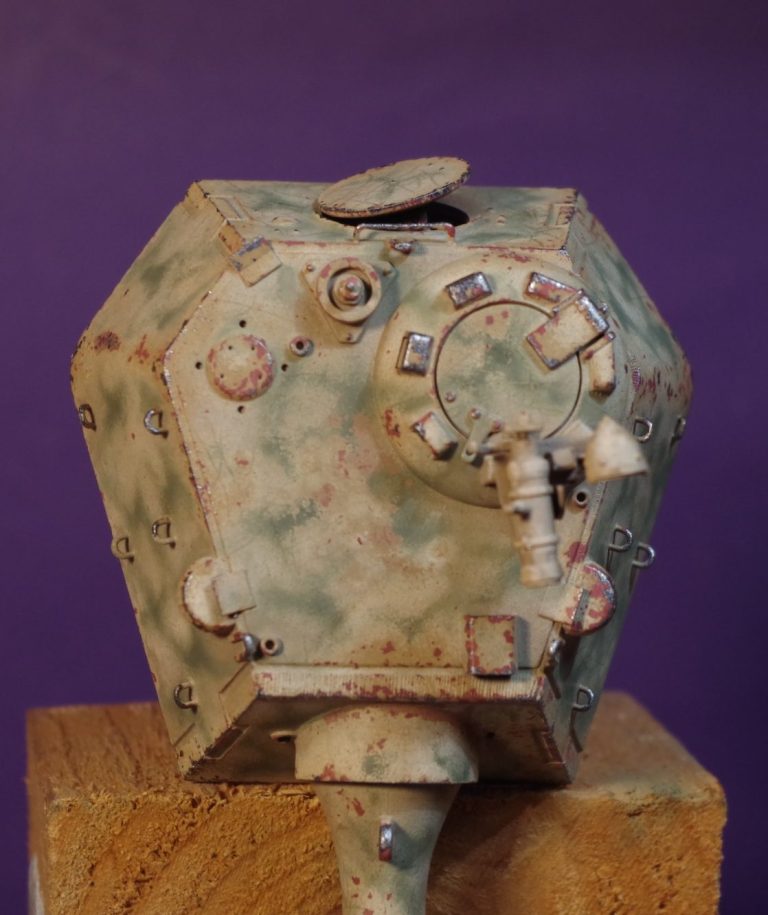
In photo #18 there’s a top view of the Schmalturm turret, and the differences from a normal Panther turret can be seen. A similar shape, but smaller.
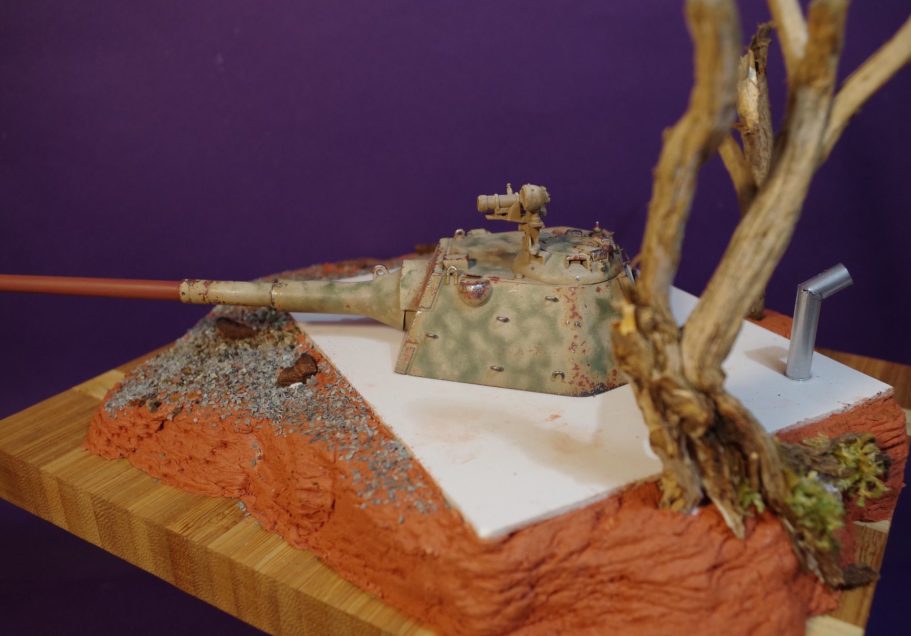
Of course without a hull for the turret to sit on I needed to make a base. Photos taken after WWII show that turrets were used as static defences as the German forces retreated. A lot of the photos I’ve seen show large box-like structures with t he turrets placed on top – an obvious thing to build if you want better range and speed of construction. However, had the war continued, and this kind of defence still been necessary, would it not have been better to bury the working components of the turret beneath ground, thus lowering the silhouette and making this an even better ambush weapon, if time had allowed of course ?
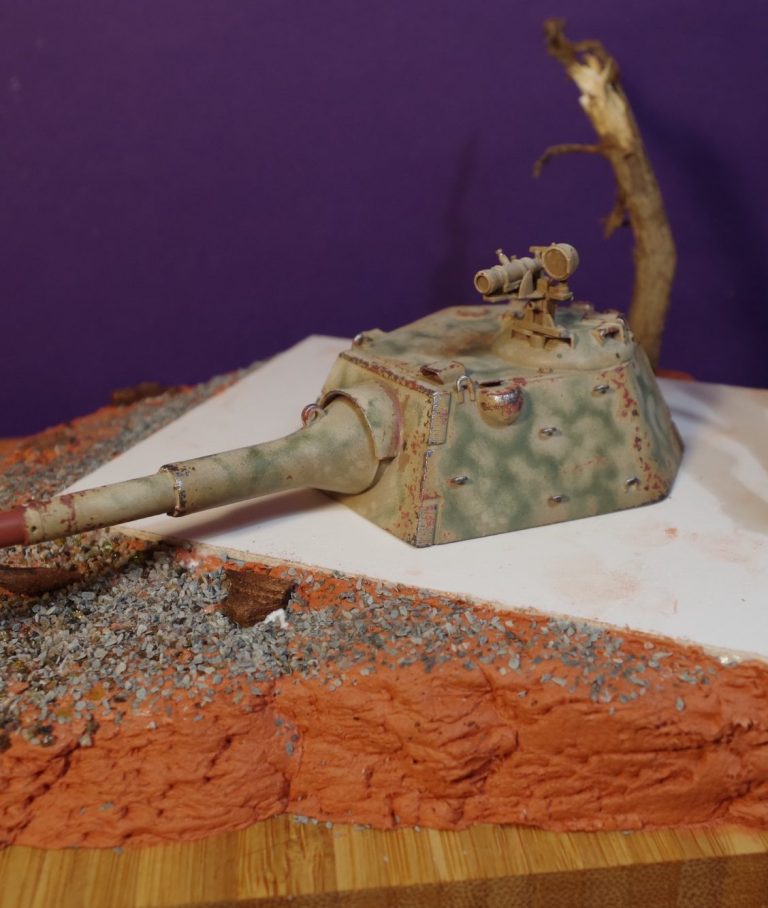
Well, that was my thinking, so although I did build a box structure out of scrap plasticard, I used Das air drying clay to build up the ground around the box, adding a dead root system from a miniature rose bush to make a tree, some aluminium pipe as a chimney for any diesel generator that would be needed to power the turret and a breather pad for ventilation along with some spare hatches for the turret crew to gain access for themselves and supplies.
All this can be seen in photo #19, with a different view in photo #20.
Once the top of the box structure was painted to match in with the turret, and the groundwork painted, tree with added foliage from some moss and the figures added, the camouflaged nature of the turret can be fully appreciated. The figures were glued in place as though they had neutralised the turret and it’s crew, and are discussing their next objective.
Thoughts?
OK a simple idea for using up a spare turret sort of grew arms and legs ( and a couple of heads etc ), but I do hate waste, and the schmalturm is a rather nice design and a shame to have one sitting in the spares box never to see the light of day.

It also gave me the opportunity / excuse to use the Mauser Earth figure, and whilst I have the 120mm Verlinden Russian Sniper girl on a shelf somewhere, painting the smaller Alpine version was good practice for if I ever get around to doing something with that.

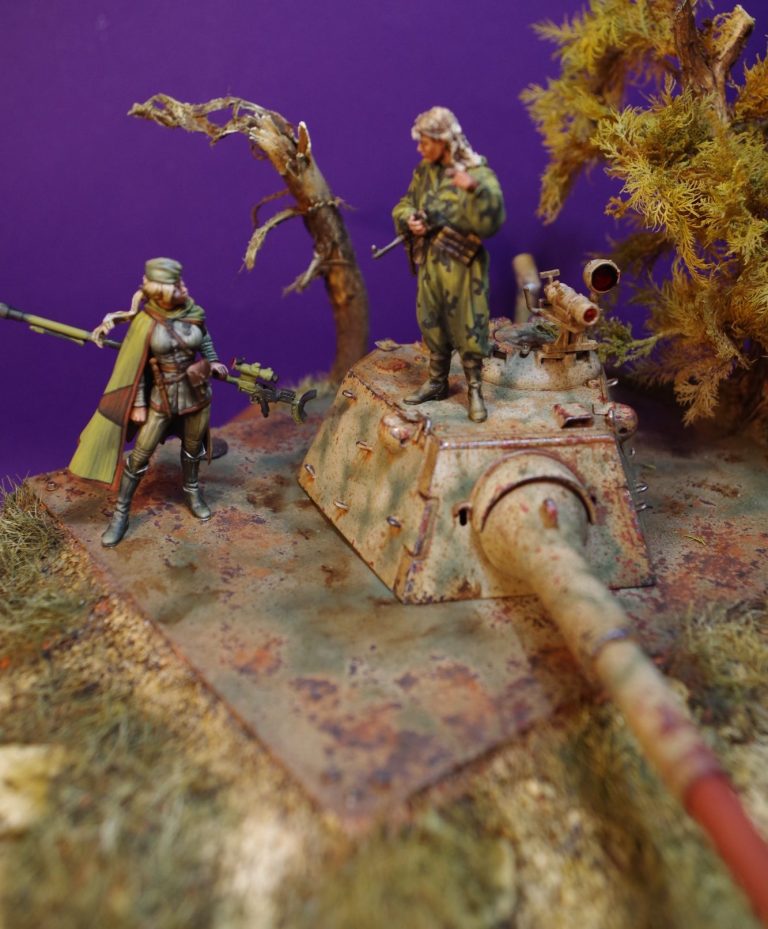

So, yes, this is one I’m pleased with on various levels, and hey, look, I’m sort of saving the environment from plastic waste…… a little.

We need your consent to load the translations
We use a third-party service to translate the website content that may collect data about your activity. Please review the details in the privacy policy and accept the service to view the translations.