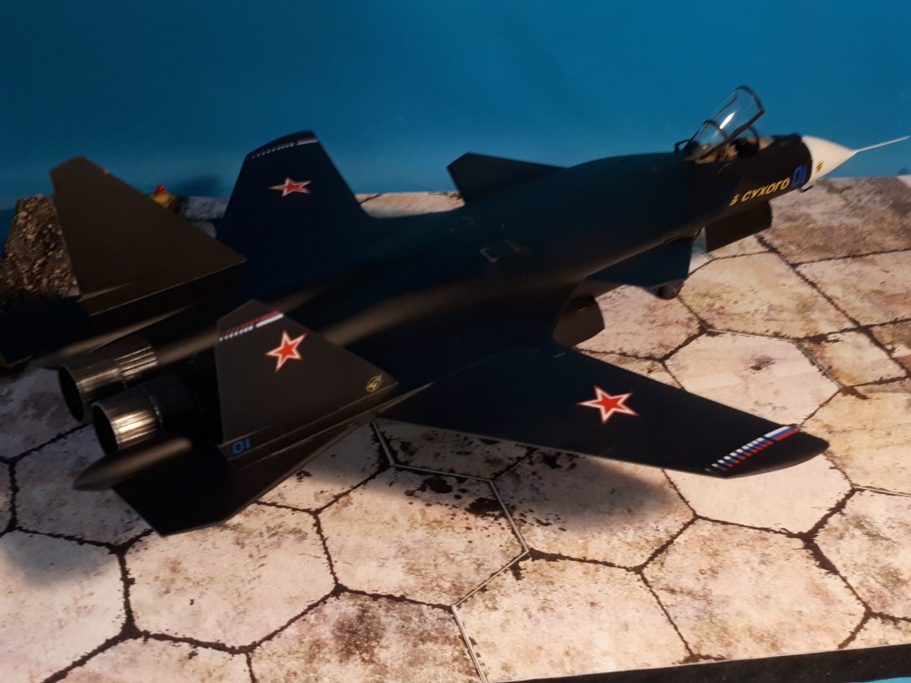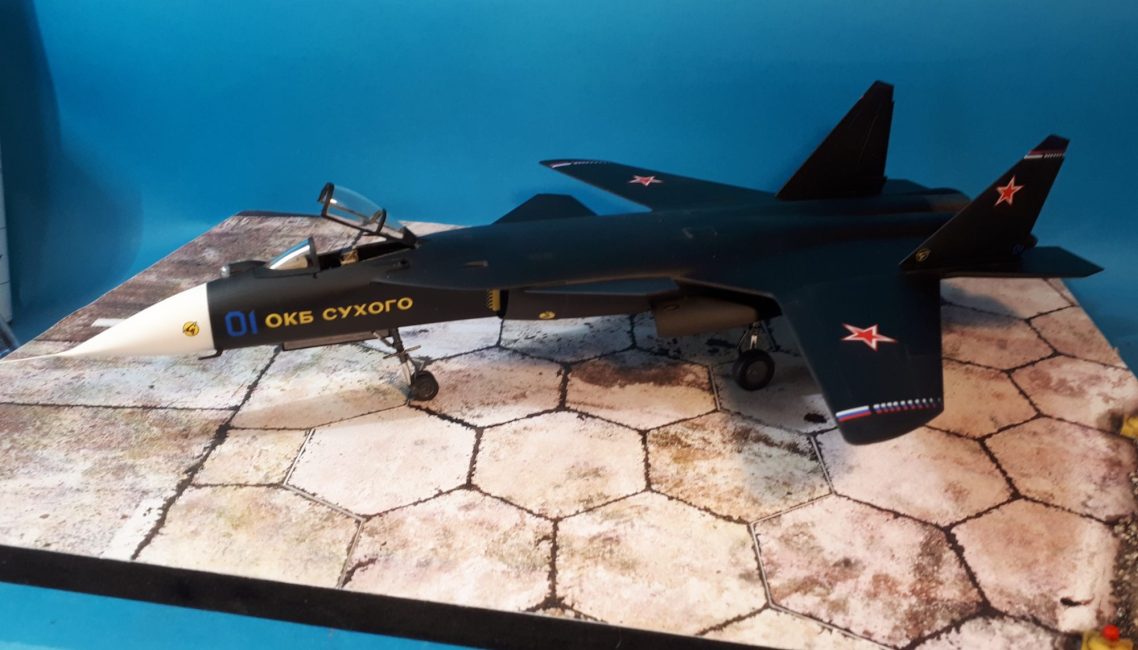
Sukhoi Su-47 Berkut
1/72nd scale plastic kit from Hobbyboss
Assembled and painted in 2024

The Russian SU-47 has been given a few names or designations, beginning with S-37, then being changed to the SU-47. The name Berkut translates as “Golden Eagle” and then NATO bestowed upon it the name Firkin.
The airframe was initially developed during the 1990’s as an experimental supersonic jet fighter by the JSC Sukhoi company with the distinguishing forward swept wings making it something very different looking from the comparable aircraft fielded or being designed at the time.
This change of wing orientation gave the SU-47 excellent agility and a high degree of manoeuvrability, the design was taken only as far as a single prototype which with flight testing did give a lot of information from it’s advanced technologies that was used on later production aircraft such as the fourth generation fighter SU35 and the fifth generation SU57

The SU-47 was built to test out composite materials and sophisticated “fly by wire” control systems alongside the new airframe structure.
Russia’s aerodynamics development institute TsAGI has been aware for decades about the advantages of forward swept wing design, with research going back as far as the Junkers JU 287 from WWII
There is an inherent danger with the design of the forward swept wing, in that at higher speeds the wings tend to bend more than on a comparably aft swept wing, with failure of the structure being much more likely even at lower speeds.
The SU-47 was however only ever going to be a test a tech demonstrator, and whilst the project was initially launched in 1983, the dissolution of the USSR saw government military funding fro the project frozen and was only allowed to continue with Sukhoi supplying the monies to continue.

The forward swept wing configuration was abandoned, mainly because it was only seen to be advantageous in combat at trans-sonic speeds, with the conventional rear swept wing being superior at supersonic velocities.
To save finances, the forward fuselage, twin uptight tails and landing gear were all taken from the SU-27 family of aircraft, however the airframe does have space for advanced radar equipment and space for an internal weapons bay.
However, after saying all that, I just liked it because it looks more like a sci-fi design than something that would actually exist in reality, and as there was a model of it, well, it’d be rude not to get one…. Well, wouldn’t it ?

The kit
Hobbyboss have produced this in 1/72nd scale, the box top art is shown in photo #1, and the scale made me think initially, to me at least, that it’d be reasonably small. In fact the SU-47 is a large aircraft, built along similar lines to the large Sukhoi fighter platforms like the SU-35.
So having recently completed the Saab Draken in 1/72nd scale, I was surprised to find that the fuselage of this aircraft dwarfs the Saab. In fact this is of a comparative size to a 1/48th scale Draken that just happened to be on the shelf above the smaller Saab in the display cabinet.
As for the parts, the fuselage is split horizontally, so that the top and bottom halves join along their outer edges, with the outer wings being separate parts.
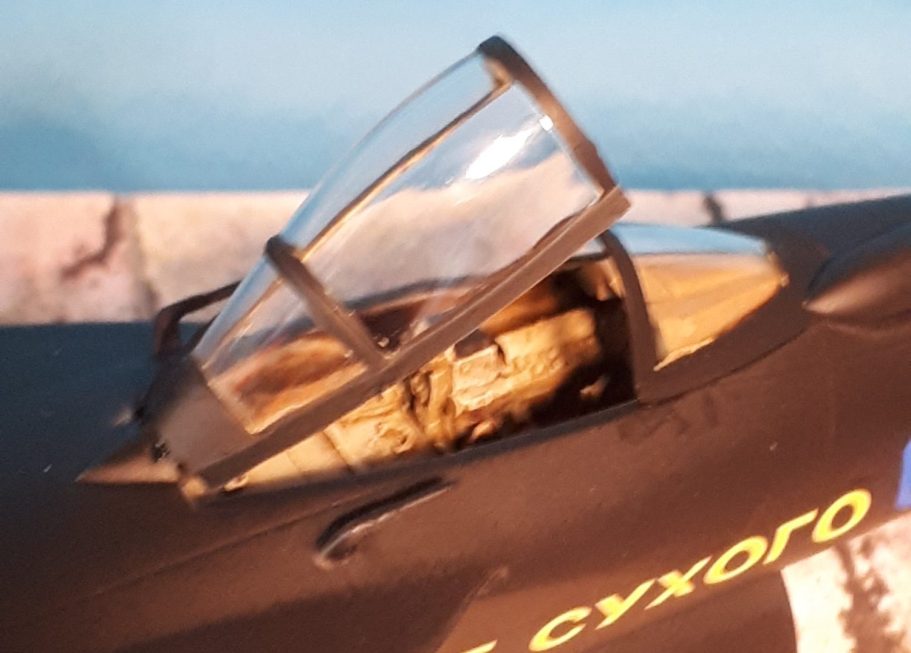
Whilst the cockpit is ok, I thought I’d look for a resin replacement – the re isn’t one – and thought I’d see if perhaps one for an SU27 might fit.

It took a bit of trimming of the upper part of the front wheel well to fit it in, and some epoxy putty to fill in the gaps at each side, but the replacement was a lot more detailed and worth the effort to be honest.
It looks rough, but in photo #2 the replacement cockpit can be seen. The putty has been added to fill in the gaps between it and the fuselage as these would possibly be visible once the upper fuselage was fastened in place.
Not knowing whether this would be a “tail sitter”, I always add a weight to the nose, and in this case it’s a scrap piece of white metal that is inserted into the epoxy putty prior to the putty curing. It’s probably overkill, as it’s a fairly large lump, but rather that than not enough weight at the nose.

I’ve painted it with an initial primer mix of Isopropyl Alcohol and some green acrylic, then added two more coats of the same green acrylic, this time just thinned with a little water to allow it to flow into all the recessed detail.
As I say, this looks a bit of a mess at the moment, but a lot of what you see here will be covered up, so cosmetics really isn’t as essential as hiding gaps and adding that weight.
I was going to replace the exhaust nozzles as well, but there isn’t a resin aftermarket offering for those either, and whilst I did get a set for the SU-27, the ones on the SU-47 kit part are joined together and on reflection are “good enough” that going to the trouble of recreating the jointing fillet between them to be able to use the aftermarket set, seemed a bit like too much effort for very little return….. And I can use them perhaps on either a SU-27, or better still the SU-50 or SU-57 that are currently on the “to do” list.

Other than that the construction is very straight forward, the separate back-swept wings are a little bit thicker than the fuselage sections that they join onto, and in retrospect, if I was to make another of these, I’d remove the location lugs, or alter them to sit the wing sections about 1mm lower horizontally. I attempted to sand them down and re-scribe the panel lines, the former not really working once paint was added, but the latter looks fine.
I mentioned trimming away part of the front wheel well, photo #3 shows the underside of the fuselage in that area, and I’ve actually taken off the whole of the top of the plastic roof to the well so that the cockpit can sit in place and the upper fuselage fasten up properly. I trimmed the underside of the replacement cockpit tub as much as I dared, there’s quite a bit of material that can be removed, but it’s still too deep a casting to sit in place without surgery being performed on the wheel well.

As the aircraft is going to be sitting on a section of runway apron, it isn’t going to be seen, so again, it looks a bit of a dog’s dinner, but it allows the greater detailed replacement part to be used.
Photo #4 shows the use of clamps and rubber bands to hold the two fuselage halves together overnight whilst the glue cures, and in the upper right, the kit exhaust nozzles with their fillet of plastic that joins the two together.
I’m still unsure as to whether I should have cut these up and used the resin replacements, the SU-27 ones being a lot better detailed.

Photo #5 shows the much neater looking cockpit area, and I would add some more detail to the cockpit – seat belts and headrest painted in and some drybrushing and washes to bring out the detail. I’d also add some darker washes of paint down the edges to better hide the gap, the cockpit glazing would be fastened in an open position to allow things to be seen a bit better, so the gaps, whilst they’d been filled, still needed a little bit more help in being hidden.

Photo #6 shows the main parts of the airframe fastened, re-scribed and washed ready for spraying with primer.
With the nose cone being a completely different colour – white – I thought it best to leave it separate and paint it up prior to fastening it in place, rather than having to try and paint a nice, even line around it if it was glued to the fuselage – a little bit of forward thinking to make life easier.

Photo #7, and by the magic of article writing the priming has been completed – grey Halfords Primer – a couple of coats of Tamiya Black sprayed over that, and once dry, some gloss varnish added to help the decals blend in.
The decals work really well, nice and thin enough to sit on the surface of the model in a neat fashion, but not so thin as to risk breaking up when adjusting their placement positioning.

Photo #8 and a couple of coats of Mr Hobby Matt Varnish have been added. It still looks like a sating finish, rather than properly matt, but a third coating of the varnish will sort that out. I prefer adding thin coats and building up the finish slowly, rather than trying to do it all in one go and ending up with faults in the paint.
This is the first Soviet aircraft I’ve made, so I’m not sure if the suggested White colouration for the wheel wells is peculiar to this plane, or prototypes like it, or whether it’s common across all of their fighter aircraft. Making more of them will give me insight on that one, I’m sure.
Speaking of which, the wheels and struts were painted and joined together whilst separate from the rest of the kit, and only fastened in place once the fuselage was painted and dry.

Worthy of note here is that I have taken to wearing a nitryle glove on the hand holding the model once it’s painted, especially if it’s a monotone colouration like this, and supposed to be a matt finish. Grease from fingers – even in very small amounts, shows up glaringly, and can completely spoil the paint effects that have taken time and effort to get.
So it’s well worth investing in a box of the gloves – which I also wear when spray painting with either airbrush or rattle can – a left hand coated in grey primer is not a good look !
Whilst that was drying, my mind turned to the display base.
Photo #9. I’d got a printed card section of Soviet Runway from somewhere – possibly in with an auction lot from Veteranus Auctions ( Look them up on Facebook, there’s about 300 auctions per week between their two Facebook pages, and some unusual kits along with one or two bargains can really drain your bank account, but add some cool stuff to your stash ).

The runway comes in three A4 sections that have to be trimmed to fit together, but look very good once done.
The trimmed sections were fastened to a piece of MDF that I’d cut to size, and I painted the edges black before fastening the printed runway in place with double sided tape.
The only addition I made was some sand on one corner, built up to look like an earthwork verge along with a couple of guide lights from a Verlinden resin set.
Returning to the aircraft, now that the varnish had dried, I added the wheels and painted the exhaust nozzles with some Darkstar metallic steel and then silver.
The rest of the shots show the finished SU-47 in place on the runway, and as I plan on taking this to shows, the rear wheels have been drilled out to accept small sections of wire, which in turn is fastened into corresponding holes drilled into the base.
Small amounts of superglue were added to make the joints permanent.
The final thing to do was to fasten the cockpit glazing in place, and take the photos.


Final Thoughts
So, apart from looking so “sci-fi” and pretty darn cool anyway, I really enjoyed building this and painting it.
Apart from the surgery needed to make the replacement cockpit fit – a problem of my own making – this kit falls together.
I would in retrospect alter the sit of the main wings to smooth the transition with the fuselage, but that’s the only fault I came across with the model during construction, and would be simple to fix if I’d actually reined in my enthusiasm to use the glue pot, rather than my brain.
As mentioned, for a 1/72nd scale aircraft, it’s rather large, and takes up a sizeable space in the cabinet, but it’s definitely worth it for the eye-catching look, and the “is that from Thunderbirds ?” questions that ensue.
The printed runway works well, and I’d definitely look for more of these type of offerings to save the hassle of drawing lines on card, adding oils staining etc and then still having to fasten them down. This was so much simpler and to be honest, a lot better looking.
So, all told, a “thumbs up” for this Hobbyboss kit, worth getting, worth building, and worth adding to the display case.


We need your consent to load the translations
We use a third-party service to translate the website content that may collect data about your activity. Please review the details in the privacy policy and accept the service to view the translations.