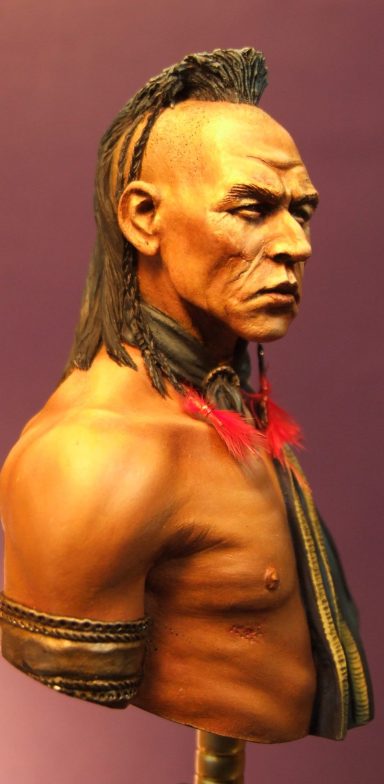
Magua from Last of the Mohicans
1/9th scale Resin bust from Mitches Military Models
Painted in 2017
So admittedly, this is one of my favourite bad guys from one of my favourite films – “Last of the Mohicans” and takes the form of the character Magua played by the actor Wes Studi.
The film is based on the second of five books written by James Fenimore Cooper in 1826 the story being set in 1757 around the time of the Seven Years War that saw British and French forces figuting to take control of North America.


Both sides made use of Native Americans to bolster their troop numbers, but France’s needs were greater because they were badly outnumbered by the British.
If you’ve not seen the film, and have the least bit of interest in the period of history detailing the formation of America, then this film might just interest you. It’s not there to show historic battles, it’s not even a vehicle to thrust a point about the subjugation of the Native American peoples, it’s simply a good yarn about good guys, a particularly nasty guy ( our mate here Magua ), love, revenge and lots of clouds of gunsmoke....... Oh and the scenery, can’t have a good film without scenery, and this one’s got it in bucket loads.
So, you need to see the film really.
No, I’m not telling you the plot, and certainly not the ending – that’d spoil it now, wouldn’t it.
So, let’s talk about something else – the model for instance.
Magua, to my knowledge, has only been depicted twice in a larger scale kit – once by Carl Reid when he was trading as Harton Miniatures, and once here with the offering from Mitch’s. Both are good likenesses, and different enough to allow both space in the display cabinet.
Wes Studi’s face is an excellent example ( I was tempted to say study, but resisted ) of craggy character, and to be honest is a joy to paint ( Carl reid used the head a second time to produce a Pawnee bust....... but I digress ).
The kit here is simple, a true bust and has minimal parts to make it up, the main casting is well produced and the sculptors skill just shines through.
Cast in a softish cream resin, there is little to clean up, but the single mould part line was easy to get rid of, and there was little else to do. I filled a couple of small air bubbles with Magic Sculpt, but these were on the underside of the casting, and as there was no surface detail to get in the way, the putty could be sanded flat and the holes lost to memory.

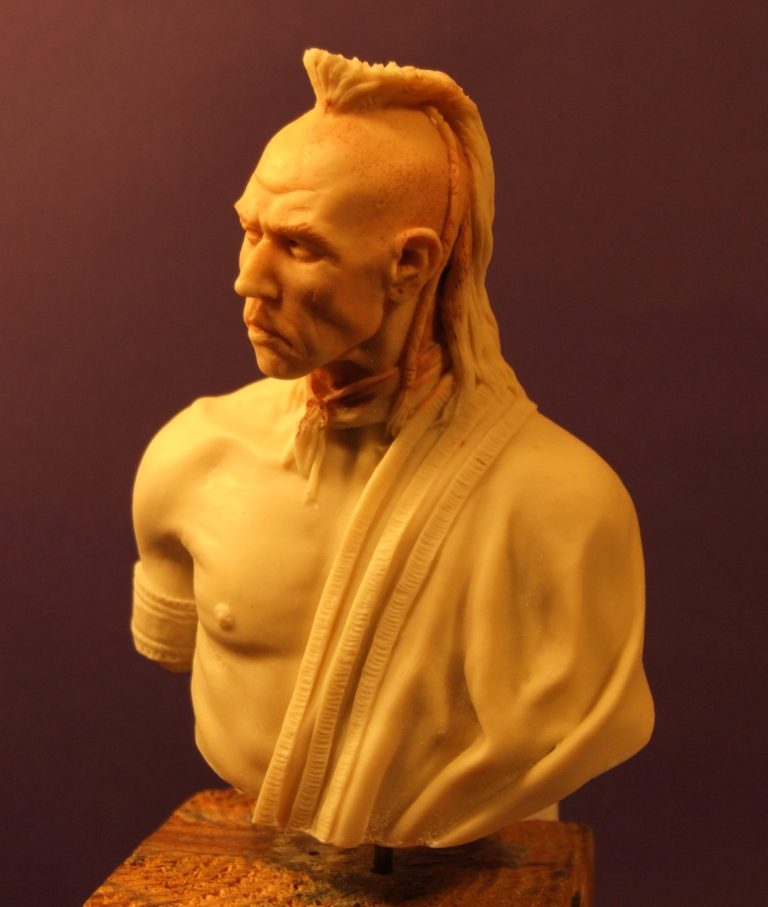
Photos #1 and #2 shows the bare casting with me having primed and undercoated the head. I know I don’t often make note of it, but it’s only very ocassionally that I wash the resin prior to priming it, this is because I use only a small amount of paint and alarge amount of Isopropyl alcohol to prime the surface of the kit, and the alcohol will pretty much take out any mould release agents or grease.

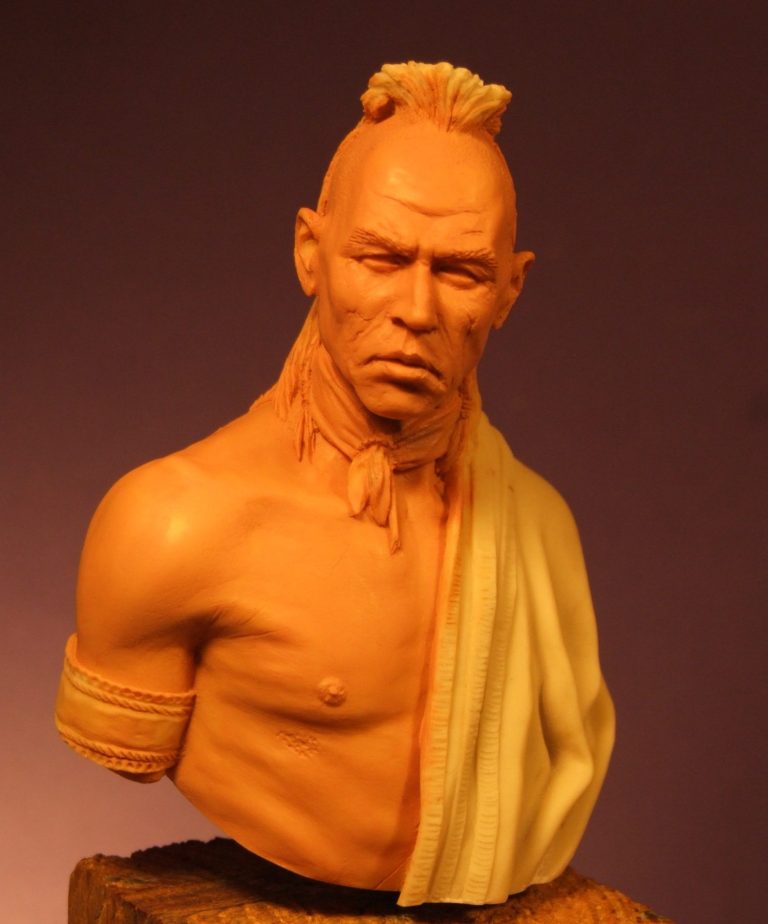
In photo #3 I’ve continued with the primer and underocat layers across the whole of the skin areas, using MP ( Miniature Paints ) no 72 - Tanned Flesh. I’ve moved away from the Games Workshop paints a bit as they stopped doing the Foundation range, and the ones I had “in stock” or in use are coming to a very dried up end.
Moving on to photo #4 I’ve added the usual mix of Mars Brown mixed with about ¼ of it’s amout of Titanium White. This is applied over the whole of the model’s head and then stippled to both even out the coat and take out any brush marks. Also in this shot you can see where I’ve added a lighter colour to the model.
You can see that the additions of paint are in broad sections, and that whilst not completely white, they are substantially lighter than the first coat of paint. This will be blended in using a large soft, and most importantly dry, brush – see photo #5.


Yes, I know I’ve also gone and added more of the light colour as well, but if you compare the two pictures, you'll see that I’m adding this new paint over the top of the colours that have been blended, and adding it in smaller sized areas. This again will be blended with the soft brush.
A trick here is to keep wiping the brush on a piece of old cloth – make sure it’s clean, and preferably a light colour – any fibres that do stick to the brush will be light in colour and not as easily seen if you miss taking them off the surface of the model. The amount of paint added through this process will build up on the surface of the model, and if it gets too much, it’ll just make it difficult for you to work on. It’s also why some people have the colours turn “muddy” because there’s too much paint on the model and it’s being worked too much with the brush – over-blended.
So, photo #5, now hopefully you can see the lighter colour gradually having an effect on the darker paint. The highlights are building up steadily, and again I’ve added some more of the light paint ( did I mention this is just Titanium White with a hint of the Mars Brown in it...... Um, well, that’s what it is ).
The final blending has taken place in photo #6. At this stage I put the model in a drying cabinet ( an old kitchen cupboard with a 40w bulb in it, switch the light on, close the door and forget about it for a couple of days.

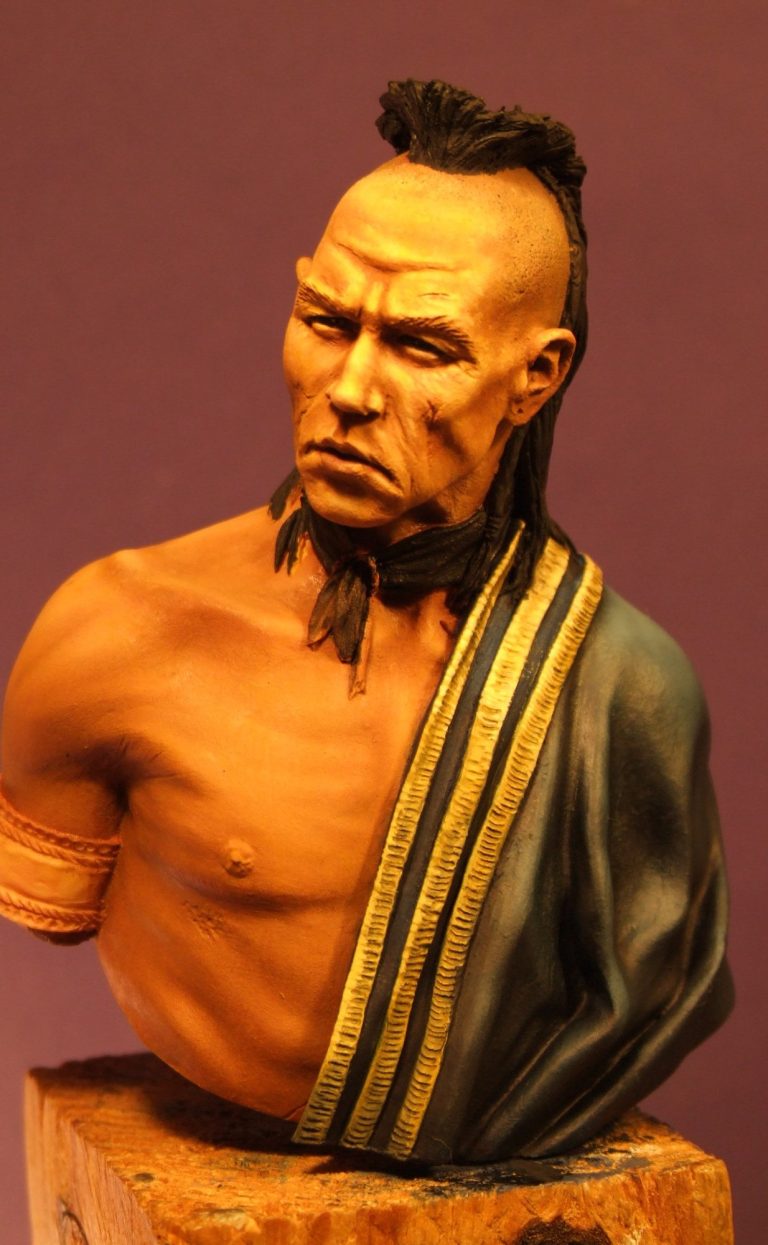
Now photo #7 looks like a whole lot has happened – but with it being a relatively simple kit, it doesn’t take much for this one to gallop on.
What I’ve done here is add some shadow areas to the deeper decesses of the face, block in the shaved head area that would have a fine stubble, and then paint in the blue and gold of the robe or trade blanket that he’s got thrown over his shoulder.
The shadows for the face are a mix of Mars Brown and Mars Black, about an even mix to give a very dark brown. This is thunned and applied to the deeper creases – corners of the eyes, under the brow ridge, between the lips andunder the chin. I also added some to the deeper area of the armpit both front and back, and where the trade blanket joins onto the flesh area.
The trade blanket is a bit awkward to research – there’s only a couple of stills from the movie with Magua dressed like this, and in one the blanket loos almost black. It is in face a very dark blue, and I used Prussian Blue oils over a mid blue undercoat ( Midnight Blue from GW I think – had it so ling that the label’s dropped off ). The oils were then lightened and brought up through mid-tones to highlights with the careful addition of Titanium White. I say careful addidion, because i didn’t want to lighten the cloth too much and lose the effect of a very dark blue.
Again with the drying cupboard, but as blue tends to take longer to dry, this time I left him for a week – it’s why I paint several pieces at once, it gives them all time in the drying box.
Also in the last photo I’ve painted on the gold braiding that runs in three lines on the edge of the blanket. I did this with acrylics – yes, you can paint acrylics over the top of oils. The easiest way to do this is to treat it like you’re starting the whole kit over again and prime the area that will have the acrylics with a very weak paint ( just enough paint in fact to see where you’re applying it ), mixed with more of the Isopropyl Alcohol. For some reason the alcohol is able to grab onto the surface of the oils and form enough of a barrier to allow an acrylic mixed with water to adhere.
I used a darkened version of the Iyandan Darksun ( GW version of a desert sand colour ), this was then gradually lightened as I applied more coats of paint, gradually adding more and more Skull White ( Yes another favourite GW colour ) until I was happy with the highlights.
Normally with braided areas I would allow things to dry fully and then wash over a mix of Tamiya Smoke acrylic mixed with a little Gold ( GW Shining Gold works well ).
Two good reasons why I didn’t – first, I didn’t want it to look sparkly because it dowsn’t appear to be a true gold braid in the few glimpses you get in the film, and second, my shining Gold had dried up. OK I could have used the excellent Darkstar acrylics, but in this scale the particles of pigment are a little too finely ground and I wasn’t convinced that they’d work – excellent ( understatement there ) if i was doing something in 54mm or 75mm, but 1/10th is just a little too big ).
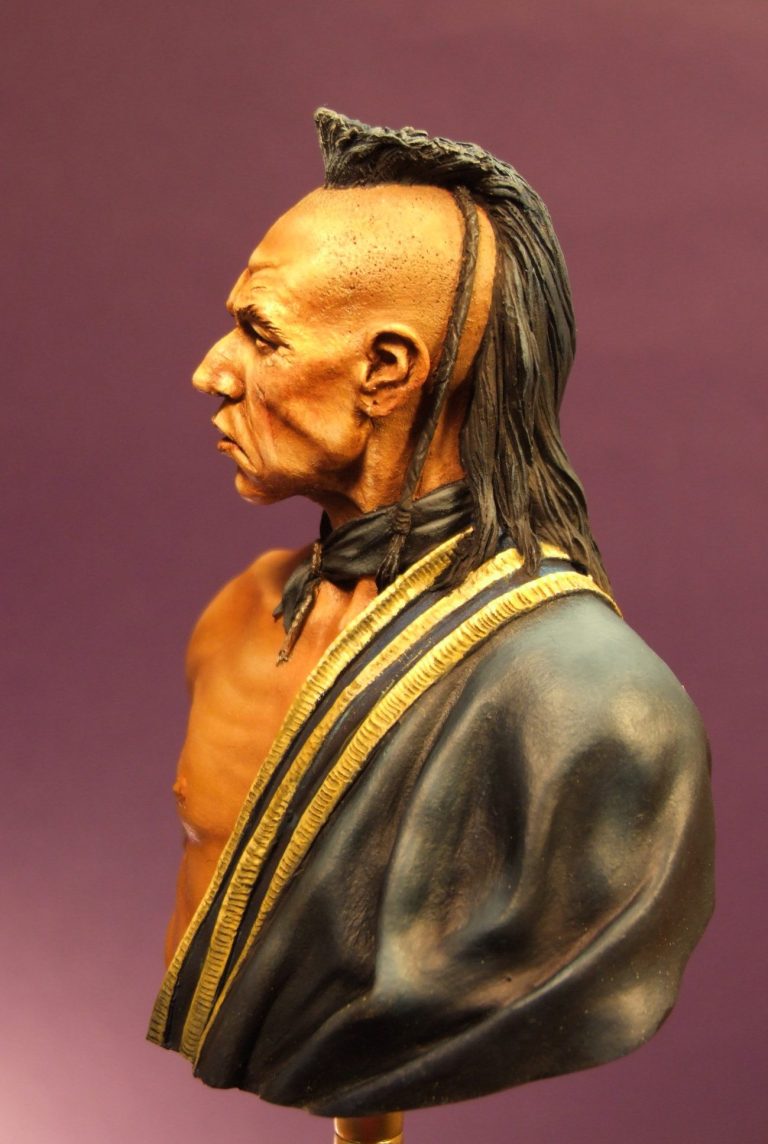

The neck-tie and the hair were the final parts to get treated to paint – both pretty much black, although I added some Buff Titanium to build some highlights on the neck-tie, and used some very subdued light brown to pick out the raised details on the hair. This admittedly looks a bit overdone, but the lighter colour made with some Titanium White added to some Mars Brown, would fade within a couple of months, and might even need “topping off” with a bit more of the light colour to make it visible – see photo #8.
Oh, yes. The armband. I painted it with predominently gold colours...... Um, this is wrong if we’re going to the refrences in the fil, although from stills when Magua is pictured with this cloak it’s difficult to pick up the exact colour, and it does look kind of gold. However as you see other stills ( OK I was too busy concentration on the ones with this cloak ) and watching the film, the armband is in fact silver....... So maybe I need to repaint or at least adjust the colours on this area.
But to be honest, that’s as far as this one has got.
I did get an excellent plinth off Richard at Oakwood Studios, it’s an old, craggy piece of wood that he’s managed to find me when I suggested it months beforehand, and he cut it at an angle to accept a bust. He’s managed to make it look just rustic enough to merge in with the Native American subject, but polished enough to actually be ashame to ruin with me putting a model on it, me ruining it by doing just that is shown in photo #9.
Further additions..... Oh, there’s always something. Paul Dobson, a good friend of mine, was painting this same piece from Mitch’s almost at the same time as me, and he noted that there are a couple of braids either side of the head that are very thin plaited and with a bright red/orange feather decoration at the end. These are too fine really for the sculptor to make and reliably get the mould process to produce, but with a little wire and some red fly-tying feathers, it would be very simple to make and add these to the model....... OK, so I’ve yet to do this, even though Paul gave me some feathers of the correct colour to do this..... I’ll get around to it eventually I’m sure......


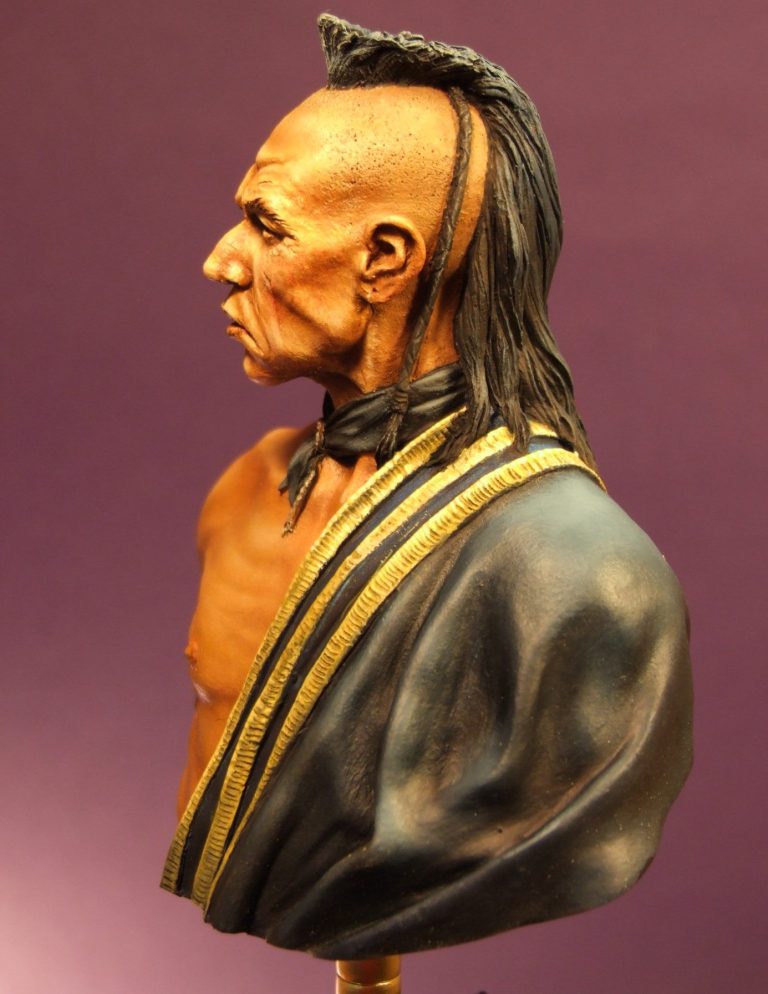
And by the magic of the written article, it was done – the addition of the braids and feathers. Photos #10, #1 and #12 show these having been added. Simple to make too, just siz pieces of thin wire flex stripped out of some speaker wite that I had spare. These were then made into a long plait cut to length, a short piece of wire used to bind the feathers onto the ends and then paint the wire black. A couple of small holes drilled just under the hair and the wires attached with some superglue, the black touched up – because it was still wet and I have no patience, and that’s it, done.

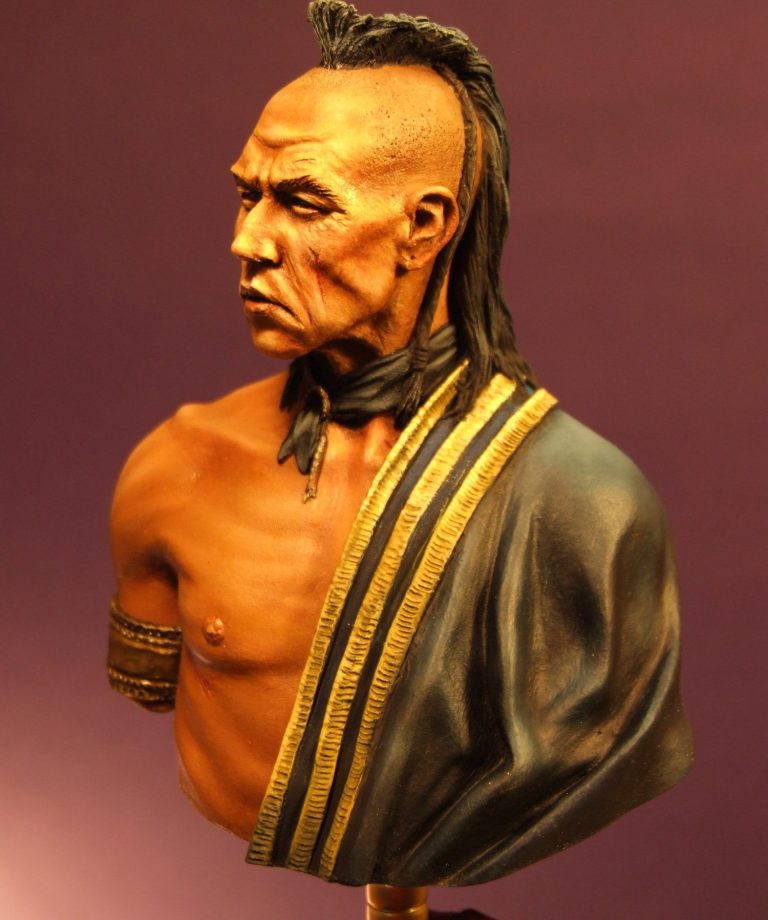
I mentioned earlier that the brightness of the flesh would fade. This is a rarity for me, in that these last three shots are taken a couple of months after I finished the bust – normally I write the article up pretty quickly and send it in for Martyn’s consideration. So the fade is visible comparing these shots to the others of the bust in a finished state, the other shots having been taken within days of it being completed prior to adding these two new braids.
Most, if not all white paints have what are called “Optical Brighteners” in them – it’s why the skirting boards in your house look all fresh and new with a lick of paint, then a few months later when you do the next room in the house the older paint looks, well, old. Some trade paints don’t have them, but then they tend not to look quite as bright a white; and for us modellers, we’re stuck with alomost all the paints I know of, and certainly the ones I’ve got, all having Optical Brightners in, which means you either have to compensate at the time of painting, or go back repeatedly and top up the highlights...... Or both.
Overall then, a very good likeness to Wes Studi in his role as Magua. Surprising also that the film is twenty five years old ( makes me feel ancient typing that ) and most people know instantly who this is supposed to be a likeness of, which is a testament to someone who knows how to sculpt and also pick out the points that make us recognise a likeness.
So do I like th emode ? Hell Yeah !
And although I made the Harton miniatures offering many years ago – about 20 years ago actually, and which is on display at my Sister-in-law’s home – I recently got hold of another one of the Harton pieces to put in the pile of models that have an invisible”To Do” hovering over them.
Mitch’s Military Models currently do another two busts in this series, representations of the British Officer Colonel Munroe played by Maurice Roeves and also of “Hawkeye”the Pathfinder played by Daniel Day Lewis in the film. All of them are available separately for £20 each or all three for £55, plus p&p,
Mitch’s Military Models website - http://mitchesmilitarymodels.co.uk/ and these are under the listing for “V”busts.
We need your consent to load the translations
We use a third-party service to translate the website content that may collect data about your activity. Please review the details in the privacy policy and accept the service to view the translations.