A Revolutionary Girl
1/10 scale resin kit from FeR of Spain.
Painted 2018
Frances’s revolution of the late eighteenth century rocked Europe onto the back of its heels. The hoi-polloi lowlifes having the temerity to rise up against their betters, and all because of the lack of life’s essentials like food and fuel.....
It began in 1789 with the storming of the Bastille in Paris on the 14th July, which whilst it had previously been a Royal Fort, had been converted into a prison. At the time though it only held seven prisoners, but that didn’t matter much to the revolutionaries, they were seeking arms and gunpowder.
The upper classes at this time, their riches put them so far above the working classes and the poor that the rift is almost unimaginable. There was no chance for gaining those lofty heights either – the poor remained poor whatever they did, and the only way to be in that fortunate upper strata of the nation was to be born into it.
So whilst the poor in France were on the verge of starvation most of the time, the rich lived a life of ease and wealth that was opulent beyond belief.
The poor paid taxes whilst as often as not, the rich didn’t and slowly but surely the country came to a boiling point.
Louis XVI was King at the time, and both he and his wife – Marie Antoinette - flaunted their wealth before all levels of their subject, was this the thing that eventually lit the fuse for the revolution to begin ?
Perhaps.
One thing is sure, whichever side was taken, the people on it were wrathful and cruel in their search for justification of their cause. Men and women took up the fight, and once the revolutionaries were in the ascendant the guillotine ( which was a British invention, believe it or not ) came into constant use.
Whilst Louis XVI was beheaded in January of 1793, Marie lasted a while longer in prison, but eventually went the same way.
Several people of historical note come to us from this periods of French history – Maximilien de Robespierre is one such, who became famous ( or perhaps infamous ) for his cold-heartedness and becoming known for sending opponents to be beheaded. What goes around often comes around though and Robespierre was himself sent to the guillotine in 1794. Another who gained world renown is one Napoleon Bonaparte – go on, you’ve heard mention of him – Napoleon took the reins of power after Robespierre’s demise, and made France great again within Europe..... Well for a few years anyway.
A tumultuous period, and one that changed the face of France for the better, although it took time.


Photo #1
Ok, so that’s what I was interested in, I did toy with cutting off the tricolour rosette from the hat and just having her as a female privateer in the Caribbean, but then I thought, nah, she’s good as she is.
So, photo #1 show the box art, a very nice paint job by Pepa Saavedra.

Photo #2
The model is packed safely within a plastic box and on opening, you get a multi-part kit with the breakdown of parts as shown in photos #2 and #3.

Photo #3
The casting
......and perhaps a new idea
Sculpting is very good, not much if anything to clean up as the castings are well formed and fit together well. Interesting breakdown to remove the left sleeve and have it clip under the shoulder and onto the left hand, strange looking, but works well and gives the undercuts that having a one piece casting wouldn’t have.
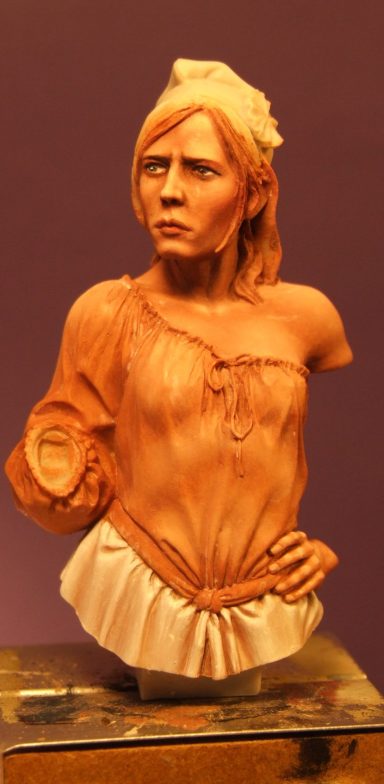
So to painting her then. I liked the idea of a semi-transparent shirt – look it’s logical because the clothing that the poor wore would be of low quality and probably thin and threadbare. But things like this need planning. The best way to tackle something like this, regardless of whether you’re using oils or acrylics is to paint the model as though it’s got no clothes on. Granted the areas that will eventually be clothed don’t need as much detail as those that remain bare, but painting the flesh in all over is the best starting point.
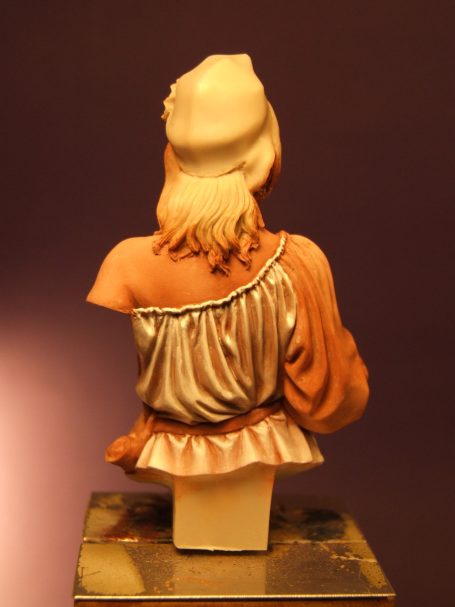
In photo #4 I’ve done just that, and for a little while here we’ll just look at the front of the model. In actual fact I was painting the back at the same time, but I did split this up into sections once the flesh colours had been completed. The flesh – as usual for me – is painted in oils, the usual colours being used ( Mars Brown and Titanium White ). These were allowed to dry for a couple of days.
The shirt was going to be painted with acrylics, and with a new method to me, but used by Fernando Ruiz. It makes use of an acrylic retarder, which slows down the drying time of the paint. I tested this idea out, and by adding just a tiny drop of the retarder to some paint laid out on the tile that I use for a paint pallet, the colour was still liquid and useable three hours later.
Needless to say, this’d take some getting used to.
So, normal method I use for acrylics is to establish a solid colour, and then add shadow and highlight layers very gradually by thinning the paint down and repeatedly painting layer after layer onto the model so that the colour builds up gradually. Dangers of this method are that if the paint is too thick, then you get water marks, and the whole area can require stripping off and the process starting again. Plus adding eighty or so layers to a model is time consuming and pretty darn boring.
So the new method allows you to paint with acrylics using a very similar method to that used for oils........ Hmmmm, it’s going to take some getting used to !
“But what is this substance, this acrylic retarder ?” you ask.
Well, it’s called Amsterdam 070 and I got a 250ml bottle from Pullinger art for about £16. There are smaller bottles available, but for what it cost with shipping, it’s probably worth getting the larger bottle and having done with it.
It’s likely to last a while too, as you need the smallest of drops adding to the paint on the pallet.
So, photo #4 shows the model at the first stage of painting in the white areas. I’d added an initial coat of very, very thin Skull White paint, mixing this with a lot of Isopropyl Alcohol. The alcohol allows the paint to flow and grip onto the surface of the oils so that subsequent coats of paint can be mixed with water. As I wanted to compare the two methods of painting, in this shot I’ve used my old method of lots of layers of water and a touch of paint to do the lower part of the shirt front. I thought this would allow for a decent comparison later.
And by the wonders of article writing photo #5 shows the upper part of the shirt front painted with the retarder. Now admittedly this is the second try, the first time I added water as well as retarder. This does not work, and really when you think about it, you don’t need to add water, or maybe only a spot of it perhaps, whereas in the first try I was adding almost as much as I normally do and waiting ages for the area to dry.

Gallery
No !
Wrong, you fool Hopwood !
That’s not how it’s done at all.
Simply put out the paints you want – yes all of the colours you’re going to use – in this case a little Chaos Black, some Kommando Khaki and some Skull White. You, they’re all Games Workshop colours.
Add a spot of the retarder to each colour, and in my case a spot of water because some of these paints are getting old and becoming pastes rather than nice flowing liquids.
Then beginning with the lighter colours, add those to the areas of highlight, then add some mid-tones next to them and blend the edges where the two colours meet, then add a mix of the Khaki and Black and add this to the shadow areas and again blend that with the lighter colours next to it.
When satisfied with the effect ( remember you can always go back and add more once it’s dry ), then it’s time to dry it off. OK you could do that with patience and a cuppa, or you could use a hairdryer to make it much quicker so you can get on with painting..... one guess for the path I chose.
Once dry, as mentioned, there’s nothing stopping you going back and adding more highlights or shadows, and that’s what I did.
Working around the model to complete it in stages as shown in photos #6, #7, #8, #9 and 10.

Photo #11
Photo #11 I’ve slowed the process down – look this was interesting seeing how quickly the process could be done. So photo #11 shows the first stages of the addition of paint to the left sleeve, I dried it off at this stage. Also worthy of note is that on a transparent piece of clothing the highlights work differently. Where the cloth touches the skin, the skin colour will show through, and thus appear darker than say the upper sides of a crease where the material bags away from the skin. This shot is a good example of that where if you look at the point of the elbow that and the short length of the upper arm above it will remain a pale flesh colour, whereas the creases forming at either side of the elbow will be lighter as you only see the colour of the cloth.
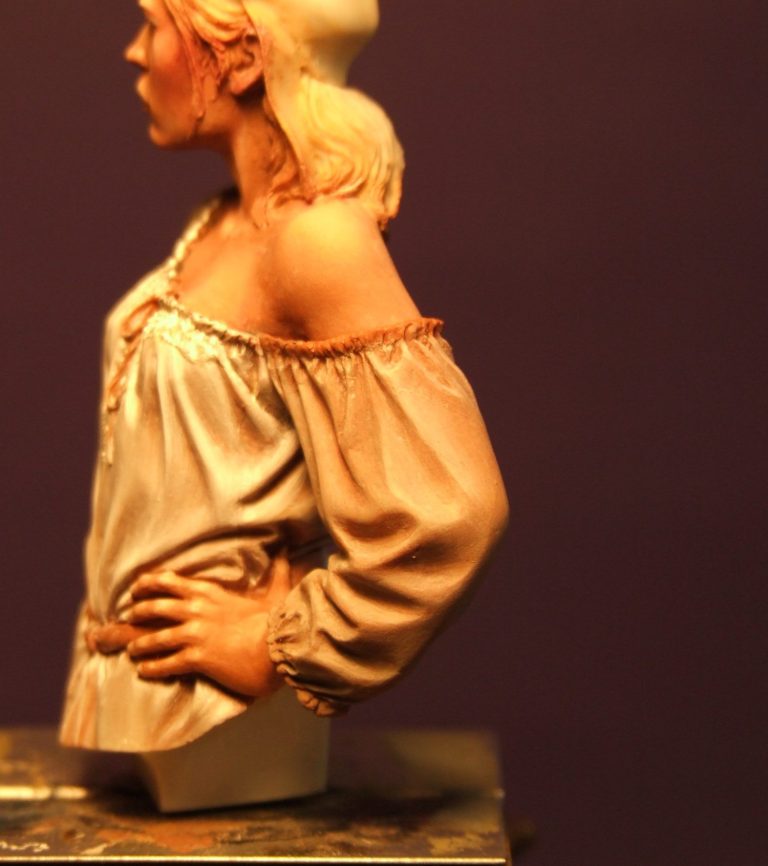
Photo #12
In photo #12 I’ve added more colour to the highlights now, building these up so that the upper edges of creased cloth becomes a brighter white. Again the colour can be adjusted and added to because of the long drying time, then fixed with a blast of warm air from the hair dryer.

Photo #13
As with all “sectional” painting, there will be slight differences in colour, and balancing these is part of the fun. Photo #13 shows a shot of the front of the model with the shirt mostly finished. You can see though that the left arm that I’d just been working on is still a different colour to the rest of the shirt. This would need a few washes to kill the starkness of some of the shadows and also possibly then some more highlights to brighten those areas up too.

Photo #14
Photo #14 shows the back of the arm, and with this part almost finished you can see that the underlying flesh tone makes it look like the cloth is almost transparent.

Photo #15
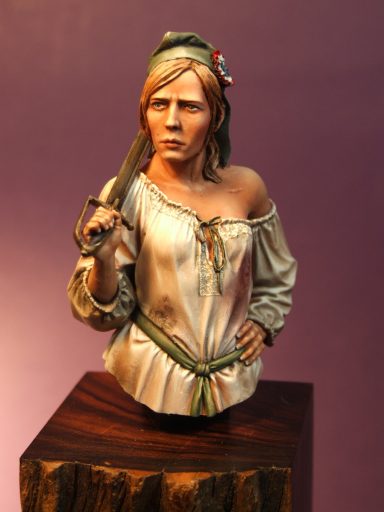
With the shirt completed, it was just a case of painting in the hat, in this case green, and the belt, again green to match the hat, the tricolour rosette and give her some brown / bordering on ginger hair.
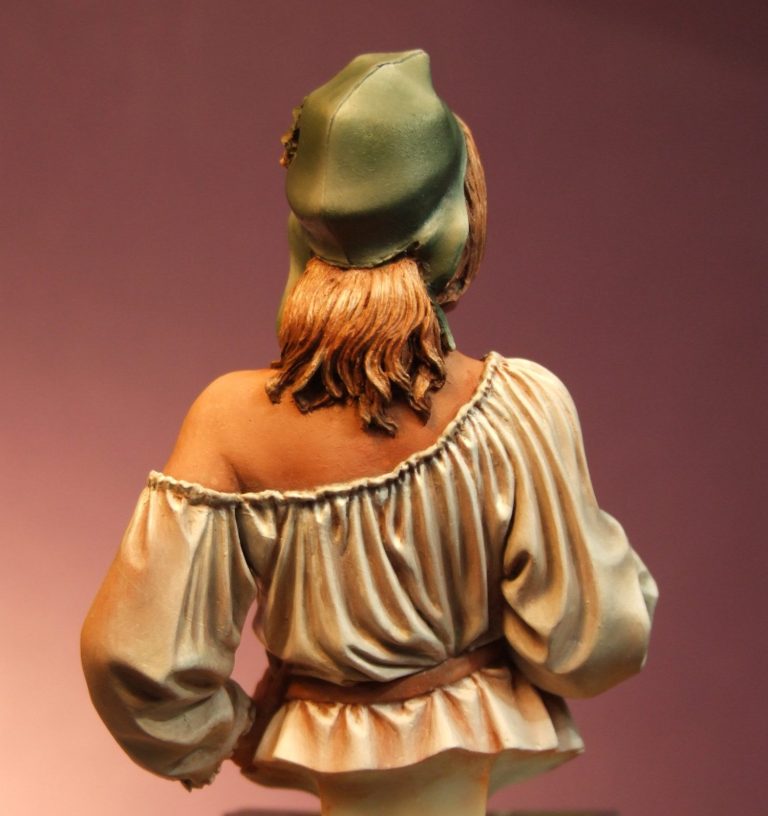
Photo #16
The other thing I added – because I had time on my hands and nothing more – was an embroidered detail around the front neckline of the shirt. This is just me doodling with a fine brush and adding dots and squiggles in a vague pattern to a small section of the shirt. I was planning on doing a larger area, but this looked Ok as it was, so I left it.
Gallery
Finally, some stains. If you note she’s got a scar on the front of her left shoulder, I wanted to hint that she was actually in the thick of things once or twice and so a scar there, and some stains from burnt wood and a bit of blood were added to her shirt. Just a case of a small amount of oil colour scrubbed on with an old brush, then a small amount of white spirit to soften the edges.
The sword was made to look a bit old and battered and painted using Darkstar’s excellent range of acrylic metallic paints, and then just a case of fastening things together and the addition of an excellent Oakwood Studios plinth as shown in the finished shots.
Final thoughts
This isn’t in all honesty a period in history that I’m familiar with, so I found it interesting to research, and all because I liked the look of a model !
FeR are bringing out a good range of models, building from different sources, with sculptors providing new offerings, plus bringing back the Elite Series of kits as well. Subject matter is varied, although quite a few Napoleonic subjects, there’s the odd Celt, American and medieval kit mixed in there too and plenty of fantasy pieces to round things off.
It’s a tad upsetting seeing how many of these I’ve actually got, and realising this is only the second one I’ve painted ( Boudicca was the first ). There’s a lot of good kits available from FeR, and you can get them either direct from the website:-
http://ferminiatures.com/ or if you prefer ordering in the UK, then SK Miniatures carries most, if not all of the range:-
http://www.skminiatures.co.uk/
Oakwood Studios are at:-
We need your consent to load the translations
We use a third-party service to translate the website content that may collect data about your activity. Please review the details in the privacy policy and accept the service to view the translations.
