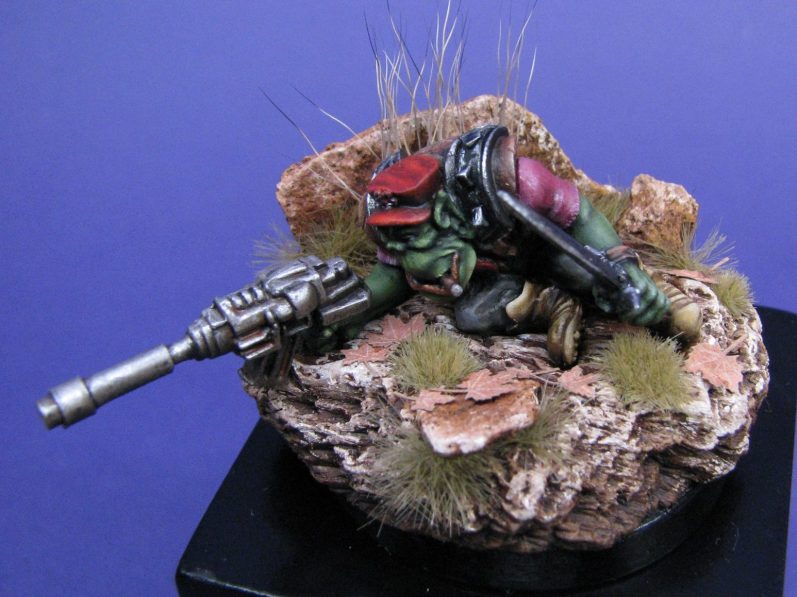
Sneeky Shoota
28mm White Metal and Plastic casting from Games Workshop
Painted in 2008
Yes, I know it’s spelt wrong, but he’s an Orc, and that’s how they spell stuff.
This is an old idea I had many, many years ago, and one that I made a model of, using the same piece. Unfortunately it was stolen, and although I had two of the models ( luckily ) and I could make another one ( and a better one too ), it’s taken around ten years to get it done.
Obviously I was angry at the theft, but hey, some folk are lower than a snake’s belly, and that’s the way of the world.
Anyway, happier thoughts…..
The base kit is one of the old Games Workshop Orcs, this one came as a set of three rather belligerent chappies, and this figure in particular is trying to kick down a door.
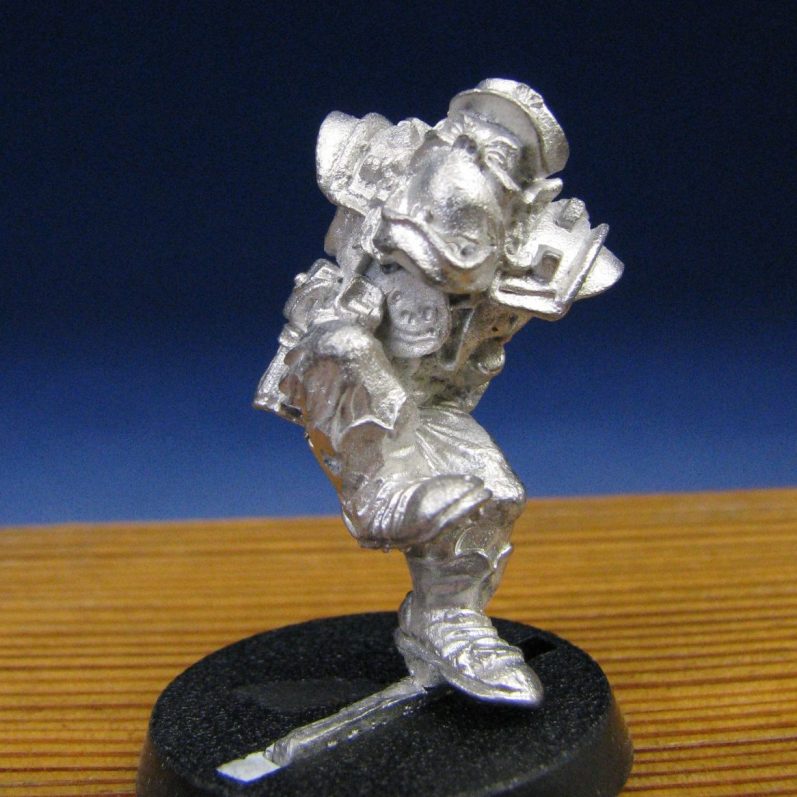
Photo #1 shows how he is moulded, with the tab on one of his feet and separate arms and a choice of weapons to be added by the modeller. These latter are in plastic.
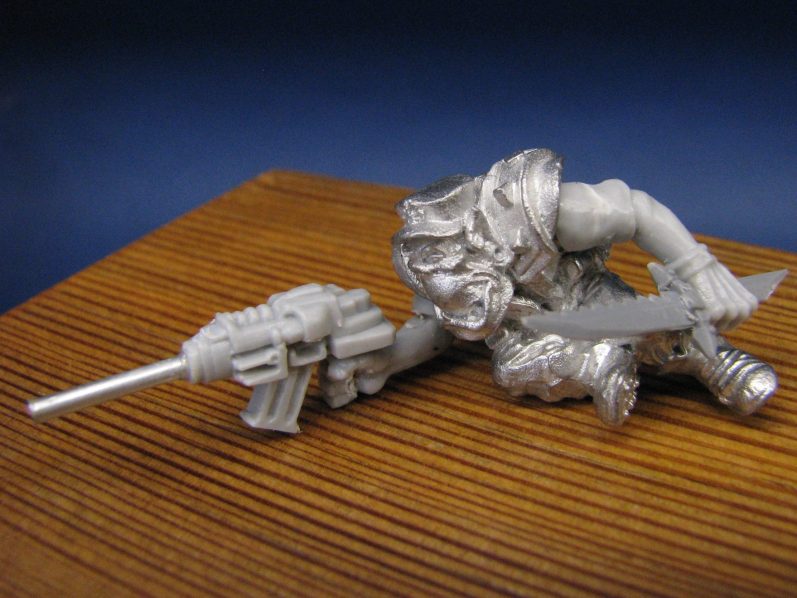
Simply by cutting off the tab, applying a file to some of the lateral sections of his clothing to flatten things out, and it’s easy to come up with a prone figure, just waiting to take a shot at some unsuspecting Space Marine prancing about in his puffy power armour. This is shown in photo #2.
I’ve added the arms and weapons in this shot too, but are pinned in place with short lengths of thin wire, and can be detached so that painting will be easier. The gun has been altered from a standard Orc gun to have an extended barrel. I would later add a small collar onto the end of this, and the tube used is some that I got in an Andrea mounted figure kit ( for use in that as a flag / spear pole ).
The knife at this point is a two bladed affair, although that would have to be adjusted later on for some reason ( hey, it married up O.K. at this point ! ).

Photo #3 shows quite a jump ahead. I’ve painted the trousers in a grey colour using acrylics, the boots and shirt with oil paints, using a pinkish colour for the shirt.
Now a few folk questioned this choice, but working on the idea that Orcs and in particular the Goff Clan, like red, and aren’t the best at keeping things clean and nice…..So what colour does poorly dyed red go after long exposure to the sun, rain and other elements ?
Yup, that’s it – pink.
So that’s why.
The armour was painted with various metallic shades, again using acrylics, but then weathering it with oil paints to make it look both old and damaged. Not easy at this scale, but by adding small squiggles and dots, a fair approximation of wear and tear can be arrived at.
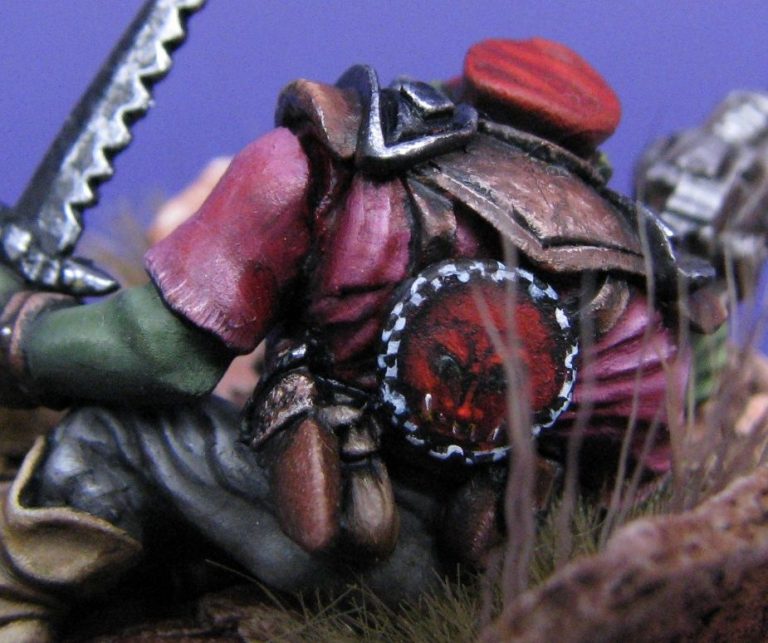
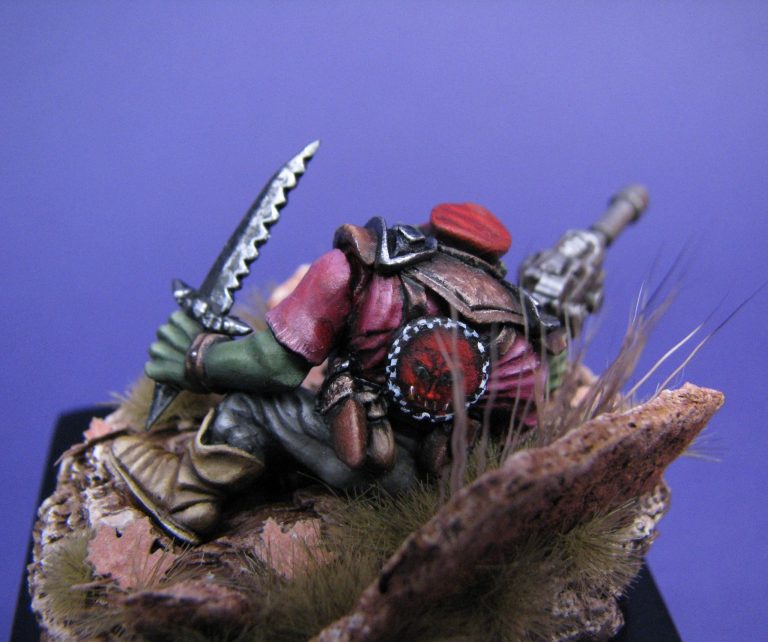
The killer though is painting a small sun disc face on that back plate. The plate itself is flat, un-engraved and about 4mm across, so you’ve a very small blank canvas. I had done this on a couple of Orcs some years ago, and wanted to see, not only if I could do it, but if I could do it better.

It’s done in oils this time, working from the deepest shadow up to the highest lights. It’s delicate work, and a case of trial and error, pushing the paint around to the right places until you’re happy with the effect. That’s all I can tell you really, because that’s how it’s done, there is no simple formula to it.
The eyes and teeth are added after the red colours have dried fully, and then the fun of adding a chequerboard outer rim seemed like the thing to do ( some folk might call it madness ! ).
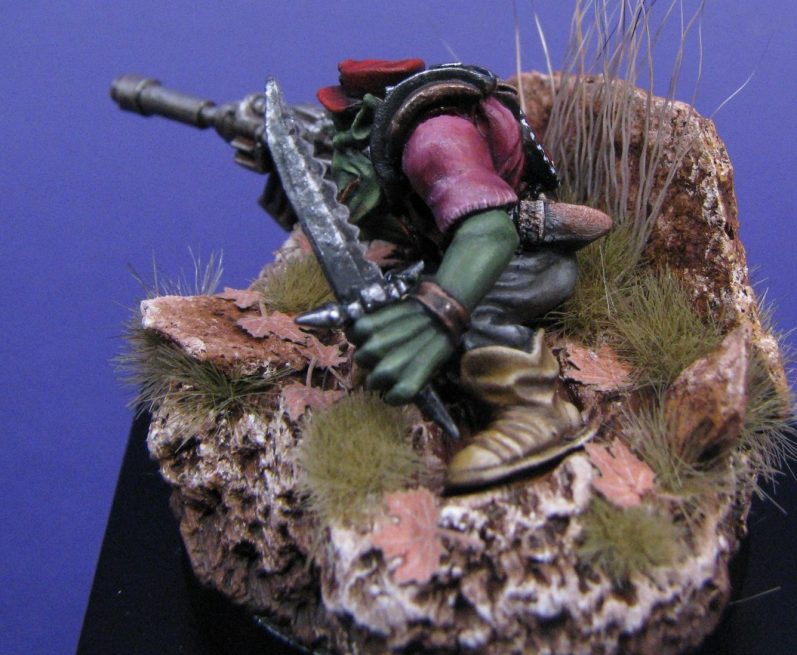
Apart from the gun and knife, the only other addition was to give the figure a cigar. This can be seen in photo #4 and is simply a small piece of wire, fastened into a hole in the side of his mouth. The painting again has to be pretty exact at this scale, the ash on the end giving it that final bit of realism.
In this shot, the pin in his hand can be seen that the gun will locate onto. A bit of a mistake here, because I then had nothing on the gun to hold onto whilst I painted it, and resorted to sticking a short piece of wire into the barrel and using that as a handle.

Photo #5 shows a similar angle, perhaps slightly better to see the face, and also that the hat has been painted with a brighter red colour.

Photo #6, whilst showing the back plate again, and it’s still wet, picks up the small brush-marks where I’ve pushed the paint about. I thought this might be of interest to let you see just how small the part really is in proportion to the thickness of paint, and how it’s important to paint with a very gentle hand, because although most of these marks will dry out and disappear, anything that’s more heavy-handed than this will show up, and spoil the effect.

In the next shot, there’s a view of the upper shoulders. I tried my hardest to get rid of that mould line on the left shoulder pad that runs to the back of the neck, but couldn’t get it to flatten out properly. So I decided to make it look like a crack in the leather of the shoulder pad, running underneath the armoured spiky bit on his left shoulder. Not sure that it works properly, but it was about the only thing to do in the circumstances.

Photo #8 shows a good view of the knife blade. I used a lot of black and dark blue on the blade, primarily for shading, but also to give a battered texture to the metal, the only smooth bit being the very sharp edge that he’s polished onto it. For that it was Winsor and Newton silver ink, which is about the best bright silver I’ve found.
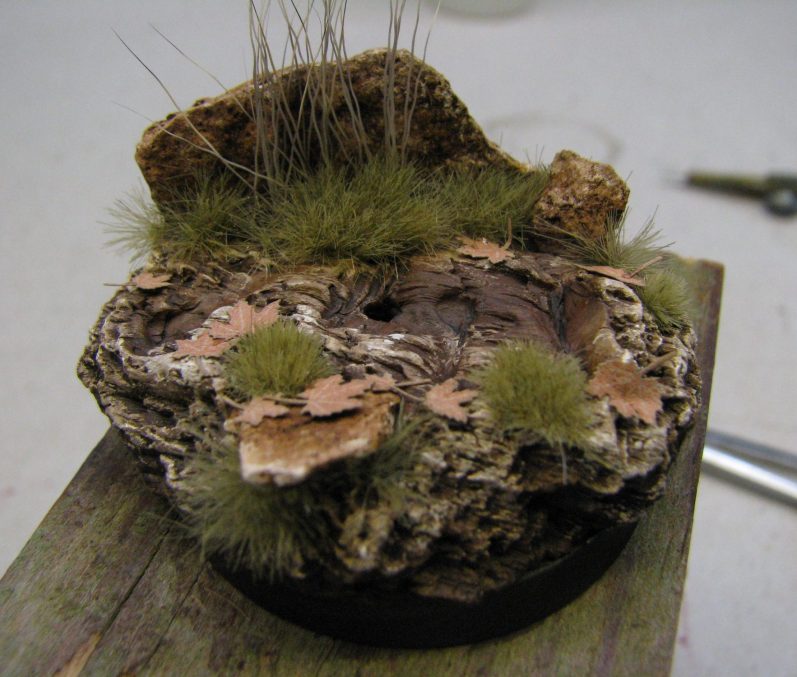
With the figure finished, I decided that I needed to start work on the base. This was a blob of Magic Sculpt, pushed firmly onto a GW 40mm plastic gaming base, then textured with a small piece of rock. The flatish plates sticking out of the groundwork are lumps of rust that I found at work, and the grass is deer hair, cut to size and fastened in place with superglue. The figure was pressed into the putty whilst ti was still soft, and the grass was added after painting.
The whole thing is painted with oils, these allowing me to pick out the texture more easily and quickly than acrylics would. See Photo #9

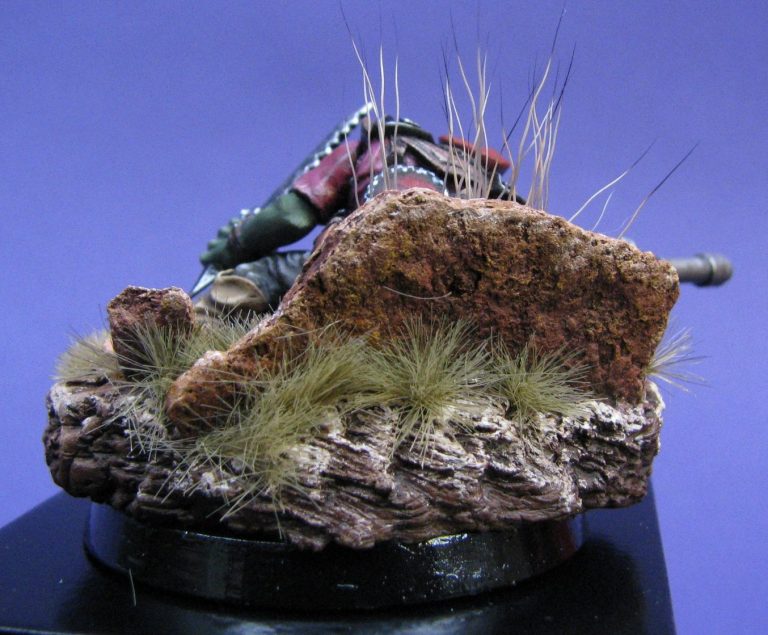
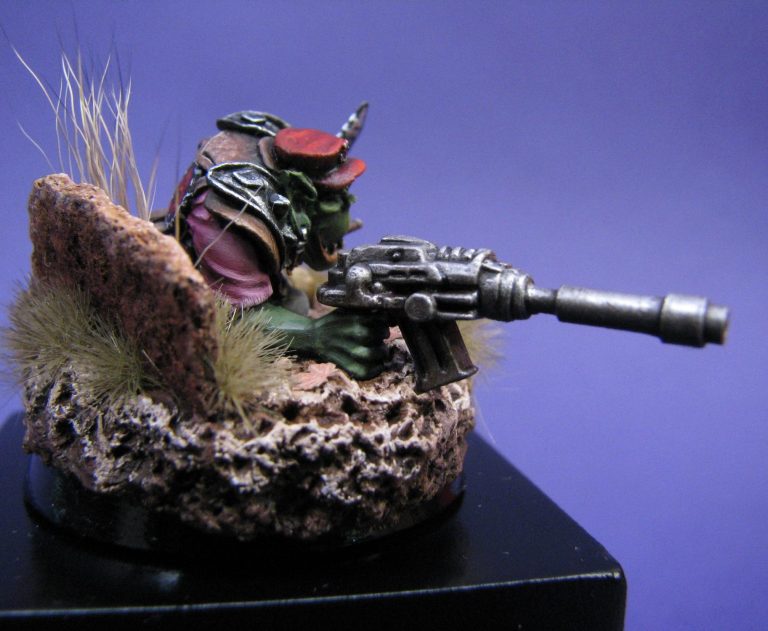
From photo #10 onwards, you can see the finished model. There’s a lot of work gone into such a small space; and I guess a lot of it will be missed by most casual observers - such things as the chest plate having a face on it, and the cap badge can easily be overlooked, but it’s still fun to paint them properly, because there will be one or two folk who take the time to notice them.
I think this is the fourth or fifth GW / Forgeworld piece I’ve done this year, and I’ve got to say that it’s fun ( although sometimes frustrating ) to paint at this scale again.

As prices of military models, and the larger fantasy pieces rise, this scale of figure seem to be better and better value, especially, if like me, you’re a collector with hundreds of the little blighters in your collection already.
I tend to see more and more of the mould faults in these, when looking through those that I’ve got stored, and I guess that’s me being more of a painter now than a gamer, because ultimately I’m looking at what it’s going to take to get a piece prepared for doing a cool paint job on, rather than having the luxury of ignoring such faults that mean little so long as a model can be painted up for use on a gaming board.
A good little figure though, and I had fun putting it together.
We need your consent to load the translations
We use a third-party service to translate the website content that may collect data about your activity. Please review the details in the privacy policy and accept the service to view the translations.