Egyptian Dancing Girl
1/9th scale resin kit from PiLiPiLi
Painted in 2009
The Belgian company of Pilipili has released several "girlie" busts now, all of which I've managed to pick up in my travels around the shows. This is the fourth addition to the series, depicting a Temple Dancing Girl.
Presentation of the model is very good; the box art depicts one large and a couple of small pictures of a very well painted example, done by the sculptor and owner of Pilipili - Lee Van Quang.
The box is sturdy, and the parts are packed in a couple of plastic bags to keep them all together. The resin used is an ivory colour; it's very soft, and cleans up easily. Changes are readily made, as the resin is soft enough to carve without it splintering or cracking.
Parts are plentiful, the head and neck being cast as one part, with a separate part for the right side of the hair up as far as the headband. The arm is separated at the armband, and a separate hand - of which there are two, just in case of bad moulding - and also a separate lotus flower, again two being supplied just in case of damage in transit.

Now for my whinge.
Parts usually fit quite well with Quang's models, but the neck to shoulder joint on this one doesn’t fit at all snugly, and in my opinion, is badly placed too.
The joint is split at the base of the neck, so that to hide any filler or carving, the head/neck is going to have to be glued in place before painting.

This makes life very awkward, as getting a paintbrush under the hair that is on the left hand side of the head once the head's in place is a bugger, to say the least.
I'd have preferred to see either the hair on the left side of the head produced as a separate part - as with that on the right; or, making the neck
joint coincide with the top edge of the necklace. This would cause a natural break, which would be a whole lot easier to fill once the skin had been painted.
Of all the many Pilipili kits I've done, this is the first time I've hada problem of this kind with one of their models, so on the whole, I can live with the hardship.
It's worth noting though, that you'll have to plan for how to get at this area of the model before dipping the old brush into the paint.
Apart from that though, it's plain sailing. I'm guilty - as with the Geisha girl from Pilipili - of removing the hand that comes with the kit. In this case, I also took away part of the lower arm too.


This meant that I had to sculpt in the knot in the dress, and also add some detail under where the arm had been. No big problem. The difficulty with the neck joint was tackled - and not necessarily solved - by gluing the head in place, and then filling and filing the joint, but leaving off the right side hairpiece until the flesh had been painted.
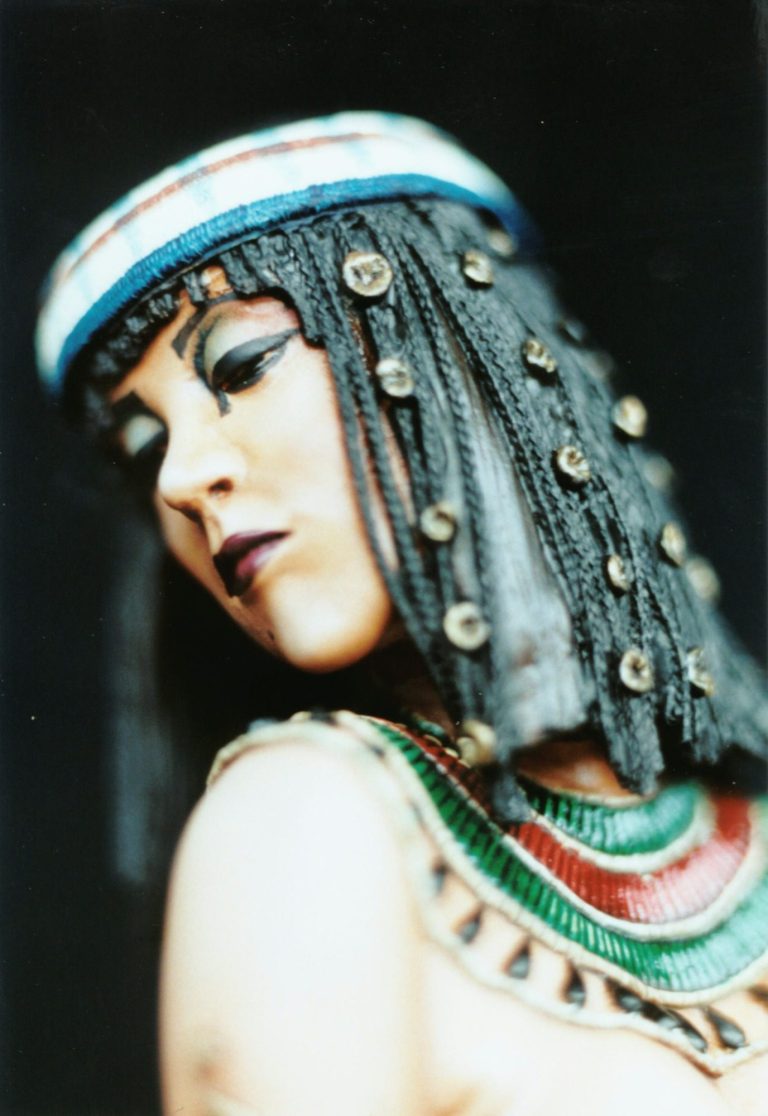
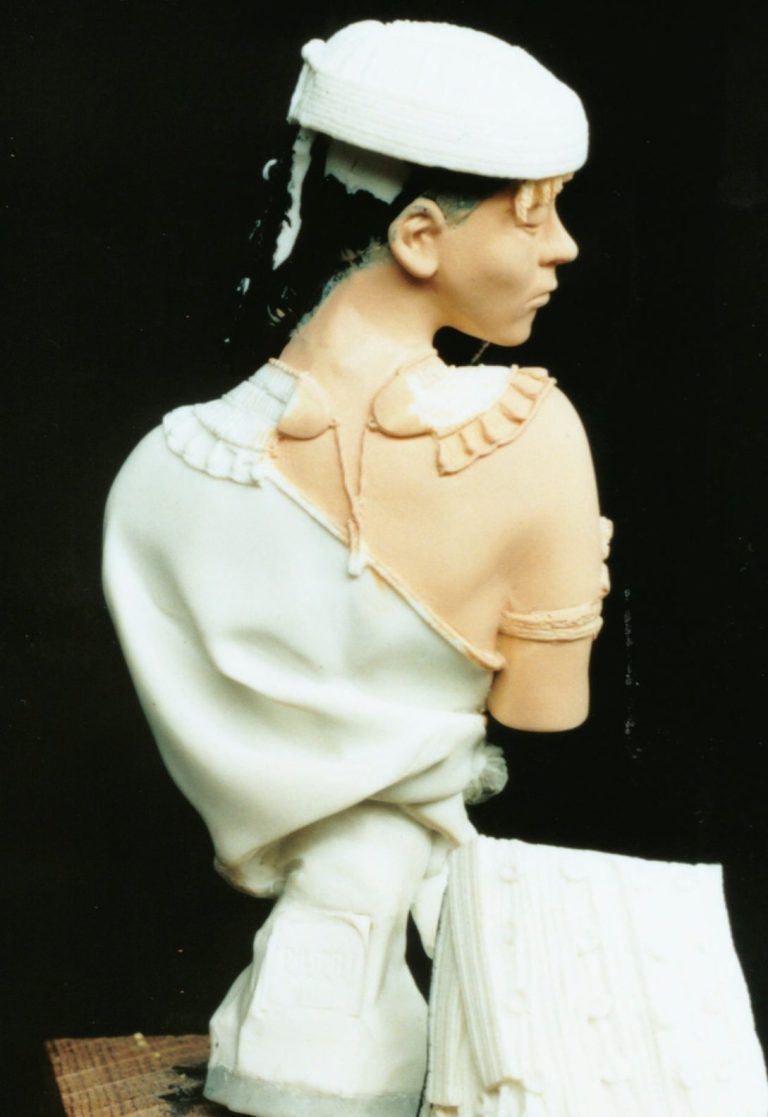
I also found that painting the inside of the hair attached to the head with black acrylic prior to adding it to the body made life a lot easier. See photo #1. In photo #2 I’ve shown a rear view of the figure, and this shows how I continued the black acrylic around the back of the head so that when the separate hair piece is glued in place, there’s no possibility of the bare resin showing.
The flesh was painted in my usual way, acrylic undercoat with a dark flesh oil paint over the top. I used a slightly tanned mix as a jumping off point for the oils, adding a little bit of Mars Brown to the mix to darken it just a little. More Mars Brown was used for the shading, along with some Burnt Umber and Mars Black to build up the deeper shadows. As usual, Titanium White was used to bring out the highlights on the upper surfaces that would catch the light.
The hair is black acrylic, followed by black oils, with highlights for the un-braided hair in Mars Brown. I found this quite difficult to do, and had to repaint the hair a couple of times, as the Mars Brown is quite a dominant colour, and tended to take over from the black if I wasn’t careful. Highlights on the braiding were added from very small amounts of the basic flesh mix, dry brushing these on to pick out the detail.
For the dress I used a cream undercoat, again acrylics, with oil paint over this, using white as a final highlight to make the cream colour as pale as possible. With light colours like this, it’s important to build up a good solid undercoat, adding several thin layers of the acrylic paint onto the model. This is because any faults or blemishes in the undercoat will just shine right through the oil paint finish

Details on the jewellery were touched in with gold, and various browns were used for the edging of her clothing.
I had a go at depicting the black Kohl makeup seen on many of the Egyptian tomb wall decorations, using Mars Black oils for this.

I also painted in the eyes, using an off white and a dark brown. The eyes are mere slits, it's true, but it's amazing how much better the model looks simply by adding these and then some gloss varnish once they're dry.

The lips were a mix of Purple Alizarin Madder, Alizarin Red and some of the Mid-tone flesh for a highlight, again glossing this with some varnish to finish off once dry.
Now for the base.
The three models I've done from this range so far, have really enthused me.
With the Geisha Girl I used a black plinth from Armstrong Bases and painted Japanese designs onto each of the four faces to add to the model's attraction. The base for the Island Girl I'm still thinking about, but I thought the obvious thing for the Egyptian Girl was some of the carvings from typical Egyptian art.
Hmmm. Easier said than done. Initially I thought of painting depictions straight onto the plinth, then had second thoughts and altered the idea, perhaps using small sheets of papyrus.
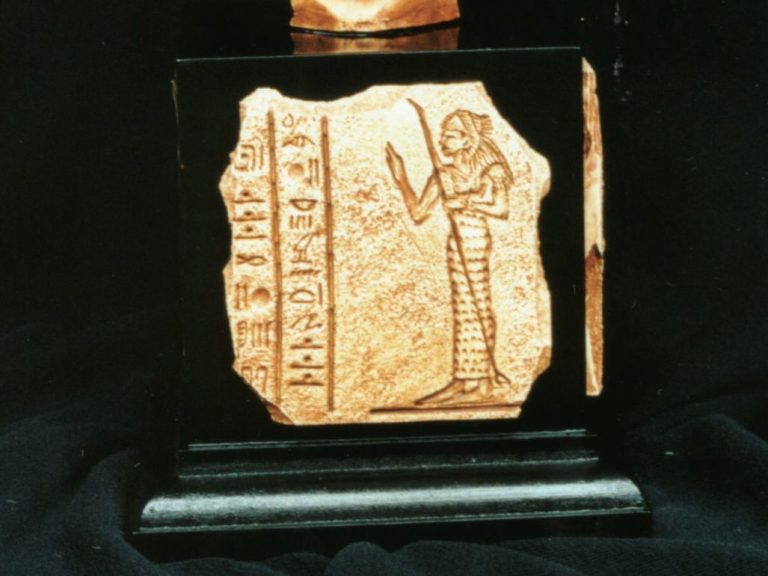
Then, in a flash of inspiration, I thought about sculpting my very own little pieces of Egyptian tomb wall.
How cute.
This was fairly simple. By rolling out some Milliput into thin-ish sheets, and then pressing the detail into them before the Milliput hardened. I used pictures from my reference sources on ancient Egypt as a guide, these same sources giving rough translations of what the individual hieroglyphics mean, which enabled me to spell out "Dancing Girl" on the nameplate in both English text and also Hieroglyphs.

The Milliput was painted with off-white acrylics, and then washed with a couple of coats of Mars Orange and also Burnt Umber to pick out the detail. Then a light dry brushing to lift the highlights a bit more, using Naples Yellow oils
The nameplate was a spare piece of papyrus that was just lying around
( what, you don't have spare papyrus lying around the place where you live ?

Shame on you ! ), and after painting on the relevant lettering, the Milliput
and Papyrus bits were fastened to the Armstrong Bases plinth with some superglue.
After a few photos, that was it, finished; yet another nice and relatively painless addition to the display cabinet.
I'm pretty pleased with these Pilipili girl kits. They're nicely produced; easy on the eye, and not too massive that you need lots of space for the finished article.
Because of the subject matter that Quang chooses, the painted decoration can be as simple or as involved as the modeller wishes.
The soft resin means that "lopping bits off" - like I've done with the arm in this case, are easily done, making the model more of an individual.


Quang was also doing a deal at Euro Militaire 2001 in that if you bought a model direct from him at the show, you got a large poster sized picture with the model, which was particularly useful for painting ideas, and also shows what an excellent painter he is.
These are available from Historex Agents of Dover at the addresses below.
Historex Agents. 157 Snargate Street. Dover. Kent. U.K. CT17 9BZ
We need your consent to load the translations
We use a third-party service to translate the website content that may collect data about your activity. Please review the details in the privacy policy and accept the service to view the translations.