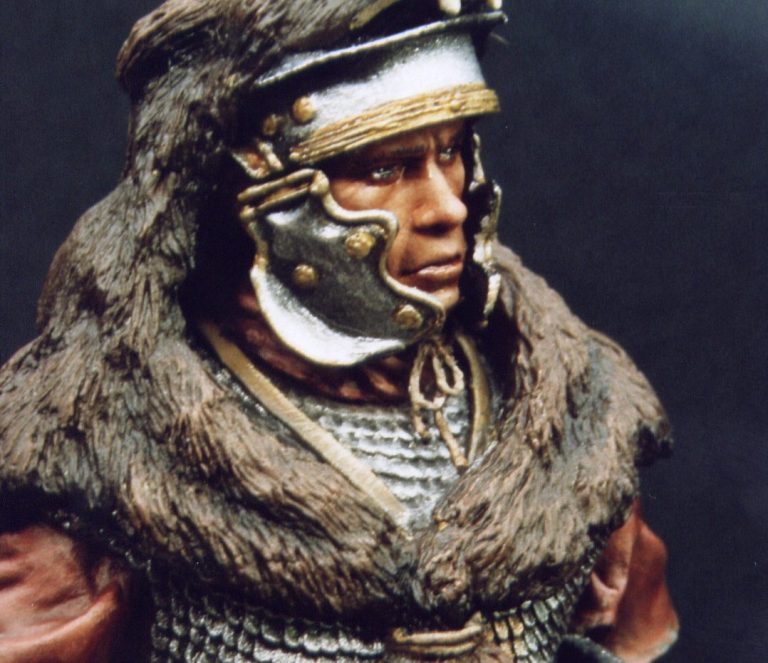
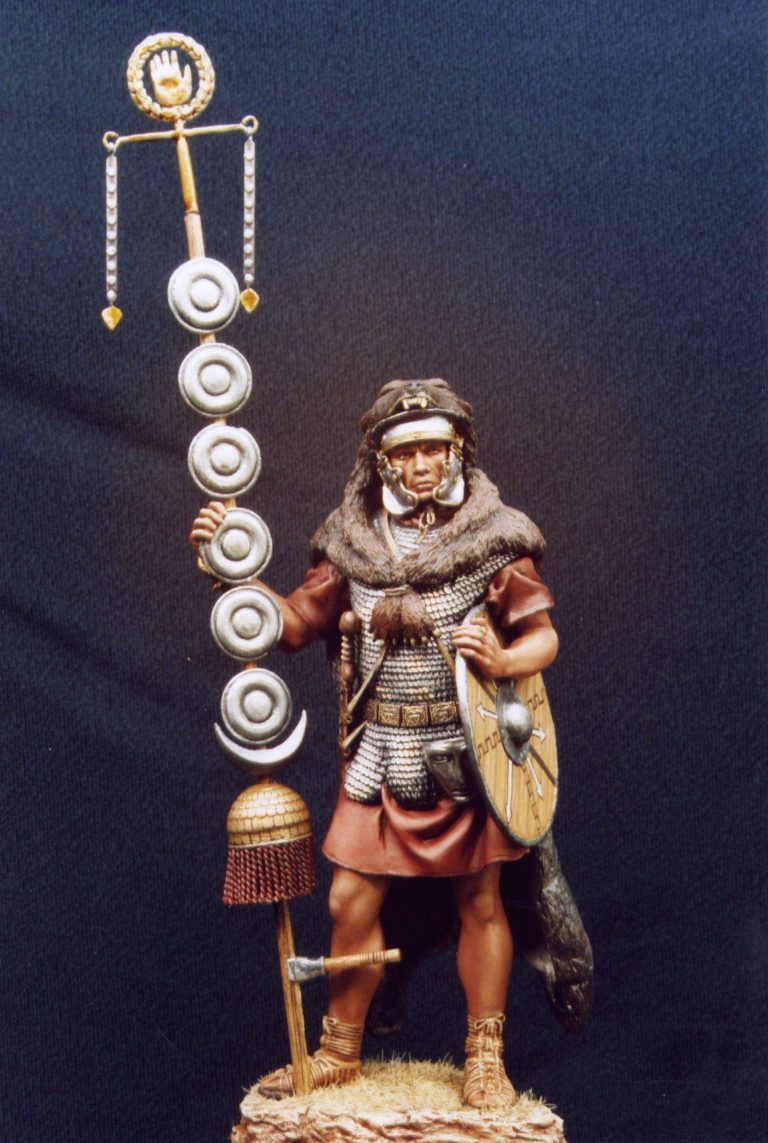
Roman Signifer
90mm White Metal kit from Andrea Miniatures of Spain
Article in Military Modelling Magazine 2007
I suppose that there should be a bit more interest in Roman army subjects recently; simply with the series ”Rome” being run on television both here in the U.K. and also over in America.
Views seem to have been mixed on the historical accuracy and acting, not to mention the storyline; but I for one thoroughly enjoyed the series, not least for the atmosphere that it seemed to create. A general grubbiness and poverty within the masses was ably captured that is rarely shown in most film representations of the Empire.
Whilst I wasn’t about to try and re-create a scene from the series around this figure, I do advise anyone with an interest in the period to have a look at the series – if you haven’t already, as there are lots of ideas that could be used for small scenes in model form.
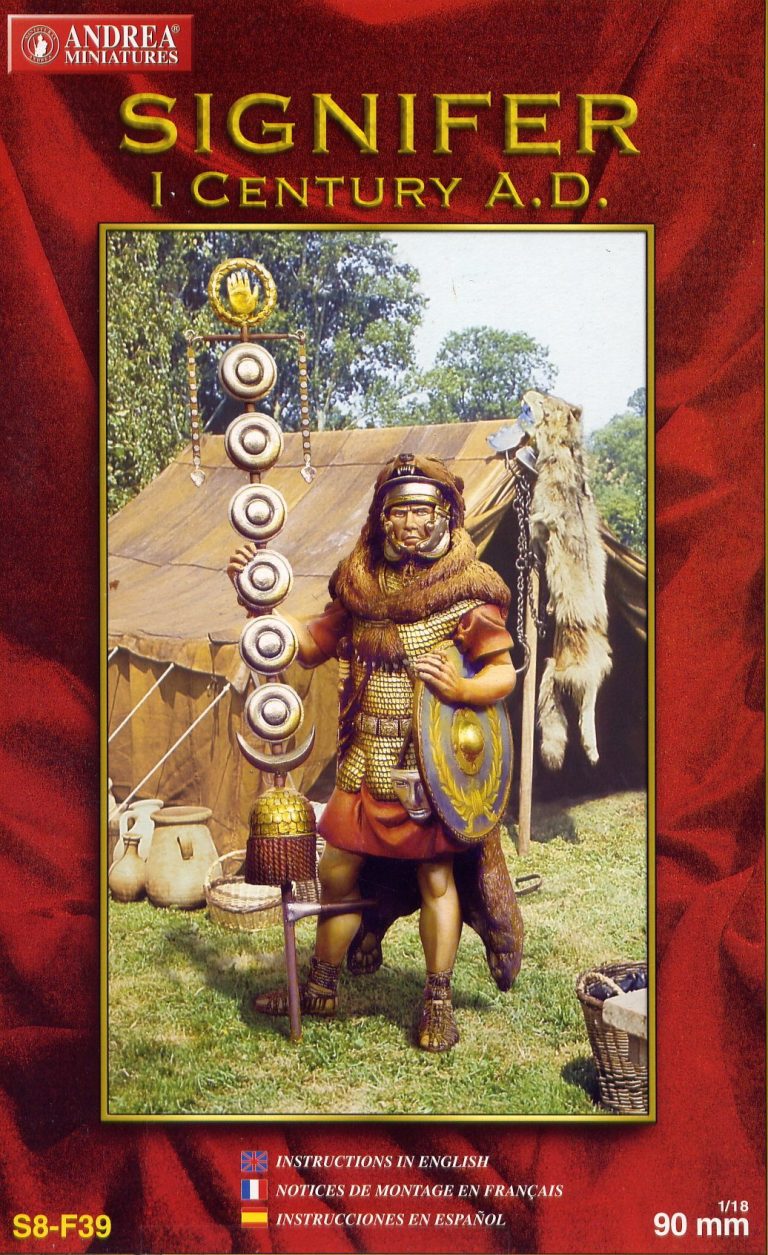
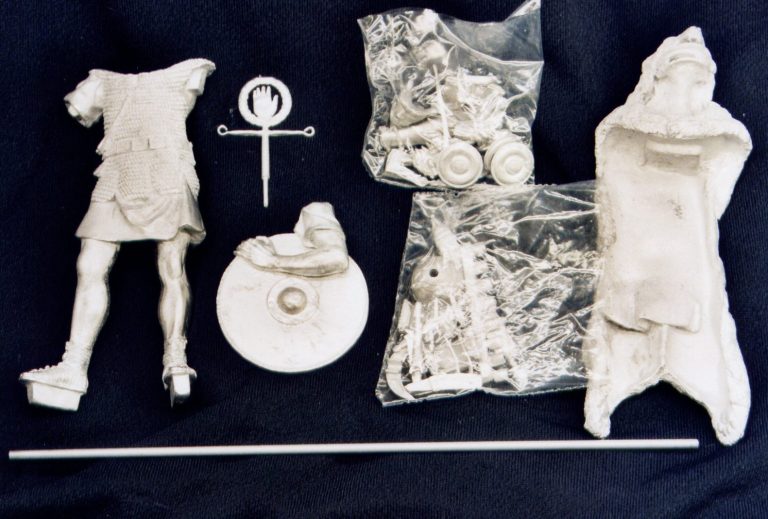

As for this kit, well it seems like Andrea have pushed the boat out a bit with this offering. There are a lot of parts – two pictures full in fact, as shown in photos #2 and 3. These all come in a larger than usual box that has several pictures of a painted and assembled model to give you some inspiration. The front of the box art is shown in photo #1.
Split up of the components is good too; allowing the model to be painted in sub-assemblies and for the glue to be added as painting is completed.
Clean-up was fairly rapid, as there were no mould faults, and just the usual part lines to deal with, using a scalpel and files.

Photo #4 shows the head casting along with my thumb ( useful thing to give something scale, and it’s always handy – sorry for the pun ). This is one of the bits where the Andrea designers got clever, and the head is just a three sided casting with a slot running up the back of the neck and head which then fits into the void under the helmet. This allows the painter easy access to the face rather than having to try and get to it under the helmet brim, and allows for a lot more apparent depth to be added to that area of the model when it’s finished.
I chose to depict quite a dark skin tone, as with the Greek Veteran Bust ( Mil Mod Vol. 36 Issue 01 ), I thought that the subject would have more character if he looked like he’d spent some time out of doors.
The usual oil paint mix I make up relies heavily on Winsor and Newton Flesh tone, Mars Yellow and Titanium White for it’s base, but this time I added in some Mars Brown to make the mid-tone quite a bit darker.
This was painted over an undercoat of Games Workshop Swamp Brown acrylics, and then to form shadows more Mars Brown was added, followed by Burnt Umber. I used a small, dry brush to stipple the paints together, working gently so that the paint colours mixed only at their edges, and so that natural shadows on the casting were enhanced.
Highlights were painted on with some Titanium White oils, again using a clean, dry brush to blend them in to the surrounding paint whilst it was still wet.
The lips were painted once the skin tones had dried, and were mixed from just a small amount of the mid-tone with an addition of Carmine to make it slightly more pink. Highlights on the lip were added with just the mid-tone flesh mix.
To paint the eyes, I used a fine brush to add on the whites first with some GW Skull White Acrylic ( with just a dash of Ultramarine Blue to take out the starkness ),
and then addition of oil paints for the iris and pupil. I used various browns and black oils for this, with a final Titanium White catchlight to make the eye appear wet.
Photo #5 shows the model partially assembled. Here the main casting has had the cloak and headdress added, along with the face casting too.
As you can see, the toga has been painted with a reddish brown; this consisting of the swamp brown undercoat with oil colours over the top. The oils used were a mix of Mars Brown and Carmine, adding some Mars Black for the shadows, and then highlighting with Titanium White.
In this shot I’ve also begun painting the armour, I began by painting this area with GW Chainmail acrylic mixed with an equal amount of Chaos Black. To begin picking out highlights, I then drybrushed with some silver ink added to the mix to lighten it, and then very lightly with pure silver ink to bring out the brightest highlights.
The Fur cloak has also been painted, although you can only see a small portion of this. I’d begun with a couple of coats of GW Swamp Brown acrylic, and once dry added oils paints over the top. Mars Black was used in the deepest recesses, particularly any areas that were hollow or lacked detail. These areas will be covered up anyway, but it’s best to put some black over them and then scrape it away from the areas that will have glue, so that there’s no chance of some bare metal being seen.
Actually I’ve cheated here, as photo #5 was actually taken before photo #04; simple to see really, because in photo #4 the eyes have been finished. They’re not yet painted in photo #5. This latter shot is just a dry run to see how things fit, but was worth taking to demonstrate how the model was progressing ( the secrets I give away….).
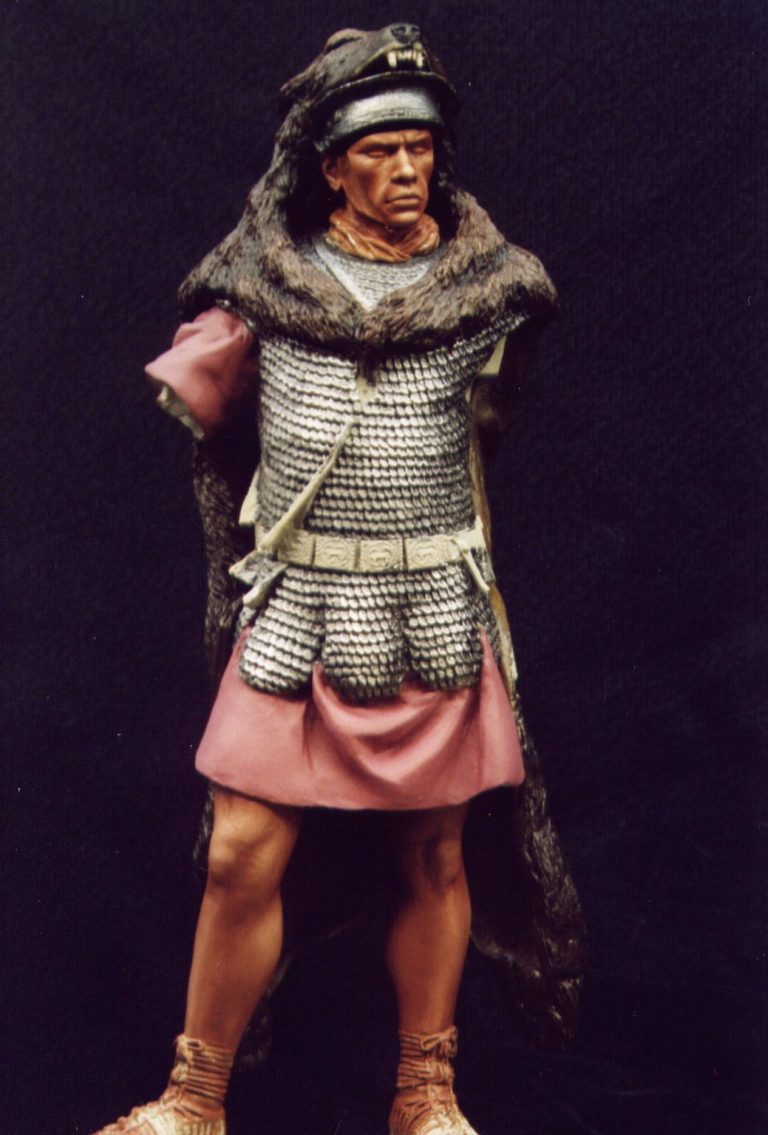
Whilst all this lot dried, I turned my attention to the shield.
I’ve got the excellent Brassey’s book on the Roman Army, and of particular use are the drawings in the appendices that show uniform and proposed shield designs.
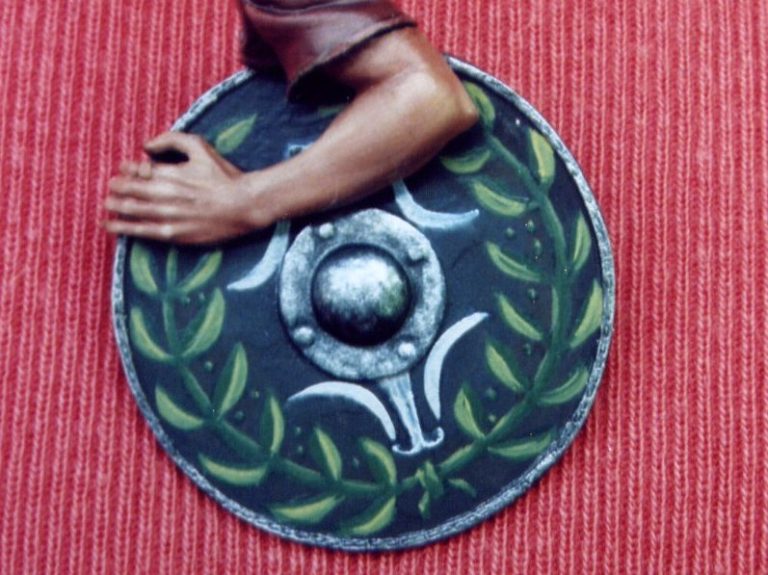
Initially I’d thought of the design that I’ve painted in photo #6, but although I was relatively happy with this, it was a bit dark. The rest of the figure is painted with muted and dark colours, and I felt that the model needed something a little brighter.

As shields would probably be of two kinds ( a bit like armour for the officers I suppose ); these being dress ( fancy and barely of use ) and service ( practical and either strong enough to be worth repairing, or alternatively something that is useable but simple and easily replaced ).
I feel that shields would certainly be like this, as the ones used in battle would probably be sturdy, but simple in design, particularly where any long campaign was concerned. The other natural assumption might be that shields would take a lot of punishment, and hence would be likely to be replaced fairly often.
With this in mind, I though that maybe only a minimum of design might be added – simply for recognition of the bearer in battle, and that maybe the natural wood of the shield might have been left on show.
Working also on the premise that the shield might be a relatively new replacement, I chose to make the wood grain appear quite bright, rather than the wood having had the chance to “grey off” to a more silver “been exposed to the elements” type of colouration.
I used a pale mix of Mars Yellow and Mars Brown oils over an Orc Brown Acrylic, and then added the planks with some of the Mars Yellow. This was followed by some Titanium White to add more detail to the grain, and then finally some Burnt Umber to mark in and redefine the separate planks of wood.
Both sides of the shield were painted in this manner, and the results can be seen in photo’s #7 and #8. If you look carefully you can see that the lay of the planks will line up, and even if the shield is made from “plywood” with several layers, then the alternate layers would lie the in the same direction.
Having completed the shield with some additions of Mars Black and Titanium White for the designs ( see finished shots ), I could return to the main casting.

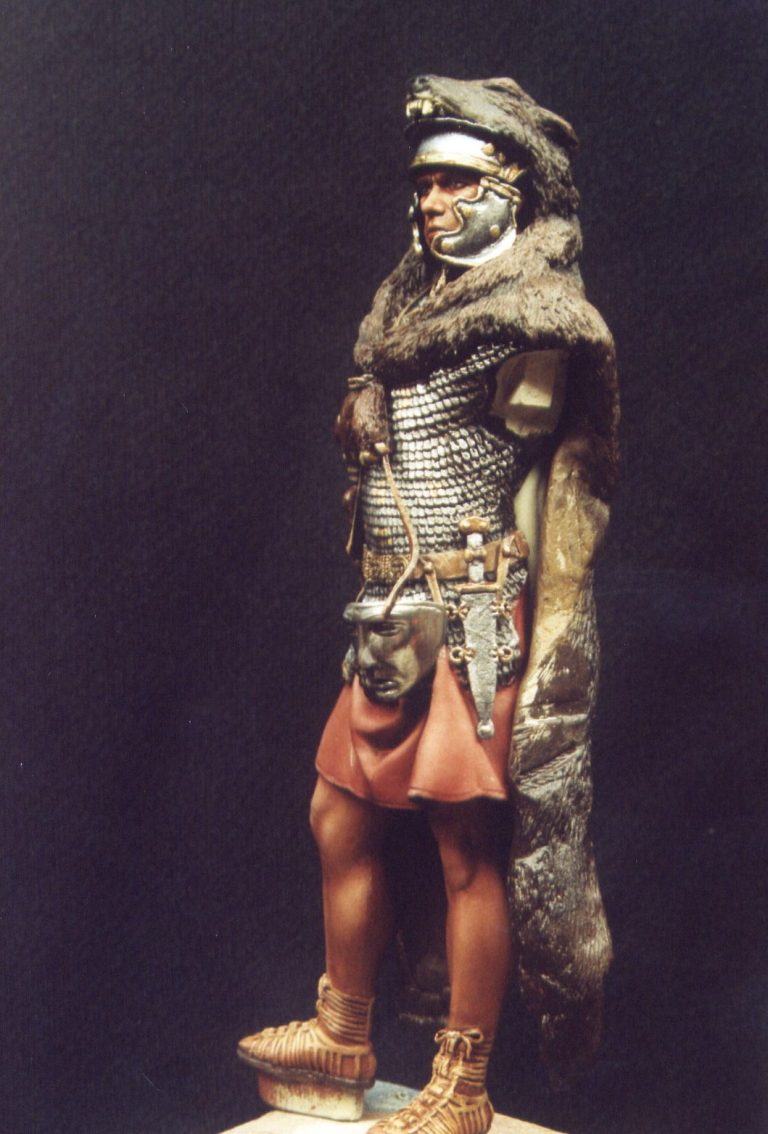
Photos #9 and #10 show the addition of the mask and also the dagger. I decided to polish the mask with fine grit emery cloth, followed by some T-Cut car polish to add the final shine. To preserve the finish the mask was coated with Tamiya Clear Smoke acrylic. It’s worth noting that I also painted in the neck scarf prior to the face being added to the model. There was a small amount of filler needed to mask a gap at the bottom of the scarf, where it joins into the chest casting, but this could be sorted out after the glue had dried.
The dagger was painted in a more traditional way, using the same colours as detailed for the armour, but using both the deepest shadow ( Chaos Black ) and the highlight colour ( Silver Ink ) to pick out scratches on the surface of the metal. It’s a pity that this is the only time that the details added will actually be seen, as the dagger is virtually invisible once the shield is in place.
The bear paws have been added too. These were pained to match the rest of the cloak, and the tie fastener painted to mimic a worn leather lace. The teeth on the bearskin were touched in with some Burnt Umber ( for the lines between the teeth ) and then the teeth themselves added with Mars Yellow, working up to nearly pure Titanium White for the highlights.

Just at the bottom of the picture you might be able to see the sewn hemline of the toga. This was just some dark red-brown acrylic added with a fine brush, and then the thin band of material left below it having some of the bright highlight added to it to make the edges look worn.
This might be more visible in the next shot – photo #11. The sheathed Gladius has been added now, and the leather scabbard painted to look worn and scarred. I used Burnt Umber and Mars Brown oils to paint in the main body of the scabbard; then using a fine brush, added all the cracks and cuts with Mars Yellow and Titanium White.
To add some interest to the armour shirt I’ve painted on some gold paint, hinting that brass pieces have been used to mend the armour at some point. There’s also some brighter silver leaves to the armour as well, but these seem to have blended in a little too well to the surrounding silver of the rest of the armour.
I made the sword match the workman-like shield, giving it a wooden pommel and fist guard. The lighter colouration of the hilt could be ivory, but more probably a light wood or even horn.

You can see the model taking on more form in photo #12. The arms have been added, and smaller details painted in, like the gold ring on the index finger of the left hand.
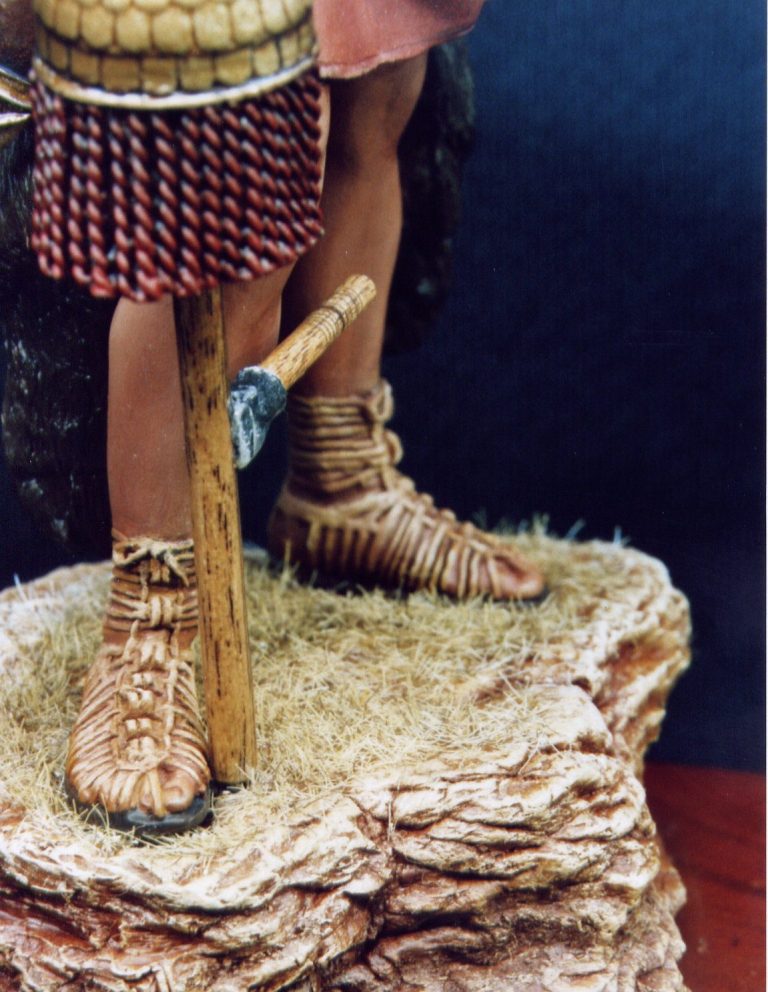
The sandals are one ( of many ) parts of the kit that are very well sculpted. These have amazing detail, but are relatively easy to paint.

I’d continued the flesh colour all the way down the leg and onto the foot, completely ignoring the sandals, barring adding a little bit more shadow colour than strictly necessary if the leg and foot had been bare. Then I could simply add some Mars Yellow and Titanium White to the raised detail, leaving the Mars Brown of the skin tone to form the shadows.
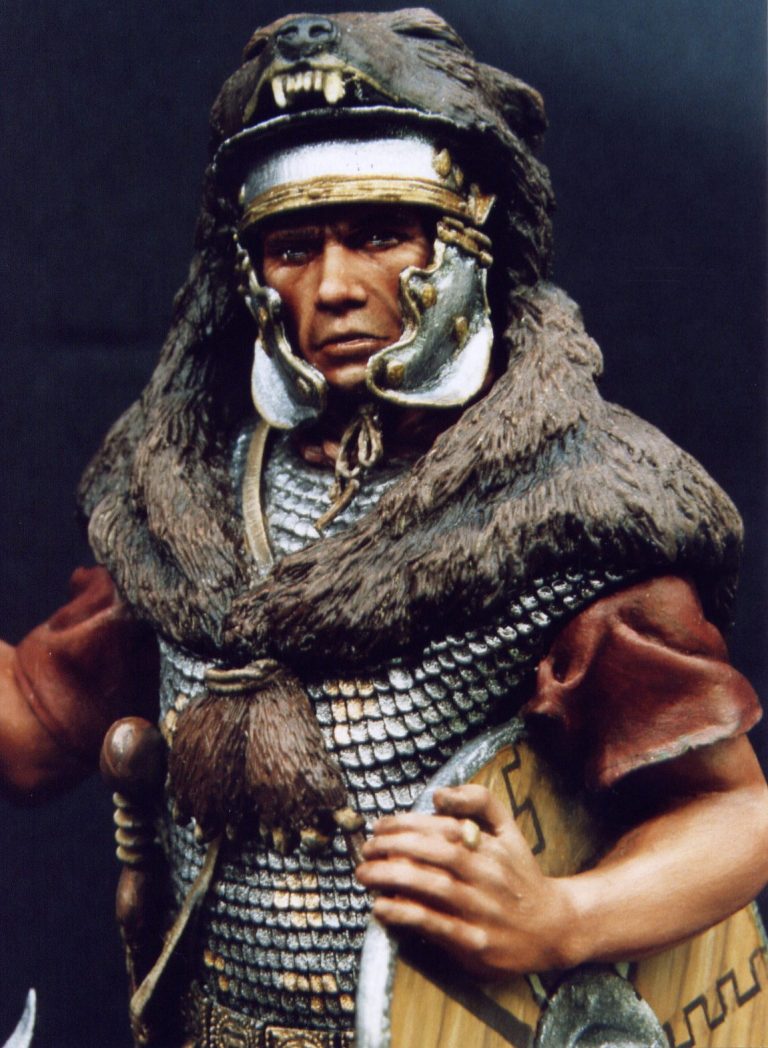
Photo #13 shows the model at the same stage from a different angle. I used some Chaos Black to add the pads of the bear’s paws, which can just about be seen in this shot, and the cheek guards have also been added. These are delicate little castings, and come to life with the addition of the paint. Because of their size, and shape, they’re a little awkward to handle when gluing them in place, but the detail of the fine casting far outweighs this difficulty once they’re positioned correctly. The final touch is to add the tie strap that would hold the cheek-guard together under the chin, and this is provided by Andrea as a tiny little bow and tails casting. Again, this is a little fiddly to get positioned just right, but well worth the effort. It’s actually easier to see this detail in photo #12.
In the final shots more of the details can be seen, the only change I made to the kit was to use a bar-b-que skewer ( sanded to the correct diameter ) instead of the metal tube that is supplied in the kit for the standard’s stave. I did have to drill through the hand and one of the discs too, so that this could slide through and down to the ground. It saves piecing the tube and all the problems in alignment that would ensue, but takes a steady ( and confident ) hand to do the drilling.
I did initially go to the trouble of polishing all the discs for the standard; but somehow they just didn’t look right, and painting them seemed to bring them back into scale.
To my mind, the discs, or more precisely the backs of them, are the only weak point of the model. Admittedly I hadn’t got the skewer quite as thin as it should have been, but even if the aluminium tube that is provided in the kit is used, I think that the “U” shaped backing straps for the discs would require a little bit of filler for them to match up with the backs of the discs.


Having said that, I only used filler twice for the whole model ( these backing straps and the neck scarf ), and with a kit of this complexity, I don’t think that that’s bad at all. In fact I think that it’s pretty darn good.
To finish off the standard, the hand motif at the top was painted, and the hanging strap decorations painted and then added. These latter actually hook on to the crossbar, and don’t really require any glue unless the model is going to be moved about a lot ( yes, I know – going to shows will see the straps chip paint off the other bits of the model that they can reach ).
With all the parts painted, I could think about the groundwork.
Although the groundwork is perfectly serviceable, I still chose to use some Milliput to make something almost exactly the same ( D-oh ! or perhaps even Duh ! ).
Once it was painted, with some static grass added for good measure, the model was added into position, and the final shots taken.
The verdict
Straight out of the box, this will produce a good model. It looks impressive, and embodies the feel of the Roman’s at the height of their dominance of the western world.
The sculpting is excellent, the casting and production match that high quality too.
There isn’t even a “but” in my summing up.
Granted, there are lots of little bits and bobs that can be done to individualise the model. Painting will provide some of these differences, as does changing minor details – like the shaft of the standard for example.
There might be some folk, who will look at the price and maybe have second thoughts, but there is a lot of metal in the box, spread among a lot of individual parts, and they’re all well produced. The groundwork isn’t excessively big; so if you’re like me, and tend to discard such items as a rule, you’re money hasn’t been wasted.
I like the pose, I like the details, and I like the subject. Enough said.
Thanks go to Andrea for sending the kit in for review, and to the Editor, Ken Jones, for passing it along to me.
Model available direct from Andrea Miniatures of Spain, or from Historex Agents of Dover,



We need your consent to load the translations
We use a third-party service to translate the website content that may collect data about your activity. Please review the details in the privacy policy and accept the service to view the translations.