Stenning Supra
Adding home made decals to Tamiya's 1/24th scale plastic kit
Completed in December 2023

I posted up a Toyota Tom’s Supra from Tamiya that I did for my son Thomas, and in the article I mentioned about having had to strip the model of its paint and decals because of problems with varnishing.
Having bought a second kit to get a new set of decals, I was left with all the plastic parts to make a car, but no decals with which to decorate it.
Whilst there are replacement sets of alternative liveries available on the internet, I thought I’d have a go at making some myself, allowing me to indulge my love of fantasy art along side having a very individual model.
I did have to make one alteration to the bodyshell of the car first though, and that was to cover the large vents that are on the bonnet ( hood if you’re American ). This was simply a case of using a thin sheet of plasticard to slot into place over the vented area, producing a flat surface that would show off any images a lot better.

Derek Stennings is an American designer and a superb artist, I’ve admired his drawings and paintings for several years after he came to my attention when some of his concepts were made into model kits produced by Industria Mechanica.
Unfortunately they were all limited runs and quite pricey, so I don’t possess any of them, but I do have two of his artwork books, and have spent many hours gazing at the artwork within them.
Photo #1 shows the cover of his book entitled “Born in Concrete” with cosmonauts featured throughout sporting particularly large headgear, and usually one or more floating spheres.
Could I transfer a few of the images onto the car though ?
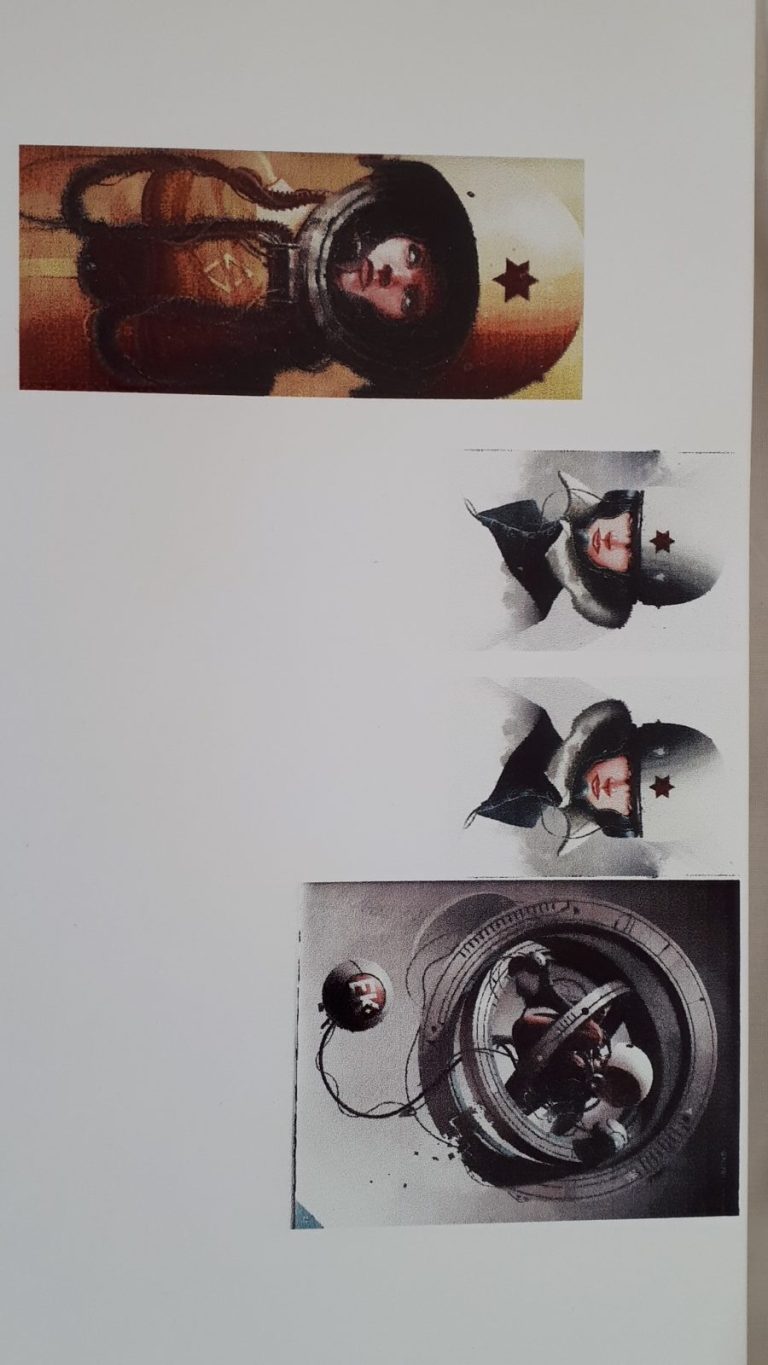
The simplest method would be to use blank decal sheets, scanning selected images from the book and printing them on a laser printer.
To ensure that the ink didn’t get damaged by the soaking process to remove the backing paper, I sprayed several thin coats of varnish over the decals before cutting them out.
I tested them for size on plain paper first, deciding which image would be placed on which panel of the car.
The printed sheet is shown in photo #2,
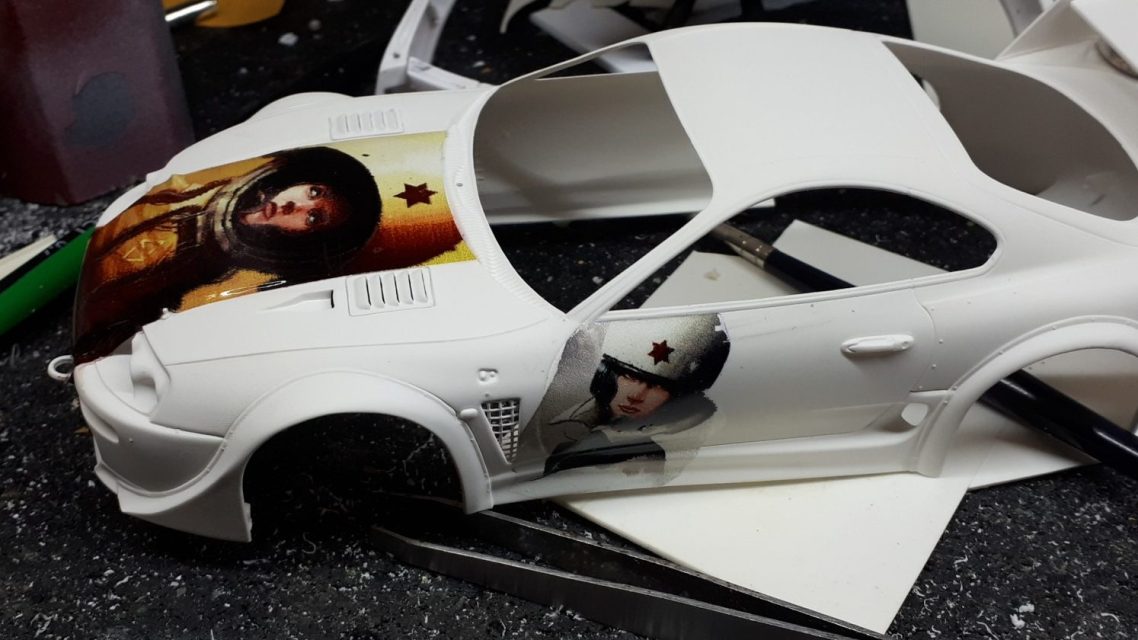
and the process of putting the decals onto the car begun in photo #3
I sourced the decal sheets from eBay, and it is very thin, conforming to the surface of the model really well.

Photo #4 shows the main image I used for the bonnet, and both it and the ones on the side seemed to look very good, having used a small amount of Micro Sol and Micro Set to help the decals to bed down.

The side panels have a lot more compound curves for the decals to form over, and a little bit more time was needed to get them to settle into position, but no real problems were encountered, the results of the left hand side decal being shown in photo #5.

Photo #6 shows the image that I decided would go on the roof of the car, it has pixelated a bit and a better print was made that was a lot clearer.

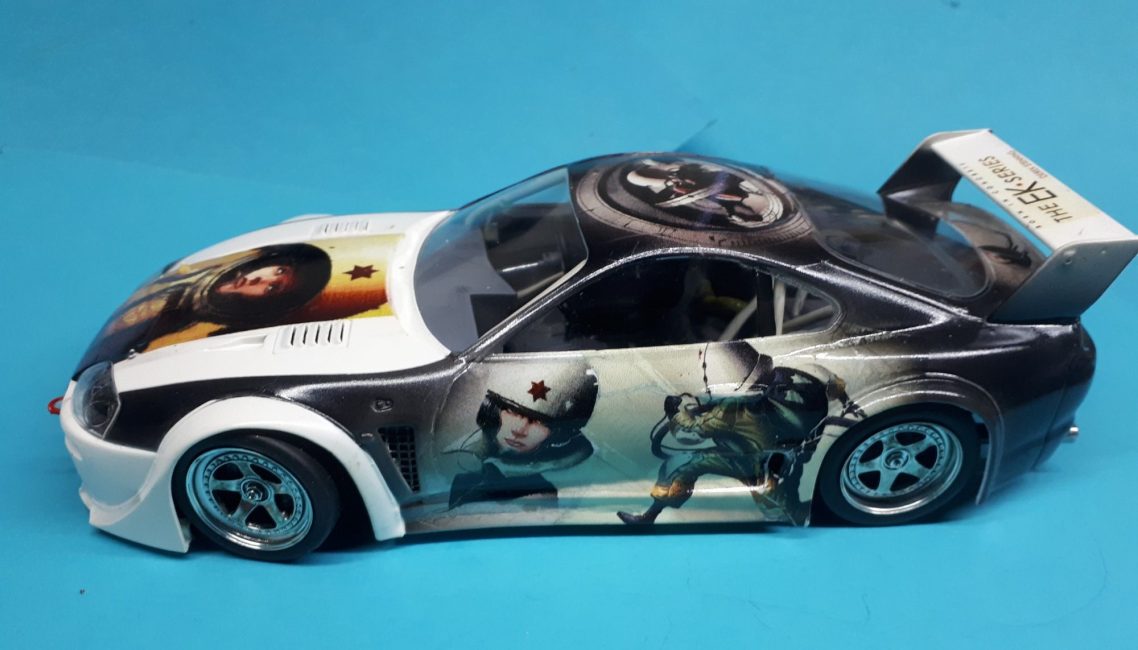
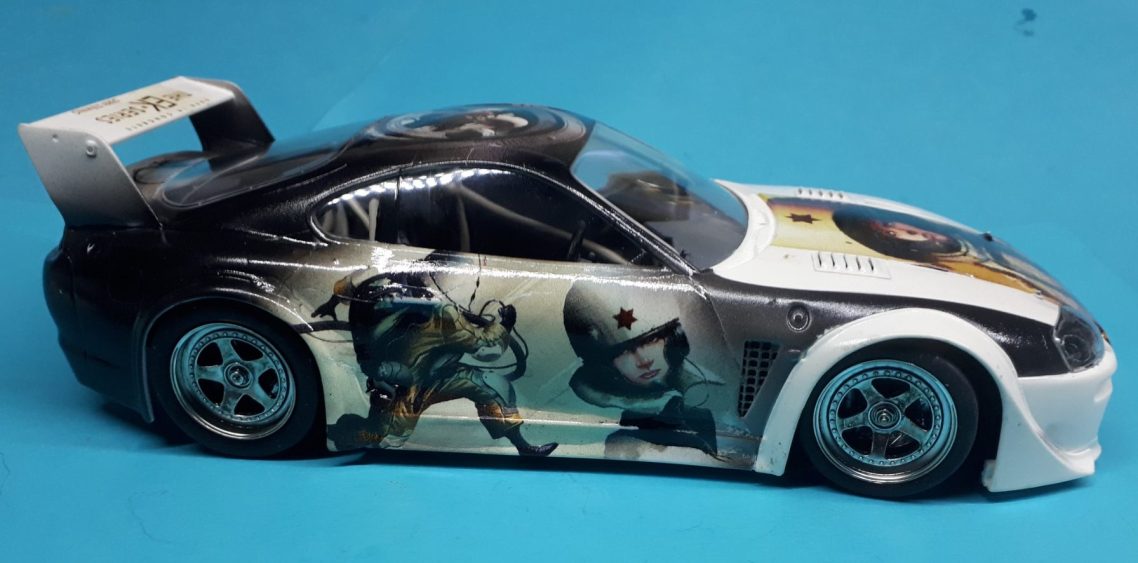
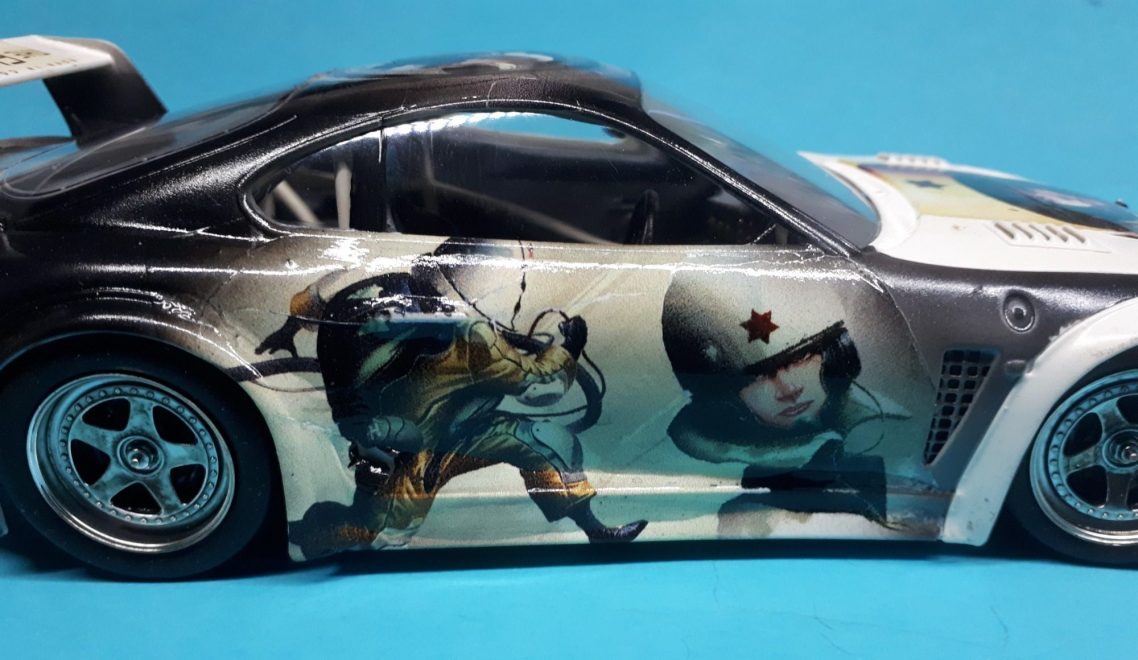
I thought that the side panel looked a bit empty, so a running figure from the book was incorporated alongside the first image to fill in the side of the car – photo #7

Photo #8 shows the decals added, and although things are looking OK, there is a separation to them that is somehow jarring. I needed to figure out how to make them look like a single design idea.

Photo #9 perhaps shows this shortfall better in that the woman’s head decal colouration cuts off abruptly behind the vent. It might have been better if it followed the line of the door, but I’d not thought about that when applying the decal, my mind being fixed on getting as much of the image visible on the side of the car.

With a bit of careful masking, and even more careful airbrushing, I added black paint to some areas of the model, faring this in to the edges of the decals as shown in photos #10 and #11.
The addition of the black paint fading into the decals binds the images together, breaking up the edges that were evident in the previous shots and making the overall effect a lot more pleasing.
Of course, having had a pleasant result with all this, I had to actually sit down and assemble the rest of the kit, although being a Tamiya offering, that wasn’t really a chore, and having managed to prime and paint the cockpit, install the glazing without fogging any of the clear plastic sections, even on the headlight covers, I’m happy to say that I was actually pleased with the overall finish on this one.


All about the decals
Well it is really, the kit itself became a donor for an idea I thought would work, and I do hope that if Mr Stennings sees this, he isn’t upset or offended by me copying and using his images in this way.
I like trying new ideas, and this was the first real attempt at printing decals and getting them to work properly.
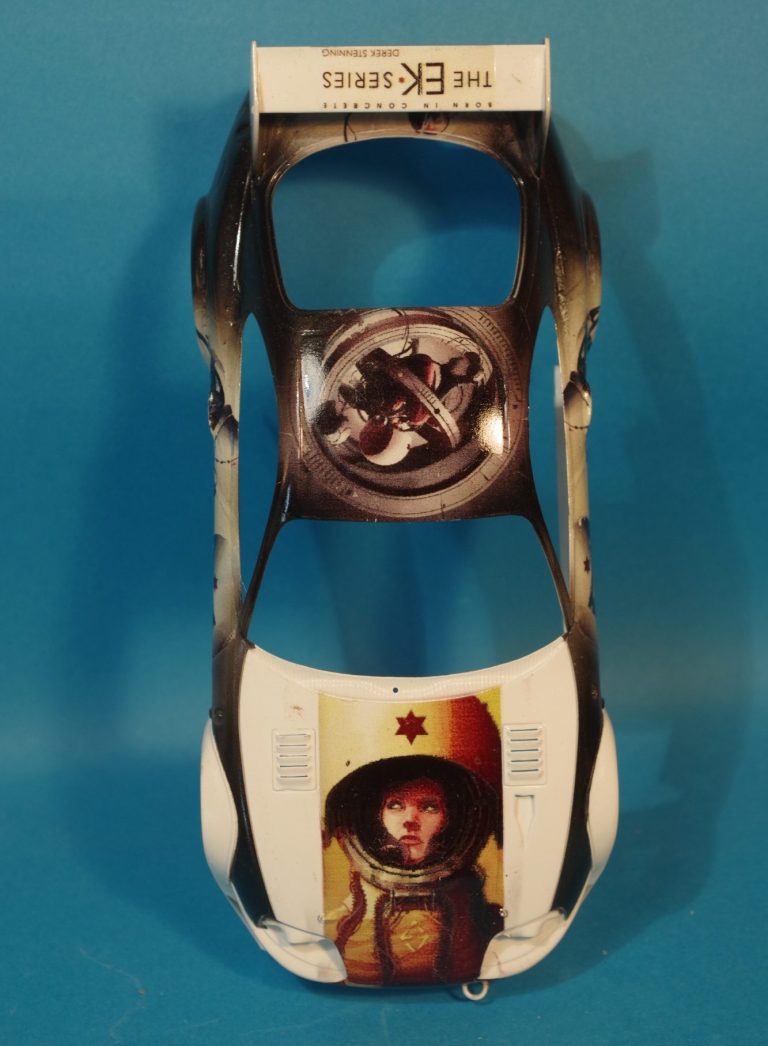
The idea of airbrushing connective areas to cover edges of the decals was necessary to smooth things out, and fortunately it worked well.
I think I may have tried too hard to get images to fit into particular areas, and in hindsight would use larger prints, selecting the prime area of each and trimming off heavily any sections that were not needed. I think more thought to having the images cover single panels or having any breaks at the juncture of panels might be something to think about too.
Overall though, I’m more than happy with the results.




We need your consent to load the translations
We use a third-party service to translate the website content that may collect data about your activity. Please review the details in the privacy policy and accept the service to view the translations.