How to - Paint with Oils
Oil paints seem to be making a comeback, although acrylics will stay with us ( and quite rightly so).
I view paints as part of my tool-set, so being able to use Acrylics, Oils etc is all part of painting models, and it's useful to be able to swap between different mediums.
Here's a few articles that run through painting a bust in Oils, I'll add sections here that detail with separate parts of the model, starting with the face, then moving on to clothing etc.
There will be separate pages added to detail different methods and different scales, but let's start with this one for a large scale Military bust.
Don't let the subject put you off though, the methods being used is the important thing, and can be transferred to be used on any model - fantasy or military.

How to - Paint wih oils
Part One - painting a face
For this demonstration I’m going to use the Verlinden Demi-Brigade bust, sculpted by Derek Holmes.
The finished model is shown to the left, and although there will be a lot of text and pictures, I'll gradually take you through painting the whole model.
Why use this particular bust ?
I feel that it’s a good bust for a beginner to start on as it is relatively simple to construct, and because of the moulding method that Verlinden use, there is only the removal of mould blocks to worry about – there are no mould lines.
So OK, Verlinden are out of production now, but you can still piack them up on Ebay second hand.

Photo #1 shows the head of the model, which I’ve fastened to a scrap block of wood that I use to hold the head whilst I paint it. I have drilled two holes into the underside of the neck and into these are fastened two pieces of wire with about 15mm of wire sticking out from the bottom of the neck.
These two pieces of wire will then go into corresponding holes drilled into the wood block.
Also in photo #1 I have primed the whole of the piece with a thinned acrylic white ( Games Workshop Skull White – thinned with Isopropyl Alcohol or windscreen wash liquid ). The addition of the alcohol allows the paint to go onto the surface of the resin without “beading”, and as the paint dries a key is provided for all the other paints that will cover it, thus ensuring that the colours used on the bust will actually stick there.
The mix of paint to alcohol is quite surprising to most beginners, in that very little paint is actually needed; it’s the alcohol that is important. So only put 1 part of paint to twenty parts of thinners. That is, one drop of the white paint to twenty similar sized drops of the alcohol, and you’ve got it.
Now one of the properties of the alcohol is that evaporates pretty quickly, so it’s an idea to use quite a large brush to paint the model with on this one coat. The brush can be washed in a little bit of the alcohol too, once you’ve finished.
A tip here – I use the old 35mm photographic film pots to mix paint in, usually a camera shop will be happy to give you a few of these rather than have them clutter up their premises. When I’ve finished with a mix of paint – and there’s always too much, then I pour any spare thinners and paint into a film pot that I keep for this one purpose, and let it settle out. The paint sinks to the bottom, and the alcohol becomes relatively clean. It’s probably not clean enough to use as paint thinners ( although after a week enough paint might have settled out that it is ) but it is good enough to allow you to use this to clean your brushes in.
Waste not; want not.
After the application of the acrylic with the alcohol, it’s then O.K. to just use water as the thinning agent for further coats of acrylic paint. This is what happens next, and I’ve added three or four very thin coats of a flesh mix to the face area. The mix is made up from Humbrol acrylic Flesh, Skull White and Orc Brown – the latter two are Games Workshop ( GW ) colours. The ratio of each colour should be around 2:1:1 respectively. As I’ve mentioned, this is then thinned with some water and painted in several coats.
A mention about the water. Some people use distilled water, some use tap water, I personally prefer to use cooled water from a boiled kettle, or alternatively melted ice cubes. I also add just one drop of washing up liquid to the pot of water, which will break the surface tension, and allows the paint to flow even better.
Having got a solid colour of acrylic established on the model, I tend to leave the piece for 24 hours before adding any oils to it. It’s O.K. to say that acrylics dry quickly, but they are still relatively soft for a few hours, and I need them to be fully cured before I start putting oils over the top of them.

Photo #2 shows the first addition of these oil colours, and as you can see, there’s not that much of a difference. I have used Winsor and Newton colours here – of artist quality – and the mix is as follows. Flesh tint – 3 parts, Mars Yellow ( or Yellow Ochre ) – 1 part, Titanium White – 1 part.
The mix of these is open to variation, and what I aim for is to make a colour that is similar to the skin tone that is needed for the particular model that I’m about to paint. I wanted a Caucasian with a bit of a tan, so I’ve pulled back slightly on the addition of the white. By adding more of the yellow – and it only needs to be a tiny bit more, an oriental skin tone can be made. By adding some Mars Brown, a more suntanned colour results, and this can be used for Caucasians who’ve been out in the sun for a fair length of time. The mix is variable; it’s meant to be, so that each figure painted is slightly different from any others.
I did get hold of some Flesh Colour from Reeves, and although I’ve not had chance to try it, it does look a lot less pink that the Winsor and Newton “Flesh Tint”.
The paint is applied to the face with a large flat brush, aiming to have a fairly even covering and making sure that the paint gets into any recessed detail. Once this is done, a fresh brush of a similar size is used to stipple the face, taking off any excess paint, but also clearing away any brush marks and evening out the amount of paint on the model.
Now to begin the shading; I’ve begun in photo #3 to paint on Mars Brown, adding this only to areas that will be in shadow. Obviously these will be in different positions if you’re having directional lighting effects, say a torch in a wall bracket next to the figure, but for most models, it’s accepted that light is falling fairly vertically either from a natural source ( the sun ) or if indoors, then a light fitting.
So, having placed these dark patches on the face of the model with a small brush ( I use a Winsor and Newton Series 7 no. 1 ), it’s time to start the blending process.


Photo #4 shows how I’ve blended the initial shadows into the lighter mid-tone oils, and I’ve used a soft synthetic brush ( Proline size no.2 ) to stipple the two colours together. Now to stop too much of the dark colour transferring to areas that I don’t want it, I make sure that I wipe the brush regularly onto a soft piece of clean cloth ( an old T-Shirt is ideal ). The idea here is to move the paint around enough so that the new additions of darker colour mix with the lighter colour underneath, but that the darker colour doesn’t migrate to areas where I don’t want it - like the areas that will remain mid-tone or others that will eventually be made into highlights.
In photo #5 I’ve added more of the Mars Brown. This second addition will deepen the shadows further, and as you can see, the paint added this time is well within the already established shadow area.


In photo #6 this dark paint is again blended in, being careful to keep it to the areas that will need to be in deepest shadow.
Now I can begin with the highlights. These are simply small additions of Titanium White( see photo #7 ), again placed on the model with a fine brush ( another Series 7 No. 1 )

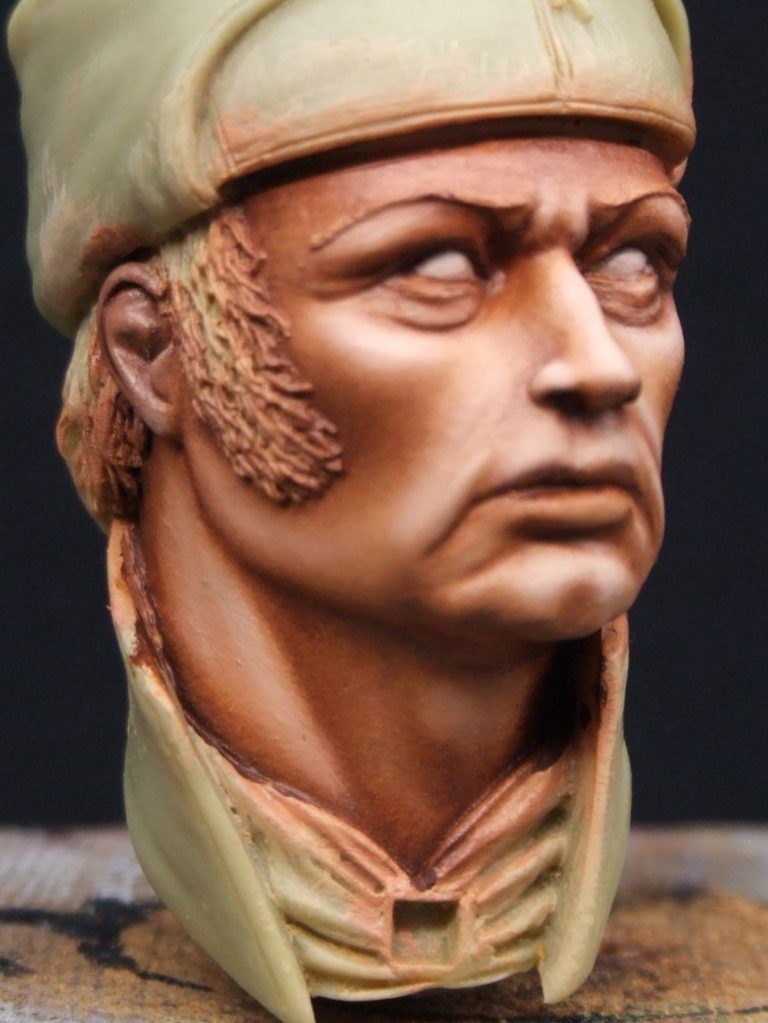
and using another soft clean brush the white is blended in to the mid-tone – see photo #8.
In photo #9 the face is finished off with the eyes, eyebrows and lips having been painted. The lips are some of the mid-tone flesh colour mixed with an equal amount of Mars Brown, this then having just a touch of Carmine added to it to make it slightly pink. The paint is added to the lips, and then some more of the mid-tone is used to add a highlight along the bottom lip only. After that, a thin line of Mars Brown can be added between the upper and lower lips to provide a definite split between the two.
The eyes…..Well to be honest, I think eyes need a small article all of their own, so I’m afraid you’ll just have to be patient whilst I find a good example that will allow you to see what I do clearly.

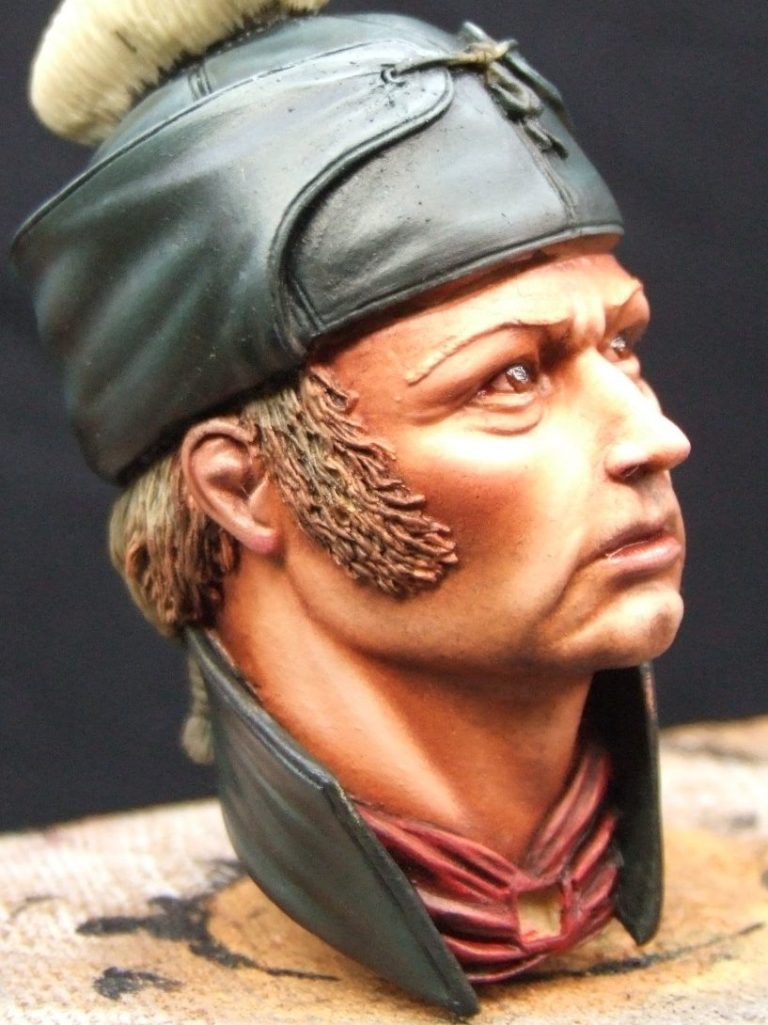
The final shot – photo #10 – shows the head completely finished. One rule I stick by is to frame the face – painting in the hair at least, and part of any hat, with undercoats of the correct colours. This makes the face colours look quite different from when they just have bare resin, primer, undercoat or even paint splashes spoiling your appreciation of the finished skin tones. I’d advise you to do this too, to frame the face, because if you don’t then the additional colour “noise” from having painted the face will detract from the finish and won’t give you a true view of the work done so far.
To be continued........
Next time I'll add details of painting the clothing.

Part Two.
Painting the clothing.
The undercoated model – as seen in photo #1 – has had an acrylic green painted on to it in several thin coats. I mixed the green from Games Workshop Moody Blue and Sunburst Yellow, adding just a small spot of Matt Varnish ( Tamiya X 21 ) to the mix, along with some water to make it flow.
Why add the matt varnish ?
It’s there simply to ensure that the acrylics go matt. This in turn will allow the acrylic undercoat to absorb more of the oil carrier from the oil paints, and help the oils it turn to go matt when they dry.
The picture shows the model after three or four coats of paint have been built up.
In photo #2 I’ve begun adding the oil paint. In cases such as this I prefer to establish the shadows, and paint on a mid-tone that will cover the rest of the area afterwards.
The oil paint used here is a mix of Prussian Blue, Mars Yellow ( both Winsor and Newton ) ,and a dab of Humbrol Matt Cote. I honestly couldn’t tell you the mix, as I just played about with the colours until it seemed right.
This dark colour is painted onto every area that will conceivably be in shadow, and then a soft brush is used to stipple it to remove any excess paint.
Photo #3 shows – rather badly, I admit – that the mid-tone has been added, and it’s edges stippled to run it in to the shadow colour. The mid-tone was simply a lighter shade of the dark green made by adding some more of the Mars Yellow, a small amount of Chrome Yellow and a little Titanium White to the shadow colour. If you look closely, the shadow areas can still be seen, although they have faded back closer in to the folds and wrinkles of the clothing. Probably the best place to see this effect is under the lower edge of the small leather belt that crosses the right of the bust’s chest.
Another note here. Do not wash the brushes in thinner ( White Spirit, Turpentine or Turpentine Substitute ) during the process of painting. When swapping from one colour to another, simply wipe most of the paint off the brush with a soft cloth. If there’s too much of a darker shade still held in the bristles, then load the brush with some more of the lighter paint, and using the soft cloth, work the lighter paint gently into the bristles. It won’t clean the brush completely, but will allow some of the darker paint to be diluted by the lighter colour. Again wipe off the excess paint, and then try again.
As for washing the brushes, I only do this at the end of the painting session, or once I’ve finished the section of the model I’m working on.


Back to the painting again.
Having established the shadows and mid-tones, I moved on to the highlights; the first additions of these can be seen in photo #4. Because Yellow is usually a weak and transparent colour, I’ll have to add this in two or possibly three passes, stippling each addition of paint in to the green that is already on the model. The best thing to do here is to try the yellow paint ( in this case Chrome Yellow ) on some of the mid-tone that’s still on the palette - to see how much it affects the green. Then, by adding a large area of the yellow to the model - and making further additions cover smaller areas inside the initial highlight - the lighter colour can be built up.
So, to continue; I’ve added some Chrome Yellow in photo #4,
and then in photo #5 stippled this with a clean soft brush. As you can see in the latter shot, there’s not much difference made to the green colour. That’s good, because the colour change will be gradual.


Photo #6 shows more of the yellow being added to smaller area this time,
and Photo #7 the effect once it’s been stippled in, and the model dried in a heated cupboard.


In photo #8 I’ve begun painting in the belts. This neatens up the model and stops the messy painting transferred onto them distracting the eye from the painted clothing
Photo #9 shows the upper body nearing completion, with the belts finished, and the shading and highlighting on the clothing can be seen much more clearly.


Part Three
Painting Leather Belts
This is a really easy way of painting leather belts on models, and is suitable for almost any scale either large or small.
Now before anyone says anything, I realize that the belt on this model should in fact be white, or an off white colour. Just bear with me, because this was simply the largest and most accessible belt on a model that I had handy. It won’t remain this colour when the model is painted properly.
With that said, we can begin. Photo #1 shows the oil paints laid out on a white tile. These, working from the top left, are Mars Black, Mars Brown, Mars Yellow and Titanium White. All these colours have dense pigment that covers underlying colour well.
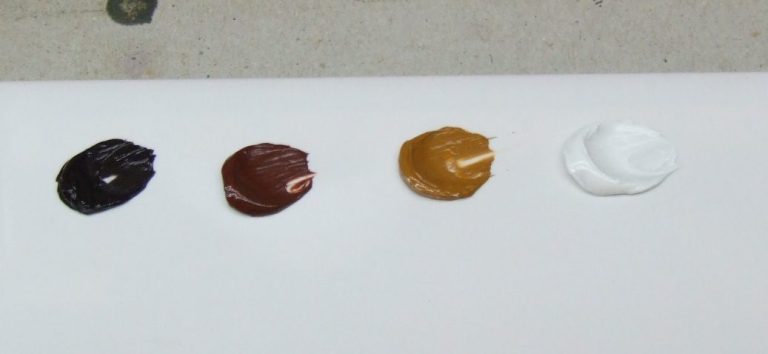
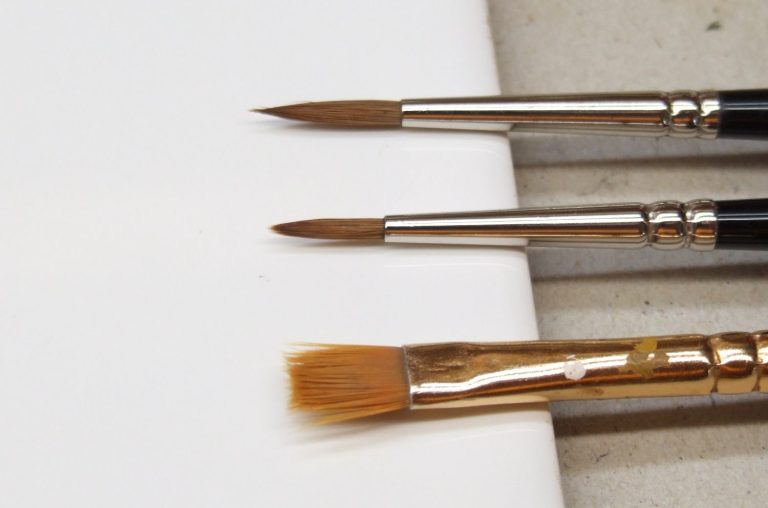
Photo #2 shows the brushes that are needed. In fact, only two were used, the wide flat brush at the bottom of the shot is for applying the initial colours, and the brush just above it was used for the details. The brush at the top wasn’t used at all.
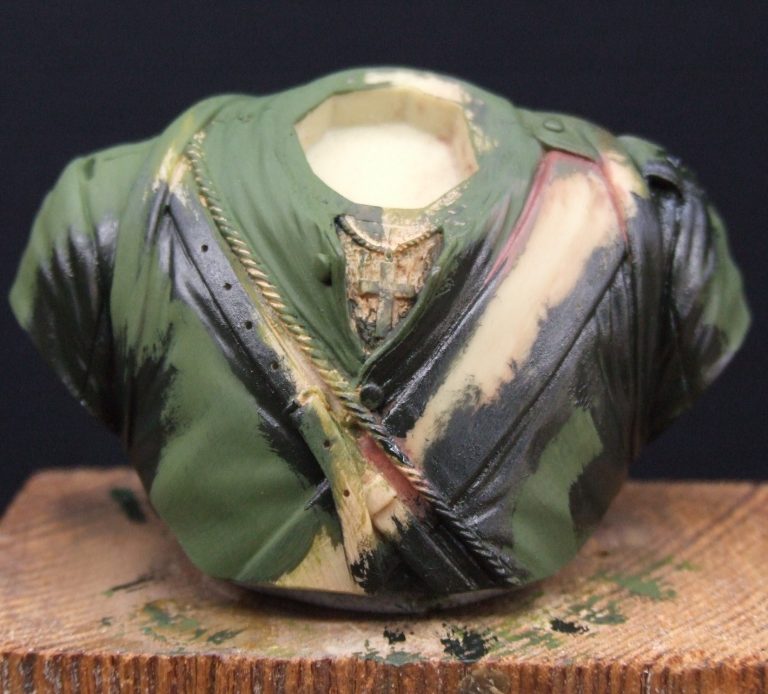
As to the model, well that has been primed, and the green undercoat for the tunic added ( See photo #3 ). The belt would normally be painted in after the tunic has been finished and had a chance to dry thoroughly. Unfortunately you’ll just have to use your imagination for that.
Enough waffle though, let’s paint.


I began by undercoating the belt area with some Swamp Brown acrylic ( Games Workshop ). I added three thin coats of this colour – and the result is shown in photo #4. You might notice that there’s a slight gloss sheen to the acrylic. This is good, as the undercoat won’t absorb too much of the oil from the finishing coats, and the satin finish of leather will be more likely as a result.
In photo #5 I’ve mixed some of the Mars Black and the Mars Brown, then applied this to the model with the flat brush. The sheen of the wet pain can be seen clearly here, and also the brush marks. The paint is quite a thin application, and the underlying acrylics can be seen in places where there are deeper grooves from the brushstrokes. On a smaller model, it might be advisable to just paint this dark colour on to the areas that would be in deep shadow.
After the dark brown was painted on, I wiped the brush on an old T-Shirt to remove most of the dark paint from the bristles. Please note; there was no use of thinner to clean the brush.


Some of the Mars Brown was then painted on with the same flat brush, just working from the top of the shoulder to about three quarters of the way down the chest. Again, the results of this are shown in photo #6. This time I’ve dabbed the belt with a soft T-Shirt after the paint was applied. This removes the brush stokes, and helps to blend the oils together even further.
Mars Yellow was then painted on to this, and although the brush will leave marks and make the area – from the shoulder to about a third of the way down the chest – appear shiny again, the soft T-Shirt can be used to dab gently at the belt so that the brush marks are removed – see photo #7.
Now for a new looking belt, this probably isn’t too bad. Some work could be done to refine the highlights and shadows, and perhaps some of the very dark brown used to strengthen the outer edge of the belt too. But this could probably be left as it is, especially on a small figure, and it’d be quite acceptable.
The next part of this demonstration shows how to make the belt look worn and distressed.


In photo #8 I’ve begun to add a mix made up from equal amounts of Mars Yellow and Titanium White. This is feathered on to the edge of the belt with the fine brush. By making the fine brush into a fan shape on the palette, the individual bristles paint on separate lines in a very fine manner. The brush stroke begins at the very edge and works in towards the middle of the belt. I tend to make about three or four strokes with the brush before wiping it on a cloth and then recharging it with fresh paint.
Once this part is finished, the fine brush is then wiped on the T-Shirt to remove almost all the paint, and then the same brush is used to go over the area just covered, using the exact same motion, but this time with no paint. This blends the colour in to the edge of the belt and can be seen in photo #9.


Although repetitive, the same colour is used on the same brush to apply more of the paint, working in exactly the same way. The strokes are slightly smaller, and the paint is applied in a slightly lighter manner, the results gained are in photo #10.
In photo #11 I’ve mixed quite a bit more Titanium White into the pale yellow mix – roughly 1 part Mars Yellow to 3 parts of the white. This is then applied just to the edges, working in the opposite manner to that used previously, and approaching with the brush from the outer edge of the belt. The tips of the bristles are then used to just disturb the already wet paint on the belt, and to leave a broken edging of pale paint.
There’s not that much of a difference between the two pictures ( #10 and # 11 ). But without the lights and camera leeching out the colour, when you do this, the difference will be more obvious.
Again, the belt could be left at this stage; there is obvious wear to the item, and it looks a bit more interesting when compared to the belt shown in photo #7.


However, there is still more that can be done to age the item.
In photo #12 I’ve added gashes and slashes to the belt to hint that the wearer has been pushing through brush, possibly been slashed at with knife, bayonet or a sword, and generally make the belt look totally abused.
Again this addition is very simple. By flattening out the bristles on the palette for a second time, a chisel like point can be achieved on the brush. Using it at it’s sharpest; the brush can be swiped over the belt, having charged it with some of the pale yellow paint.
As the brush travels over the wet paint, it puts down some of the light colour and by accident picks up some of the dark colour. This dark colour can then be used to add the impression of cuts and splits to the edge of the belt.
So long as the brush is wiped on the soft cloth after every alternate pass, and then recharged with fresh paint, the painter can make the belt look as abused as he or she likes.
A closer view of the finished piece can be seen in photo #13.


To Finish off
I think it’s already obvious that I tend to paint in sub-assemblies, I find this easiest for how I paint a piece, although sometimes joining one or two of the parts together works, but in the main I paint and then assemble areas once completed.
It’s something I’ve done almost since I began painting figure with any seriousness, although it isn’t the only way of doing things. Steve Walker – a superb painter – assembles everything and then paints, beginning at the top of the model and gradually working downwards. He says that, for him, “if I can see it, then I should be able to get a brush to it” and having seen the transformation of a model that he’s half way through painting, with bare metal on the lower body and legs, to a fully complete face, headgear and upper chest, it’s breathtakingly gorgeous.
However, painting is a personal thing, we do it for our own pleasure, and the methods, materials and genre are there to provide us with the escape into a smaller, quieter world are for us to control and decide upon.
But to return to this model…..
Having painted the face and clothing, I need to run through the painting of the equipment.
Although the painting of this model has been split into several parts, that is to simply aid the flow of how each piece is painted and written about. In actual fact, I probably work on all the areas at the same time, allowing the oils to dry on one part, whilst moving onto another.
Again, the reason being that the paints remain wet for an extended period of time compared to acrylics, and I’m ham-handed enough to put my fingers on wet paint if I don’t put a section to one side to allow it to dry fully.
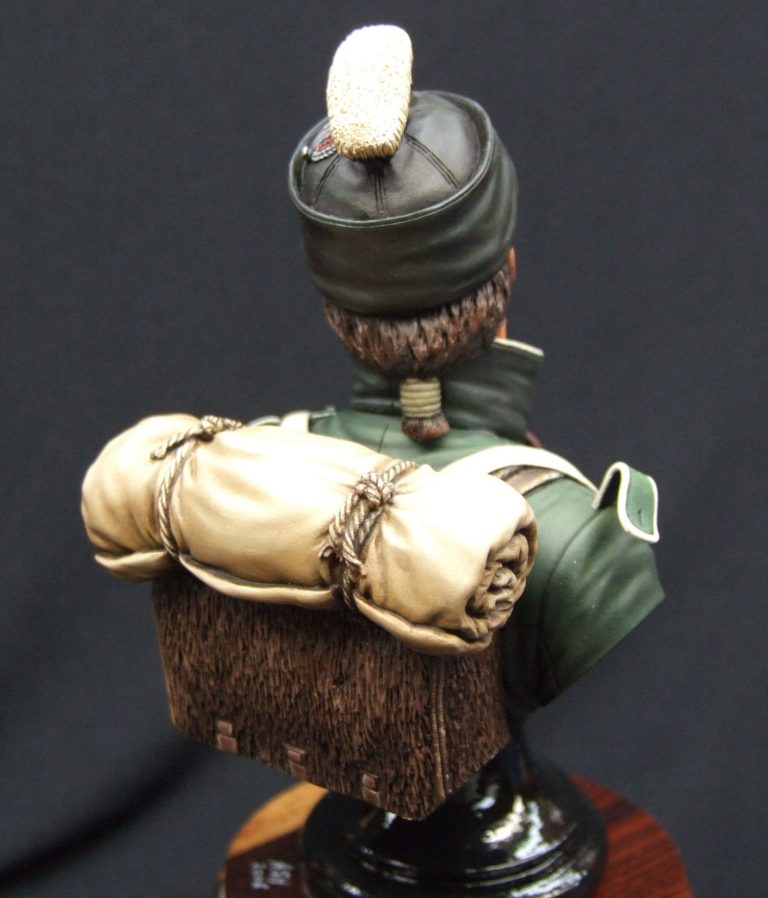
In the case of this article there isn’t that much in the way of equipment, a backpack and bedroll shown here in photo #1.
There were a couple of small air bubbles in the resin to fill on the side of the bedroll, nothing to worry about, but best to do them now that hope that they won’t be seen.
I’ve primed the resin as usual with a thin wash of a flesh colour mixed with Isopropyl Alcohol, allowing this to dry and then painting on a red/brown acrylic onto the backpack.


Photo #2 and I’ve added a coat of Burnt Umber oils to the backpack, thinning the paint with a small an=mount of White Spirit to allow it to flow a little – think of the consistency of double cream – and using a large brush to get the paint into all the details.

Photo #3 and I’ve added some Buff Titanium Oils to the raised detail. This is done with another large brush, adding a little of the pale paint to the bristles, then wiping the brush on a soft cloth to remove most of the paint. The area I want to lighten is then very gently painted, dragging the brush in a downwards motion, but only just touching the surface of the model. After each pass, the brush is wiped on the soft cloth, recharged with a small amount of the light paint, wiped on the cloth to remove the excess paint, and then gently applied to the model again.
It’s a slow process to begin with, but as you get used to the method, it speeds up and becomes a natural repetition.
Why wipe the brush after it’s touched the model – to remove any of the dark coloured oil paint. This is a common problem for painters beginning with oils, in that the area being painted ends up looking monotone and muddy.
Put simply, it’s the “plasticine principle”. Think of when you were a child, you had plasticine in a vast array of lovely colours that eventually turned into a single mass of brown after repeatedly being used to make different things.
Same with oils, if you don’t wipe the brush after it’s touched the model, then any paint lifted from the surface, and believe me, it’ll be there, will go to contaminate anything you touch afterwards.

Washing the brush isn’t an option at this stage, because White Spirit will remain in the bristles and thin the paint unintentionally. So the best thing to do is to remove as much of the contaminated paint as possible and recharge the brush with fresh paint from the palette.
As more light colour is added, the texture begins to stand out, and mid-tones and highlights begin to surface. Photo #4 and I’m happy with the backpack and have allowed it to dry. Also in this shot I’ve undercoated the bedroll with an acrylic mox of Desert Sand and Skull White.
Photo #5, and here’s the fun of writing articles, I have actually added a mix of Vandyke Brown, Mars Yellow and Titanium White oils over the whole bedroll, and then added more of the yellow and white to lighten the mix, blending this in to create mid-tones and using a coarse brush to stipple the paint on to create a slight texture.
Small spots of lighter colour are added to selected areas, and then blended in using a larger soft brush. More white is added to build highlights and the overall result is that in this shot you actually can’t tell much if any difference from photo #4.
Ain’t article writing fun !


However, photo #6 does look like I’ve not just been sitting at the bench having a brew and a biscuit, and the texture is visible. What is of note is that there are very few shadows, yes, some of the really deep creases have them, but as we’re working to the idea of the light source being above the mode, that light will stop deep shadows being visible from this angle.
I have added some darker colour into the braided detail of the ropes tying the bedroll up, these are more to qualify the detail and the possibility that grubby hands have been used repeatedly to tie up the bedroll. In hindsight, I think I should have made more of a difference in colour between the ropes and the bedroll, but that’s one to think about next time.
Once the backpack and bedroll had fully dried, they were added to the rest of the bust, and a suitable plinth found to fasten him to.
The finished shots show the completed model.
The painting looks a lot more complex than it is once you know how it’s done, and the ability to be able to blend oil paints smoothly is what attracts me to use them, rather than to use acrylics all the time.
I liken it to having a tool kit, you wouldn’t use a screwdriver to knock in a nail, so using the appropriate tools – be it type of brush or type of paint – is simply a case of “right too for the job”.
Do I use acrylics for anything other than undercoats ?
Yes, and usually lighter coloured areas are easier to control contrast on with acrylics, particularly in smaller areas of a model.


We need your consent to load the translations
We use a third-party service to translate the website content that may collect data about your activity. Please review the details in the privacy policy and accept the service to view the translations.