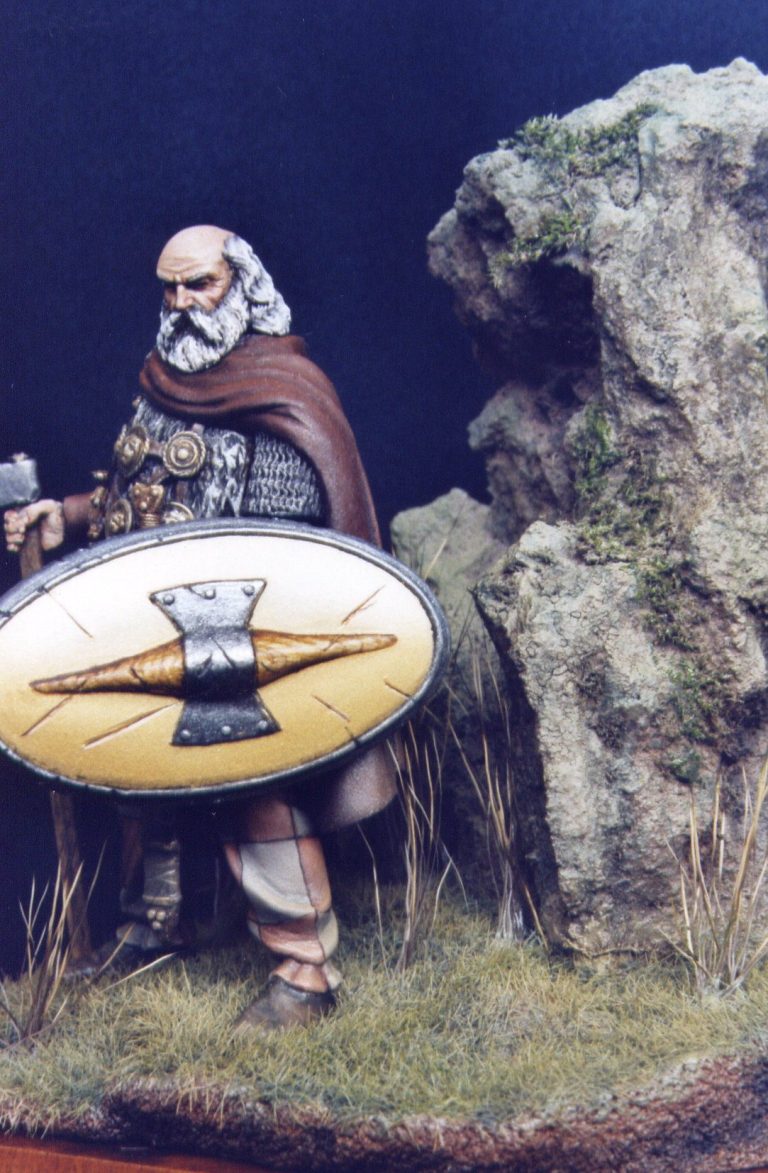
Celtic Chieftain
54MM White Metal casting from Pegaso of Italy
Article in Military Modelling magazine 2005
I will freely admit that I really like Pegaso's offerings. In fact I've been buying them for nearly thirty years or more, and have an embarrassingly large grey army with their box livery on my shelves.
They very rarely disappoint, and they produce some really good looking pieces that fasten together cleanly and paint up well.

The kit.
These little offerings from Pegaso really are very nice. Everything about them seems to be well produced; from the colourful box, with it’s pictures of a painted and finished example, the foam packing to protect the parts on their travels to you the modeller, through to the casting of the parts from excellent master sculptures.

The parts for this kit are laid out in photo #1, and I’ve done a minimal clean up of them with a fine file and a craft knife. There’s very little to do here actually, as the kit had no faults, and the lines caused by the two part moulds were very small and easily removed. The only difficulty really is the removal of the pour vent from the back of the shield. As the shield has a slight curve, and the vent is positioned on the inner face of the curve, it is rather awkward to get to with a conventional knife or file.
Photo #2 shows the dental pick that I use for cleaning such problems as these. This curved tool can be used to pare away the excess metal a small amount at a time, and then to polish the surface so that any tool marks are removed.

One alteration I did make was to remove the axe haft. I cut this away so that just the hand and the axe head were left, and then drilled up into the bottom of the hand so that a thinned down cocktail stick could be used to represent the wood. This can be seen in photo #3.
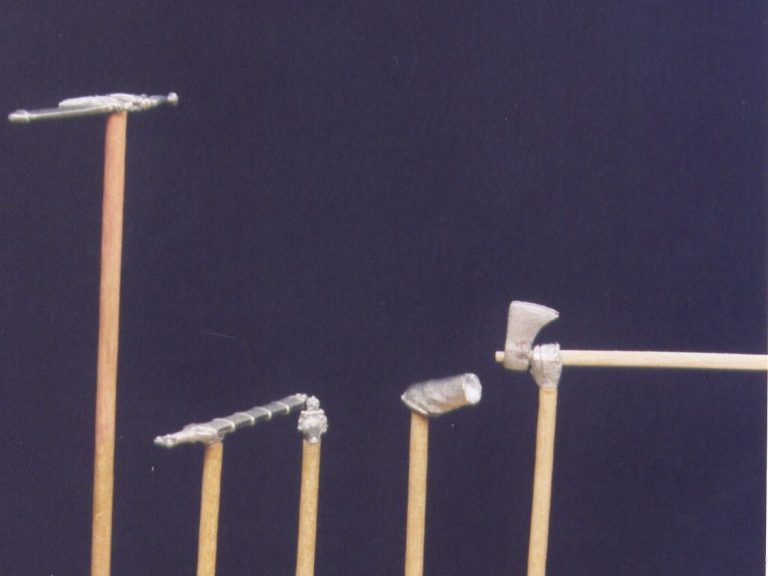
Also in this shot, you can see that I’ve fastened the smaller parts onto cocktail sticks with small amounts of superglue. The ends of the sticks can then be placed into several drilled holes in a block of wood. This allows the parts to be painted easily without being held directly, and once dry, they can be snapped off the holders and glued onto the main casting.

In photo #4 I’ve begun painting the main casting. I began with a primer coat of Games Workshop Skull White, mixing the first application with a small amount of Isopropyl Alcohol. This stops the paint beading on the bare metal, and gives it a better grip onto the surface of the casting.
I’ve completed the small area of mail shirt, using a shadow colour mixed from Games Workshop Chaos Black, and Chainmail acrylics, with mid-tones of just the Chainmail colour, then some highlights with Winsor and Newton Silver Ink.
Also shown in photo #4 is the completion of the grey colour of the trousers. I’ve used oil paint for this, beginning with a mid-grey made from Titanium White and Mars Black, adding a little Mars Yellow to kill the starkness of the colour. This mid-tone was painted onto the model, and then the shadows were added by blending in a little more of the Mars Black. For Highlights I painted on more of the Titanium White with a small dab of the Mars Yellow, building up the tops of the creases and areas that would get heavier wear.
Photo #5 shows a lot more of the model being completed, quite a jump in fact; and here I’ve added the burgundy patches to the trousers, although they do need outlining yet. I used Mars Brown for these, adding some basic shadows of Mars Black to the undersides of the creases so that the shadow on the grey areas followed through into the burgundy. For highlights I added using a little bit of a Titanium White / Mars Yellow mix.
For the bottom edge of the shirt I used some more of the Mars Brown, shading this with a little Mars Black, and only using Titanium White to highlight. The loss of the Mars Yellow in the mix for the highlight manages to make the two areas appear to be a slightly different colour.
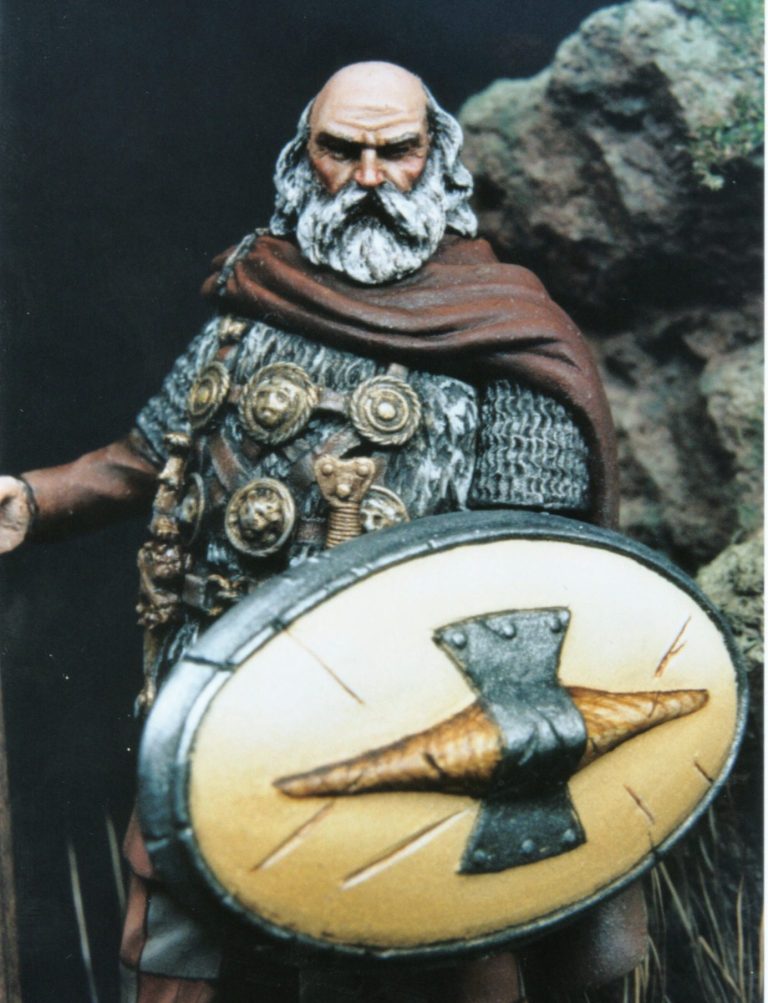
The fur vest is painted to represent a wolf skin, and began as a thinned coat of very dark brown oil colour ( Mars Black and Burnt Umber ). To this I added some basic mid-tones of Mars Yellow, and then topped off with some Titanium White. This last colour was quite a thick application, allowing brush marks to remain so that the hair effect was enhanced.


I wanted the model to remain rather monochromatic, and although a man of this status might very well have had richly coloured clothing to denote his wealth within his community, I thought that if he was actually taking part in a skirmish, he would probably have dressed in more muted colours.
The brown colouration was therefore carried over to the cloak and the shoes, using the same palette of colours, but altering the mix so that slight differences in colour were painted onto each item of clothing.
The belts too were painted with a mix of the brown colours already used, and as the Roman honours are captured items, I thought that the belts would have seen some use. I added cracking and scars to the leather belts, using light colours on the edges to enhance the look of age to this area.
Again, working with the idea that this chap is a veteran of the tribe, I painted the face to have a ruddy complexion, adding more Mars Brown to the mix for the shadows than normal, and also adding some liver spots to the flesh over the forehead. It’s worthy of note here that a lot of the “age” imparted to the figure is added by paining on the wrinkles.
At this scale, “less is definitely more” as the saying goes, and you can’t just add wrinkles everywhere and anywhere to get a craggy look to the model. The forehead for example very rarely has more than four lines running across it, more usually three in fact, and adding seven or eight will not look authentic. Remember – although you may well know someone with a really wrinkly face, you still have to try to aim for the normal acceptance of that which “most people” have seen. So if you’re trying to add age to a face, then paint lines radiating from the outer edge of the eyes ( usually two or three each side ),.

perhaps some lines running down to the jaw line from under the cheekbones, and then the “worry lines” across the forehead – as mentioned stick to a maximum of three. Creases can also be added to run up vertically from the nose too ( as though the face is scowling ). If the neck is at all visible, then a couple of creases running horizontally across it can aid in the aged look of the subject
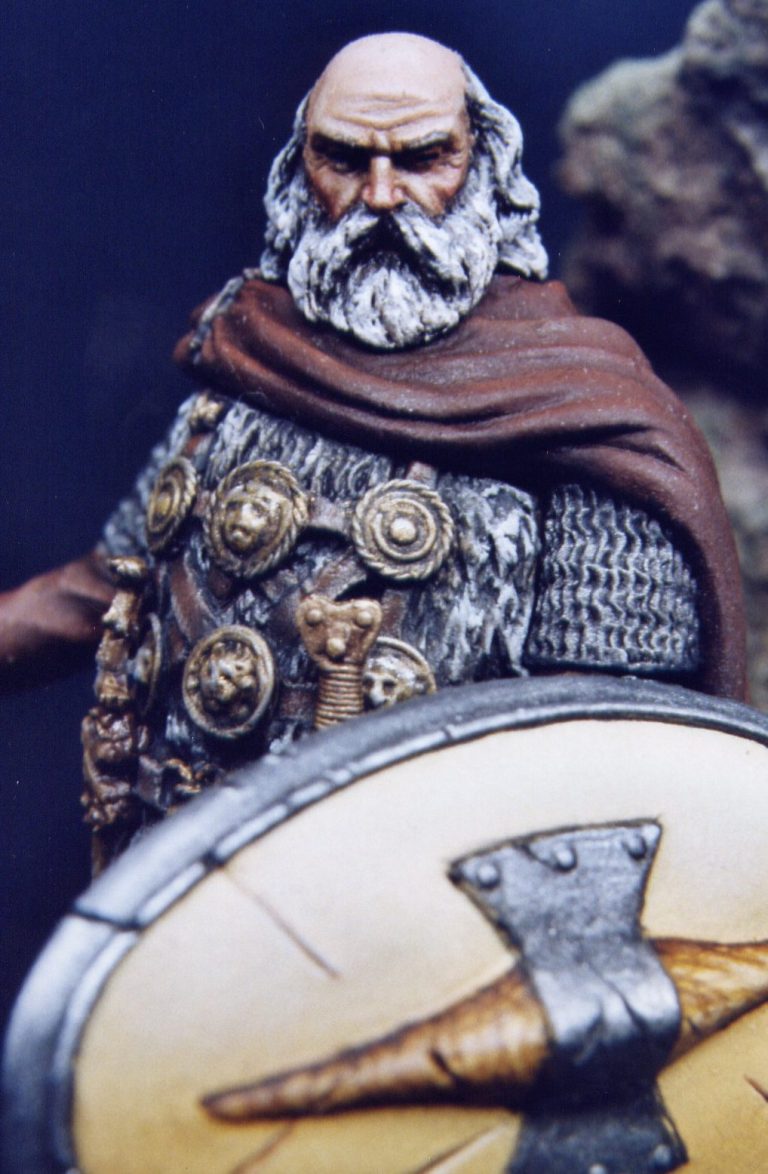
Another addition to hint at age is redness to the cheeks and particularly the tip of the nose. A tiny amount of Carmine can be added and blended in, but don’t add too much as it can look a little like a clown’s red nose very easily; the same goes for the cheeks. These features can all be seen in the close-ups in photo #6.The grey beard also strengthens the idea of age, and this was painted in a very similar manner to the wolf skin vest.
This colour scheme was all very well, and the figure was taking shape now, but it was all looking a little dark. So for the shield face I used Mars Yellow and Titanium White to paint on a brighter coloured leather compared to those colours previously used. I added several slashes to again indicate that the chap has seen a fight or three, using the same colours with a little Burnt Umber to paint in the wood grain on the shield strengthener. These same colours were used to paint in the planks on the back of the shield.
The shield rim and the boss were added with the same colours as for on the mail, being aware that the shield was being held at a particular angle, and that the shadows and highlights would fall in a certain way.

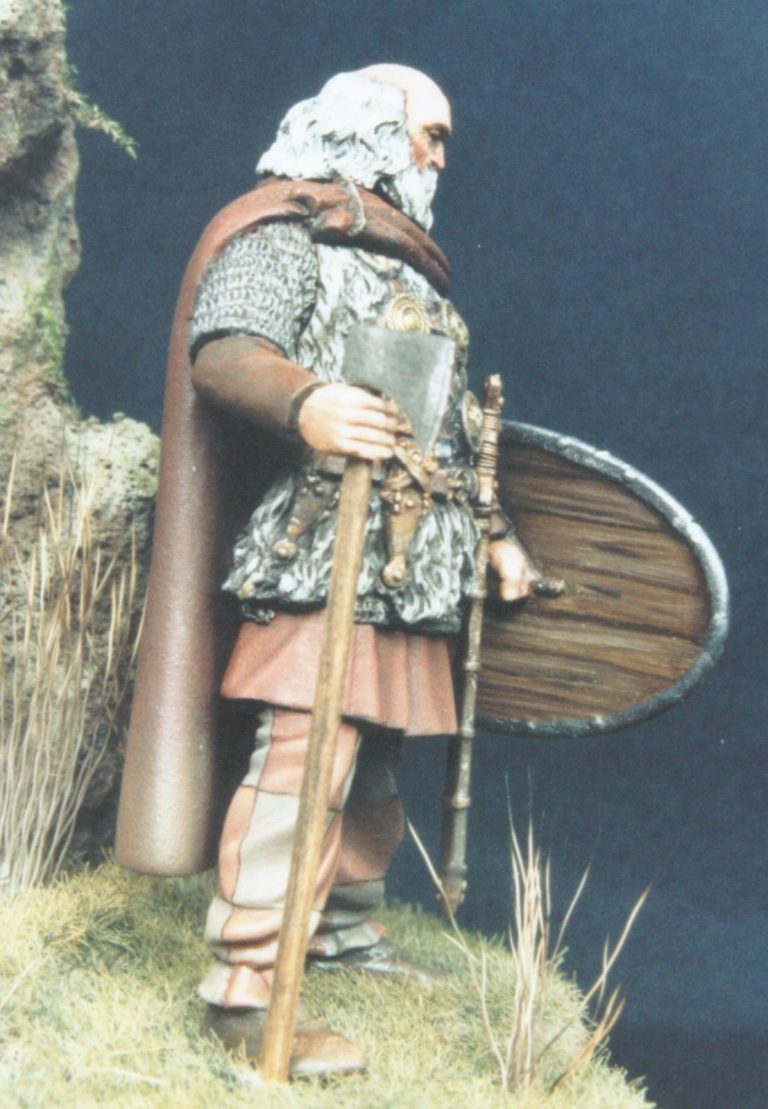
In the final shots you can see the addition of the sword, dagger and the hand with the axe, these having been painted with the aforementioned brown palette so that the colours remain muted and sympathetic to one another.
I’d done one of the other Celts from Pegaso, and wanted to continue the groundwork theme through from that figure to this.
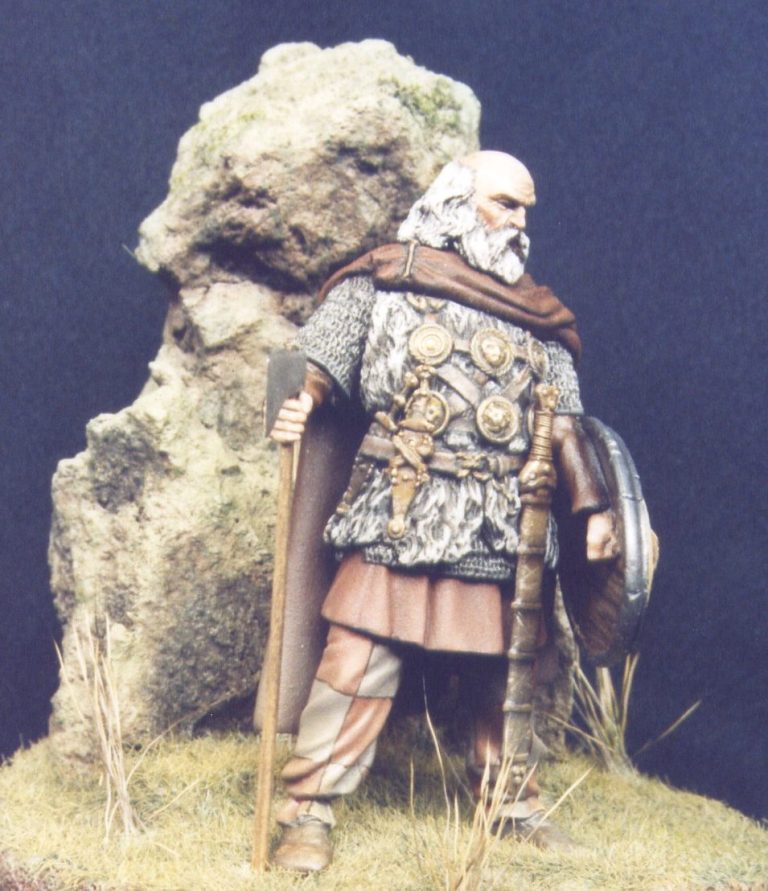
I used a similar size pedestal base from Armstrong Bases, and added some Milliput to the top of it to form the basic outline of the groundwork. I then added a piece of coke ( must find some more of this as it looks rather good ), and built more Milliput around it so that it not only held it in place; but also so that the coke was blended into the groundwork.

Once dry, the Milliput was painted with some Burnt Umber oils, and then some white glue applied ( after the paint had dried ) and Static Grass added. This latter was stained with washes of Humbrol Green acrylics – working from a dark green through mid-green to a sand coloured yellow.
To finish the groundwork off, some longer grass was added – this being dyed deer hair, cut to size and glued in place with superglue.
Final words.
I really do like these 54mm figures from Pegaso. Having got into the habit of painting small scale figures ( because of a long-winded house move ) for space and transportation reasons, I’m finding it comfortable to carry on with this scale of model, if not necessarily with the Celtic subjects.
I’ve built up a stock of Pegaso 54mm model kits over the last couple of years; mainly these Celts, along with most of the Gladiators, and although they might not appeal to everyone, I can say that there’s very few of them that I haven’t acquired to go on my “to do” shelf.
They’re nicely sculpted and thoughtfully engineered so that there is little need ( if any ) for filler, and the models can be painted in separate pieces to allow the modeller maximum access to the detail with his or her brush.
Definitely a winner, and now, there seem to be additions of Celts to the 75mm scale – well, we’re all getting older, I suppose the eyesight’s gotta go sometime !


We need your consent to load the translations
We use a third-party service to translate the website content that may collect data about your activity. Please review the details in the privacy policy and accept the service to view the translations.