Life-Sized Bolter Guns
3D Printed Space Marine Weapons from Games Workshop's 40K Universe
Painted in 2018
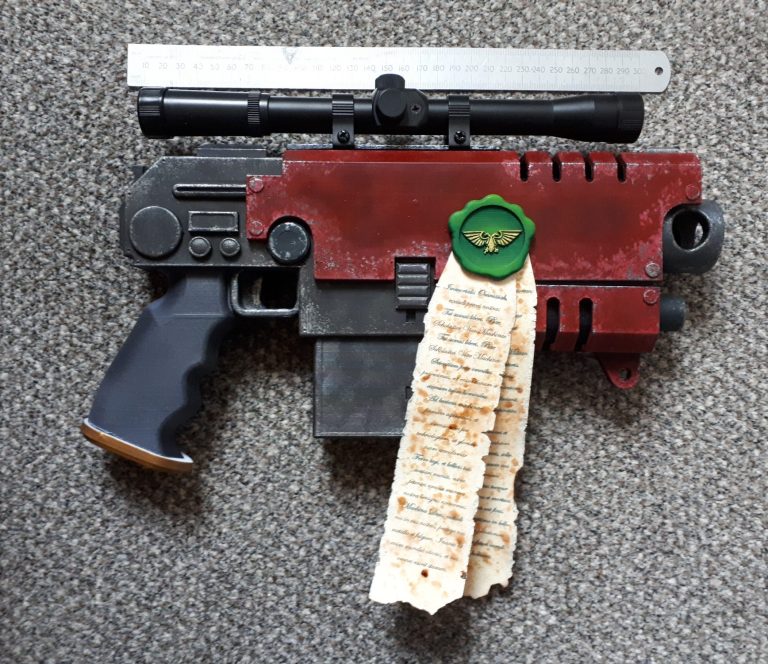
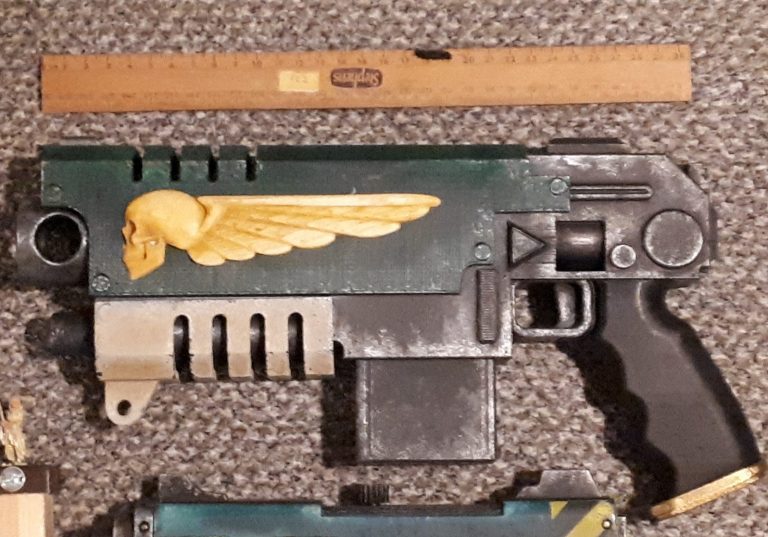
As an avid trawler of the Internet, I saw these advertised on Facebook Marketplace and thought “They look cool !”
But I’m always a bit wary of things, so just initially ordered one of the small handguns.
When it came I was pretty impressed with it, bearing in mind this was in 2018, so the technology for 3D printing was still a little coarse when it came to image slicing and reproduction. However, these were 1:1 scale and I thought that I could put up with the visible slicing of the printer; it would enhance the machined and fast production of the Imperium in the forty first century.
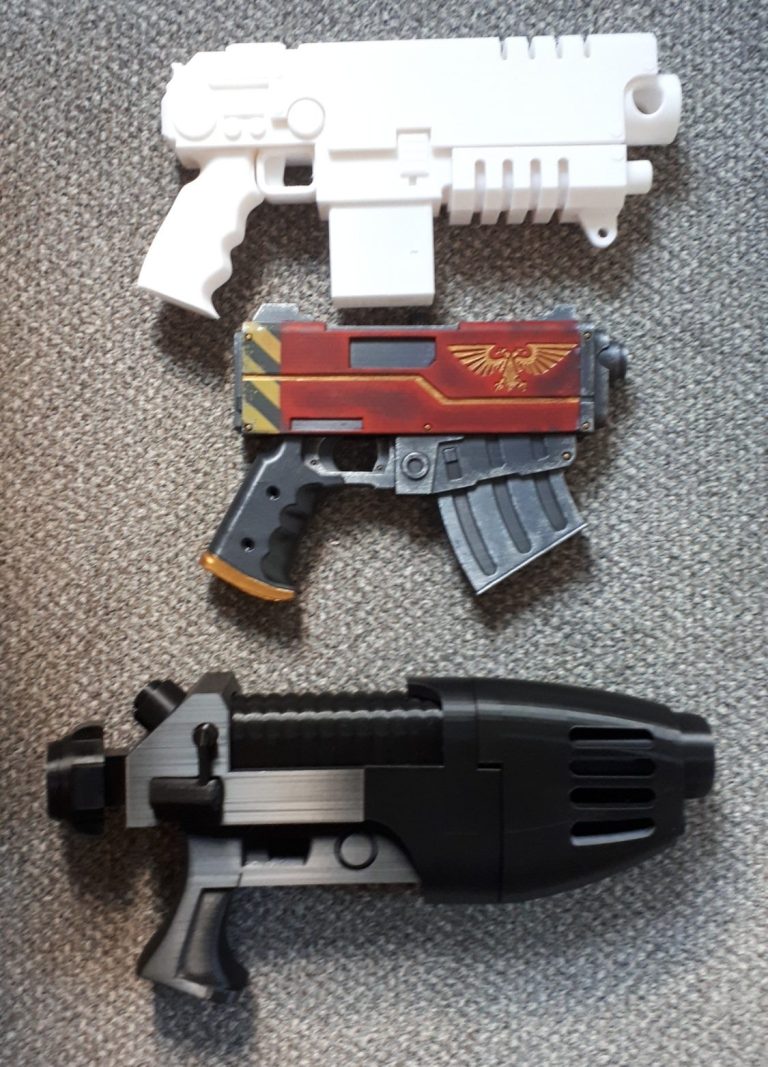
SO I ordered another of the small handguns, two larger bolters and a plasma gun. Well, it’d be rude not to ( see photo #1 ). There was also a chain sword, but come on, one has to draw the line somewhere.
I did have a cunning plan, in that my son, Thomas, loves the Warhammer 40K universe, and when you have children of whatever age, Christmas is always coming.
In all honesty, painting these up used a lot of the methods I normally use on an AFV, beginning with an initial primer coat of Halfords Grey primer, followed by a couple of coats of a metallic dark Steel colour from Halfords they were ready to start adding colours.
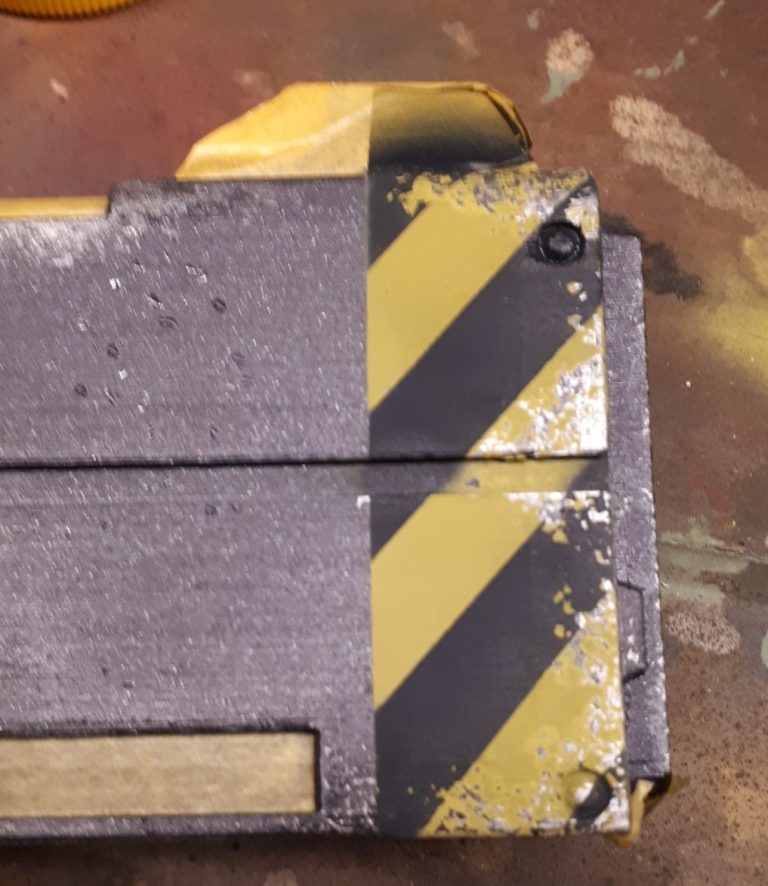
I left this to dry for a few days, then marked out a section at the rear of the gun body with masking tape and used a sponge with Marmite on it to dab at the areas that would see most wear. I then sprayed the whole of the back end with an off yellow Tamiya colour. Allowing this to dry for about an hour, I then added more masking tape to create the places that would have black chevrons, went over the area again with the sponge and Marmite and then sprayed over some Tamiya Black paint.
I waited about half an hour before stripping the tape off and then washing the back end of the gun with a soft brush, detergent and water. The results can be seen in photo #2.
There is some masking tape still on there, this is masking the rear sight rail and a slot towards the bottom of the main gun body, both of which will remain steel coloured.
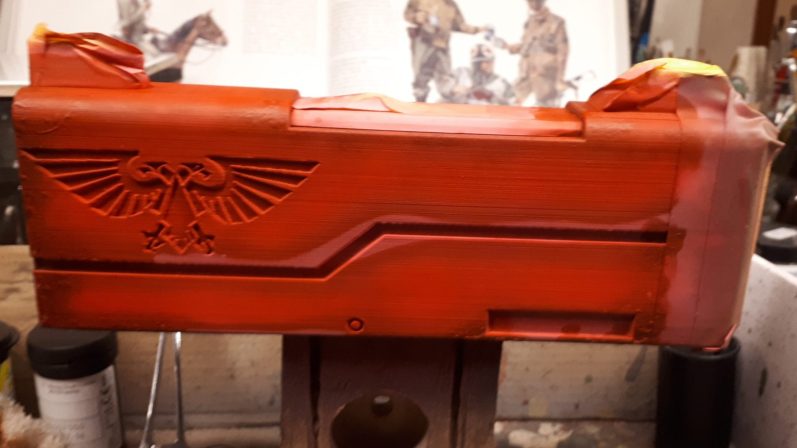
In photo #3 I’ve masked off the chevroned section at the back of the gun body and have then gone over the rest of the gun with a sponge and some Marmite, stippling it onto those areas that I think will get wear or damaged during heavy use.
You can see in this shot where the Marmite is leaking under the paint although it will tend to leave a spotted or scratched effect when it comes to washing it off. Also I learned at this point that Isopropyl Alcohol, when added to some paints like this Tamiya Red, makes the finished and dried colour appear pink. It then needs some other red or a varnish to bring back the true colour.
Photo #4 shows the rear end of the gun body, and here I have added the Marmite – which looks like brown rust – to the steel colour prior to spraying it red.
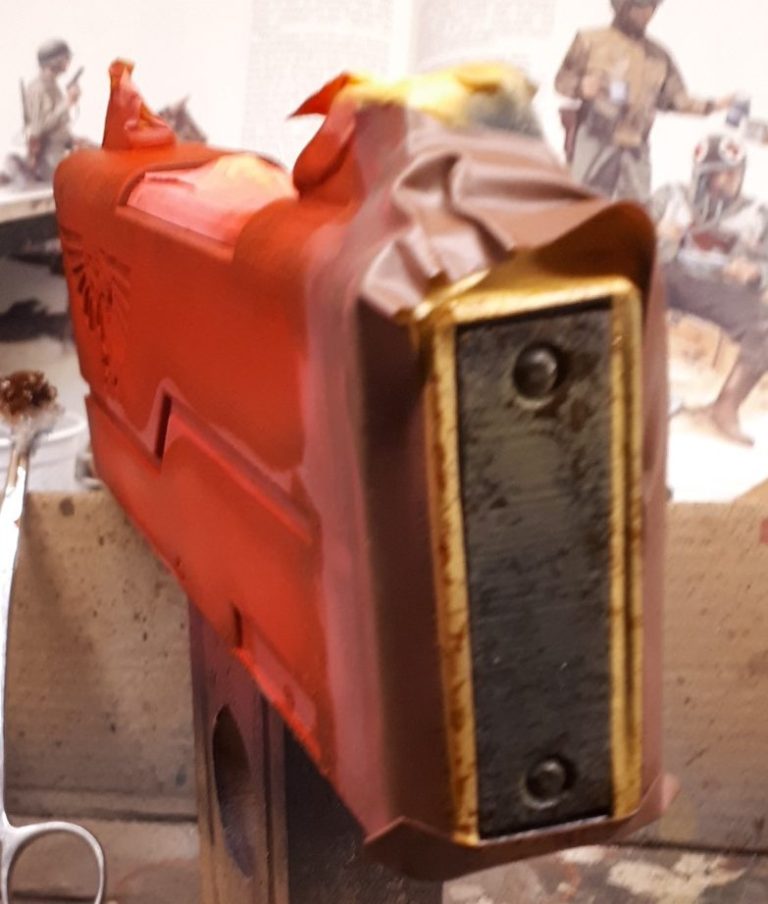

With the masking stripped off, this is what the gun body looks like – photo #5 – before it’s washed to reveal the paint chipping effect.
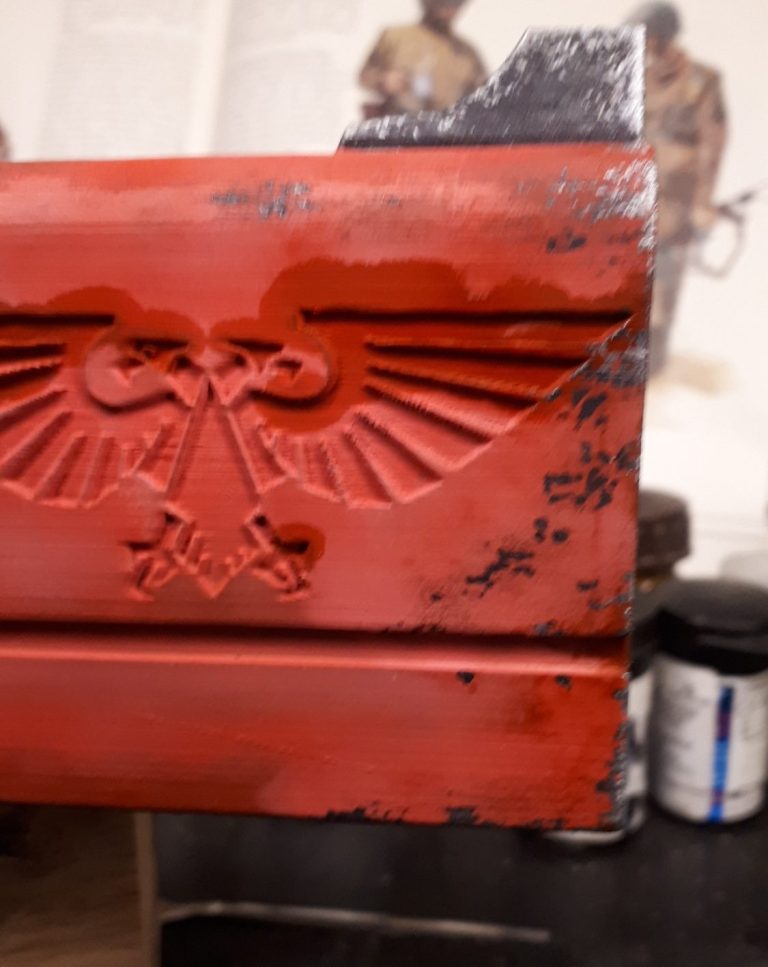
And in photo #6 you can see the front end of the gun body, having been washed and the chipping effect revealed. The different colour around the top of the eagle motif is simply water that hasn’t dried off yet. Once it does, the whole gun body will be a dark pink colour – lovely !
Photo #7 shows the back end of the gun body, and you can see the layered effect of adding the Marmite between spraying the black over the top of the yellow.


And continuing that idea, photo #8 shows the rear of the gun body after painting and washing, and the resultant chipping effect. I actually felt that there wasn’t enough chipping on this part of the gun, so went back and repainted it.
Photo #9 shows the difference, although I have then coated this with Tamiya’s Clear Red lacquer to get the red to return from that pink colouration.


Of course we need the purity seals from the Adeptus Mechanicus and the blessing of the Machine God of Mars prior to the issuing of the handgun to a Marine, and in contrast to the red, I thought that a nice green seal would stand out. Again the lined print slicing can be seen in the centre of the seal, but I’m still convinced that having cleaned it off the outer edges, it looks OK.
Having bought the larger Bolters, and being pleased enough with the effect I’d got of the smaller pistol, I began painting two of the larger and another of the smaller ones.
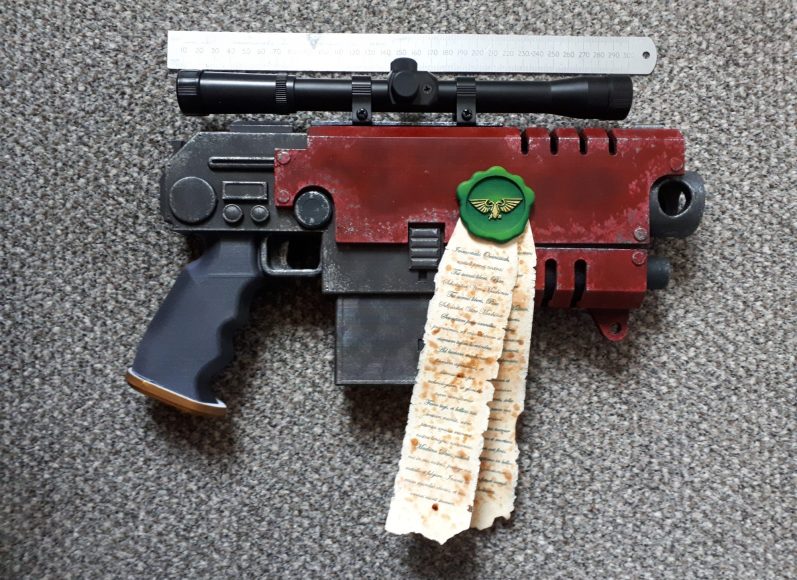
The ones for Thomas would be in a green and cream livery, whilst the second one for me would be in the same red.
Shown in photo #11 is the finished red Bolter, with a conventional sight attached, the purity seal in place along with the magazine and grip.
The muzzle on this is detachable and I made a longer barrel from some pipe and a universal push fit pipe fitting. I’m not sure that marines lower themselves to the level of sniping from a distance, them being gung ho and rushing into face the enemy toe to toe ( Seems a little silly and short-sighted to me ), but maybe the survival rate of marines would be a bit higher if they did have snipers.
Photo #12 shows a close up of the purity seal text. I adapted the Christian Lords Prayer for this, thinking that it might be something that would transform from one faith in the present to the adaptation of worship of the barely alive, but deified Emperor in the 30th and 40th Millenniums. Oh, I translated it into Latin too,


Moving on to the pistol and bolter that I did for Thomas, The pistol is shown in photo #13, which looks rather good in the green and cream livery, and the red seal works well in contrast.
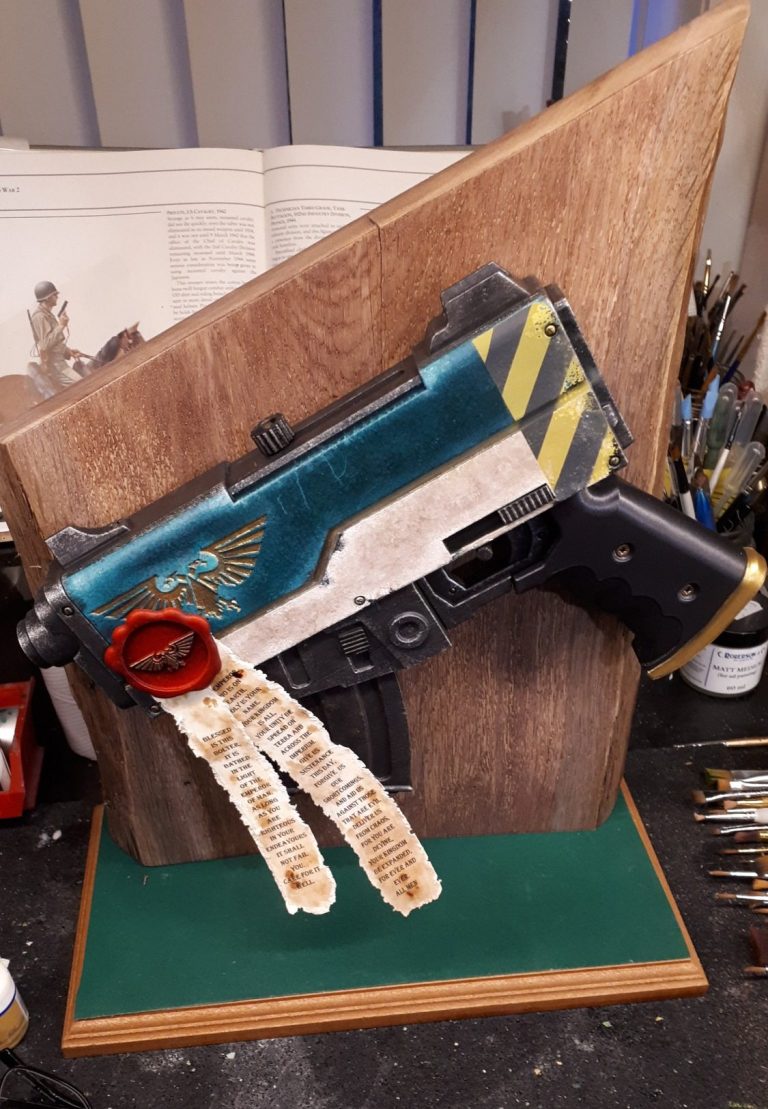
The guns lacked presentation though, so I needed to think of a way to display them and came up with an angled piece of wood taken from a reclaimed plank of Portuguese oak, cutting it to shape, planning it flat and sanding it smooth. After varnishing it and fastening it to a plinth, the angle of display for the gun was marked out and a couple of holes drilled into the upright part to support the gun – photo #14.

Photo #15, which I probably should have shown earlier, shows my bolt pistol without the purity seal and in the process of getting the red colour back to where it should be. This was a mix of adding Carmine oil paint to the middle sections in a cloud pattern and scrubbing it with an old brush to blend in the edges, re-applying more over a smaller area and more scrubbing with an old brush to blend it in.

Photo #16 is the other side of the red bolt pistol, with the sight installed and the purity seal on the other side. It looks a bit open and unadorned, but as all the Space Marine models I’ve seen have been right handed, this side is going to be against the body armour if held across the body, so having no decoration or anything to catch on anything is a good idea.

A close up of the front end of the gun and again the fine pitting and chipping of the paintwork can be seen – photo #17.

Photo #18 shows Thomas’s bolter, again a lot of use and wear is evident, stippling the dark steel colour with a couple of different shades of silver, gradually working to a lighter colour balances out the wear on the body with the areas that remain metallic.
The purity seals on Thomas’s gun are in English, photo #19 shows them prior to being joined to the seal and the adapted Lords Prayer can be read clearly along with a blessing and orders to care for the weapon on the second script.
I’d printed these on a normal printer so when it came to adding damage to them I had to be a bit careful with any liquids used during the aging process. Inkjet printed things don’t react well to liquids, so whilst coffee granules were sprinkled onto the scripts, only a small amount of moisture was sprayed on to make the coffee spread and stain the paper.
I’d tested out the idea of burning the edges of the scripts to damage them, this didn’t work too well as controlling the areas that burned was more difficult than I’d thought, it was far easier to dampen the edges and use a dull blade in a craft knife to tear the paper edges.
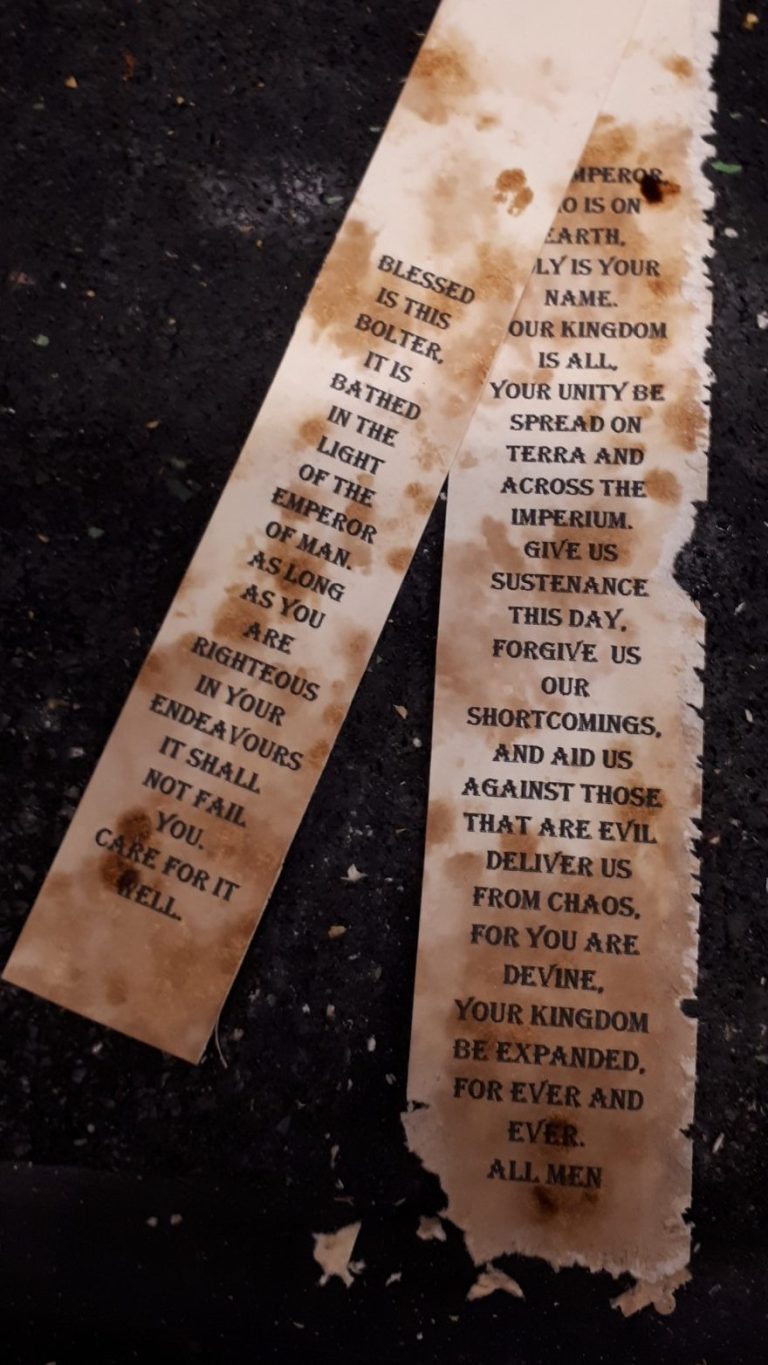

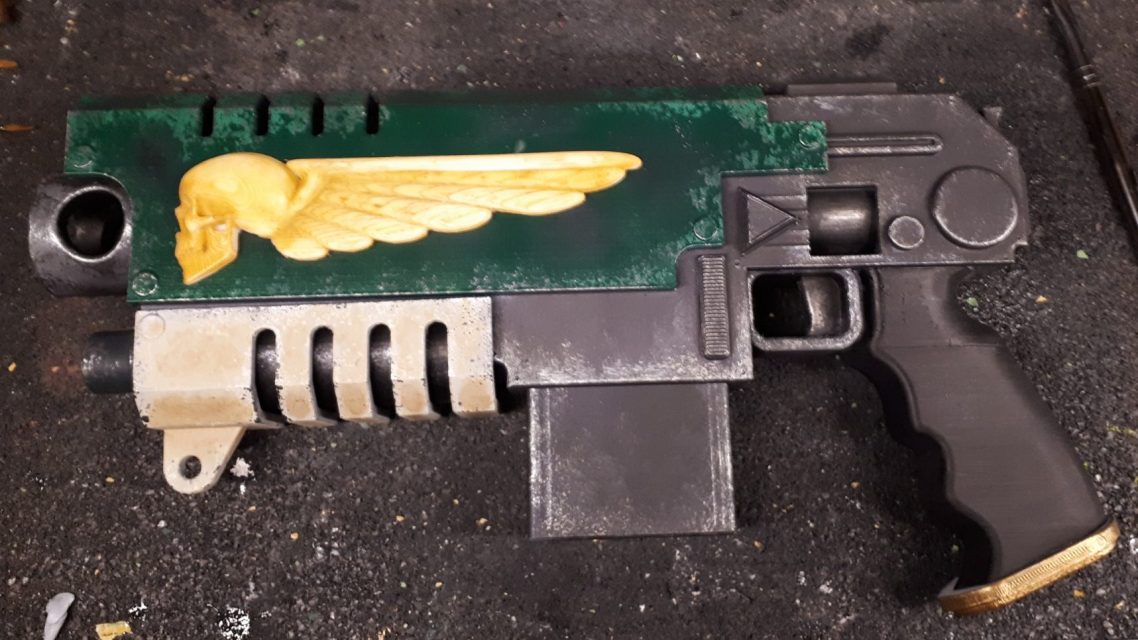
Photo #20 shows Thomas’s bolter, and the sides of this, like the red one of mine look a little bare. There were some skull and wing motifs that were supplied with the bolters, and although I chose not to add them to the red bolter,
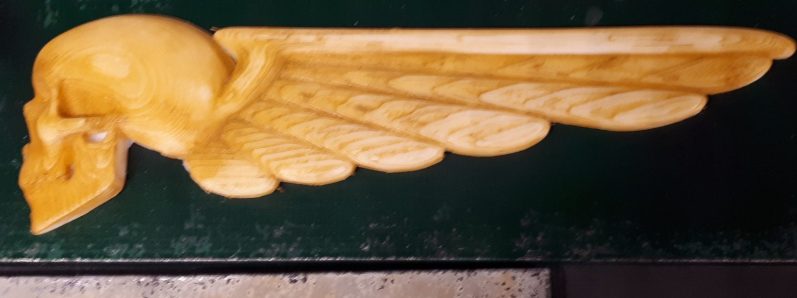
I though they might look good on Thomas’s green and cream one, so these were painted up in a slightly more yellow shade and added to the sides of the bolter – see photos #21 and #22.

Just so show how large the bolters are, photo #23 shows Thomas’s bolter next to a wooden 30cm rule. The bolter and pistol aren’t heavy as they’ve been printed hollow with strengthening struts inside to hold their shape, so it is a little strange to hold them and not have any feeling of weight.

Size comparison again in photo #24, with the bolter ( top ) pistol ( bottom ) and a Games Workshop 30mm figure on a base next to them.
Last thoughts.
I enjoy painting stuff, whether it’s an ancient Greek Warrior, a paper Panzer that never existed beyond the drawing board, a dragon or a dwarf, they all have an attraction for me in some way, well I suppose that this is evident if you’ve looked at all the different article subjects on here already.
I never thought I’d paint something that was 1:1 scale, something that I suppose is an item that a re-enactor might use, but enjoy these I did.

I am willing to sell the red bolter, but I plan on keeping the pistol, and Thomas was very impressed with his Christmas presents when he got them, I think I got away with it again regarding painting cool stuff for him.
As 3D printing advances both in availability of equipment, the finesse of such machinery and the amount of people designing STL files, the choice of items ( really, really cool items I might add ) is blossoming. It really is a great time to be a model painter, and although I will continue to sculpt occasionally in an “old School” fashion, I do admire the people who have adopted and adapted this new technology and brought us such fantastic items to break our bank balances with.
It is true what someone said – get your children interested in model kits and they’ll NEVER have enough money to buy drugs.
We need your consent to load the translations
We use a third-party service to translate the website content that may collect data about your activity. Please review the details in the privacy policy and accept the service to view the translations.