Cave Troll, My Arse !
Casting from Mr Lees Miniatures
Painted in 2019
This was painted with the intention of giving it to a friend – Ian Fainges – because he really likes models of dwarves.
It’s a relatively simple bust, a head and shoulders really, and not much more, but the shoulder pads allow for a lot of detail to be added in the form of damage and scarring, and the head can be made to look quite aged and old.

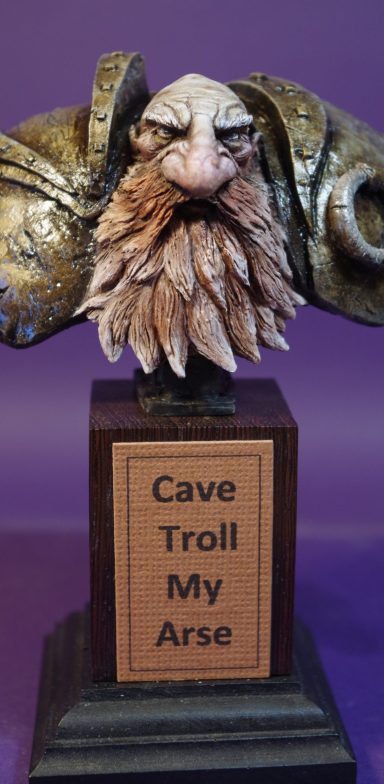
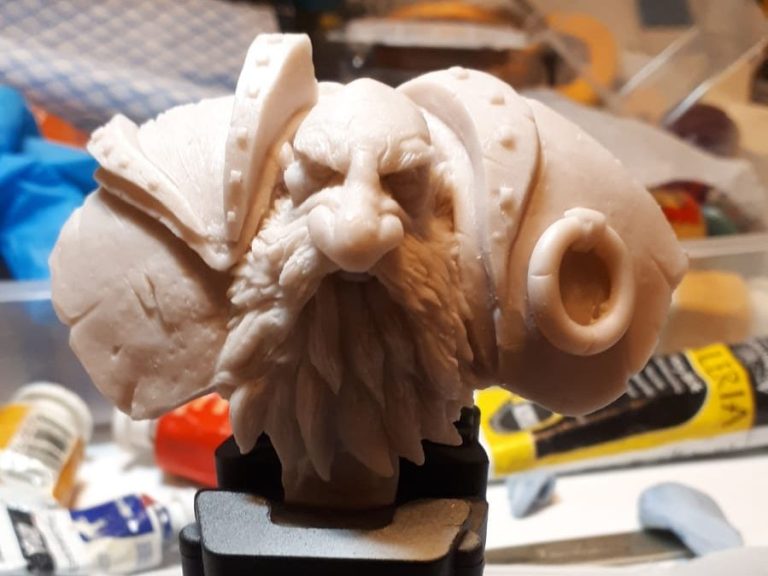
Photo #1 shows the bare resin bust, plenty of detail as I mentioned, for the painter to play about with, and a clean casting with little or no work to do removing mould part lines.
Photo #2 and stepping away from priming in a pale colour, I chose to use black because most of the model is armour and I’d be painting that first.
I’d later regret the use of black coating the skin areas, as it was tedious putting several layers of acrylic flesh colour over the black to try and get a solid base for the oils to go over.


Photo #3 However, eventually I did get a solid flesh base done for the oils and I’ve used Printer’s Inks over the Black primer for the metal areas.
I began with a mix of Mars Black and Bronze Printer’s Ink, moving to just the Bronze on it’s own, then some very light touches of Antique Gold and Old Silver Printer’s Ink for the highlights.
Printer’s Ink is a little different to use than paint, in that it doesn’t dry properly, even with heat from a warm environment. So once it has stabilised – overnight in a warm cabinet – then you’ve got to cover it with some form of lacquer or varnish.
My preferred method is to use several coats of Tamiya’s Smoke Lacquer, thinned 50:50 with water so that I can add several coats.
The advantage is that not only does the Smoke seal the inks in place, it adds deep shadows to the recesses if allowed to pool slightly.
Photo #4 shows the difference the Tamiya Smoke has, not only deepening the colours, but adding a gloss finish to them as well. The left hand side shoulder pad has been treated to several thin coats – the first one is always patchy – whilst the right hand side hasn’t been done yet and is still just the Printer’s Inks fully dried, but having a matt finish.
The face has been painted in this shot too, I went for a greyish skin-tone, hinting at his age, but also a life spent mainly underground, possibly mining or guarding excavations.
The flesh colour is made up of Vandyke Brown and Titanium White ( a lot of the white ) and will be allowed to dry before adding some tints of colour.
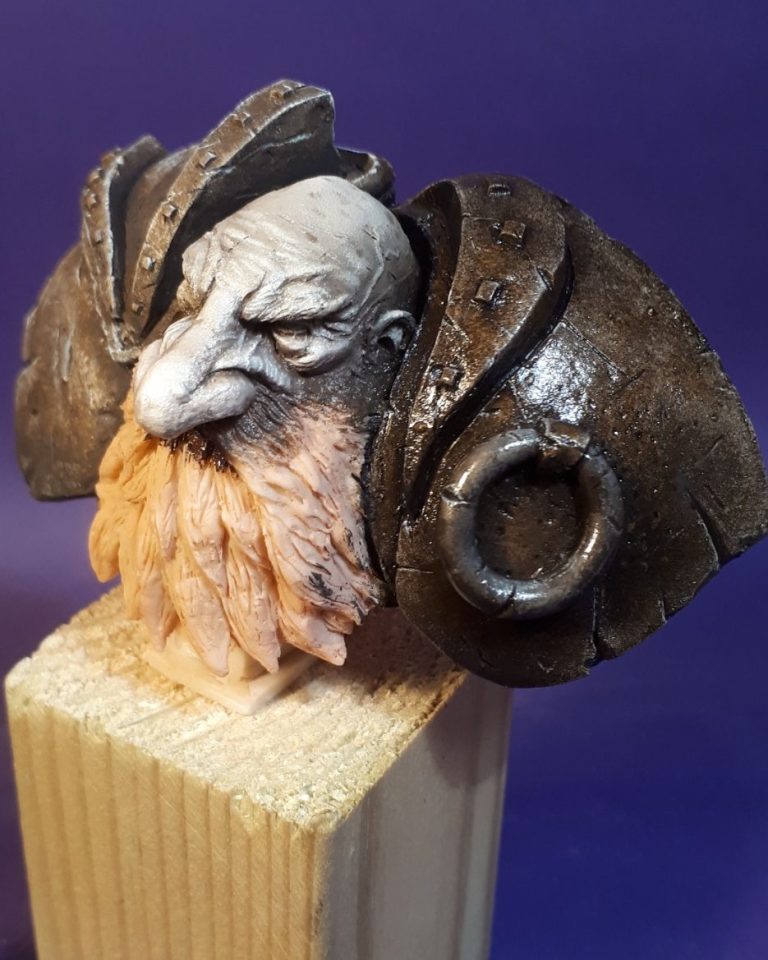

Photo #5 gives a good view of the different Printer’s Inks used on the armour – the bronze and gold of the main plates compared to the iron and silver of the ring on his left shoulder pad.
I’ve added a slight blush to his cheeks and nose with a very small amount of Carmine oils ( honestly, a really small spot added ) and then used a large soft brush to blend it in to the surrounding area.
Carmine is a very strong pigment and needs to be used very carefully. A very small amount goes a long way, so adding very small amounts and seeing how greatly it affects the area is better than adding too much, because it stains the surface and is nigh on impossible to remove if there’s too much of it applied to the model.
Photo #6 and a better view of the pink effect on the tip of the nose. I’ve also added some age spots to the bald cranium. These are small spots of Burnt Umber added in a random manner and then using a clean, soft brush, they’re blended in to the surrounding area. The dark brown is easier to control than the Carmine, but it’s basically the same method. Again, it’s easier to add more than it is to take too much off, so small spots of the brown, and see what effect is gained.

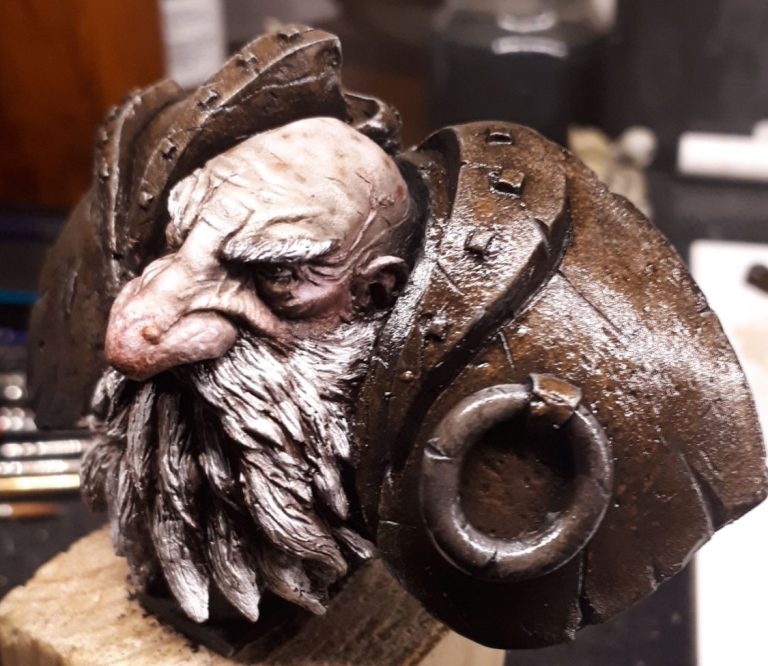
Photo #7.The beard was about the most difficult area to paint to be honest. The way it’s been sculpted looks cool without any paint, but all those little tassel-type things actually hinder the painting somewhat.
I added a dark brown oil colour – Burnt Umber, then started adding Buff Titanium with a wide brush, stroking the paint on like I was brushing the beard with a comb. I added Titanium White as final highlights, although the difference between the buff colour and white isn’t really visible in this shot.

Photo #8 and a look into his hard gaze. Small details have been accentuated – a black shadow pin wash blended into some areas of the armour, the wart on his nose given a shadow and some more Carmine / Burnt Umber mix to differ it from the surrounding skin, and a darker brown wash for the recessed detail of the beard.
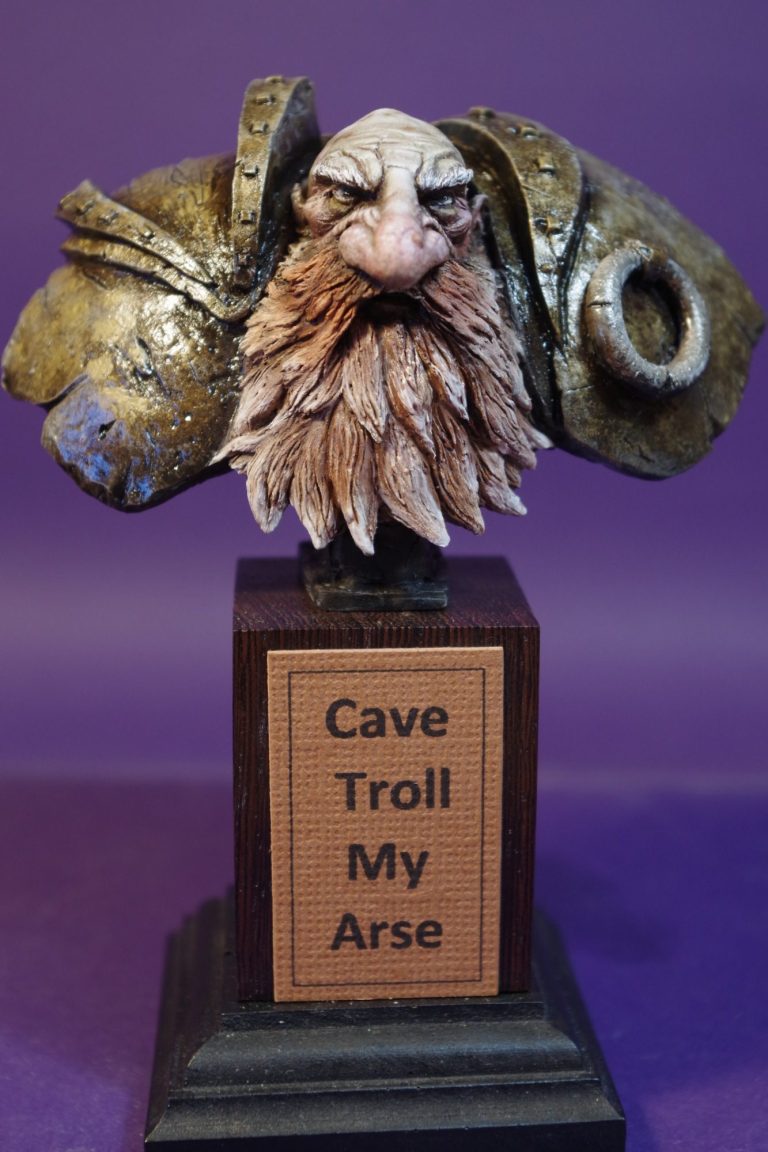
Photo #9 shows the bust on an Oakwood Studios base, with the nameplate “Cave Troll My Arse”. If you’ve ever watched the comedy series “The Royal Family” you’ll recognise the misrepresentation of a Jim Royal comment, which I thought fitted the look of the bust quite well.
Further alterations have been made to the beard, I wasn’t happy with the grey colour and so added some Light Red oils to the beard, with a heavier application to the moustache, it makes him look like he’s got ginger hair turning to grey, and suits him a lot more I think.
Final thoughts
This is a lovely little bust, however, since painting it Mr Lee’s Minis has ceased trading and I’m unsure what has happened to all the moulds for the various ranges, including this model, or if anyone has taken over producing them.
A shame if they don’t reappear, as there were some absolutely superb models in Kyle’s vast range.
The Printer’s Inks are really good to use, they’re available in the UK from El Greco Miniatures in powder form and just need mixing with a liquid – White Spirit, Liquin or possibly an Acrylic Medium could be used ( I’ve not tried that last tone to be truthful ). They can also be mixed in with Oil colours to get different shades, but require drying with some kind of heat source – a drying cabinet etc – and even then can be said to be “fugitive” – rubbing off easily and getting onto areas of a model where you least want them. So they need sealing in with some form of varnish or lacquer, as in the case of the Tamiya Clear colours.

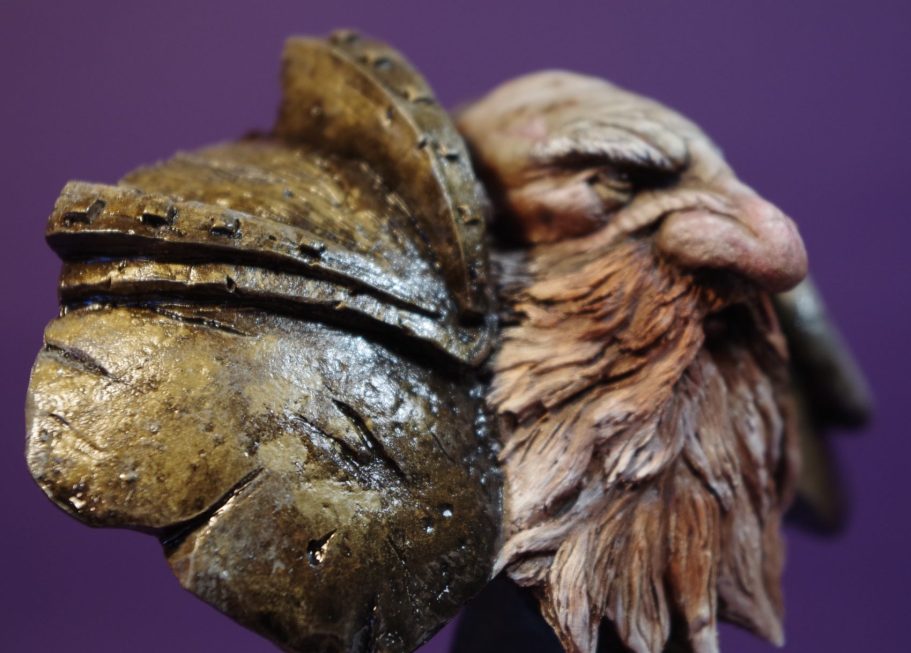
I like them because the effect they give can’t be fully appreciated until they’ve dried, so there’s that little bit of surprise when they’re taken out of the drying cabinet to see what effect has resulted.
This might seem an odd comment, but it’s the truth, because the detail seems to “pop” once they’ve dried, and looks even better once a coat of varnish has been put on.
They’re worth a try is all I’m saying.
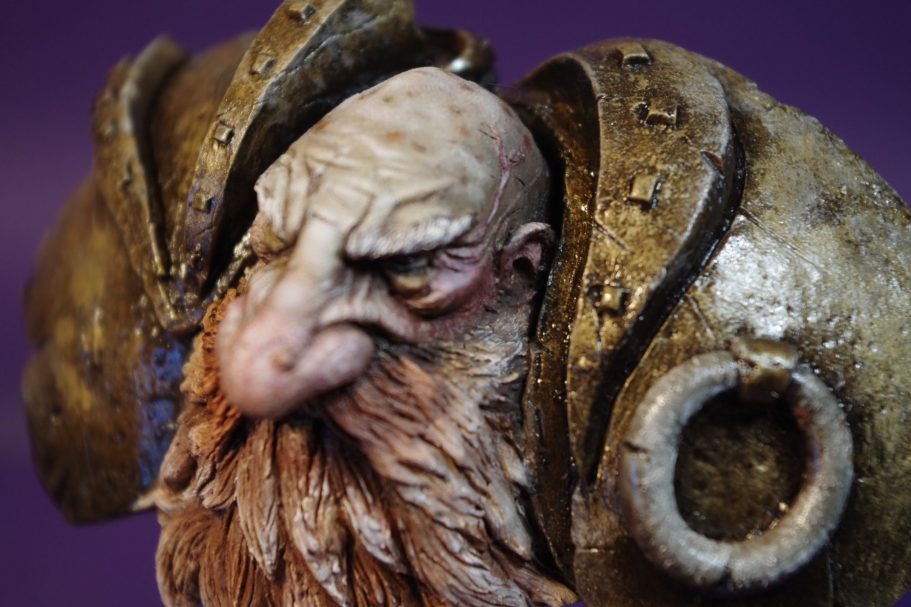
Oh and the other thing about them is that if you use a matt varnish, then they look a lot like Non Metallic Metals, which is pretty weird considering that they’re definitely metallic.
Returning to the fact that this was done for a good friend, I took it over to Australia for Ian – yes, he lives on the opposite side of the world to me – and he seemed pretty pleased with it. We’ve swapped a few models over the years, although I think I’ve had the better deal because he’s given me sculptures that he’s made himself, and which I’m very proud to have in my collection in the display cabinet.
We need your consent to load the translations
We use a third-party service to translate the website content that may collect data about your activity. Please review the details in the privacy policy and accept the service to view the translations.