Making miniature leaves for base scatter
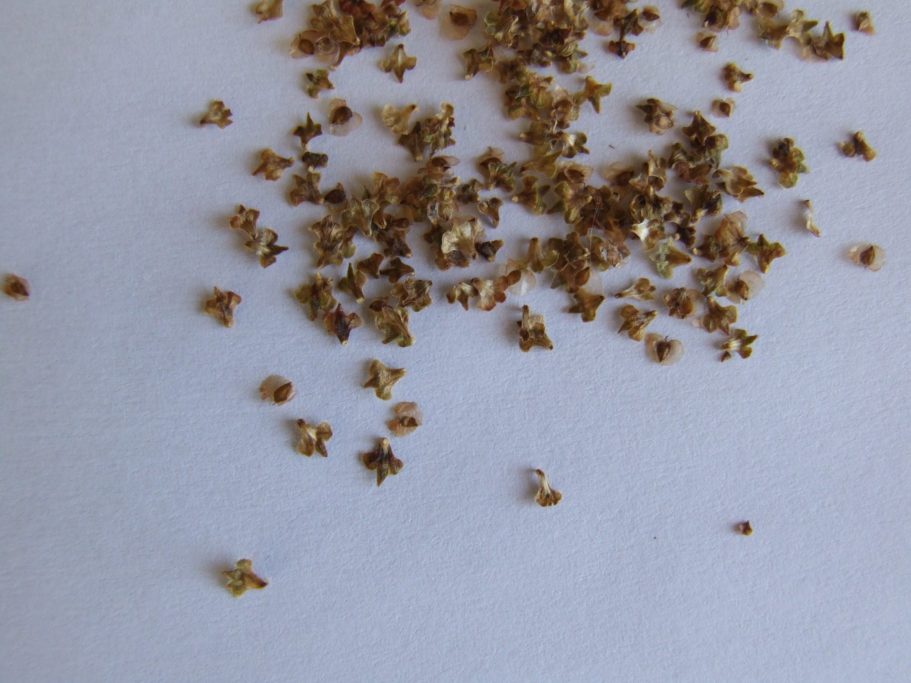
Many years ago, a company called Hudson and Allen produced miniature leaves for use on dioramas and vignette groundwork. They were relatively inexpensive too, and came in a variety of colours – the natural coloured ones are shown in photo #1.
Unfortunately Hudson and Allen stopped trading a few years back, and so the source of these leaves effectively dried up – or so I thought.
I knew that they were a natural substance, and not manufactured like the excellent laser cut leaves from Plusmodels, but what they came from, was a bit of a mystery.
This was all put to rights when I just happened to mention it to Mike Harbour and Kieth Clutton, who said that the leaves were part of the seedcase that came from a Silver Birch tree.

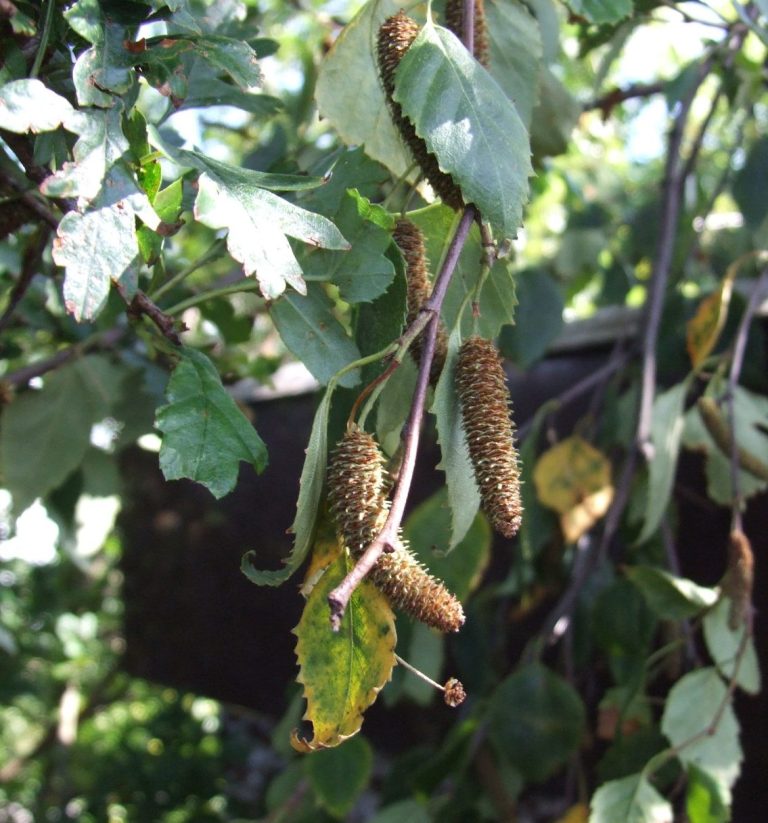
When I happened to move house, I was pleased to note ( and contrary to popular opinion it wasn’t one of the reasons for living here at all ! ), that there was a mature Silver Birch tree growing in the garden ( pictured in photo #2 ), and the bits that we modellers are interested in are shown in the centre of photo #3, looking like prickly little green bananas.
When ripe, dependant upon the weather, they become prickly looking like this, and break up with little or no effort into the seeds, their protective casings and a small stick that they are held onto whilst they mature and grow. Usually in Britain, they become ready to harvest around the middle to end of July each year.

I use and old plastic container to collect them in, and although this is sometimes a bit messy, as they break up and fly all over the place off too ripe, the majority of the harvest can be caught and stored temporarily like this - photo #4
Of course there is a problem, isn’t there always ?
As I mentioned, there are three components to the seedpods, and we only require one of them – the protective cases.

It’s easy enough to sort through and discard the little sticks that everything attaches to, and even getting out any leaves is relatively simple – the mess in the box that’s been collected is shown in photo #5.
But, and this is a huge BUT, there are literally hundreds of seeds in each little seedpod, and we don’t want them.
Just to give you an idea of how laborious it could be, I broke up two seedpods and sorted through them to get the miniature leaves, and get rid of the seeds. It took me a full hour, and after that I had enough “leaves” to do for one 54mm figure base.
There’s just gotta be an easier way to do this, and there is – read on.

I use a large tub of water, with just a drop of detergent ( washing up liquid, to you or I ) mixed in it to break the surface tension.
DON’T be tempted to put loads of detergent in, it just makes more of the seeds mix in with the protective cases, and thus ruins the selection process.
So, one drop of detergent to about two litres of tap water, as seen in photo #6

Next, pour in the seedpods, having done your best to separate out the bits of leaves and also having broken up all the seedpods into their constituent parts. These will tend to float now, as seen in photo #7.

Stir this mess vigorously with a spoon so that all the dried bits become soaked with the water – as in photo #8 – and leave them to settle.

. In photo #9 I’ve taken a shot of the seeds. These look vastly different to the protective coverings, and these seeds tend to float. The protective coverings that will become our miniature leaves are slightly denser, and also tend to get water logged, and thus after a while will tend to sink.
I stress, that it’s a “most of them” kind of thing. A few seeds do sink, and quite a lot of the protective covers remain floating, but the majority of each tend to do as they should, and it’s certainly easier than sorting through them one at a time.

Anyway, this messy mixture is left to soak for about three to four hours. Stirring it each time you walk past – say each half an hour might well help, I can’t really say, I stir it though, and it makes me feel useful in the intervening time, so you might as well do it too.
After the hours have gone by, give the mess one last stir, allow it to settle one last time for a couple of minutes, and then using the very best spoon from the dinner service ( Ouch that hurt dear ! ), well, perhaps not quite the best spoon then, but one of the decent ones – a deep soup spoon works best actually, but….Look, just try and get the majority of the stuff off the surface of the water, anything that floats isn’t good, so dump it in the bin – see photo #10.

Having cleared of as much as possible, I then prop up the container under the tap so that there is as little room for the water to fall that we’re now going to top the container up with. I also use the spoon to deflect the water around the surface, so that the stuff at the bottom doesn’t get too stirred up – see photo #11.
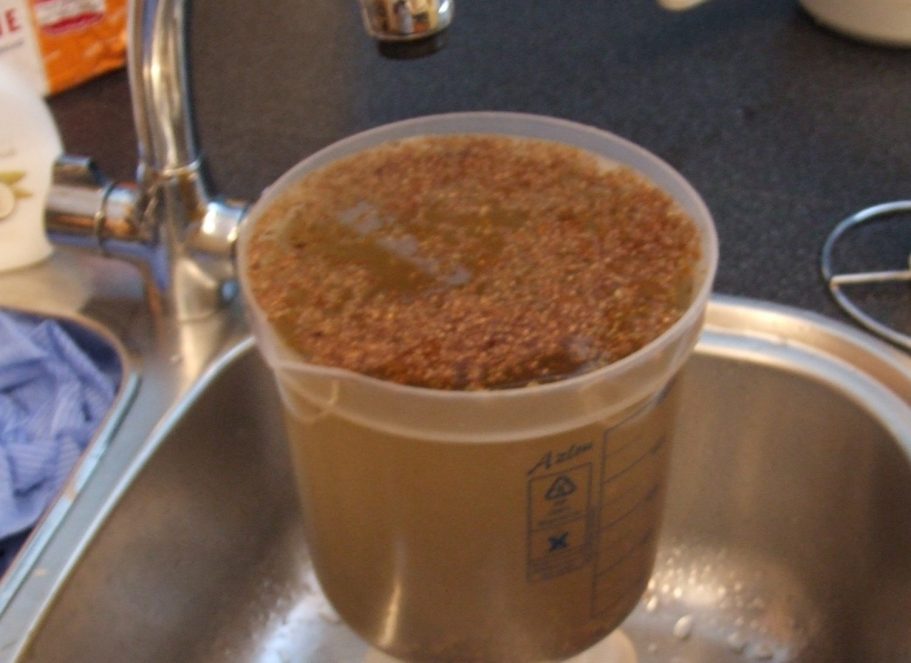
When the water level gets nearly to the stage where it overflows, stop. Shut the tap off, and let everything settle for a couple of minutes, that’d be photo #12 then.
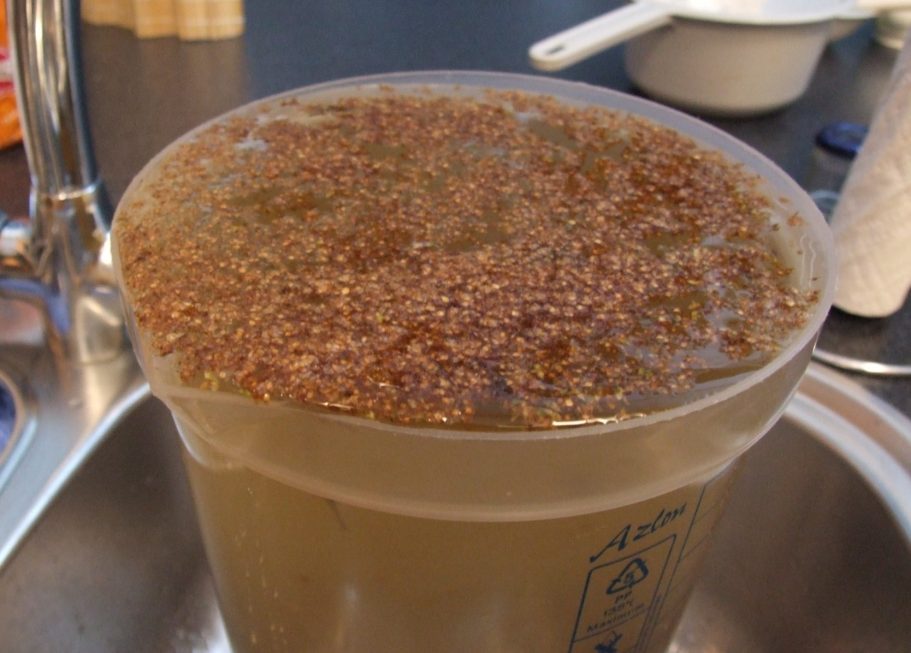
Once everything’s calmed down, then restart the tap, this time more gently, and again deflecting the water flow with the spoon – see photo #13.
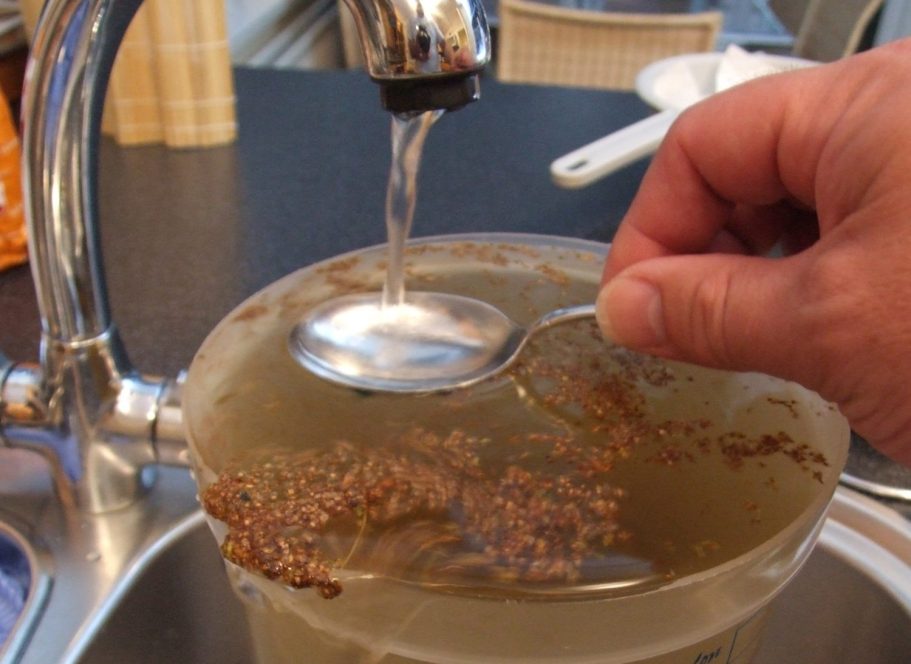
The rest of the stuff that’s floating will overflow down the side of the container, and be swilled down the sink, the stuff at the bottom should remain in place – as is happening in photo #14.
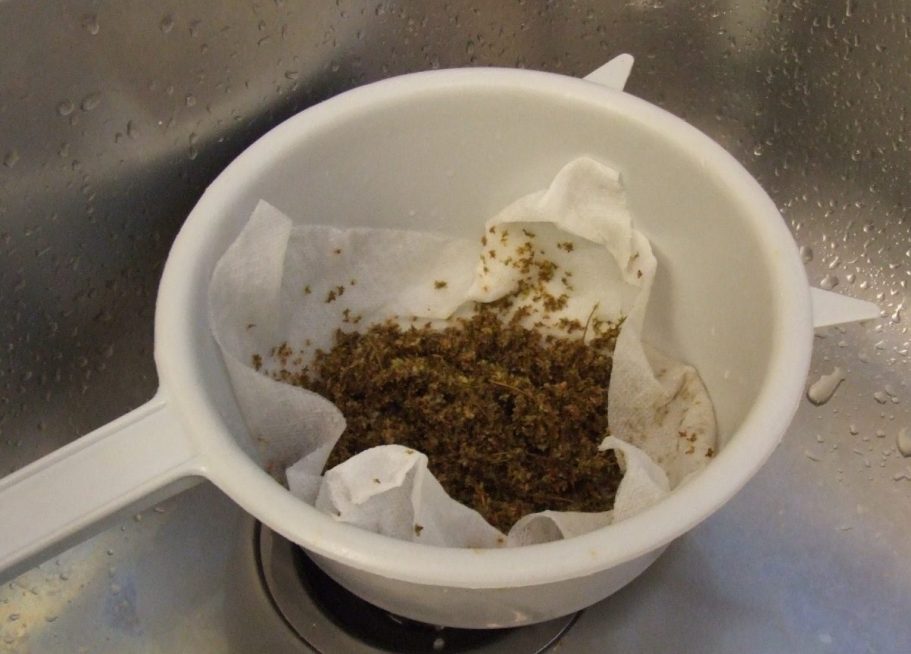
Once all the surface detritus has been discarded, it’s then easy to separate the “leaves” that are at the bottom of the container from the water, through a sieve with some kitchen paper inside to allow their easy removal from the sieve as in photo #15.

With the water poured away, the kitchen paper with the leaves in can be gently squeezed out, and then laid out on some newspaper to dry – photo #16.

Spreading the leaves out further will allow a faster drying time, and probably 24 hours in a warm room will see them dry enough to store in a small jar as seen in photo #17.

In photos # 1 and 18 the resulting leaves are shown, and although there are still a few seeds left in with the “leaves”, these can either be ignored, or picked out as hey are noticed when using them on a base.
As for colouring the leaves, well I should suppose that using a commercially available dye would work, boiling them up as per the instructions, or simply painting them with some thinned oil paint would also work.
They can be fastened on to groundwork with wood glue, which dries clear, sprinkling them on to the desired areas of groundwork, or placing them individually with tweezers for a more exact layout.
By using small gauge wire, or even a torn and teased apart scouring pad; the leaves can be applied to look like a climbing plant, maybe Ivy.
We need your consent to load the translations
We use a third-party service to translate the website content that may collect data about your activity. Please review the details in the privacy policy and accept the service to view the translations.