Innocent ?
1/8th Resin half figure from Creepytables
Painted in 2023
I think I’ve mentioned before that occasionally I buy a kit and it goes straight onto the painting bench.
This kit from Creepytables was one such – I bought it at SMC October 2023, and it was begun that same month. It’s a little cartoonish, and relatively simple in itself, but it just has that certain presence that made me want to paint it.


The sculpting is very good, and the moulding of parts excellent, just some minor part lines to clean up and mould blocks to remove. Parts fit is pretty good, although a little filler might be necessary for the small component that makes up a separate portion of the hair.
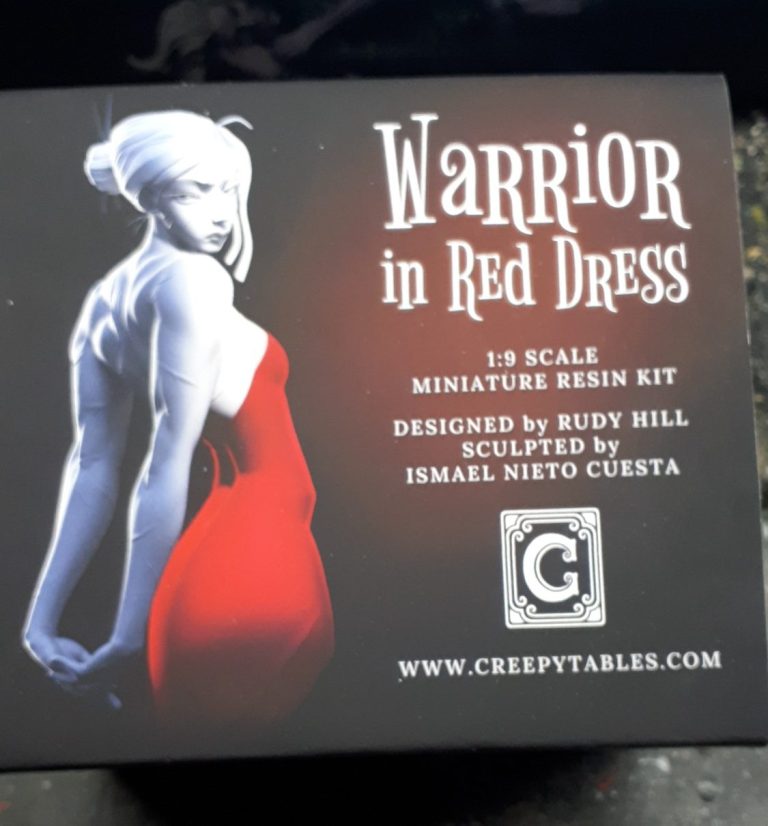
The box art is shown in photo #1, which in itself is rather attractive and draws the buyer to part with their money.
Although I liked the idea of the simple red dress, I wanted to try something different, and my initial idea was taken by my good friend Mario Delgado – no, I’m not saying what it was, but I wasn’t going to paint mine that way, because as I though it, he said it out loud. Therefore, it’s his idea.
So what to do.
Maybe a metallic gold dress would work ?
Hmm, kinda did, but it looked too much like metal, so I though maybe just leave lines down each side and paint the rest black….. with maybe some of the gold showing through.
Photo #2 shows me beginning this process, having added a belt around her waist from some electricians tape, one thinner band over the top of a thicker strip to make a two layered belt.
The gold colour is a Mica lacquer from the Tamiya range, and sprays on really well over a white primer from Halfords.


Photo #3 is a second view of the dress at this stage.
Photo #4 in important for comparison for photo #7, in that photo #4 shows the extend to which I’ve stippled on marmite with a sponge, having first added masking strips of tape to the sides of the dress.


And photo #5 shows the whole piece with its coat of Tamiya Black having been sprayed on.
In photo #6 I’ve removed the pieces of masking tape, and whilst there’s a little creep of black paint under the edges, this can be easily sorted with a few gentle passes of a cotton bud soaked in a little Isopropyl Alcohol.


Photo #7….. Ah, photo #7, here’s the disappointment, the gentle washing with a soft brush, water and detergent removed way more of the black that I wanted, whilst I liked the effect, there was still too much of the gold showing, much more than I’d planned, and this is the problem with the Marmite effect – you just don’t know how good, or extensive the result will be.
Not to worry though,
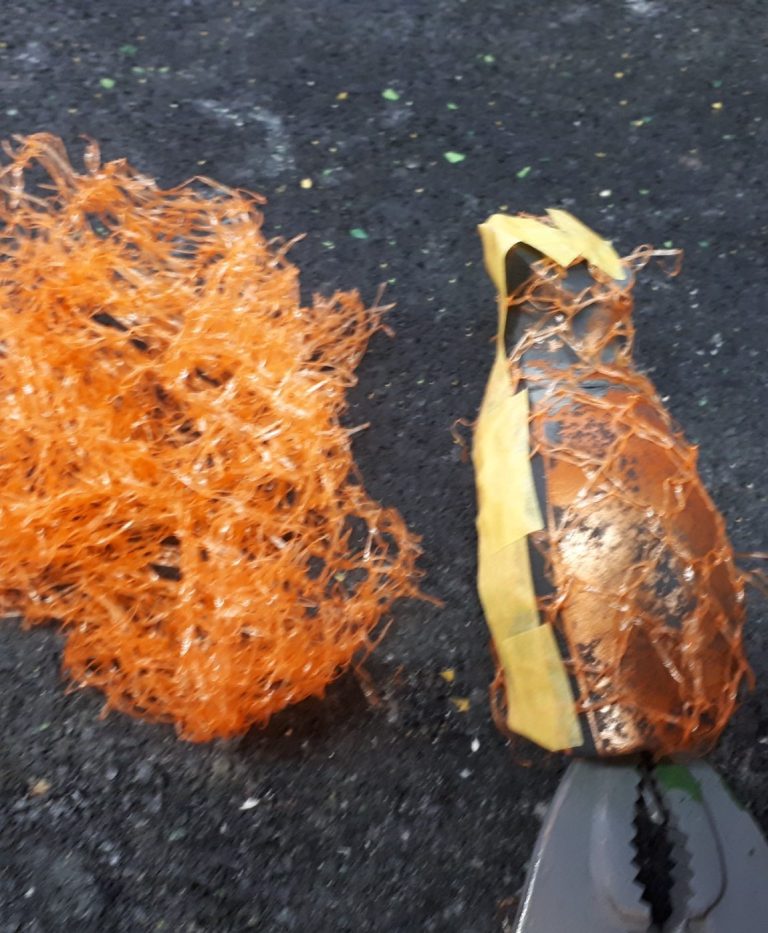
In photo #8 I’ve found some old plastic wrapping off some fruit – oranges or Satsuma’s I think – that is a lot more open than other netting I have stored away for masking purposes when stretched out and placed around the model.
I’ve fastened it in place with some Tamiya masking tape and will spray some more of the Tamiya Black over the top to see what happens.
What probably isn’t visible in this shot is that I had added a belt around the waist of the dress using two strips of Electrical Insulation tape. The initial length added is wider than the second one, and I attempted to get the second layer of tape to be central over the first one to give a double thickness to the middle of the belt.


Photo #9 shows a close-up of the netting in place, the wire pin that’s been glued into the underside of the model is being held in an old set of mole grips, so that I can hold the model and not get too much overspray from the airbrush or rattle cans that I use on my hand. I still wear a nitryle glove, but it just offers a little bit more protection.
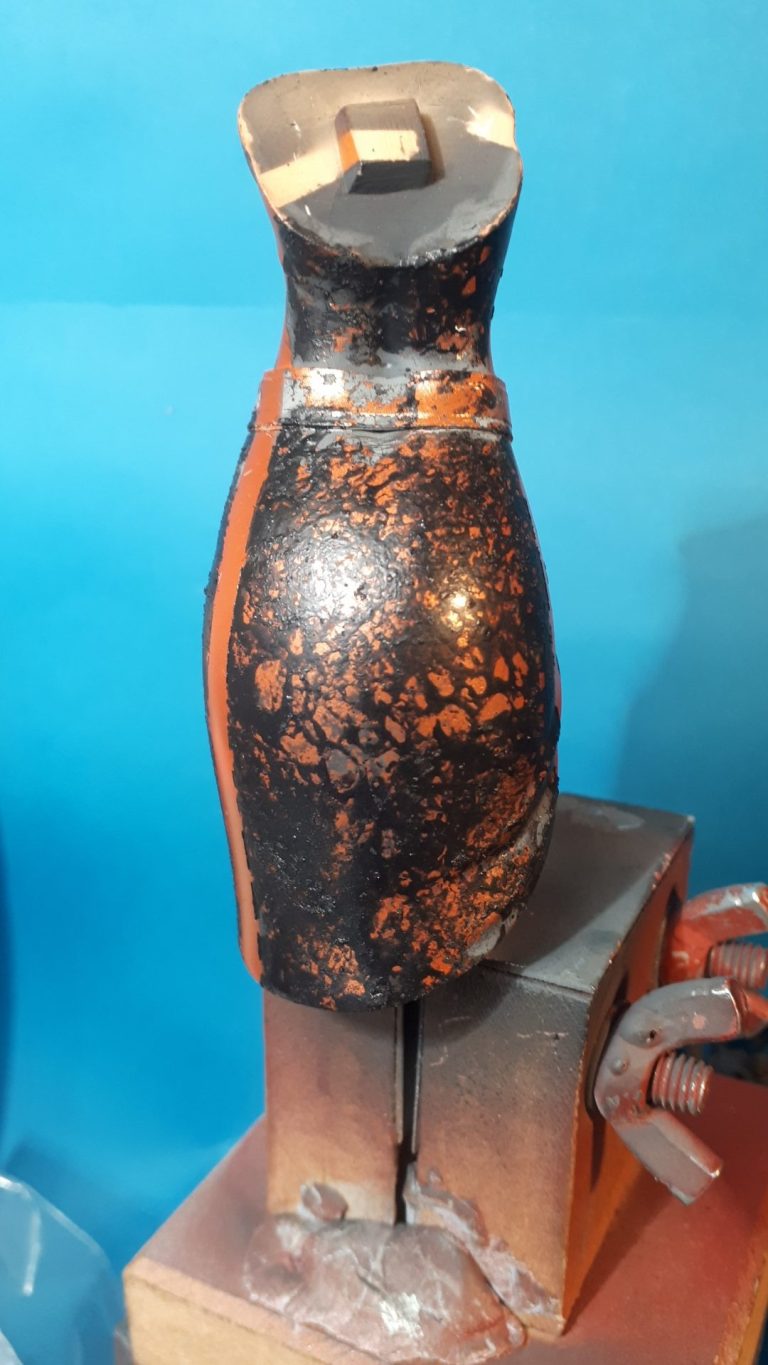
Photo #10 shows the results of the application of more black paint, and this is looking better and resembles the effect I had in mind originally.
There’s still some painting to be done to enhance the black – there is some grey showing at the belt line ( the belt being more visible in this shot than in previous ones ) and on some spots lower down the dress where too much Isopropyl Alcohol has been used to thin the Tamiya paint, these areas will have to be painted by conventional paintbrush with some black acrylic to blend them in to the surrounding area.
I’d travelled to SMC in Eindhoven this year with three friends – Mario Delgado, Ian Macintosh and Mike Genner – One evening over the weekend, Mario showed us a painting tutorial he’d found online that showed a different method for using oil paints ( and my apologies, because I can’t remember the name of the guy that was doing the video ).
The basic idea was to airbrush a couple of acrylic flesh colours onto the model being painted, one darker shade that was airbrushed on from a low angle, and then a lighter colour airbrushed on from a high angle, the two colours creating natural shadows and highlights.


Once fully dry, a very soft brush charged with a minimal amount of oil paint was applied to the flesh areas, with what can only be described as a gentle scrubbing action – think of the way blusher is applied when a woman is doing her makeup.
Darker colours are applied first, working on all the areas that would naturally form shadows, and then lighter colours are applied after that to form up and strengthen the highlights.
The results from airbrushing the skin are seen on photos #11 and #12, and whilst it does look rather pale, I thought that the addition of oils would bring back any warmth that was necessary.
The spot of light paint on the right bicep was going to be a worry for later, first I wanted to see if the method would work on the face.

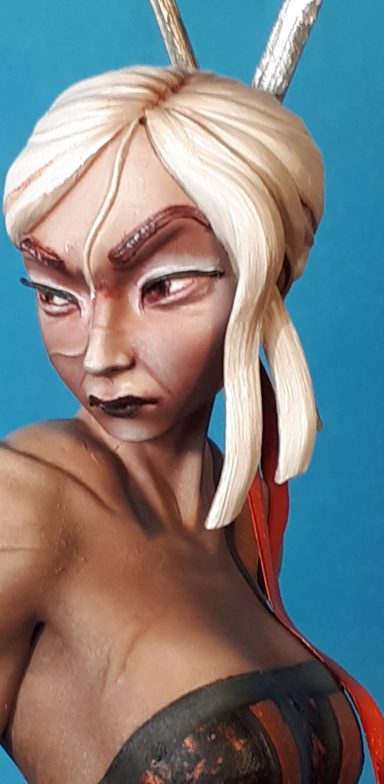
Photo #13 shows me having tried out the method, the oil paints not covering the colours that have been applied by airbrush, they are more to enhance and tint the acrylic colours, and define the features.
I added the eyes in to give the face more reference, although the left eye looks a bit weird, that’s simply because the paint is still wet and reflecting light in a rather disturbing way.
However, I think I got the oil colours to work pretty well on the face, but I couldn’t get it to work on the rest of the body.
It’s not a case of being able to wash the oil colours off with some White Spirit if things go wrong, because the oils are staining the acrylics beneath them. So my inability to get the method to work on the shoulders and back was a bit of a problem.
Even more-so because I really liked the effect that I’d got on the face.


Photo #14 shows the model having been fastened together temporarily to give me some idea of how the flesh tones were working.
But what did I do to get the flesh tones on the body to match up ?
Well, to fix the problems with the shoulders and back I had to repaint the whole area in my usual method with oils, matching the oil colours and effects to those already painted onto the face.
This wasn’t easy, as the face wasn’t my usual Mars Brown / Titanium White blend, and I think you can see in this shot the slight difference between the two areas painted with completely different methods.
Whilst I’d had the dress and flesh areas separated prior to this shot, I’d painted dark grey border on the top edge of the dress and in a twin “V” on either side of the gold “V” on the front. The belt has been painted in with a gold edge and a red and black mottled pattern too.
Photo #15 shows a side view, and the muscle detail that has been sculpted onto the flesh areas really shows up in this shot.
At this point I thought that the gold stripes on the dress looked too “flat” so added squiggles and swirls of a lighter gold paint from the Darkstar range. It helped that these can be thinned with water, and in doing that the sprayed on gold repelled the acrylic colour a bit and helped with the randomness of the effect.
The upper body has been fastened in place at this point and there is a glue mark just above the vertical gold band that is reflecting light and shows as a thin grey fleck. This will need sorting out with a little paint later on.
I’ve undercoated the hair at this point too, and added the separate section of hair to the slot on the forehead, undercoating all of this with a very pale grey acrylic.


Photo #16 gives a good view of the back of the model and that superbly sculpted, but very muscular back and arms. I’m not sure about all the scars that have been sculpted on, I chose not to enhance them at all with any redness simply because I felt they looked better simply having the flesh coloured highlights.
It would be easy to add some Carmine oils to them, making them appear swollen and perhaps a little angry, and even to add some blood leaking out of one or two so that she appears to have been wounded in a fight, but I left them alone and understated.

It’s difficult to tell, but in photo #17 I’ve painted the hair. I already had the white undercoat established as a solid colour – well GW Corax White, which in fairness is a very pale grey ( GW, if anyone from there is reading, will ya extract a digit and bring back Skull White ).
Having the Corax White as the undercoat then, I added Michael Harding’s Buff Titanium oils, mixing is a spot or two of Warm Sepia to darken it just a little bit. I added this in quite a thin coat, but making sure it got into all the recesses, and especially into the central parting of the hair.
Buff Titanium was then painted on, building up the mid-tones, using a small, flat brush and using a combing motion along the length of the hair, very much like combing actual hair.
Then I used Titanium White to build up the highlights, this time using an old, fine brush ( Size 1 or thereabouts ), allowing the bristles to splay out and again using the combing motion to apply paint and the splayed bristles leaving lines of the pure white to create the appearance of separate hairs.
As I say, this is difficult to see in this shot, but it will show up better in the final close-ups.
There are some fine quills or spikes that come with the kit that are to be added to the hair bun, although they look a little too thin to be used as offensive weapons. I thought I’d make a couple of stiletto type daggers to replace them, and used a couple of cocktail sticks, trimmed down and thinned to make the blades, these being shown in photo #18.
The wood was sanded smooth and then coated with some acrylic paint to act as a primer, sanded smooth again and then painted with metallic paints on the blades, and the handles painted black. The finished items can be seen glued in position on the final shots.
I still felt that there was something missing.


I was disappointed with the belt, for some reason the tails or cords coming out of the bottom of the knot had reacted to either the paint or the heat within the drying cupboard and seemed to have shrivelled a bit, they weren’t as long as I’d intended them to be, so I thought I should add something similar to the hair bun, to give that flow to the model.
I used some thin strips of the Electricians tape, cut with a sharp scalpel to the width I wanted, and with an angled cut at the top end so they appeared to go into the joint between the hair bun and the back of the head.
These were glued to the shoulder and at the back of the waist so that the intended twists and curls stayed in place, then painted with some acrylics with final additions of oil paints.
Final thoughts.
I’m tempted to get a second one of these and add some other bits to detail the dress a bit more. And maybe remove a portion of the lower edge to flatten it out. Maybe….
But as it is, this is a very nice kit. It went together well, with logical split of parts, and whilst a little quirky, I like it a lot.
It’s a fun piece to paint and I look forward to seeing what other people do with this, because hopefully it’ll prove to be a popular kit to paint.
Creepytables have quite a range of busts and figures now, almost all of them are quirky – but in a good way – and having bought this and the Nereid kits from them whilst at SMC, I feel confident in recommending them.
Whilst you can order direct from their online shop Homepage - Creepytables there do seem to be a few companies carrying the range too. If you’re in the UK then the range is available from El Greco Miniatures.


We need your consent to load the translations
We use a third-party service to translate the website content that may collect data about your activity. Please review the details in the privacy policy and accept the service to view the translations.