Defence of the Ruined Temple
28mm White Metal casing from Infinity Corvis Belli
Painted in 2022

Along with the couple of thousand Games Workshop / Citadel / Ral Partha and Rackham metal figures I have collected ( and avoided painting in the main ) I also have a love for the Infinity Corvus Belli range of figures.
Admittedly I have zero interest in playing wargames, I have all the tactical awareness of the average houseplant, but I do like buying the figures.
I say that, because I’ll never have the time to paint them, but I do seriously think about painting some of them…… although thinking about it and actually doing it are kind of different things.
However, when I do get around to painting an Infinity figure, I have to admit to enjoying it immensely.
Why is that, you ask ?
Well, they are just so good on so many levels.
There are some very active and animated poses of characters within the range, many have multiple parts that add to the dynamism and the casting is usually good to exceptional.
Talking of multiple parts, this has four components, the main casting of legs, body and head, then there are the separate arms, and the two scabbards as a fourth part.
They are true 28mm though, so faces are smaller compared to GW offerings. Just to enlarge on that statement ( sorry, pun intended ) photo #1 shows the main casting partly painted with my thumb for size comparison. And no, I don’t have huge thumbs.
This one is part of a pair of vaguely Japanese Samurai styled figures, and the clothing gives the painter quite a bit of a canvas to work on.
Infinity figures usually come in small blister packs of one or two figures, or in boxed sets. The sets can have from four or more figures in them, and sometimes there are special character figures or tournament specials available. I’ve found the best source for the models to be Ebay, although some shops like Element Games carry the range to a small extent.


Prices, well single figures tend to cost from £6 plus postage at the time of writing, and boxed sets from about £15 usually. There are some figures that are rare or out of production, or simply very popular, so the prices are only a guide, and I’ve paid as much as £20 for a single figure. Ebay is good, but if there’s a few determined collectors, then the price will inevitably creep higher.
Back to this figure though.
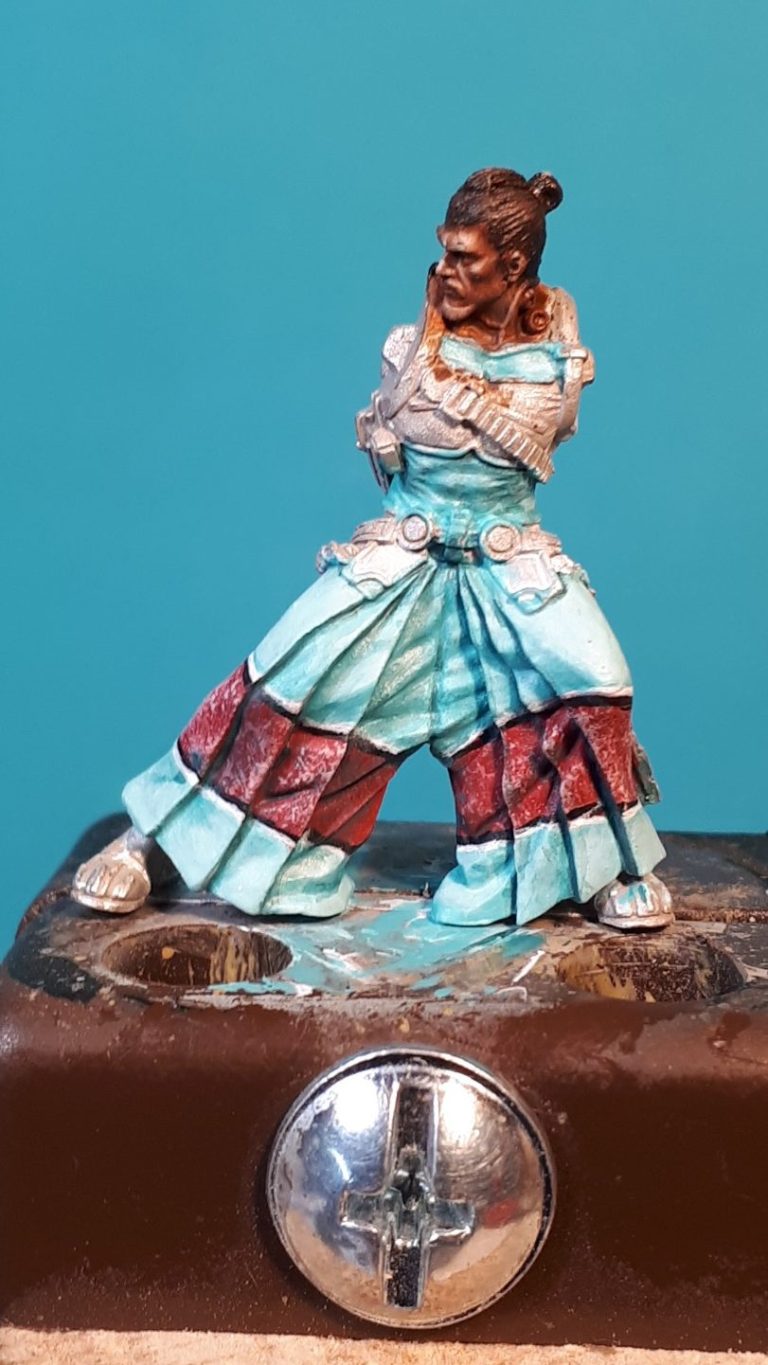
Photo #2 shows the main casting fastened to a block that I use as a handle whilst painting.
I’ve cleaned the slight mould lines from around the edge of the casting, primed it with my usual mix of acrylic paint and Isopropyl Alcohol, and then got on with undercoating the face, ready for the application of oils.
As mentioned, it’s a small area to work on, but the details are good, and do help the painter somewhat. I used a dark mix of Titanium White and Mars Brown to cover the face and neck, then using a very fine pointed brush – a No. 1 W&N Series 7 – I began adding and blending in more Titanium White oils. I find that by making contrast very high on figures of this size, the details stand out a lot better, so the shadows remain very dark, and the highlights quite bright.
Framing the face by adding the hair helps to see if the face works or if it needs more additions.
The clothing has been started in this shot too. I used acrylics ( yes, don’t be shocked ) for this, the mid blue being applied first, with very gradual use of thin washes of paler coloured blue to build up layer upon layer through mid-tones to almost white highlights.
In a rare surge of adventurousness, I painted on a thick horizontal band of white acrylic, adding two thin lines of black just inside it’s borders, then filled in between the black lines with a burgundy colour. Once this had dried fully, I added some very fine spotting of a pale pink to the burgundy band for decoration.
Photo #3 shows this spotting up a bit better perhaps, and also in this picture I’ve added the leather armour section across the chest. I used oils for this part, beginning with Mars Brown, and adding mid tones of Light Red to bring out the mid-tone details. Buff Titanium was used with a fine brush to add highlights and some spotting of damage to the leather.


Photo #4 shows the back of the model. Here I’ve used the flat areas of the skirt to paint in a Cherry Blossom branch and flower freehand design along with a stylised Mon to the side of it.
Moving to Photo #5, the belts have been painted on using an outer line of the Burgundy, with the inner body of the belt being a pale blue. The fastenings are gold from the Darkstar range of metallic paints..
The toes are about the poorest part of the sculpture, and try as I might, I couldn’t improve them with paint. It’s a shame, but I had to admit defeat on this area of the model, and I don’t have any alternatives in this scale that I could replace them with.


Photo #6 shows the back of the figure again and the continuation of the belt details from around the front of the model.
Photo #7 shows a real close up of the right side of the lower half of the figure, possibly blown up too much, but it shows the Mon device and the spotting within the burgundy band of colour. Note the pistol in its holder, a very dark Turquoise with edges done in a light Turquoise. I’m not usually a fan of edging items like this, with a very dark body of paint and a pale highlighted edge, but in this case I thought it worked quite well.


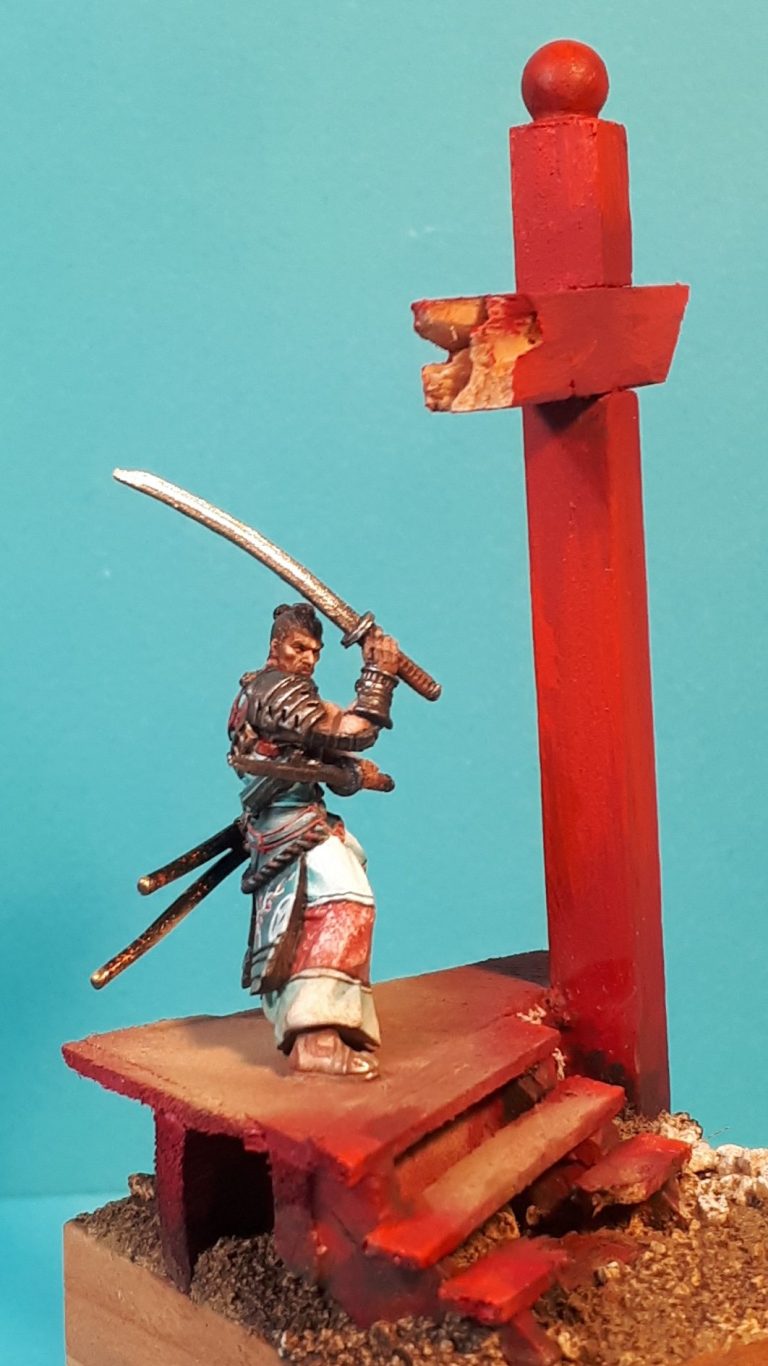
The final shots show the finished figure in close up, the swords having been painted with the Darkstar silver metallic paints and bright highlights added with a Molotow liquid silver pen. The scabbards were treated to a couple of coats of black paint, then some gold spots were added at random and finally several coats of Tamiya Clear Orange were added to make the scabbards look like lacquered wood.
I needed a setting for the little fella though, and I considered building a shrine gate for him to guard. The problem was that it would probably be too big, and overshadow him, so I “cut down the idea to have a ruined entrance to a shrine with a few steps leading up to where the figure would stand.
I’d bought a few plinths some time back that had ( to my mind ) a Japanese feel to them, the multi-layered wood of different colours seemed to point in that direction anyway, and I used one of these for the base, building up the steps and wood floor of the shrine from thin Balsa sections, and adding the upright and crossbeam from thicker Balsa square rod. The ball at the top of the pillar is a steel ball-bearing that I had a selection of in a tub – again, they’d been in my possession for a good while.
The crossbeam was easy enough to break with a little pressure exerted on it, although snapping the bottom step needed a little more finesse to leave enough of the step intact and retain to broken section so it could be bedded into the groundwork.
Please note that my Woodwork ‘O’ Level came in useful at last to make the Housing Joint for the upright and Crossbeam – “thank you’s” to Mr Parkes and Mr Walker for that – see, I was paying attention in class.
The soil and rubble were a mix of sand and cat litter that were fastened in place by dripping thin, water-like superglue onto them.
Painting consisted of a red acrylic for the woodwork, leaving the broken edge of the crossbeam unpainted where it has been snapped, some earth coloured acrylics for the groundwork, and finally adding some Vandyke Brown oils thinned with White Spirit to run into the recesses of the sand and cat litter, and to add damp patches to the woodwork.
Before the figure was glued into place I brushed on some MIG powders over the middle of the steps and the floor where he would stand.


Last words.
I did thoroughly enjoy painting this little fella, and yes, I should do more of the Infinity range ( I think I already admitted that, but it’s worth saying again ).
The sculpting, pose animation and casting of the range is brilliant, details when they’re unpainted can fox the eye a little, but get a coat of primer on them and they soon begin to make sense.
The offerings on Ebay can sometimes arrive with just the metal parts in a small zip-lock bag, seeming to have been figures that are broken down from sets, maybe individual figures that are unwanted. Sometimes offerings are part painted, and again just come wrapped fro travel through the post.
Occasionally the figures come with the blister packs or boxes that they were originally sold in, and in this case there is artwork showing painted examples of the figure being purchased. Whilst you don’t have to paint the figures in this scheme, it does give a good idea of what they are supposed to look like, and certainly gives the painter a starting point for colour choices.
There are five busts and a couple of 75mm figures that were produced as a Kickstarter a few years back. It’s rare for them to come up for sale on Ebay, and that’s probably the only place you might see them, but they were good representations of the 28mm range, and it’s a shame that more weren’t produced.
A small range of ( I think ) 200mm figures was proposed, but these were to be pre-painted and the concept seemed expensive considering that most people that would be interested wanted unpainted figures kits that they could paint themselves. The group behind the idea never seemed to get that idea, and as a consequence the idea died very quickly. Which is a shame because I think that, given half a chance, they would have become popular and sought after.
However, the Infinity game and it’s 28mm figures seems to be very popular still, and while some figures seem to be being taken out of production – possibly the earlier ones that were not quite as refined as the newer offerings – there is a vast range of figures available.
Oh, and they seem to know how to sculpt a nice female figure too, the Helen of Troy figure is superb, and there will be an article about her appearing here sooner or later.

We need your consent to load the translations
We use a third-party service to translate the website content that may collect data about your activity. Please review the details in the privacy policy and accept the service to view the translations.