Look, He's Nearly Finished the Panther !
Painted in 2017
I make no secret of it that I never work on just one model at once. I always have several kits on the go, and there is a cupboard that I store part painted models in to keep the dust off them while they wait ( patiently I’m sure ) for me to pick them up again.
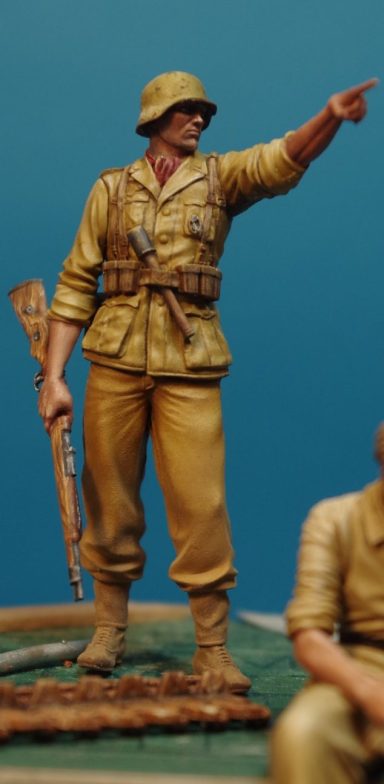

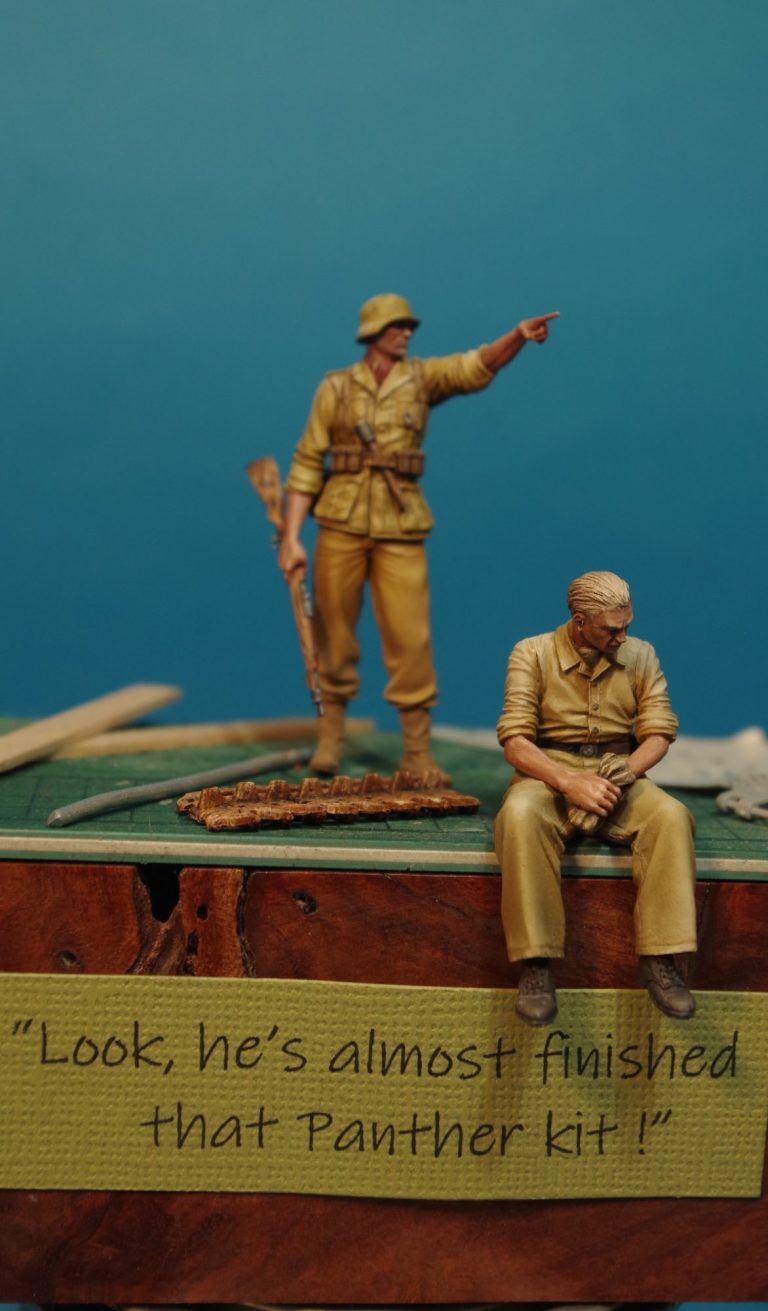
These two figures were to go with the Dragon Maus kit, but for one reason or another, they got painted and put to one side waiting for the tank to get finished off…… Which it did eventually, but they didn’t get used – that’s another article that may appear on here at some point.
I’ve always admired the models that Marajn Van Gils produces, and remember seeing one by him of a Napoleonic soldier carrying a wood plinth off a piece of cutting mat. It summed up the frustration our little kits must feel at being put to one side, or even abandoned mid-paint.
I liked the idea, and these two sitting in the display cabinet without something to do made me think that maybe an alternative setting could be made for them rather than the Maus.
As for painting them, I took several pictured during the process because I thought it would go well within the Maus article, but I’ll use them here instead.
Desert scheme for the DAK can be a difficult subject, partly because of early colour photos and different pieces of actual uniform being available to view in museums, the differences in colour due to age, wear and fading can be quite broad, so although it gives the painter some latitude, there’s still the “perceived” look that it should have.
Photo #1 shows me beginning with the trousers and puttees.
I’ve primed the figure ( from Scale 75, but it’s a 1/35th scale figure ) with a very weak solution of Iyandan Darksun ( A Games Workshop version of desert sand ) mixed with a lot of Isopropyl Alcohol. To be honest, the paint is mixed in to let me see where I’ve painted, the alcohol is there to dissolve any small deposits of mould release agent or any grease form my handling it to clean it up.
Once the primer coat has dried, I added a couple more coats of a 50:50 mix of the Iyandan Darksun and Skull White, thinned with a little water – again GW colours.
Once these had dried I mixed up an equal amount of Mars Yellow and Buff Titanium oils and applied them to the figure, stippling them lightly to take off any excess paint, and to give an even texture that removed any brush marks.
To make the shadows I added very small spots of Mars Brown, stippling this in with a small brush, and wiping excess paint off the brush with a soft cloth.
The highlights were added by adding small spots and lines of Titanium White; and then using a clean brush, blending them in to the surrounding paint; always wiping off any excess paint from the brush with the soft cloth.
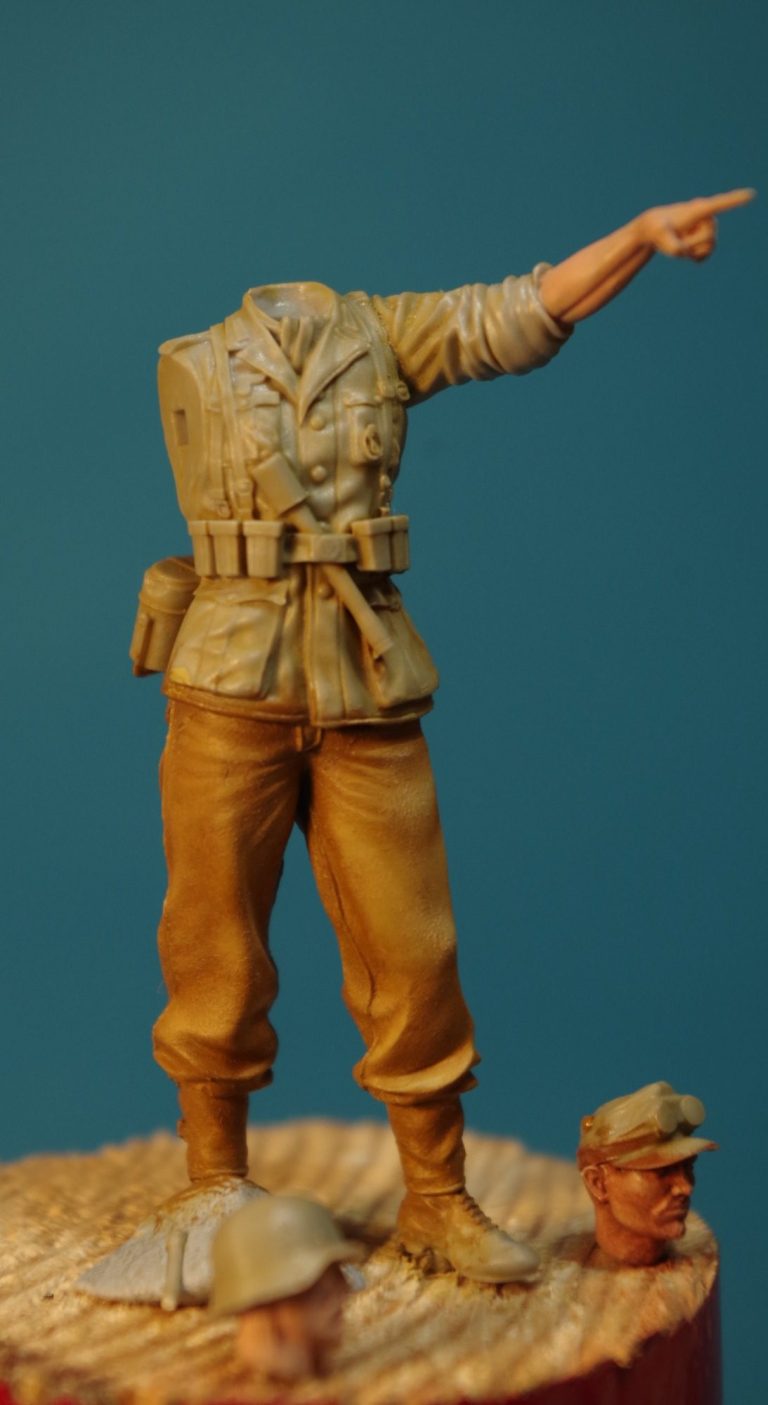
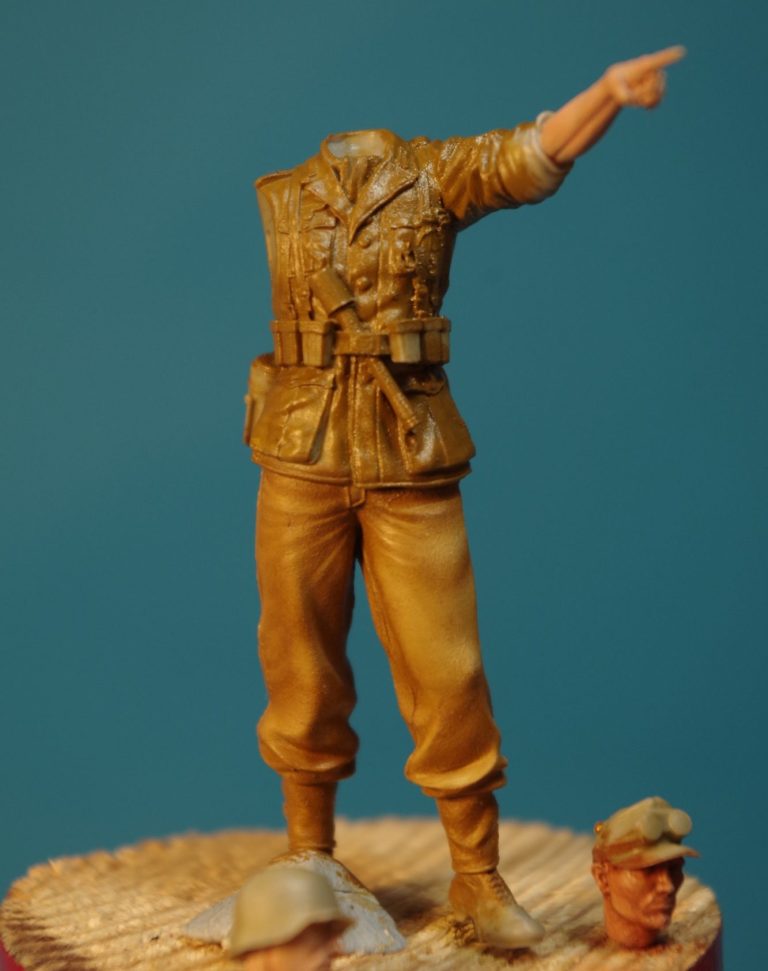
Photo #2 perhaps shows this a little better in that I’ve got the initial overall colour on the jacket and have added a lot of tiny spots of the Titanium White to areas that I intend to have highlights. As with the trousers, these will be blended in to the darker colour with a soft brush.
In photo #3 you can see the results of the blending, I have added some further white to some areas and blended that in as well, the process shouldn’t be rushed, the white can be added over the course of several applications, gradually getting that shift in colour.
Note as well that the initial colour added is slightly lighter that the colour used on the trousers.
Now a short blurb about “Overhead or Zenithal Lighting”. The simplest way to describe it is imagine if the light source ( for example the sun ) is directly above the subject. This would mean that the lightest areas would be those seen from above, and the darkest areas would be those seen from below.
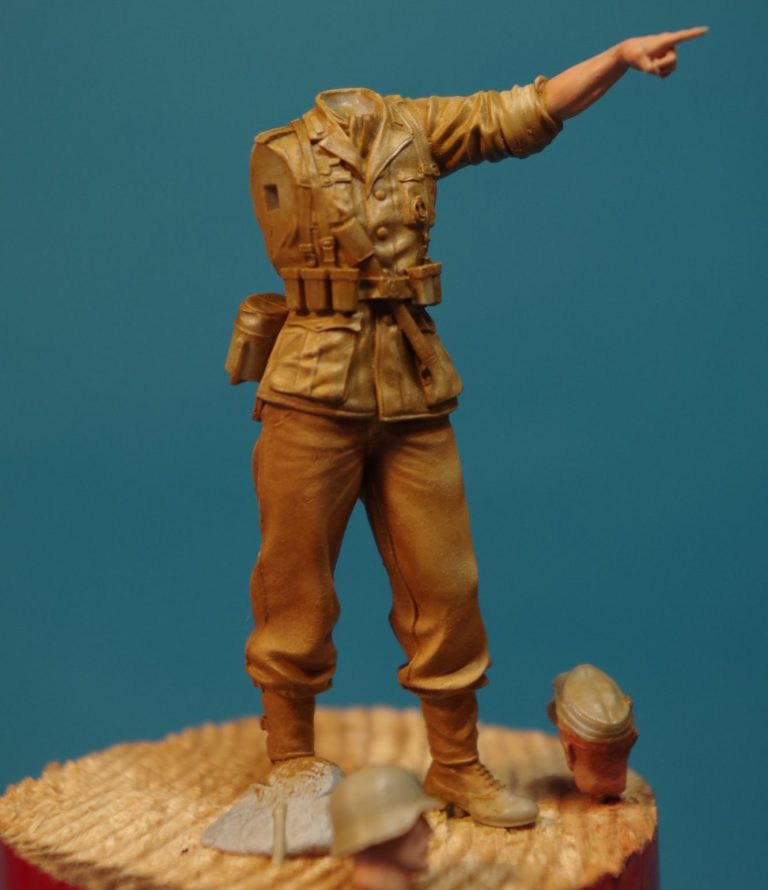

So in photo #4 we see the figure from directly overhead, and the only colours on the jacket should be highlights and maybe some lighter mid-tones. In opposition to this, if the figure is looked at from below, then all that should be seen are the darker colours of shadow and dark mid-tones.
If you can see the wrong colours in the wrong place when you look at a painted figure, then that’s probably why the painting somehow looks strange.
Just to prove that I’ve painted it, photo #5 shows the back of the figure, the clothing is complete in this shot, but the belts and kit still needing doing.

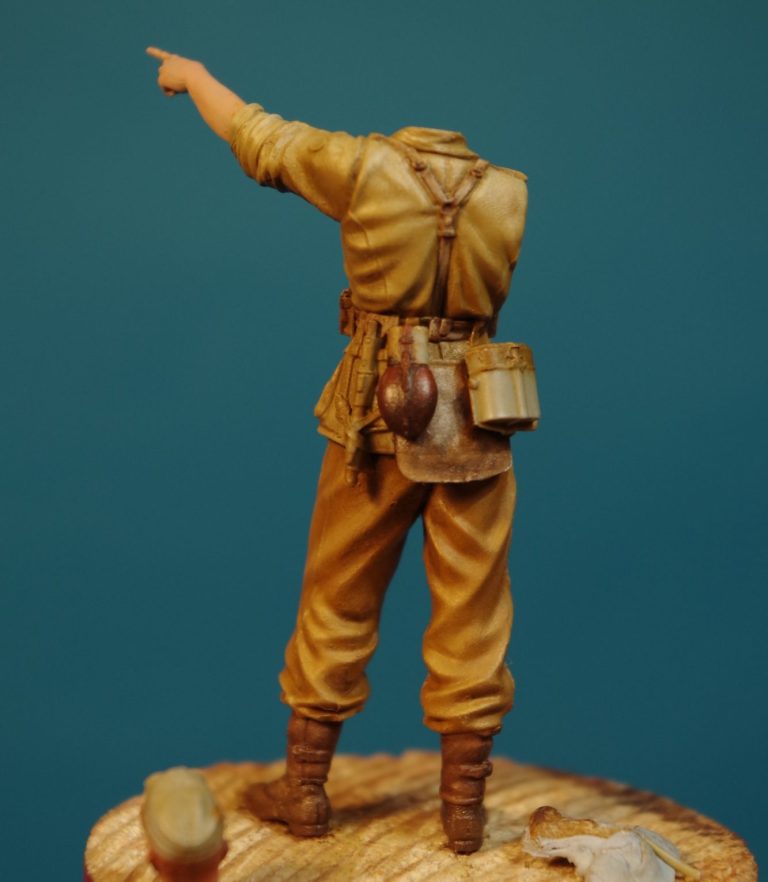
In photo #6 I’ve started on some of that, the water bottle and belts have been painted. In fairness, the colour of the water bottle is wrong to my references, it should be a sandy yellow colour, but I think there’s enough of that going on with the clothing, and this adds a little break from that. The boots have been painted too, both the bottle and boots use Mars Brown as a starting point, the boots getting a light drybrushing of Mars Yellow – as they’ll later get a dusting of MIG Pale Sand Dust pigments, and the water bottle getting mid=tones and highlights from Light Red and then some tiny spots of Mars Yellow.

The face and helmet has been painted in photo #7.
I painted the helmet first, experimenting with a method I’ve used on AFV’s but thought might be adaptable to smaller areas.
If you’ve read any of my AFV articles, then you’ll have seen that I use Marmite as a barrier for stopping coats of paint sprayed over the top of it from adhering to the model. In this case I brush painted the helmet with a dark steel colour from the Darkstar range, and once fully dry, used a very fine sponge with a minimal amount of the Marmite on it to stipple the helmet.
I like using this method because whilst there is an amount of control in where you dab the sponge, the resulting effect is still a little surprising ( good or bad ) when you come to wash the area with a brush and some detergent.
In this case I was really pleased with the very small chips that were exposed, and it’ll be something I do again.
The only drawback is that cleaning the airbrush takes longer than painting, but that’s just something I’ll have to live with.
As for the face, the basic method for beginning this is a very simple one, and if you’re starting off with figures, or just need them to look decent alongside a tank, then getting a reasonable and easy way of painting flesh areas might be just what you need.
In this case, I’m assuming that we’re painting a Caucasian head. Apologies to anyone of colour, I will get around to painting those in a different article.
First off you need a good sculpt, forget using plastic heads that come with the AFV kits ( although I know that some Dragon and Newer Tamiya ones can be very good ) for now treat yourself to either an Alpine, Scale 75 or best of the lot, a Hornet head set.
A well sculpted head will do the work for you, it’s as simple as that. All you have to do is check that there’s no mould lines – if there are, clean them up, prime it with a thin coat of Flesh coloured acrylic paint mixed with Isopropyl Alcohol, and then a couple of coats of coats of the Flesh coloured acrylic mixed with a little water, leaving each coat to dry fully before adding the next one, and then once that’s dried make a mix of Mars Brown or Burnt Sienna oils ( either one will do, although Mars Brown is getting difficult to get hold of ) and Titanium White. DO NOT add any thinners to dilute the paint, use it straight out of the tube.
Paint this colour over all the face, getting into the recessed detail, Once fully covered, gently stipple the face with a clean brush to remove any excess paint. The colour wants to be evenly spread on the surface of the model.
Next, take a clean dry brush and load it with some Titanium White oils. Wipe most of the paint off onto a soft cloth, and then in a single stroke, draw the brush down the face from the forehead to the chin.
That should remove some of the darker paint from the face, and leave in its place some of the lighter paint.
WIPE THE BRUSH on the soft cloth.
Repeat the process if necessary, but usually one or two passes with t he lighter colour should give you a face that has the basics of shadows and highlights.
If you want to go further, then very small spots of the Titanium White can be added and then blended in to further enhance the highlight details.
And that is a simple way to paint a 1/35th scale face.
As I say, more details can be added, deeper shadows, brighter highlights, some five o’clock shadow, eyes, lips etc. But the above method should give you enough of a decent looking face to put it next to an AFV and it look OK.

Photo #8 shows the figure nearly finished, with just the arm holding the rifle and the head needing glueing in place.
Photo #9 shows the seated figure.
Whilst I’ve not mentioned him until now, he was painted in exactly the same way as the standing figure, altering the clothing colours slightly to difference them from the standing figure, and initially to make him stand out against the Maus engine deck that he was going to be sitting on.
The seated figure was the second one to be painted, and it’s the dejected, forlorn set to his body that gave me the idea ( Oh, OK, the fact that the Maus was still half on the sprue still as well ) of using him and the standing figure for something else.

Setting up the base for the two figures was easy, a section of old cutting mat, a coupe of wood stirring sticks, a spare bit of track, a corner of an old decal sheet and a piece of wire – in fact all things that us modellers have lying about and generally getting in the way on our benches…… Or is that just me then ?
Along with collecting kits – I no longer really think of myself as a modeller, more just a guy who gains retail therapy by storing a lot of kits in his loft – I also seem to have a collection of wood plinths of various sizes, bought over the years from Armstrong Bases and Oakwood Studios.
So finding an appropriately sized piece of wood wasn’t a problem, trimming the cutting mat to fit on it and then adding the other accessories, pin and glue the figures down and print off a nameplate, all easily and relatively quickly done.
I realize that I am poking fun at myself with this kit, and although it might ring true for other modellers as well, I’m happy if it brings a smile to someone’s face.


I’ve had the seated figure for some time, and can’t recall who produced him and if he’s still available, but the standing figure is from Scale 75 and I can recommend their range of 1/35th scale figures. One or two of them seem to have small heads in proportion to the bodies, but a change to a spare Alpine head or one from Hornet is easy enough.
Now, where is that Panther tank, will I find it, and will it ever actually get painted ?………
We need your consent to load the translations
We use a third-party service to translate the website content that may collect data about your activity. Please review the details in the privacy policy and accept the service to view the translations.